Pages

Wednesday, 18 January 2023

Party penguins

Hey there Tea-timer friends...

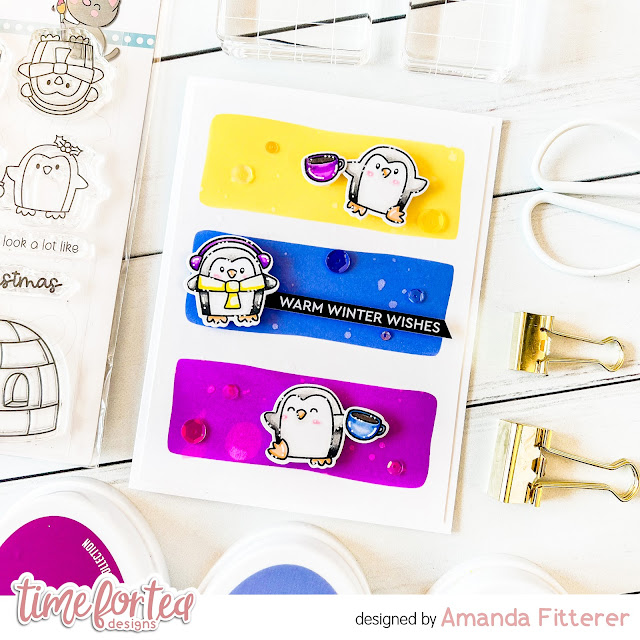
 Who's ready for some new Time for Tea designs inspiration featuring the super adorable penguins from the "It's penguin-ing to look a lot like Christmas" set?!

If so you are definitely in the right spot because I have a birthday card coming up with some partying penguins...


I haven't made a shaker card in so long and I really don't know why because they are SO much fun and I just love the end result. Shaky, shaky, shaky......

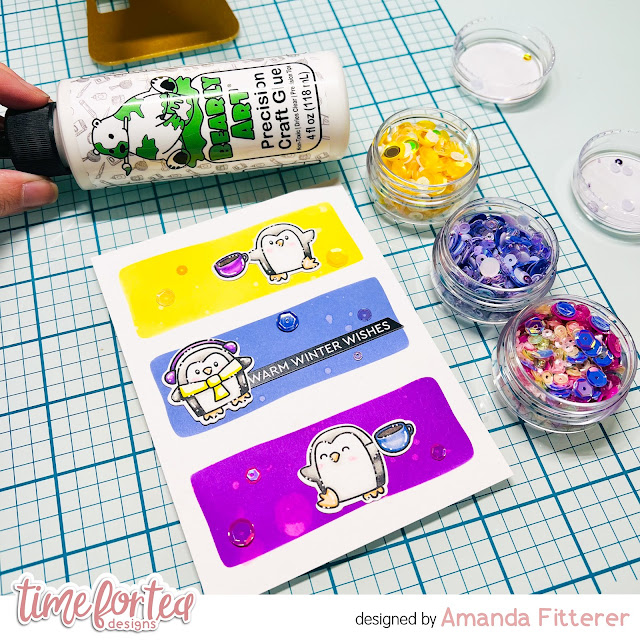
I made the shaker portion using the "Hooray sentiment & cover plate die" and filled it with lots of pretty sequins and embellishments!!


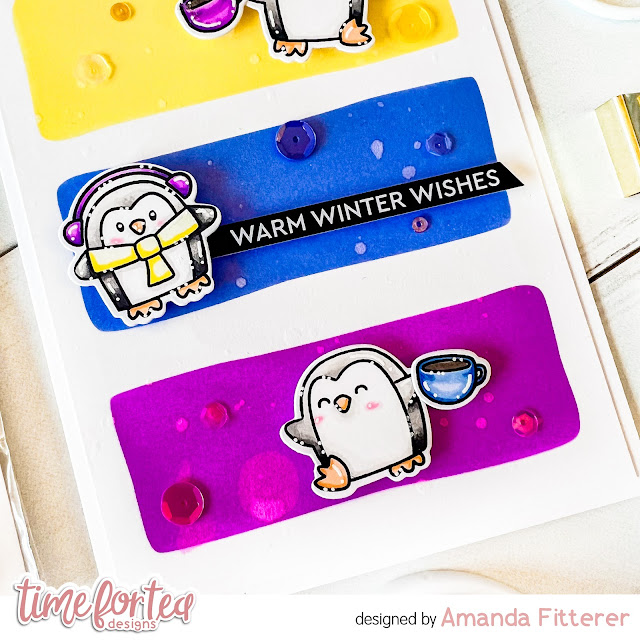
To add a sentiment I heat embossed the Happy Birthday on black cardstock using WOW! Opaque bright white embossing powder then adhered it to the card using foam tape....


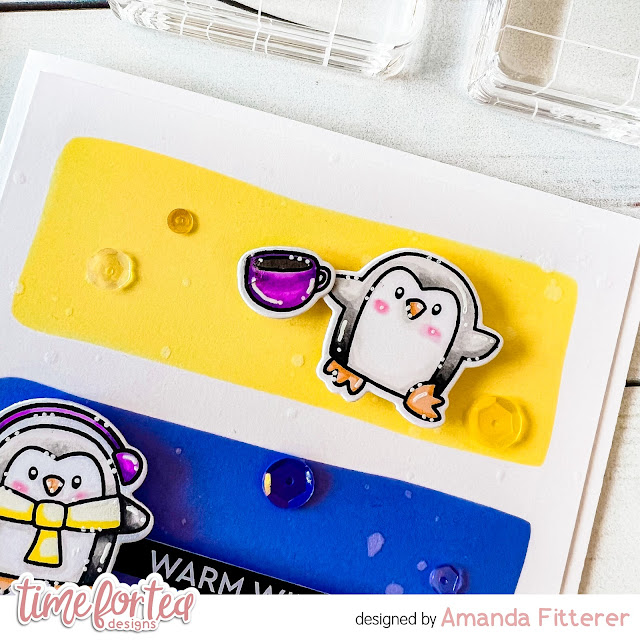
The two penguins were stamped then coloured with Spectrum noir tri-blend markers before die cutting with the co-ordinating dies. I adhered those to the card base with foam tape too and then completed the card with a few clay embellishment dots.

These penguins are ready to party and shake, HOORAY!

I hope you enjoyed today's card from me, happy crafting. Hugs Ashlee

Monday, 16 January 2023

I Love BREW!

Hi Tea Timers, welcome back to the blog! I have been gifting lots of presents for coffee lovers recently and decided to create some tags to pair with them. 


Sets used:
I first stamped out my images and used the following Copic Marker colors for them: BG11, BG13. BG15, BG18, YG21, YG23, YG25, RV21, RV23, RV25. E00, E11, E13, E23, E25. I then die cut them out using the coordinating dies and set them to the side.


I then took the tag die from the Memory Keeping Essentials set and cut it out 3 times using brown cardstock. I then took two similar stencils as the Coffee Beans and Coffee Stains stencils in the shop and used Gathered Twigs to blend it onto the tags.

With a hole puncher, I punched a hole in each of the cards. I then stamped the sentiments and stamped it directly onto each tag. I used foam tape to adhere each cup onto each tag.


To complete my tags, I took gold twine and tied them to each tag.

I hope you enjoyed this post and will feel inspired to create you own tags! The Memory Keeping Essential dies has so many amazing dies that are perfect for any project. If you want this set or any other set that I used, check out the shop and used the code T4TRANDY10 at checkout. 

Saturday, 14 January 2023

Sealed with a Kiss!


Happy Saturday Teatimer's it's DT member Natalie here with a sweet, heart themed card for today's post. It's been so hectic over the last few months and my mojo just seems to have disappeared. I really didn't know what I wanted to make, so I dug around in my stash found a stamp set I wanted to use and then found some dies I thought would work well together with it. 


I used the Heart Nesting Dies  for the base layer keeping the bigger one white and then ink blending a sunset sky on the other using Kitsch Flamingo, Dried Marigold and Squeezed Lemonade Distress Oxide inks. 
I cut out two more hearts the same size and used the Ocean Waves Dies to create the sea layers again I ink blended these with Tumbled Glass and Uncharted Mariner Distress Oxides. 


The Seals are from the Sealed with a Kiss Stamp Set and I coloured them up with Copic markers. Then for the clouds I used the Cloud Dies which I layered velum underneath to create a wispy feel. I adhered everything together and finished up by adding some finishing touches with my gelly roll pens. 
I hope you like today's card make sure you check back for more inspiration. Also if you want to buy any of the items in the Time for Tea shop you can get 10% off your order using code T4TNATALIE10. 

Sealed with a Kiss - Live Craft Along!

 Happy Saturday Tea Timers

Last night's Live replay is below!


This card was so much fun to make and I really loved the colour scheme.


I had no idea what I wanted to create at the start, I only had my stamp set selected.
If you want to see how I cam up with the final design then do watch the replay via the link above.


I really hope you like today's card.

If you want to see more Live crating do join me on HobbyMaker TV this Sunday January 15th at 1pm.


Friday, 13 January 2023

Let It Snow Winter Scene


Happy Friday! DT Annalisa here, sharing a snowy card that I created using several Time For Tea Designs products, including the newly released Snow Much Fun and Gingerbread Family - Our House to Yours.

To create the background, I used Distress Mica Stain in Shiny Bauble that I sprayed onto the Magical Snowflake Stencil (no longer sold, but you could use another snow stencil) and onto some watercolour paper. I took the 'leftover' ink on the stencil, turned the stencil over and pressed it with some paper towel onto another watercolour paper panel. The result was this beautiful, shiny background! I look this panel and added it to a white card base (5 3/4 inches by 4 1/8 inches).


I die-cut white card stock with the Slimline Mini Village Die and glued this to the bottom of the snowy panel, I trimmed the excess with scissors. Next, I used the Waves Cover Die on white card stock and liquid glued the resulting stitched frame to the card.

I used the Let It Snow Sentiment Die on some bright fuchsia card stock. I used the outline die in this set to die-cut some white card stock and used liquid glue to adhere them together and then to the card. 


I stamped the little snowman holding hot chocolate from Snow Much Fun and coloured him with Copics, and cut him out using the coordinating dies. I did the same with the little cat from Gingerbread Family - Our House to Yours and die cut him out with the coordinating dies


Thank you so much for reading my blog post, you can use my discount code T4TANNALISA10 when you visit the Time For Tea Designs shop to get 10% off your order.

Wednesday, 11 January 2023

Warm Winter Wishes Penguins

Happy Thursday, Tea Timers!  It's Amanda here!  Are you a big winter person?  I am definitely not!  Once the holidays are over, I'm ready for it to be warm again!  But at least I get to make some more winter cards with these cute penguins!

To create this cool background, I used the new Wonky Shapes Masking Stencil.  I blended Catherine Pooler's Limoncello, Serenade, and Flirty Fuchsia inks.
  

For the images, I used the It's Penguin-ing to Look a Lot Like Christmas stamp set.  I colored them with OLO Markers and then die cut them using the coordinating dies.  I used a white Gelly Roll pen to add highlights and dots.

I used Bearly Art Glue to glue down my stamped images and some sequins that coordinated with the inks.


Thank you so much for stopping by the Time for Tea Designs Blog today! I hope you have enjoyed this post and feel inspired to make something fun today!  Xx, Amanda


Coffee?!

 Hey there tea-timers...

It's DT Ashlee here today, now I don't know about you but I myself can't go without my coffee...

And what's better than just coffee? Coffee with a friend!!

Today's inspiration is a card to send to a friend to organise a coffee catchup and its got some adorable little cups with cute faces centre show...


I used these Time for Tea designs products :


This card is a very CAS one so it was super simple to create. I started with a white card base and stamped both my sentiments directly onto the base with black ink leaving a gap in between for the images. I then stamped, coloured and die cut three cute cups from the pumpkin spice stamp set. These were coloured with OLO and Spectrum noir tri-blend markers. 

Once the images were ready I added them to the card base with different levels of foam tape creating a happy little bunch of coffee cups. To complete the card a touch of sequins adhered using micro glue dots. 

Do you want coffee now?! I would but it's nearly bed time here so maybe tea for me, coffee come at me in the morning hehe. 


Thanks for stopping by the blog today, I hope you enjoyed my latest card. Happy crafting, hugs Ashlee.

Other Posts You Might Like