Pages

Saturday, 30 November 2024

🐦 Chirpy Christmas Greetings 🐦

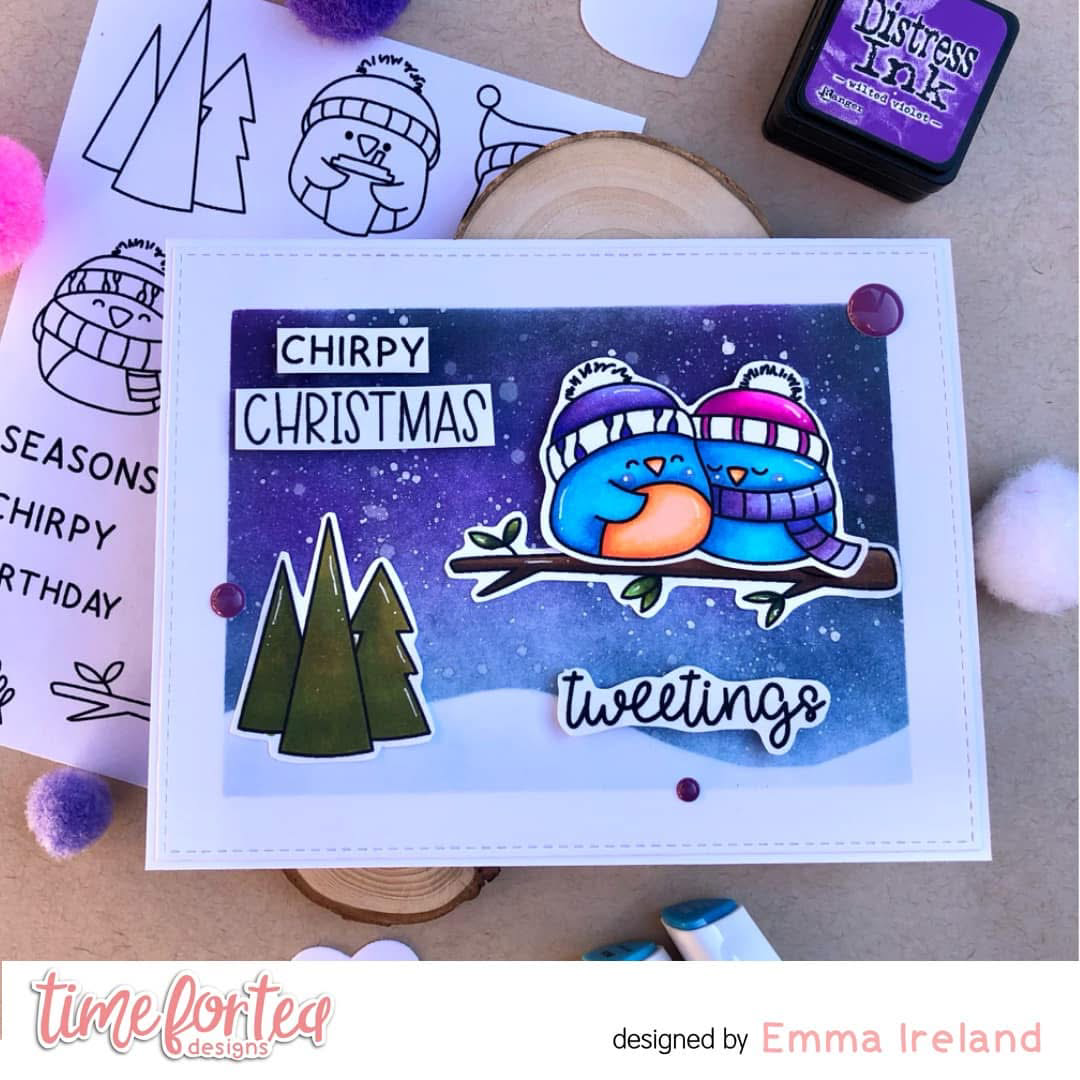
Hello Tea Timers! Emma here and I’m back today with another card using the NEW “Seasons Tweetings” stamp set from Time For Tea Designs. The new realease is just GORGEOUS! 

New Arrivals – Time For Tea Designs
There are 4 NEW sets to get your hands on this Christmas -

  1. Seasons Tweetings – Seasons Tweetings A6 Stamps – Time For Tea Designs
  2. Sweet Christmas – Sweet Christmas A6 Stamps – Time For Tea Designs
  3. Merry Cheesemas – Merry Cheesemas A6 Stamps – Time For Tea Designs
  4. Santa’s Nice List – Santa’s Nice List A6 Stamps – Time For Tea Designs

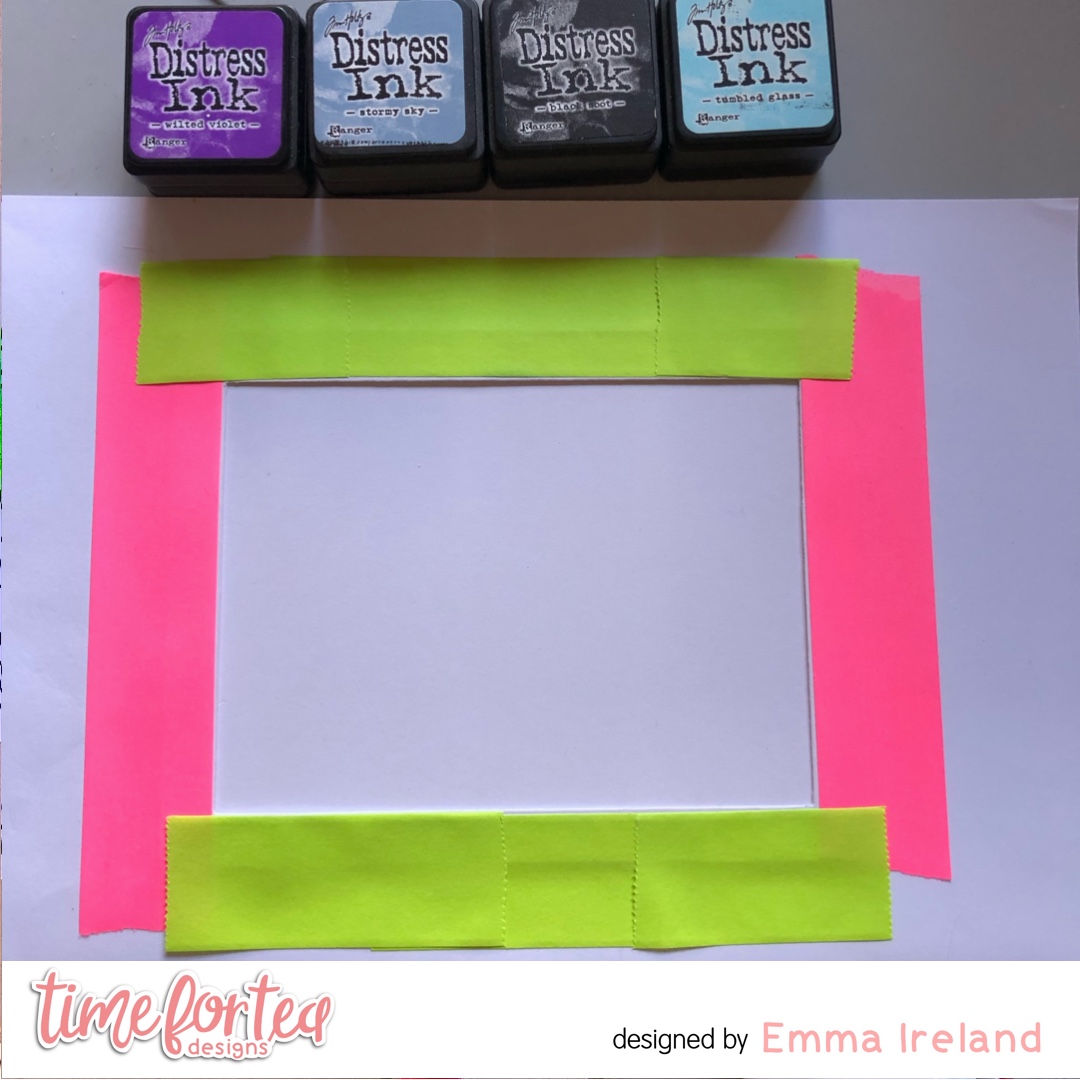
To create this card I used ‘Post-it’ tape to mask off a rectangular section for the sky and a wobbly piece for the snow drifts. I used my Tim Holtz Distress Inks and blender brushes to create a beautiful, festive night sky. I started with the tumbled Glass as my base layer and then added the Stormy Sky, Wilted Violet and Black Soot towards the top area, blending each colour with the next each time. I then used some Dew Drop Brilliance Moonlight White ink with a little water to create the snow splatter. I let it dry before removing the mask!

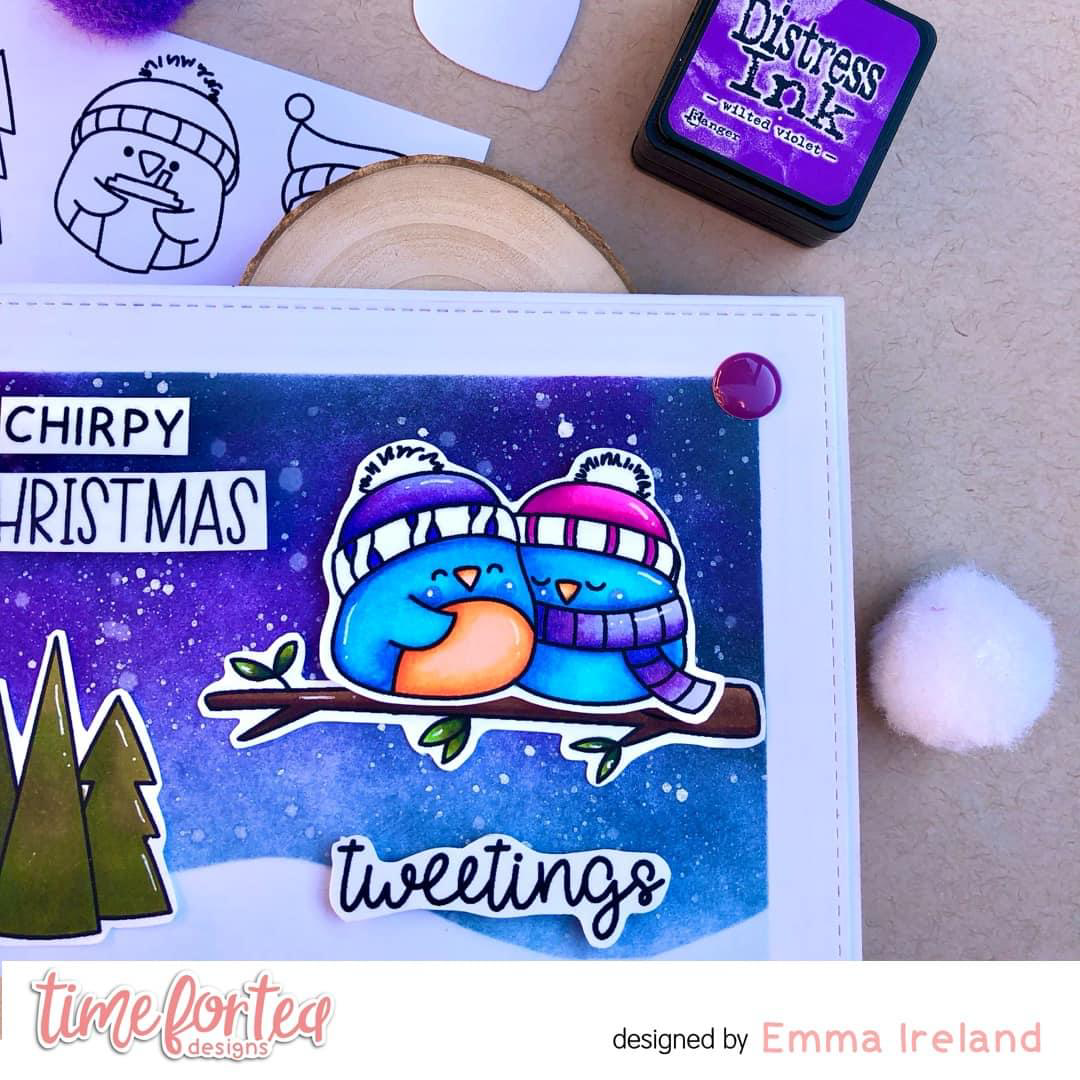
To colour my images, I stamped them on to Crafters Companion Solor White card stock with Memento Tuxedo Black ink and coloured them with my Arteza Everblend Markers. These sweet birds card be coloured to look like Robins with some nice Red and Brown shades but I chose to colour them as Bluebirds with their sweet orange tummies. These sets are very versatile!
Thank you for visiting my blog today. For a 10% discount on your order, use T4TIRELAND10 

❤️ Treat yourself to some Christmas goodies! ❤️

Visit the Time For Tea Designs blog for more information and inspiration on my card plus others from the amazing team.

Warm hugs, Emma x


Friday, 29 November 2024

You're Always On My Nice List


Happy Friday from DT Annalisa! I’m excited to share a fun Christmas card featuring the new stamp set, Santa’s Nice List, along with beautiful patterned paper from Time For Tea Designs.

I die-cut a 5 1/8-inch square of striped paper from the Winter Wonderland Paper Pad (6x6") using the Simple Square Nesting Dies. I adhered this square to a card base with double-sided tape.


Next, I trimmed another piece of patterned paper from the same paper pad using the Scalloped Circle Dies. I then ink-blended it with Lumberjack Plaid Distress Oxide, using my Midi Beautiful Blender Brush.

I used the Stitched Circle Dies to die-cut a lovely design from the Winter Wonderland Paper Pad for the background scene. I attached this background to the scalloped patterned paper panel with a tape runner. I used 1 mm double-sided foam tape to give the card some dimension to adhere both pieces of patterned paper to the card base.


I stamped the trees and heart from Seasons Tweetings, along with Santa and his reindeer from Santa’s Nice List. After colouring them with my Copic markers and adding accents with a white gel pen, I cut them out using my Brother Scan N Cut SDX125e.

Using liquid glue, I attached the stamped elements to the card. I took the smallest die from the Simple Slimline Nesting Dies to trim around the sentiment and glued it onto the card as well.


I added Designer Enamel Dots from the Festive Fun and Clear Bubbles sets to complete the card.

Thank you so much for visiting my blog. Remember to use my discount code T4TANNALISA10 when you visit the Time For Tea Designs shop to get 10% off your order.


Wednesday, 27 November 2024

Have a sweet christmas

Hello Crafty Friends,

Daisy (DaisCreaPlace) here, with my first Christmas card with the new release🎉🥳 

You may have seen more sneak a peaks with cards I made with the new stamps. I like all four of them, but this stamp "Sweet Christmas" is my favorite🥰


    On my card I wanted to create an evening/nightly atmosphere. I used the Distress Oxide colors Blueprint Sketch, Peacock Feathers and Cracked Pistachio, which I splattered with white gesso.

    The houses, which are actually gingerbread houses, can of course be colored in all colors. I made them pink and chose many yellow windows, as if there is light burning inside.


    Look at this cute animal friend🥰 There are five different animal friends in the set. All five of them have a candy cane with them, too cute. I made this one pink too!


If you are also going to color the prints with Copic markers, I will show you the color combinations I used.


    Both the bottom of my card for the mountain with snow, as well as the moon at the top right, I made with the Stitched circle die set.


    I hope I could inspire you again with this card. In addition, I am of course very curious what fun things you are going to make with this or one of the other three new sets. 

If you have not shopped yet, but still cannot resist the temptation, then shop quickly with a 10% discount with the code T4TDAISY10 in the webshop🥳🎉

Creative greetings,

Dais🌸

Tuesday, 26 November 2024

HoHoHo 🎅

Happy New Christmas Designs! 🎄

Have you seen the new cute designs that were dropped last friday? I used Santa's Nice List for this card I'm about to show you!

After coloring the images I used the Brother Scan 'n cut machine to cut the images out. I used the Simple Nesting Dies - A6 to cut a panel from striped red cardstock and a blank panel one size smaller. 

To mask the moon, I used the Stitched Circle Dies and added distress oxides peacock feathers, chipped sapphire and black soot around the circle. I left the mask on there when I splattered white acrylic paint thinned with water.

After it had dried, I took the Street Scene Builder 6 x6 " Stencil and added a row of houses at the bottom using black soot distress oxide.


I used the Simple Sentiments Clear Stamp Set and stamped 'happy christmas' onto a strip of red cardstock using versamark watermark ink. I heat embossed using white embossing powder and combined the finished label with a word die I borrowed from another brand. 

Adhered the panels onto a white card base and added the image and sentiment onto the card using 3D foam tape.


Loving the new designs? You can get them at the T4T webshop with a 10% discount if you use T4TILONA10. Discount applies to all items in the shop!

Happy shopping 😀

Monday, 25 November 2024

"You Are Always on My Nice List"

 Hi Tea Timers, welcome back to the blog. I am excited to continue the new release inspiration with a card featuring the 'Santa's Nice List' stamp set. This is one of four new stamp sets that just released in the shop.

I wanted to create a scene where it looked like Santa's sleigh was being pulled by his wonderful reindeer.

Sets Used:

I first stamped out my images, making sure to stamp out the reindeer two additional times. I then fussy cut the images out. This release does not have coordinating die sets so fussy cutting is the way to go if you do not have one of the electronic machines.

I then took Copic Markers and used them to color all of the images. Once completed, I set them to the side to work on my background.

I die cut out one of the circles from the Simple Circles die set to create a mask for my moon. I then added low tack tape to the back and added the circle to the corner of an A2 panel. 

I took Salvaged Patina, Peacock Feathers, Uncharted Mariner and Chipped Sapphire Distress Oxides and blended it onto the panel. 

I removed the circle mask and took the coffee stains stencil and blended it onto the empty circle with Salvaged Patina Distress Oxide. I then took white watercolor and splattered it over my panel and set it to the side to dry.

I took a piece of black cardstock and die cut out the mini village. I wanted to make it look like Santa was flying over the homes.

To assemble my card, I first adhered the Santa onto my panel with foam tape. I then adhered each reindeer behind the one before it with foam tape as well.

I then took the mini village and added liquid adhesive behind the top portion and then adhered it to the bottom of my panel. I trimmed off the excess part.

To complete my card, I stamped out my sentiment onto white cardstock and trimmed it down. I then added it to the corner of my panel using foam tape.

The new Holiday Release is now available in the shop. All of the products I used today are linked above. Don't forget to use the code T4TRANDY10 at checkout for extra savings. Happy Crafting!


Sunday, 24 November 2024

Joy with Seasons Tweetings

 Hi Friends!
I’m Patricia and today I share you a new card with new Christmas Release Seasons Tweetings A6 Stamps


For this card I've combined different papers from Joyful Winter 6x6 Paper Pad. I use from the background and sentiment with de Joy Stitched Sentiment die.


Also, I use the Simple Stitched Circle dies for created a "window" in a middle of the card and place the pair of birds, they were going to be the protagonists of the card but then I decided to put them all 😁


For coloring I use the Copic Markers. 
And finished I decorated with some enamel dots 
Thank you so much for reading my blog post. Remember to use my discount code T4TPATRICIA10 when you visit the Time For Tea Designs shop to get 10% off your order. Happy Crafting! 

Have a Mice Cheesemas!

Happy Sunday, everyone! DT Myrthe here with a new post for Time For Tea Designs

At Christmas, I always send out lots of cards. It’s so much fun to send family and friends a handmade card. I absolutely love this new stamp set, Merry Cheesemas by Time For Tea! I used it to create this Christmas card.

I wanted to combine the Joy For Christmas paper pad with the new stamps. The designs and colors in this paper pad are so cheerful. I chose the Christmas tree background because I thought it matched the stamps perfectly.

I then colored the stamps using my Copic alcohol markers, matching the colors of the background.

For the base of the card, I used a scalloped rectangular die, layered with a slightly smaller rectangle. I adhered the stamps to the card using foam tape. I love incorporating layers into my cards.
The stamped sentiment completes the card. 

Thank you so much for reading my blogpost today! For a 10% discount on your next order, be sure to use my discount code T4TMYRTHE10.

I hope you all have a wonderfully creative Sunday!

With love,
Myrthe

Saturday, 23 November 2024

Bearing Gifts

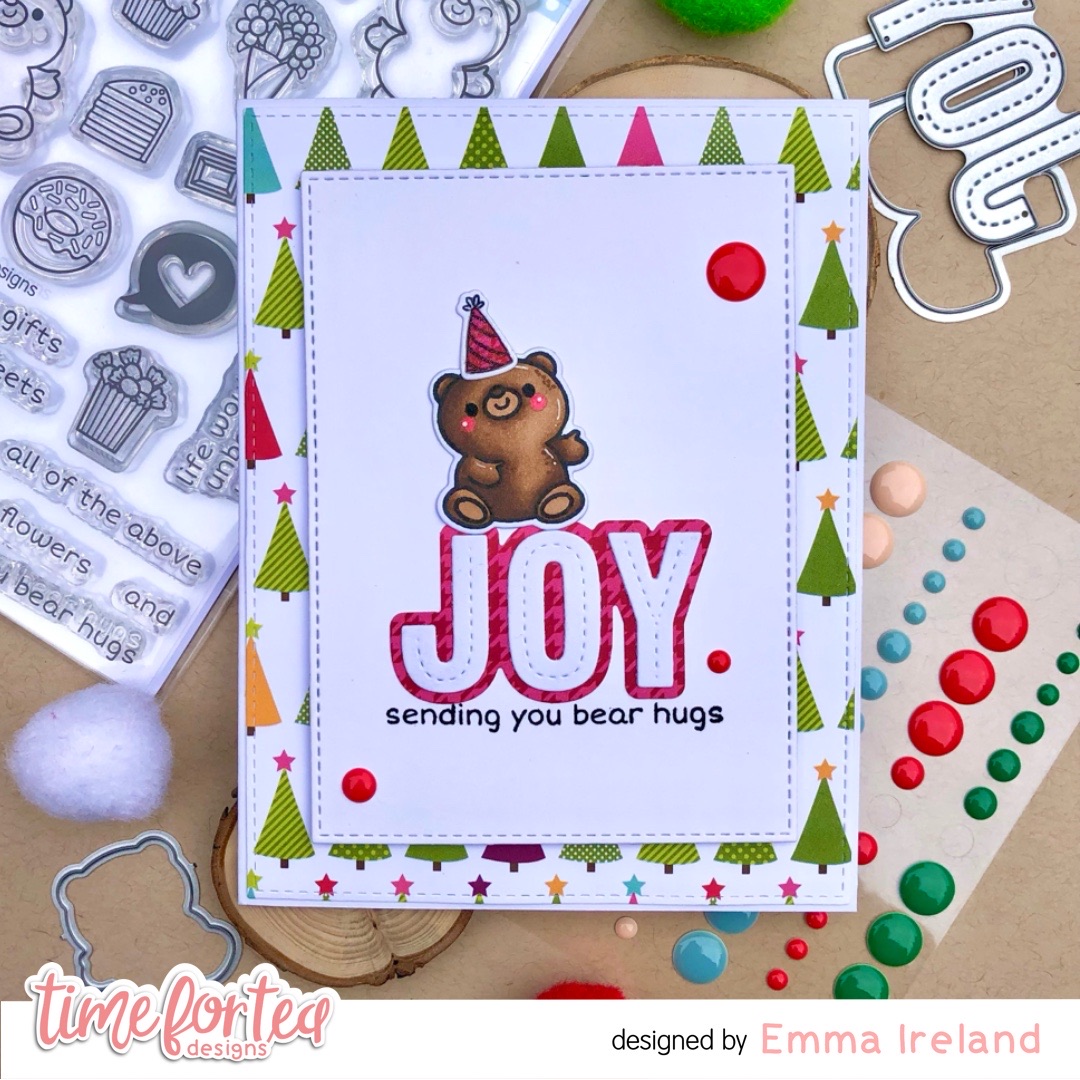
Hello my lovely Tea Timers! DT Emma here and today’s card is starting to feel a lot like Christmas. I absolutely love Christmas time so there is nothing better than getting to make cards for the holiday season. This card features the adorable Bearing Gifts stamp and coordinating die set.


  1. Stamp Set -  https://timeforteadesigns.co.uk/collections/clear-stamps/products/bearing-gifts-clear-stamp-set
  2. Die Set - https://timeforteadesigns.co.uk/products/bearing-gifts-coordinating-die-set?_pos=2&_sid=fa96e6d49&_ss=r

Although this set is not Christmas themed it still makes a beautiful Christmas card! That’s what’s so wonderful about these sets, they are very versatile!

I have use a 2 sheets from the Joyful Winter 6x6 paper pad, one for the background, which I have cut down to the A2 (US) size and one to use with the Joy Stitched Sentiment die.


  1. Joyful Winter Paper pad - https://timeforteadesigns.co.uk/products/joyful-winter-6x6-paper-pad?_pos=4&_sid=8c68f9bd5&_ss=r
  2. Joy Sentiment Die - https://timeforteadesigns.co.uk/products/joy-stitched-sentiment-die?_pos=3&_sid=8c68f9bd5&_ss=r

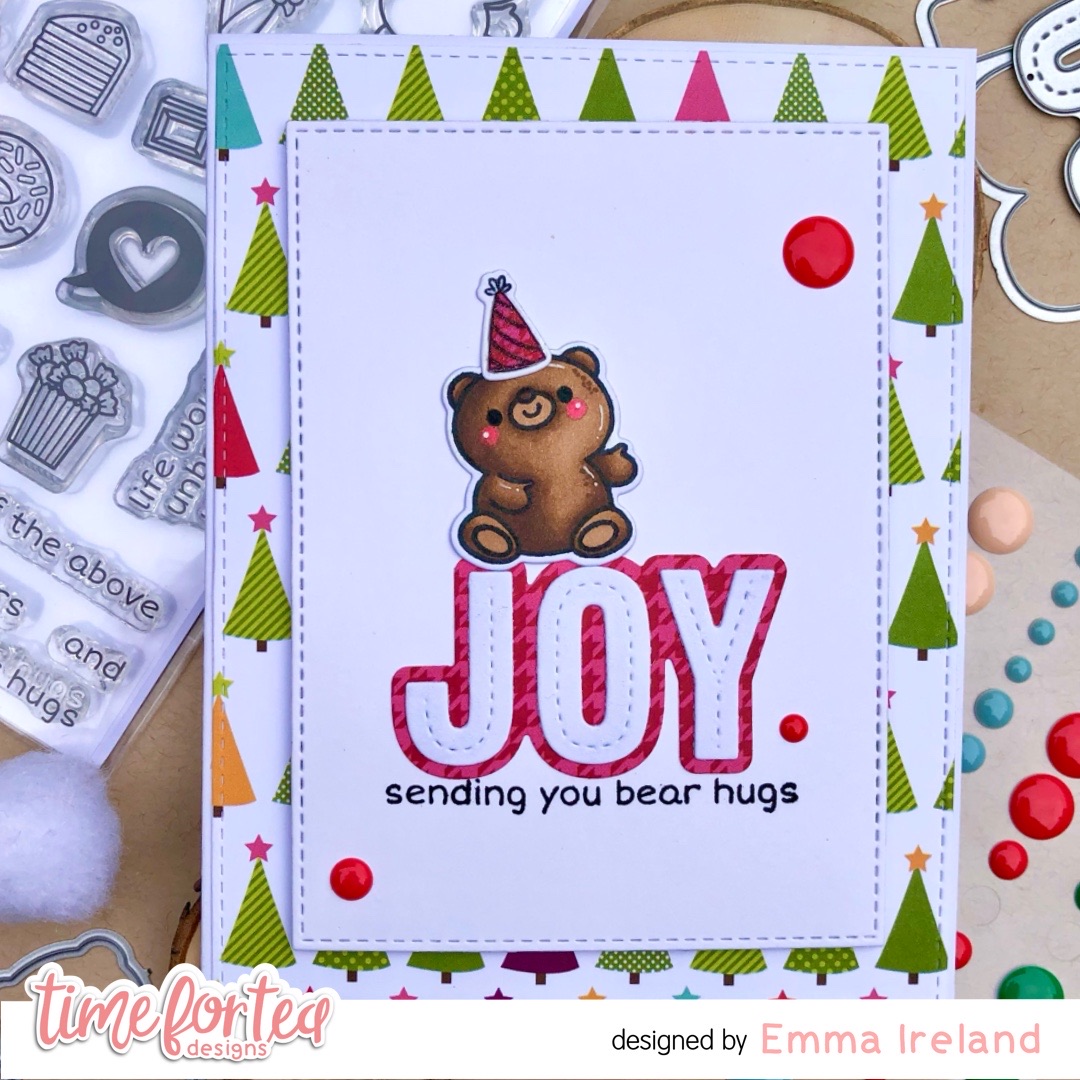
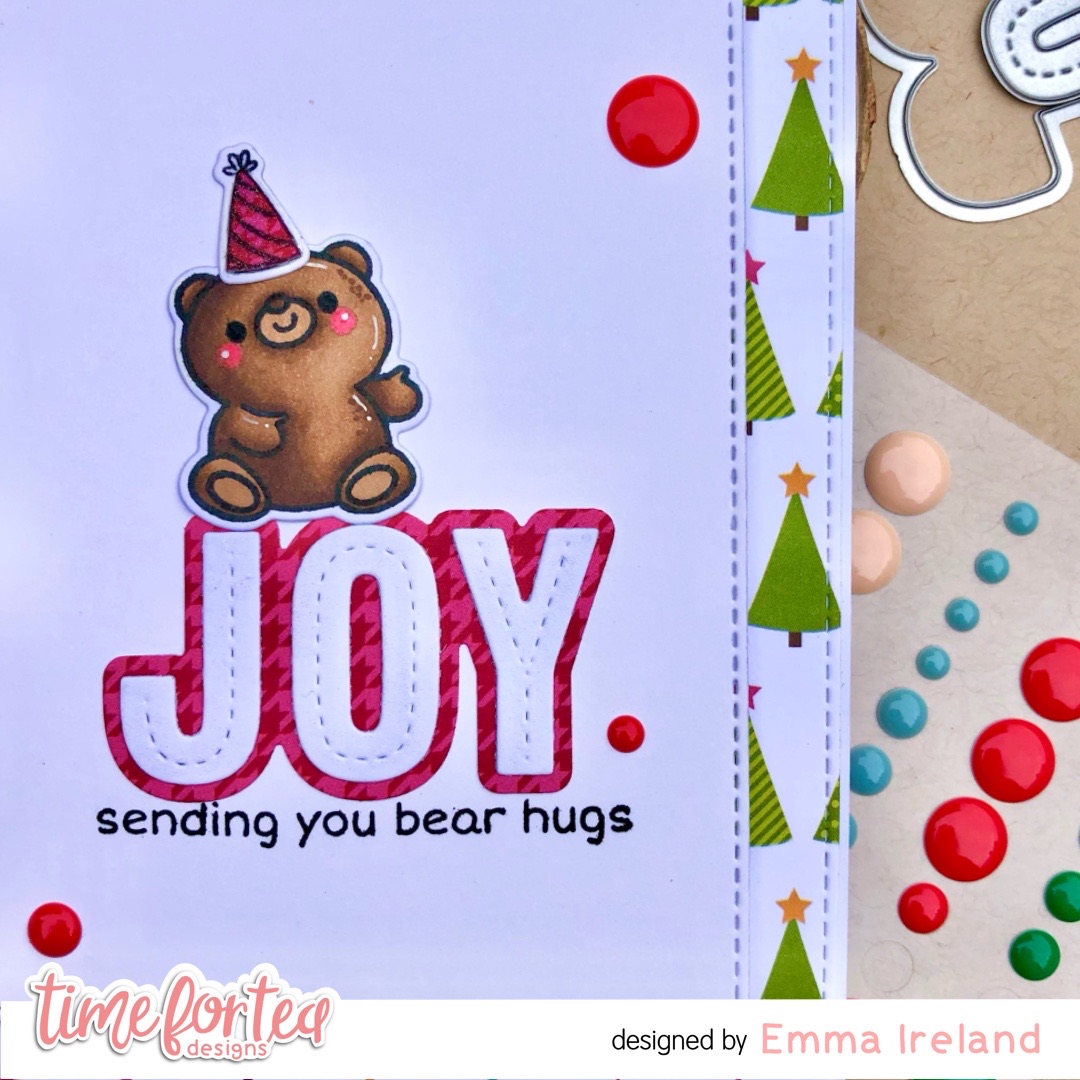
I kept this card clean and simple using just one of the bears from the Bearing Gifts stamp set and the Joy die to make up the sentiment. I have also paper pieced the little hat, from the Happy Hump Day set, with the same patterned paper I used for the Joy sentiment. 


I stamped the bear out with some Memento Tuxedo Black Ink on alcohol marker paper and coloured him in with my Arteza Everblend markers. 

I popped the white background up on foam tape for a little dimension and added some of the gorgeous red enamel dots from the Festive Fun set.

  1. Festive Fun Enamel Dots - https://timeforteadesigns.co.uk/products/time-for-tea-designs-designer-enamel-dots?variant=43488943276248

If you check out the shop, the Bearing Gifts stamp set and dies, and the Joy Stitched Sentiment Die are on sale! Go grab yourself some cuteness! 

Thank you so much for reading my blog post! For a 10% discount on your order, be sure to use my discount code T4TIRELAND10 ❤️  Treat yourself to this sweet set! ❤️ 

Hugs, Emma xxx

Friday, 22 November 2024

Have A Mice Cheesemas - NEW RELEASE


Happy New Release Day! DT Annalisa here, and I’m excited to share my first Christmas card of the year, featuring the brand new adorable Merry Cheesemas stamp set from Time For Tea Designs.

I sprayed Weathered Wood Distress Oxide Spray through the Tiled Wall 6 x6" Stencil onto watercolour cardstock and then pressed it onto watercolour paper using my fingers. I soaked up the excess liquid with a paper towel and set the panel aside for another project.


Next, I lightly sprayed the inked stencil with water and pressed it onto a 5 3/4 inch by 4 1/8 inch watercolour panel. After heat setting it with my Heat It Craft Tool by Tim Holtz, I sprayed it with Salvaged Patina Distress Oxide Spray and heat set it again. I then adhered this panel to a card base using liquid glue.

I die-cut white cardstock with the Five Windows Cover Die and used double-sided tape to attach the frame to the card base.

I stamped and coloured several images from the 'Merry Cheesemas' stamp set and coloured them with my Copics. I used my Brother Scan N Cut SDX125e to cut out the images. The bell and Christmas stocking came from the 'Santa's Nice' stamp set, while the small heart is from the 'Seasons Tweetings' set.

To add some sparkle, I applied a Quickie Glue Pen along the edges of some images and sprinkled on Lawn Fawn Prisma Glitter.


I adhered the images to the card base using liquid glue or double-sided foam tape for added dimension.

Finally, I trimmed the sentiments using the smallest dies from the A2 Layers Die set and attached them to the card with double-sided foam tape.


Thank you so much for reading my blog post. Remember to use my discount code T4TANNALISA10 when you visit the Time For Tea Designs shop to get 10% off your order.


Wednesday, 20 November 2024

Hooray


    Hello Time for tea design fans,

Today I have a colorful birthday card to share with you. I used the Happy Hump Day clear stamp with matching Happy Hump Day coordinating dies

I colored the stamp images with Copic markers.


As a base I used an A2 card model. 
I punched four small circles in different heights horizontally from my card. For this I used the set Stitched Circle Dies. In the image below you can see that you can use both the bottom part that I used for my card, and the top part of the circles. I will make a card from the top part later.


    From a scrap piece of paper I punched the same size circle, this will be my mask stencil to ink my card. I used various colors of Distress Oxide ink.


    The bottom and top where my circles are punched out I stuck back on my card with foam tape. Also under with stamped images used foam tape for more depth. 

The text Hooray I made with puffy alpha stickers


    To add an extra festive effect I threw some enamel dots around like confetti!


    I hope you will be happy with this cheerful whole. 

You can shop the used items in the Time for tea designs webshop. Use the code T4TDAISY10 for 10% discount!

Creative greetings,

Dais🌸


Tuesday, 19 November 2024

Gingerbread Christmas

Goodday everybody! Have you started making your christmas cards yet? Like so many other crafters out there, I intend to start early, to make sure I have enough cards to send out when the time comes. I guess intentions alone aren't enough 😅 Which is why this is only the third christmas card I made this year 🙈 I'd like to show it to you!


I stamped all the images from the Gingerbread Family - Our House to Yours Clear Stamp Set and the tree from the Snow Much Fun Clear Stamp Set. I colored them with Copic alcohol markers and used the Brother Scan 'n cut machine to cut them out.


For the background I used a slimline die and colored it pink with Distress oxides spun sugar, kitsch flamingo and picked raspberry. I die cut a snowy floor out of pink and white glitter cardstock using the T4T slimline hillside scene dies. I adhered this stack onto striped design cardstock which I trimmed to fit a white slimline folded card.


Using versamark clear ink and white embossing powder, I stamped the sentiment directly onto the card. Now all that was left to do is add the colored images; I love this part! I used 0.5mm and 1mm foam tape to create a little depth and tried to make it look like the gingerbreads are decorating the front tree🌲


I added a few snowflakes from the same glitter cardstock as the bottom of the card to make the scene extra wintery ❄❅❆ which finished my third christmas card of the year 🥳 Want to bake some cardstock christmas gingerbread cookies as well? Use T4TILONA10 for a 10% discount on your order in the T4T webshop!


Have a lovely day!

Monday, 18 November 2024

Snow Much Fun

 Hi Tea Timers, welcome back to the blog. I am having "snow" much fun creating Holiday cards with some of the older stamp sets. Today I am using the 'Snow Much Fun' to create my next winter scene.

Sets Used:

I first stamped out my images and then used the coordinating die sets to die cut out the images.

Once I die cut them out, I used my Copic markers to color each image. I was trying to keep with the same colors and color tone. 

I then took an A2 panel and die cut out a hill piece. I blended this piece with Salvaged Patina Distress Oxide and then splattered it with white watercolor to give it a snow effect.


I then took all my pieces and pre-assembled my card by deciding where I wanted each piece to go. I did this so I could see where I wanted my star to go so that I could blend a shining background.

Once I knew where my star was going to go, I took Scattered Straw and Fossilized Ember Distress Oxides and blended it in a circle. I then blended outwards with Salvaged Patina, Peacock Feathers and Uncharted Mariner.

Once I had my background ink blended out, I took some more white watercolor and splattered it over the background to create more of the snow effect.

I then started to assemble my card by adhering the hill piece onto the background panel.


I then decided to stamp the sentiment directly onto the card using Worn Lipstick Distress Oxides.

I then added my images first with my Christmas tree in the middle and then the star on top. 

I then adhered the snow people using liquid adhesive and foam tape.

I hope you enjoyed this blog post today. How many holiday cards have you made so far? All the products I used are linked above. Don't forget to use the code T4TRANDY10 at checkout for extra savings. Happy Crafting!

Sunday, 17 November 2024

Let's Spoon

 Hi Friends!
I’m Patricia and today I share you not one but two cards with Let’s Spoon Stamp Set and coordinating dies.


For the two card I’ve use Houndstooth Stencil, each one of them with different colors of Distress Oxide inks. One with pink tones Spun Sugar and Picked Raspberry. And the other in green tones Peeled Paint and Twisted Citron.

For one of them I used this pair of avocados as the protagonist, which I think are really cute (well, the whole set 🤗❤️)


And I made the background round with the Simple Stitched Circle Dies and Scalloped Circle Dies sets that combine very well with each other.


For the second one, the prettiest pair of spoons and also use a small circle to make it stand out from the background.


Thank you so much for reading my blog post. Remember to use my discount code T4TPATRICIA10 when you visit the Time For Tea Designs shop to get 10% off your order. Happy Crafting! 

Let's Party

 Happy Sunday, everyone! DT Myrthe here with a new post for Time For Tea Designs

For this card, I used the Jumping for Joy stamp set, coloring the images with my Copic markers. I chose a warm, autumn-inspired color palette, using rich shades of orange, brown, and yellow to create a cozy, fall feel.

For the background, I used Distress Oxide inks from Ranger in Rusty Hinge, Wild Honey, and Mustard Seed, blending them together to create a warm, inviting backdrop. To add texture and interest, I applied the Chic Chevrons stencil, which gave the background a subtle, geometric pattern that complements the warm color palette perfectly.

The card also features an interactive shaker element, created using the Stitched Circle dies. I used two of the smaller circles to cut two openings in a larger circle, filling it with glitter and small embellishments. This shaker element adds a fun and dynamic touch, making the card not only visually appealing but also interactive.

For the sentiment, I used the Let's Party die set, cutting the words multiple times and layering them on top of each other to add extra dimension and depth. The raised sentiment adds a bold and fun focal point to the card, making it even more eye-catching.

The combination of the autumn-colored stamped images from Jumping for Joy, the layered background, and the shaker element, paired with the dimensional sentiment, creates a cheerful, interactive design that’s both beautiful and fun.

Thank you so much for reading my blogpost today! For a 10% discount on your next order, be sure to use my discount code T4TMYRTHE10.

Happy Crafting,

x Myrthe 


Other Posts You Might Like