Pages

Showing posts with label Shaker Card. Show all posts

Friday, 14 February 2025

Sweet On You Shaker Slimline


Happy Valentine's Day! DT Annalisa here today and I’d like to share a slimline Valentine's Day shaker card I created using the Sweet On You and Warm Hugs stamp sets from Time For Tea Designs.

To create the background, I began with Ranger Distress Watercolor Cardstock and used Saltwater Taffy, Picked Raspberry, Tattered Rose, and Spun Sugar Distress Watercolor Pencils. I soaked the pencils in water, scribbled them onto acetate, and then spritzed the acetate with water. After that, I pressed the acetate onto the watercolour paper repeatedly, heat-setting and spritzing with water as needed. I also used Mica Spray Stains in Cocktail Party and Sugary Gumdrop.


Next, I followed the same process on another piece of watercolour paper using Salvaged Patina and Tumbled Glass Distress Watercolor Pencils. Additionally, I applied Peacock Feathers Distress Spritz, Wonderland Distress Mica Stain, and Salvaged Patina Distress Spray Stain.

I used the Slimline Scalloped Trio Circle Nesting Dies to cut out both the pink and blue panels. For the pink panel, I die-cut three hearts using one of the Heart Nesting Dies. I then glued the blue panel to a slimline card base.


To assemble the shaker element, I adhered acetate to the back of the pink hearts panel using double-sided tape. I placed 3mm double-sided tape on the back of the pink panel and attached it to the blue card panel. Before securing the pink panel, I sprinkled a mix of Candy Christmas and Mermaid Tail sequins from Pawsome Stamps in the appropriate areas.

Then, I stamped and coloured the images from the Sweet On You and Warm Hugs stamp sets using Copics. I die-cut them out with the coordinating dies and added white gel pen accents using a Gelly Roll Pen.


Finally, I used liquid glue to adhere the images and the "I'm Sweet On You" sentiment to the card. I finished by adding Glossy Accents to certain areas of the images for added dimension and shine.

Thank you so much for reading my blog post! Be sure to use my discount code T4TANNALISA10 when you visit the Time For Tea Designs shop to get 10% off your order.


Friday, 27 December 2024

Penguin Christmas Shaker


Happy Friday! DT Annalisa here sharing my last Christmas card of the year, a colourful shaker featuring the It's Penguin-ing to Look A Lot Like Christmas stamp set from Time For Tea Designs.

I started with watercolour paper and die-cut using the Stars Stitched Cover Die. Then, I sprayed the die-cut panel with Mermaid Lagoon and Uncharted Mariner Distress Spray Stain and used my Heat It craft tool by Ranger to dry it. After that, I added some shimmer by spraying the panel with Cocktail Party Mica and Merry Mint Mica.

I used White Silver Neenah cardstock to cover the entire surface of the card base. Next, using double-sided tape, I adhered acetate to the back of the inked star panel. I placed 3mm double-sided tape on the back of the panel and attached it to the card base. Before securing the star panel, I sprinkled Candy Christmas sequins mix from Pawsome Stamps in the appropriate areas.

I stamped and coloured several images from the It's Penguin-ing to Look A Lot Like Christmas set using Copics, then cut them out with their coordinating dies. I added white gel pen accents with a Gelly Roll Pen. The Christmas tree and candies are from Gingerbread Family - Our House to Yours.

To add some sparkle, I applied small dots of glue to select areas on the stamped images using my Quickie Glue Pen by Sakura and dipped them into Lawn Fawn Prisma Glitter. I then secured all the stamped elements to the card using liquid glue.

For the sentiment, I stamped "Happy Christmas" from the Simple Sentiments set onto black cardstock with VersaMark ink. I sprinkled Alabaster ultra-fine embossing powder by Brutus Monroe (in white) over the stamped sentiment and heat-set it. I used a small rectangle die to cut it out.

To finish the card, I added some clear dots from Pretty Pink Posh for an extra touch.

Thank you so much for reading my blog post! Don’t forget to use my discount code T4TANNALISA10 when you shop at Time For Tea Designs to receive 10% off your order.


Friday, 3 May 2024

Sweet Days Shaker


Happy Friday! DT Annalisa here
 sharing a sweet pastel shaker card I created using several Time For Tea Designs supplies. I love the fun and beauty of a cute shaker card!

I ink-blended salvaged patina and peacock feathers Distress Oxides onto white cardstock using my Beautiful Rainbow Blender Brushes. I added white splatter with a paintbrush, water and Copic opaque white and then die-cut this panel with the Sweet Scalloped Dies. I created a card base from white cardstock and adhered the panel down to it with double-sided tape.


I ink-blended shaded lilac, kitsch flamingo and spun sugar Distress Oxides onto white cardstock over the Scattered Hearts Stencil. I removed the stencil and ink-blended the same colours with a lighter hand and with the left-over ink on my brushes. 

I added white splatter with a paintbrush, water and Copic opaque white and then die-cut this panel with the Sweet Scalloped Dies. I then used Heart Nesting Dies to create an opening for the shaker and adhered acetate to the back with double-sided tape.

I added two layers of double-sided foam tape to the back of the smaller scalloped panel. I poured Candy Christmas Sequin Mix from Pawsome Stamps onto the teal card base and then stuck down the pink panel to contain the shaker elements.

I stamped and coloured (with Copics) several images from Sweet On You and Warm Hugs and cut them out with their coordinating dies. I added white gel pen accents with a Gelly Roll Pen. The sentiment is from Sweet Cart Critters and I cut it out with the coordinating die set.


I adhered the images to the card base using liquid glue to complete the card.

Thank you so much for visiting my blog. Remember to use my discount code T4TANNALISA10 when you visit the Time For Tea Designs shop to get 10% off your order.


Friday, 15 March 2024

Hoppy Easter Shaker


Happy Friday! DT Annalisa here to share an Easter shaker card I created using the Eggstra Special Birthday stamp set and their coordinating dies from Time For Tea Designs.  

I die-cut Distress Watercolor Cardstock by Ranger with the Slimline Scalloped Trio Circle Nesting Dies and the Eggstra Special Slimline Add-On Horizontal Die. I pressed peacock feathers, picked raspberry Distress Ink onto my glass matt, and sprayed water onto the inks. I pressed the die-cut watercolour panel into the ink several times and heat-set it.


I trimmed purple cardstock to go behind the watercoloured panel and glued it down to a slimline card base. I used liquid glue to adhere a trimmed piece of acetate over the egg panel holes.

Next, I added two layers of double-sided tape on the back of the egg panel and added pink, purple, blue and clear sequins. I then pressed the card base onto the double-sided tape to seal in the sequins.


I stamped and coloured (with Copics) several images from Eggstra Special Birthday and cut them out with their coordinating dies. I added white gel pen accents with a Gelly Roll Pen. 

I used liquid glue to adhere the stamped elements to the card. 


Thank you so much for reading my blog post. Remember to use my discount code T4TANNALISA10 when you visit the Time For Tea Designs shop to get 10% off your order.

Thursday, 8 June 2023

How to Create Laundry That Really Tumbles!


 Hey there, Tea Timers!!  It's Amanda back with a very fun interactive card using the Loads of Love stamp set!

First, I created an angled background with the Pretty Pastels paper pad.

Next, I stamped my images and colored them in with Copic markers.
I die cut them with the coordinating dies, which includes a circle to cut out the center of the washer/dryer stamp.
I added acetate and then 3D foam tape to create a "shaker".
I added some laundry to the shaker.
Then, I assembled the rest of the card!


That's how I created the cutest little laundry room!  Thanks so much for stopping by the Time for Tea Blog today!

Xx, Amanda


Wednesday, 25 January 2023

FREE PRE-RECORDED CLASS - You Quac My World

 I'm so excited to introduce the

You Quac My World FREE Pre-recorded Class.


In this FREE class you will learn how to make a super cute shaker card with these adorable Avocado's.

What’s Included:

Pre-recorded Tutorial -This is a 'quick class' and runs under 20 minutes. You can pause the video at any time if needed. Full explanations of each step are given and demonstrated by Jo.

To get the FREE Downloadable Supply List and Pre- Class Prep Instructions go to the link below.


Grab your list, collect your crafty supplies and enjoy this fun and quick card making class.

Hugs

Jo xoxo

Thursday, 19 January 2023

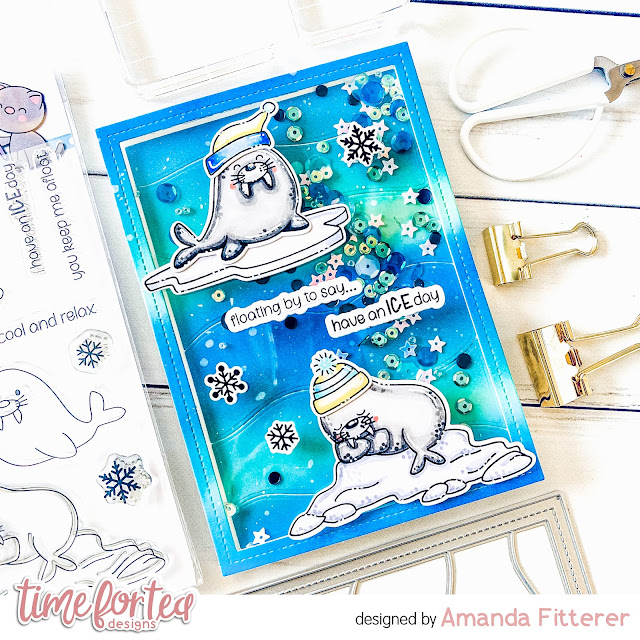
Creating a Shaker Card using the Walrus Be Friends Stamp Set


Happy Thursday, Tea Timers!  It's Amanda here!  Do you LOVE making shaker cards?!  I just think they're SO much fun and worth the amount of time that it takes to make them!

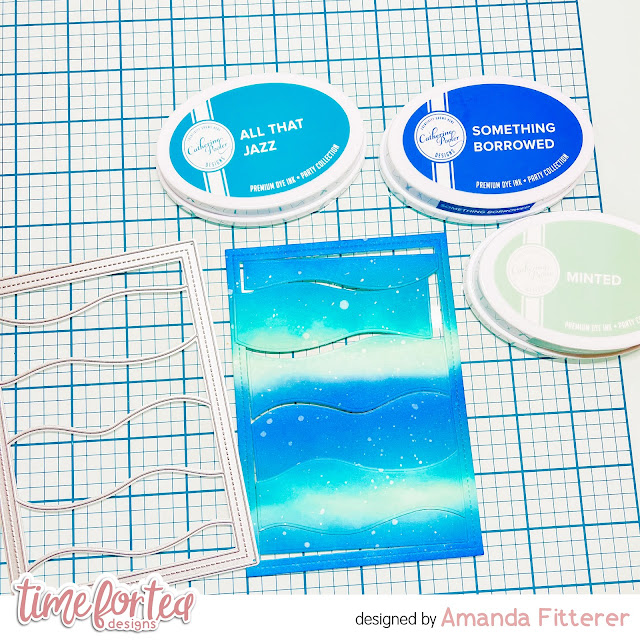
To create this card, I first ink blended a piece of white cardstock with Minted, All That Jazz, and Something Borrowed Catherine Pooler inks.  Then, I used the Waves Cover Die to cut it out.

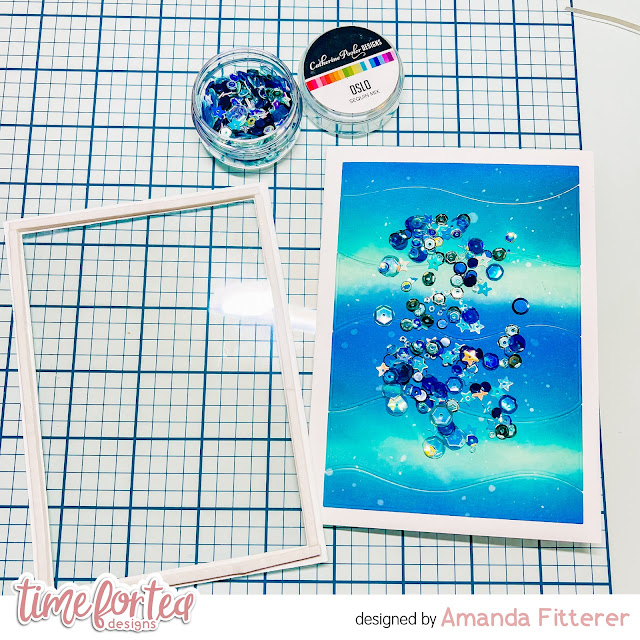
Next, I glued my waves directly onto my white card base.  I added some sequins to the center.  I used double sided tape to adhere my acetate sheet to the die cut frame.  Then, I placed Deep Foam Tape around the entire edge of the frame.  Then, I could place my frame on my card base.

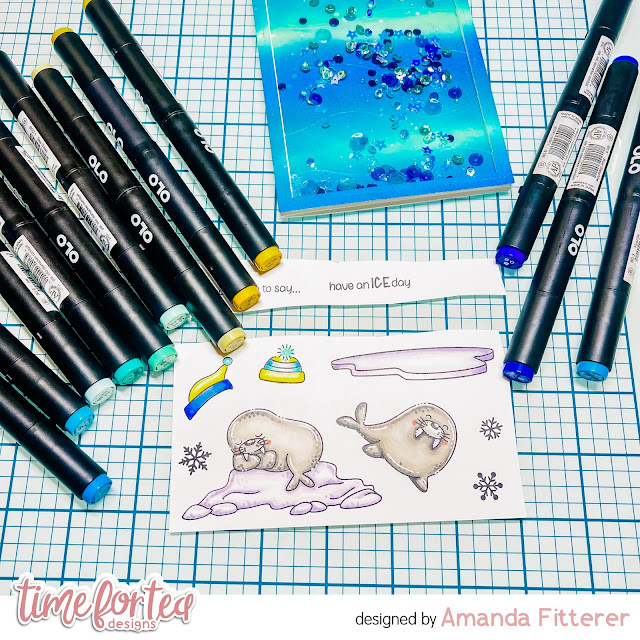
I then stamped my images from the Walrus Be Friends Stamp Set and colored them with OLO markers.  Then I die cut them with the coordinating dies.

The last step is to adhere my stamped images and sentiments to the card using 3D foam squares!

That's it for me today, friends!  I'll be back next Thursday for some more inspiration!  Xx, Amanda


Thursday, 3 November 2022

Movie Time Shaker Card!

Happy Thursday, Tea Timers!  It's Amanda here!  Today I get to share with you how I made this birthday shaker card!  I don't know about you, but I just love making interactive cards!

To make this card, I grabbed a piece of red cardstock and ink blended Maker Forte's Telephone Box ink through the Popping Popcorn Stencil.  I also blended the edges all the way around.

Out of yellow cardstock, I die cut a framed die.  Any frame die would work, including the Waves Cover Die or the Stitched Window Cover Die.

To create the shaker part, I added an acetate sheet behind my yellow frame.  Then, I used deep foam tape all around the edge of my yellow cardstock.  I sprinkled some sequins and stars on my red cardstock and then placed my frame on top.
For my adorable little movie scene and sentiment, I stamped some images from the Movie Night stamp set.  I colored them with OLO Markers and then die cut them out with the coordinating dies.  Then, I attached them to my card front with 3D foam squares.  I also cut out the letters for "Happy Birthday" with some alphabet dies.


Thank you so much for stopping by the blog today!  I hope you're feeling inspired by this post!  Come back next week for another cheery card!

Xx, Amanda


Saturday, 22 October 2022

Jumping for Joy!


Happy Saturday Teatimer's well Autumn is definitely here so it only felt right to pull out these cuties from the Jumping for Joy stamp set again. 
I went for a fun shaker card with them so I could use sequins behind to give the look of leaves dancing in the wind. I used the A2 Stitched Hearts Cover Dies to create the frame and layered acetate underneath. I then cut out a panel to fit behind which I inked up with Squeezed Lemonade and Dried Marigold and added some thick foam tape behind. Filling this with gold and orange sequins I added the frame on top. 
Then for the rest of the card I coloured up the critters from the Jumping with Joy stamp set using copic markers and die cut them out. As usual adding cute little dots to their cheeks and black shiny noses using a black and white gelly roll pen.
I adhered them using foam tape then it was just time to add the sentiment which I stamped out the jumping and heat embossed it in white on black. I didn't want the joy part though so when I die cut the sentiment I chopped that part off.  Then all that was left was the big Joy which I used the Joy Stitched Sentiment Die and cut out of dark green to carry on with the Autumn colours. 
That's my shaker card finished up, it was really quick and easy to make. You can find all the products in the Time for Tea shop and get 10% off your orders using code T4TNATALIE10.
Have a great weekend and keep checking back for more inspiration from the team. 

Friday, 12 August 2022

Porthole Sea Shaker


Hello and happy Friday! DT Annalisa here today sharing a porthole sea shaker card that I created using supplies from the latest Time For Tea Designs release. The sea creatures work perfectly with the Slimline Porthole Dies; I love how they peek through the openings.

To start, I die-cut some wood grain card stock using the largest rectangle die in the Slimline Scalloped Trio Circle Nesting Dies. I ink-blended this with Simon Says Stamp Khaki ink and Walnut Stain Distress Ink. Once the ink was dry, I die-cut the panel with the Slimline Porthole Dies.

I used the same die on some silver metallic card stock to create shiny portholes. I then used the circle frame in this set to cut some white card stock which I then coloured black with my copics. I used liquid glue to adhere these to the backs of the silver portholes so the black would show through.

I created an 8.5 by 3.5-inch slimline card base and ink blended it with Peacock Feathers and Salvaged Patina Distress Ink with my Beautiful Blender Brushes. I then added some white splatter of acrylic paint with a paintbrush.


Next, I stamped the critters from Fintastic Friends and die-cut them out with the coordinating die set. I coloured them with my Copics and added white gelly roll white pen accents. 

For the sentiment, I heat embossed some white embossing powder onto some black cardstock and then die-cut it out.

I used tape on the back of the woodgrain cardstock to connect the port holes to the front panel. I stuck down the critters to the card base in the areas behind the port holes and then added some Glitz Recollections Chunky Glitter down on top of them.


I used double-sided foam tape (which I doubled up) on the woodgrain panel to adhere this down onto the card base.

I added the sentiment using liquid glue to complete the card.

Thank you so much for reading my blog post,. Don't forget to use my discount code T4TANNALISA10 when you visit the Time For Tea Designs shop to get 10% off your order.


Wednesday, 15 June 2022

Video: Sentiment Die Shaker Card

Hi, Friends! Lauren here and I'm back with a new video tutorial on YouTube! One of my favorite ways to use the new large sentiment dies is as a shaker window. In today's video, we're going to create a fun, stenciled background, die cut it with a sentiment die and then turn that panel into a large shaker. Of course we'll have some cute stamped images to bring some fun to the card - especially the inside!

If shaker cards are not your favorite, or maybe you don't have all of the supplies, this can be easily made into a regular panel card. Just glue the die cut panel to your card base instead of popping it up to be a shaker!
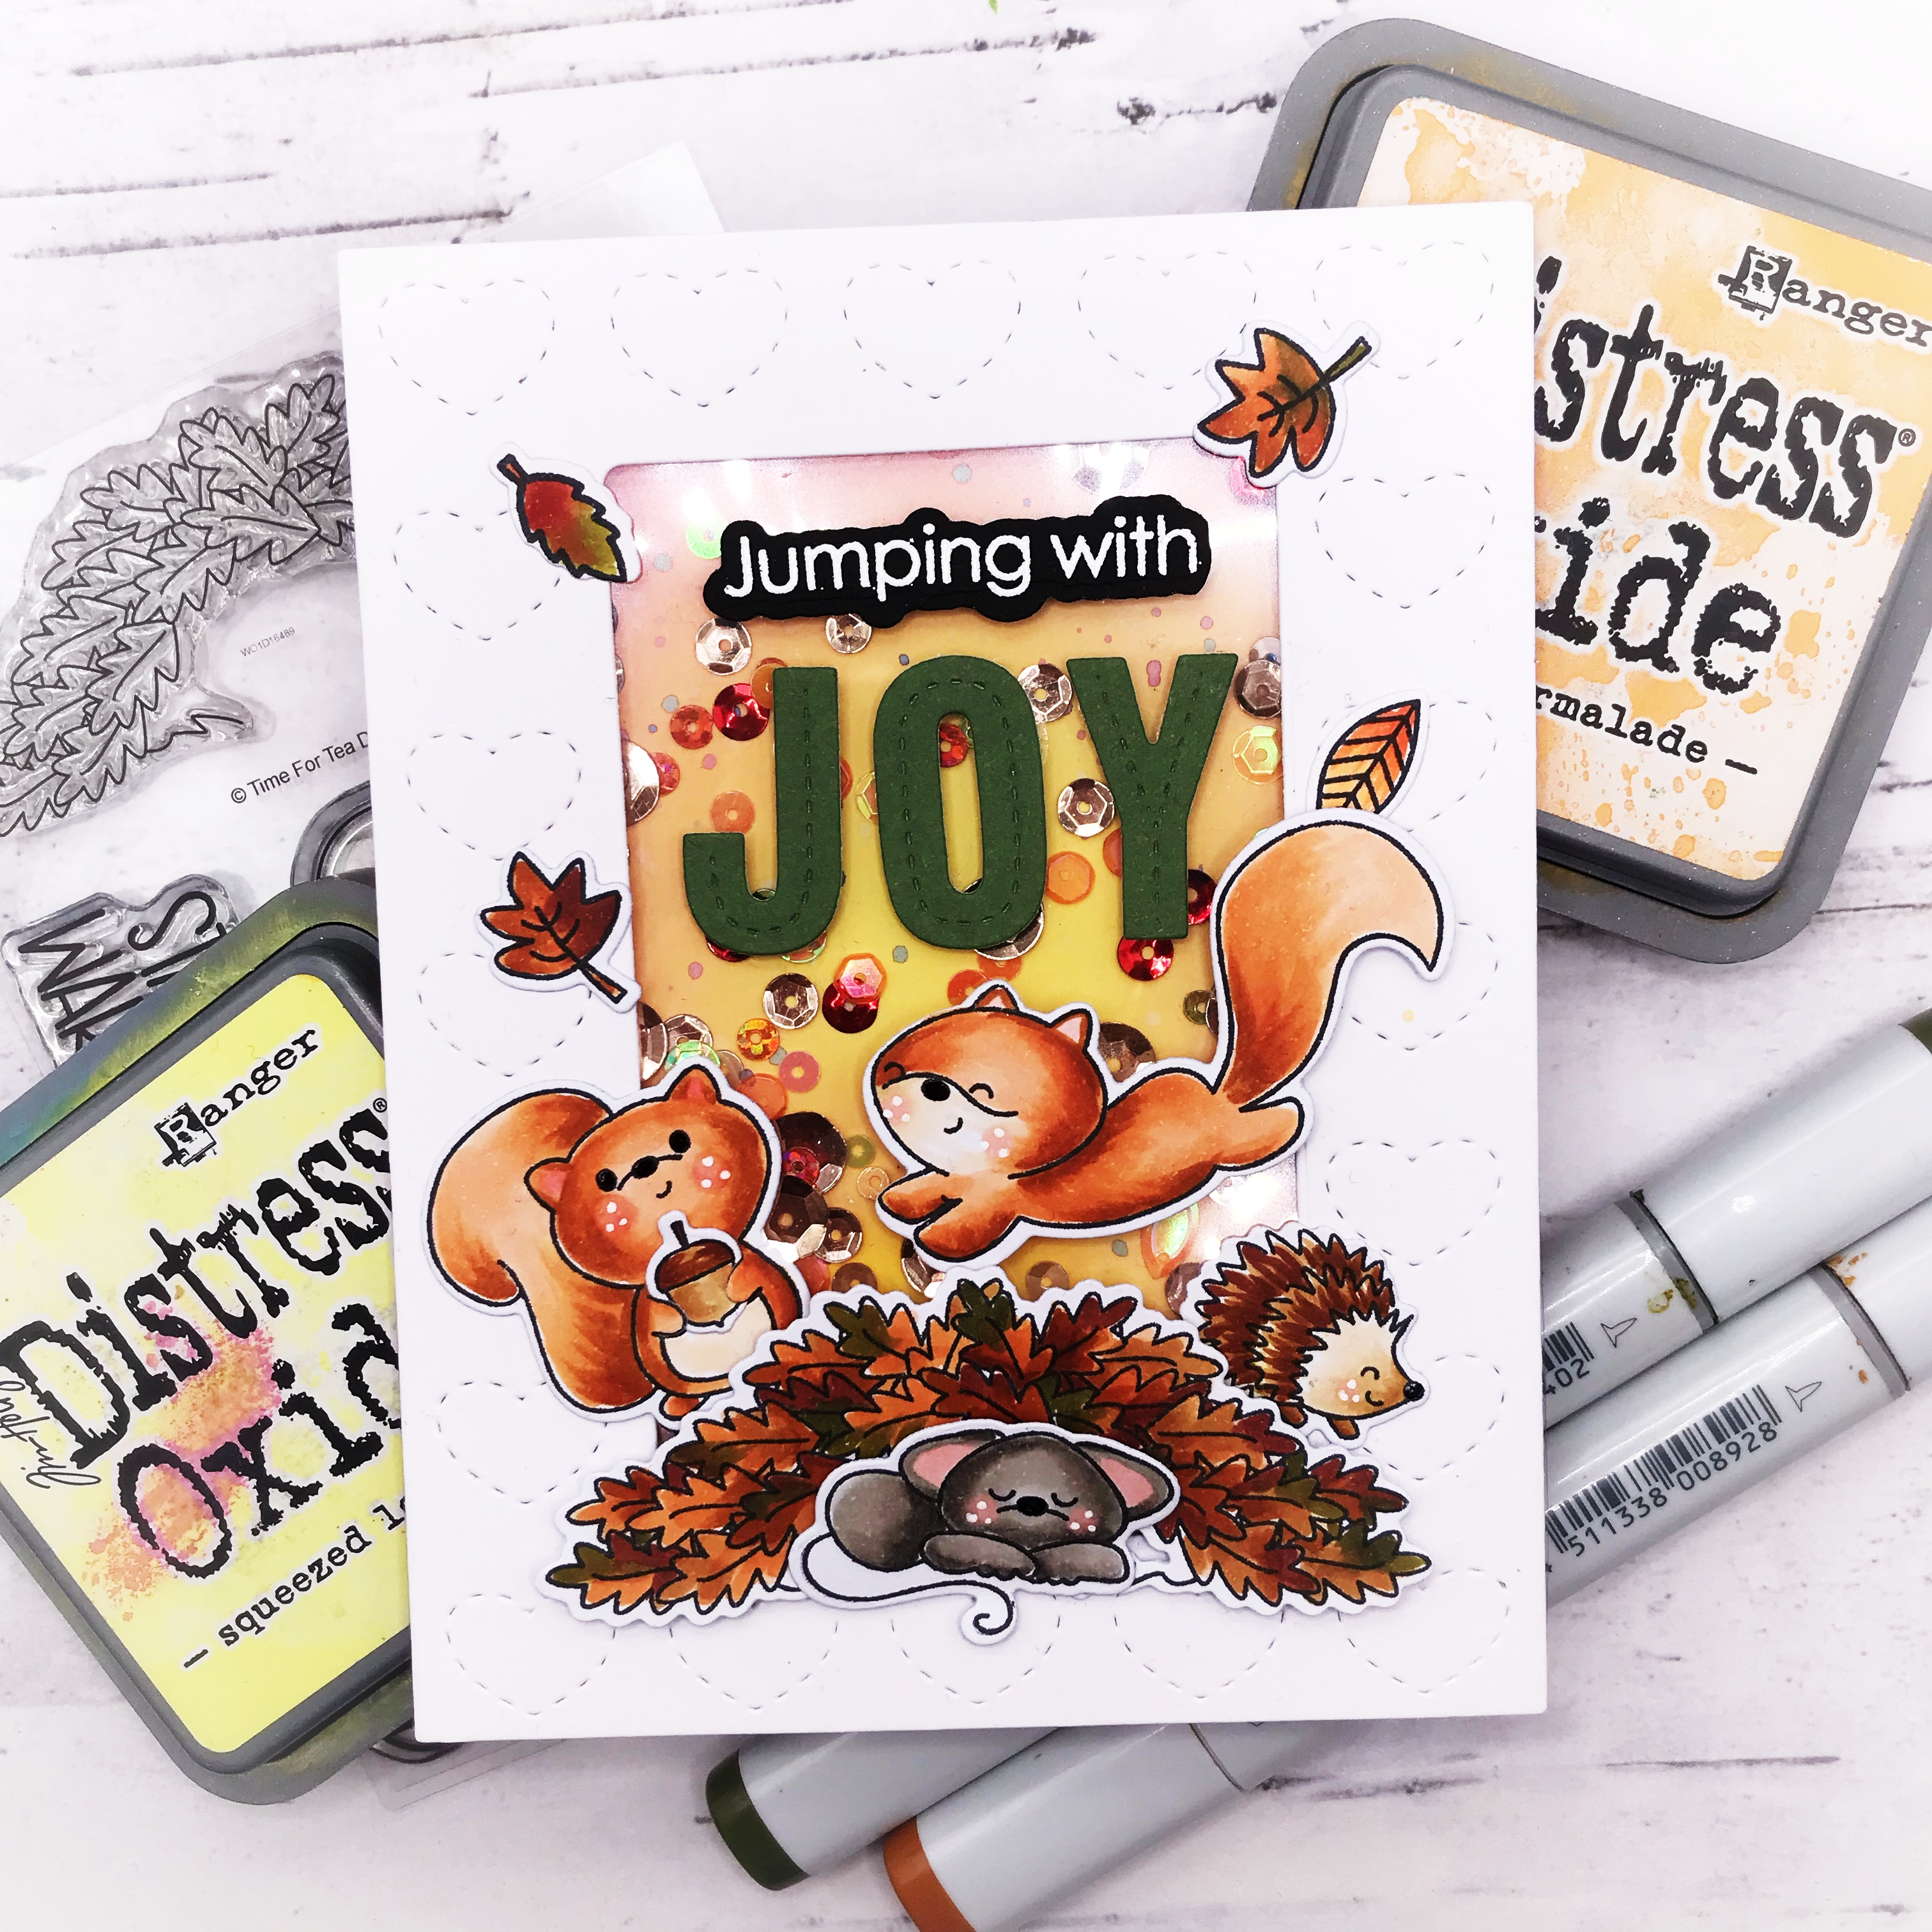
Click the image below to start the video and make sure to leave a comment if you have any questions!


Here is a quick list of the Time For Tea Designs supplies I used and make sure to enter my code T4TLAUREN10 at checkout for 10% off your order!

Thanks for joining me today and see you next month!

XO. Lauren

Find me on my social media here!

Other Posts You Might Like