Thank you so much for reading my blog post, you can use my discount
code T4TANNALISA10
when you visit the Time For Tea Designs
shop to get 10% off your order.
Hi there! Silvia's here today and I'm so excited sharing with you this card featuring the super sweet "Jumping with joy" stamp set.
I started die cutting my card base with the new "Snow Flurry Cover" die and I ink blended it with spun sugar, worn lipstick, festive berries and aged mahogany Distress Oxide inks. I then splattered with clean water, tone on tone ink (loosened with a drop of water) and white and gold acrylic paint.
I die cut the tree with the "Tree of Love Cover Plate" die from brown wooden cardstock and I darkened with vintage photo and ground espresso Distress Oxide inks. I also die cut a grassy border with the "Slimline Hillside Scene" die set and I colored it with shabby shutters, bundle sage and rustic wilderness Distress Oxide inks.
I then stamped images from the "Jumping with Joy" stamp set, I colored them with Spectrum Noir Illustrator alcohol markers and I cut them with coordinating dies.
I put everything together with a mix of liquid glue and foam tape and that's all. I really hope you like this card as much as I do.
Thank you so much for stopping by! I wish you an amazing day!
Big hugs, Silvia.
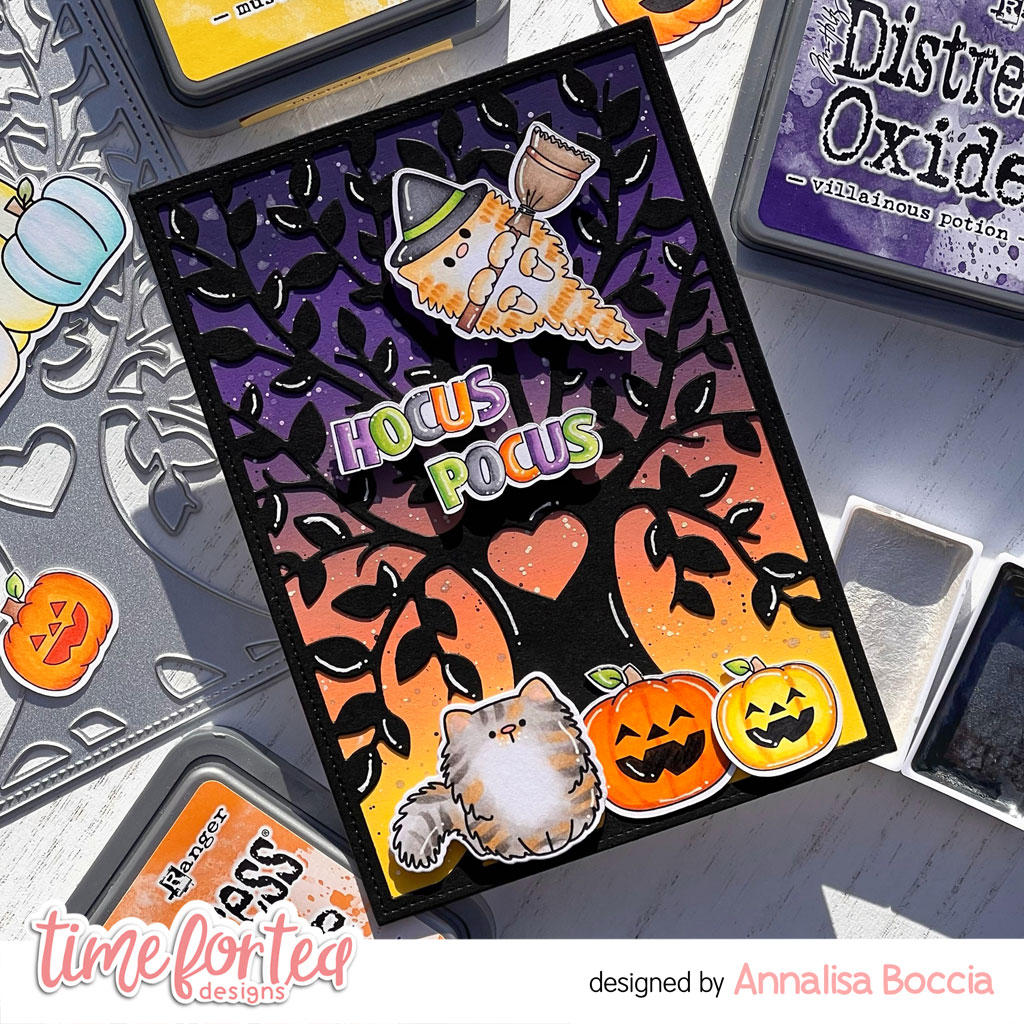
I wanted to create a spooky scene, so I chose to use the die cut Tree of Loveand the tree on black cardstock with a background made by shading distress then I also created this moon in the background, what do you think? I think it doesn't make much sheer also because my little girl Gaia said it was very sweet and wanted it as a gift right away (and I can't say no to her).
Don't forget to use the code T4TCLAUDIA10 to get 10% off in the shop!!!
Hello and welcome back to the Time for Tea Designs blog. Silvia's here today and I'd like sharing with you this paper hugs card.
I started die cutting all the pieces I needed to build up my scene from white cardstock with the following die sets: "Slimline Hillside Scene", "Smile Inverted Scallop Frame", "Tree of Love Cover Plate".
I then ink blended the hill and the grassy borders with bundled sage, mowed lawn and evergreen bough Distress Oxide inks and the tree with vintage photo and ground espresso Distress Oxide inks.
I stamped images from the "Blooming Bunnies" and the "You Got Mail" stamp sets, I colored them with alcohol markers and I cut them with coordinating dies.
For the sky I used the cute cloudy sky patterned paper from the "Brighter Days" paper pad and I cut a sentiment from the "Brighter Days Sentiment Cards white on black".
Remember that you can get a 10% off your Time for Tea order with the code T4TSILVIA10.
Thank you so much for passing by and having an amazing day. Hugs, Silvia.
Hello everyone, happy Friday! DT Annalisa here showcasing the awesome Tree of Love Cover Plate Die from Time For Tea Designs. This die is a show stopper! When Jo revealed it to the design team, I couldn't wait to get my hands on it and start creating.
I knew it had to stand on its' own for the first card that I made using it, so I decided to pull out the alcohol inks. I don't use these very often as I get frustrated that they have a mind of their own. As a perfectionist, this is HARD.
I used some Ranger Alcohol Ink Yupo along with the following alcohol inks: Flamingo, Patina, Turquoise (Ranger) and Y11, BG13 (Copic Reinkers). In terms of technique, I added a base layer of 99% Isopropyl Alcohol to the yupo paper and then applied the various colours. I did a mixture of blowing with the Distress Marker Spritzer, moving the paper around and adding Tim Holtz Alcohol Blending Solution to get the inks mixing and moving.
I used a fan to help with air circulation, but by the end of the night of doing this with alcohol inks, I felt a little dizzy. They aren't kidding when they say to do this in a well-ventilated area! Next time, I might do this outside.
Once the cardstock was dry I used the Tree of Love Cover Plate Die to cut the Yupo, I used a metal shim due to the thickness of the Yupo and it cut beautifully. I then grabbed some shiny paper from my stash to add to the background of the tree.
Next, I added the 'brighter days ahead' sentiment from the Brighter Days Sentiment Cards | White on Black. To complete the card, I added the panel to a white card base.
Thank you so much for visiting the Time For Tea Designs blog, you can use code T4TANNALISA10 when you visit the shop to get a 10% discount on your entire order.
Hello Time for Tea Designs friends! Silvia's here today with a new card featuring some goodies from the Brighter Days collection.
First of all I ink blended a white panel with dried marigold, worn lipstick, seedless preserves and chipped sapphire Distress Oxide inks and I splattered with clean water and some gold and white inks.
I then die cut the "Tree of Love Cover Plate" die from white carstock and I glued on my inked panel.
I also die cut the largest die from the "Smile inverted Scallop Frame" die set three times, I glued them first one above the other and then I on my card base.
I stamped one of the cute sloth from the "Be Slothy" stamp set, I colored it with alcohol markers and I cut it out with coordinating dies and I attached on my card with some foam squares.
To finished my card I added one of the adorable sentiments from the "Brighter Days Sentiment Cards" white on grey.
That's all for today. Thank you so much for passing by and I hope you like this card as much as I do.
And don't forget that you can get a 10% off your Time for Tea order using my code, T4TSILVIA10 .
Hugs, Silvia.