Pages

Showing posts with label Rainbow Beautiful Blender Brushes. Show all posts

Friday, 4 August 2023

Movie Night Under the Stars


Happy August, DT Annalisa here! It is a beautiful time of year to watch a movie under the stars so I created this fun scene of friends watching a movie outside. It features the Movie Night Clear Stamp Set and coordinating die set.

I ink-blended Chipped Sapphire, Prize Ribbon, Faded Jeans, Peacock Feathers, and Salvaged Patina Distress Oxides onto Distress White Heavy cardstock by Ranger using my Beautiful Blender Brush.


Next, I applied Lawn Fawn's Fairy Dust stencil paste over the Movie Star 6 x6" Stencil on top of the ink-blended panel. A word of warning for those who have purchased this, it dries out in the container quickly so use it up as soon as you can! Once the paste was dry, I added white splatter with a paintbrush, water and Copic opaque white.

I die-cut the Zig Zag Frame & Tag Dies (retired) to frame the scene and used liquid glue to adhere it to the panel.   


I stamped and coloured (with Copics) several images from the Movie Night stamp set and cut them out with their coordinating dies. I added white gel pen accents with a Gelly Roll Pen.

I stamped the 'you're a reel star’ sentiment and cut it out with its coordinating die.

I stuck the images to the card base using a combination of liquid glue and double-sided foam tape for dimension.


Thank you so much for visiting my blog, be sure to use my discount code T4TANNALISA10 when you visit the Time For Tea Designs shop to get 10% off your order.


Friday, 7 April 2023

Easter Wishes


Happy Friday, crafty friends! DT Annalisa here sharing a spring Easter scene I created using dies, stamps and stencils from the new release. I absolutely love the little bunny holding the little chick, so adorable!

I used the Square Label Dies to cut out a piece of patterned paper from the Pastel Basics Digital Printable Papers. I used another smaller die in the same set to die-cut white cardstock. I ink-blended Shaded Lilack, Kitsche Flamingo and Spun Sugar Distress Oxides over the Mini Egg Pattern Stencil using my Beautiful Rainbow Blender Brushes. I added white splatter with a paintbrush, water and Copic opaque white.


I die-cut a white fence using the Fenced In Dies and used liquid glue to adhere it to the inked panel. 

I stamped the bunny, chick and eggs from the Eggstra Special Birthday stamp set. The butterfly, flower and bee are from I Really Dig You. I stamped and Copic coloured all the images and cut them out with their coordinating dies. I added white gel pen accents with a Gelly Roll Pen. 

I used the large Easter Wishes Large sentiment die for the sentiment. I coloured it using Aqua Sky ink from Concord & 9th. I added white gel pen accents with a Gelly Roll Pen. I die-cut the sentiment two more times and adhered them all together with liquid glue.


I used liquid glue to adhere the sentiment and stamped images to the inked panel. I used double-sided foam tape to adhere this down to the card base that I covered with patterned paper.

Thank you so much for reading my blog post, you can use my discount code T4TANNALISA10 when you visit the Time For Tea Designs shop to get 10% off your order.


Friday, 31 March 2023

Holy Moley Birthday

 
Happy Friday! DT Annalisa here sharing my first card using the I Really Dig You stamp set that is part of the brand-new release! It is one of my favourite sets from the new release. I LOVE to garden so, the little garden tools and the little critters in the set stole my heart as soon as I saw them. 

I created the background using Distress Watercolor Cardstock by Ranger that I cut to a 5.5 by 4.25-inch piece using dies from the Landscape Edge Standalone Die Set. I ink-blended Distress Oxide Inks onto the different sections using Beautiful Rainbow Blender Brushes. 

Soil: Tea Die, Antique Linen; Vintage Photo splatter
Grass: Twisted Citron, Mowed Lawn; Rustic Wilderness splatter
Sky: Tumbled Glass, Salty Ocean; Uncharted Mariner splatter
Clouds: Weathered Wood


I also added splatters of water to create texture for the scene. I used liquid glue to adhere the sections onto an A2 card base. It was fun puzzle-piecing them all together.

I stamped the sentiment using my MISIT to get a crisp impression.

I stamped the characters and accessories (how cute are the bee and the worm!) with Lawn Fawn Jet Black Ink. I coloured them with Copics and added white gel pen accents with a Gelly Roll Pen. I used my Brother Scan N Cut SDX125e to cut out the images. 

I used liquid glue to adhere the planter, mole in a hole and tulip to the card. I used double-sided foam tape on the remainder of the images. I added Glossy Accents to some of the flowers, the bee, the butterfly and gardening tools to complete the card.


Thank you so much for reading my blog post, you can use my discount code T4TANNALISA10 when you visit the Time For Tea Designs shop to get 10% off your order.

Friday, 17 March 2023

Get Whale Soon


Happy Friday! DT Annalisa here sharing a get well soon card featuring the Get Whale Soon stamp set and the Wonky Background Masking Stencil. I have been under the weather for the past week, so I thought it would be fitting to share this. Thankfully I am on the mend, as it is hard to be crafty when your head is congested! 

I ink-blended Tumbled Glass, Salvaged Patina and Peacock Feathers Distress Oxide Ink over the Wonky Background Masking Stencil onto some white cardstock using my Beautiful Rainbow Blender Brushes. I added splatter with a paintbrush, water and Salty Ocean Distress Oxide Ink. I also added metallic silver watercolour splatter with a paintbrush.

Once dry, I die-cut the panel with the A2 Layering dies. I used the same die set to cut grey card stock that I glued to an A2 card base. I love how these dies make it so easy to create a layered card like this without having to measure!

I stamped the images from Get Whale Soon with Lawn Fawn Jet Blank Ink and coloured them with my Copics. I added white gel pen accents and then used the coordinating dies to cut them out.    

I stamped the 'sending you hugs' to the bottom of the ink-blended panel using Versafine Onyx Black. Next, I added double-sided foam tape to the back of the panel and stuck it down to the card base.


I used liquid glue to stick down the pills and heart to the card base for the rest, I used double-sided foam tape. I added Glossy Accents for shine and added dimension, to some of the elements. I added blue Designer Enamel Dots from the Sweet Summer Enamel Dots, to complete the card.

Thank you so much for reading my blog post, you can use my discount code T4TANNALISA10 when you visit the Time For Tea Designs shop to get 10% off your order.


Friday, 3 March 2023

Hello, Meow You Doing?


Hello, and welcome! DT Annalisa here sharing a bright tea-themed card featuring a kitty in a giant mug from the Tearrific Pals stamp set from Time For Tea Designs.

I started with a 5 3/4 by 4 1/8 inch and the Scattered Hearts Stencil. I placed the Scattered Hearts Stencil on my Wendy Vecchi 7-inch Make Art Station and used the strong magnets to ensure the stencil didn't move while I ink-blended. I used Peacock Feathers, Picked Rasberry and Squeezed Lemonade Distress Inks and my Beautiful Rainbow Blender Brushes to apply ink. 

I die-cut white cardstock using the Wide Stitched Frame Dies. I used the large frame and the thin-lined frame created when I used all three dotted frames together. I really liked the way the thin and thick frames looked together so I decided to use both. I used liquid glue to adhere both the card base.

I stamped the kitty in the tea mug, the sugar cubes and the tea bag, coloured them with my Copics and cut them out with their coordinating dies. I added some white gel pen accents, stickles and Glossy Accents for added interest. Once everything was dry, I used double-sided foam tape to adhere the elements to the card.


For the sentiment, I stamped the 'hello' from Let's Chat Clear Stamp Set and used the coordinating die set to cut it out, I cut out three additional backers for the sentiment and glued them all together and to the card with liquid glue (for added dimension). I completed this same process for the 'meow you doing?' using the Purrfect Day Clear Stamp Set and the Coordinating Dies. 

I added Clear Bubbles Designer Enamel Dots for a finishing touch to the card. These bubbles are so pretty, and I love using them on cards.

Thank you so much for reading my blog post, you can use my discount code T4TANNALISA10 when you visit the Time For Tea Designs shop to get 10% off your order.


Friday, 24 February 2023

You're A Reel Star

 
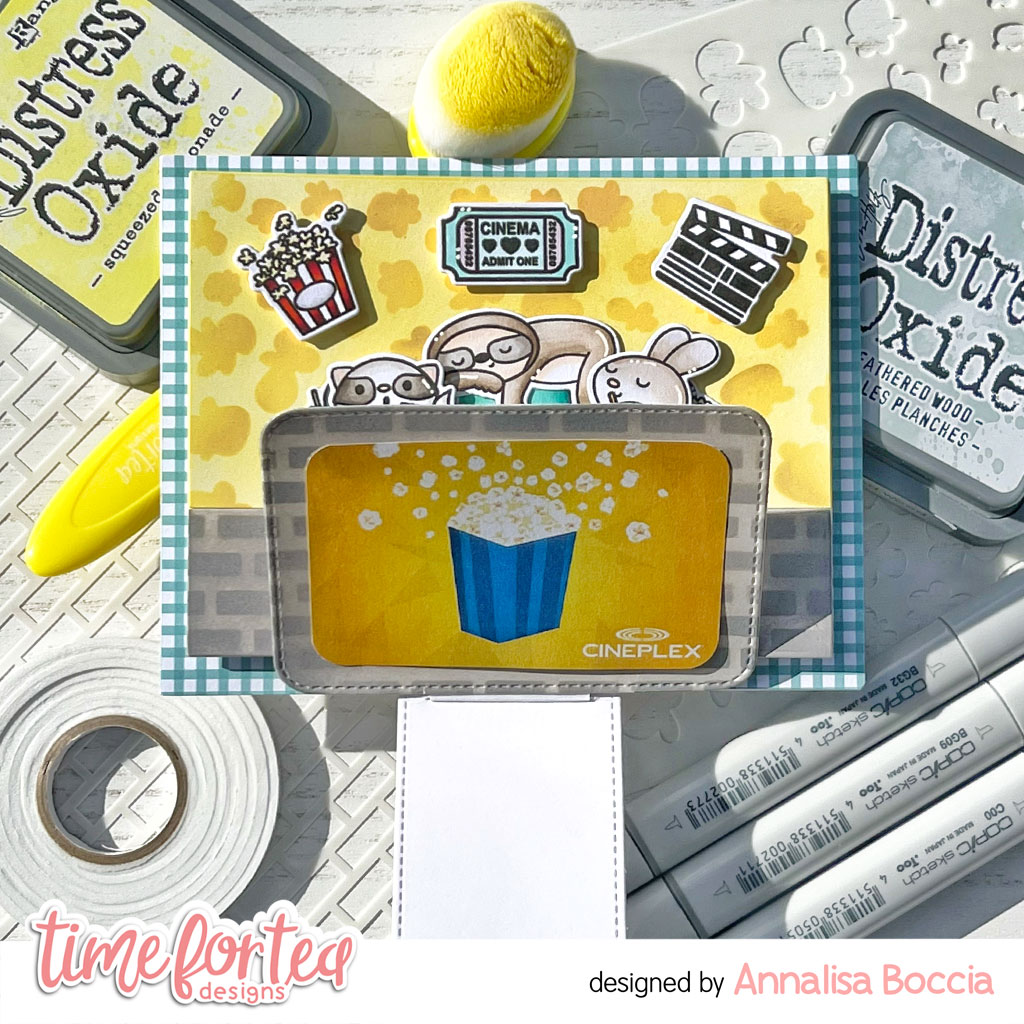
Happy Friday! DT Annalisa is here today sharing a fun interactive card featuring the adorable Movie Night stamp set from Time For Tea Designs. When I first saw this stamp set, I knew I had to make an interactive gift card scene with it. 


To create the interactive element, I used the Flippy Flappy dies from Lawn Fawn and followed several of their instructional videos on YouTube. I adhered a piece of teal patterned paper from the Gorgeous Gingham 6x6' Paper Pad using double-sided tape to an A2 card. I then created the interactive portion using white card stock and used double-sided foam tape to stick it to the card base. 


For the panel on top of the interactive mechanism, I used the Popping Popcorn and Tiled Wall 6 x 6 stencils on two panels of white card stock; for the popcorn, I used Squeezed Lemonade Distress Oxide and Weathered Wood for the wall. After ink blending with my Beautiful Rainbow Blender Brushes, I used liquid glue to adhere the panels down. I also ink-blended another tile panel for the gift card holder panel to which I adhered a movie gift card.

I stamped the critters and other elements from Movie Night and coloured them with my Copics. I cut them out with the coordinating die set and added white gel pen accents with my Gelly Roll Pen. I glued down the seats and sloth with liquid glue and the rest with double-sided foam. 


For the 'you're a reel star' sentiment, I used the coordinated die to cut out three extra pieces of white cardstock and glued them to the back of the sentiment for added dimension. I then used liquid glue to add them to the card.

Thank you so much for reading my blog post, you can use my discount code T4TANNALISA10 when you visit the Time For Tea Designs shop to get 10% off your order.


Friday, 10 February 2023

I Love Brew Kitty


Happy Friday, since February 14th is only a few days away, I am sharing a clean and simple Valentine's Day card that would be purr-fect for a tea lover. 

I used the following Time For Tea Designs products to create this card:


I started with an A2 card base, the Large Square masking stencil and the Scattered Hearts Stencil. I placed the Square masking stencil down and then put the Scattered Hearts Stencil on top of this. I used the strong magnets of the Wendy Vecchi 7-inch Make Art Station to ensure the stencils didn't move while I was inking up my card. I used Peacock Feathers, Picked Rasberry and Squeezed Lemonade Distress Inks and my Beautiful Rainbow Blender Brushes to apply ink. 

I stamped the kitty in the tea mug (Tearrific Pals) and the butterfly (Be Slothy), coloured them with my Copics and cut them out with their coordinating dies. I added some white gel pen accents.

I used liquid glue to adhere the butterfly and double-sided tape for the kitty in a cup. I stamped the 'i love BREW' sentiment from The Perfect Blend onto the card base. 


When you die-cut the Flirty Flowers cover die, a lot of tiny hearts remain that could be considered waste but I keep them in a small container for projects just like this! I coloured three of the tiny hearts Copics and used liquid glue to adhere them to the card.

Thank you so much for reading my blog post, you can use my discount code T4TANNALISA10 when you visit the Time For Tea Designs shop to get 10% off your order.

Friday, 21 October 2022

Hocus Pocus Tree


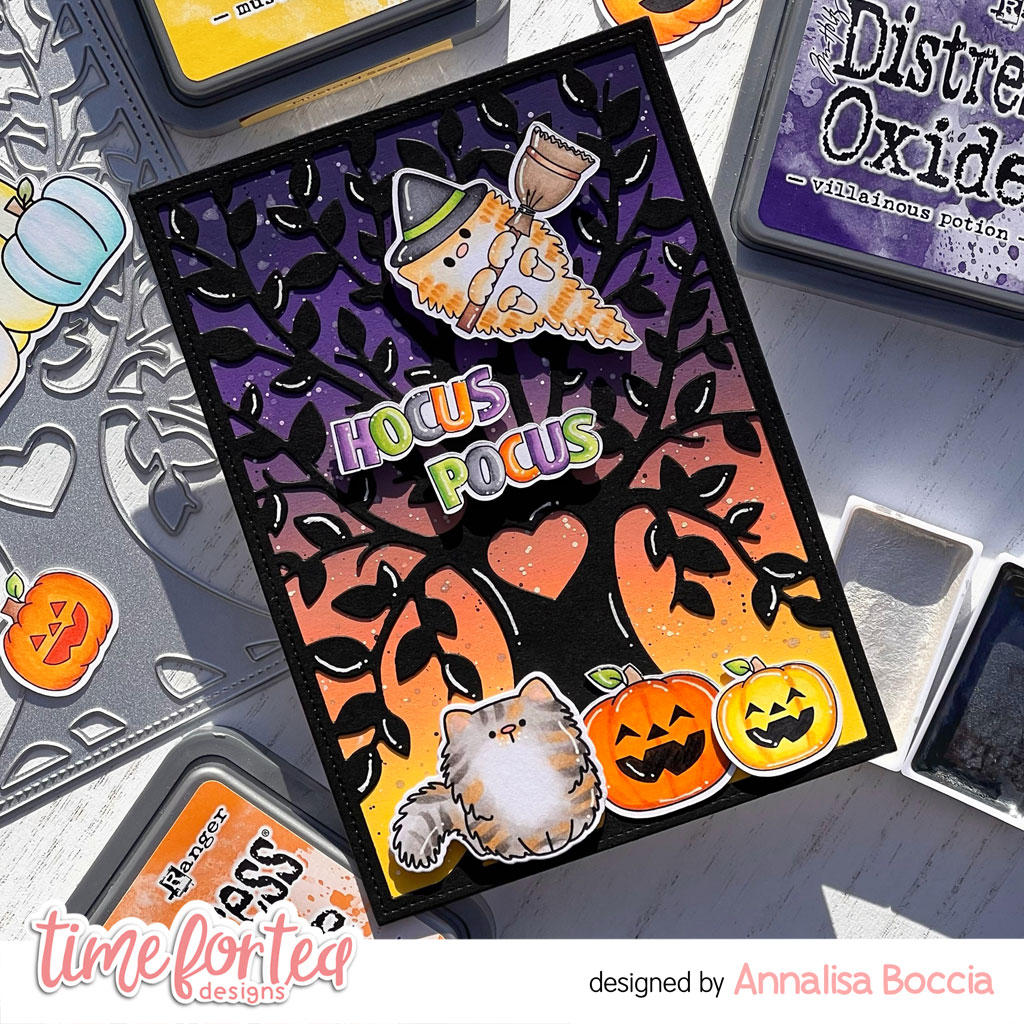
Happy Friday! DT Annalisa here with a Halloween card for you today that I made using the Tree of Love Cover Plate Die and the new Trick or Treaters Digital Stamp Collection.

I ink blended several Distress Oxide Inks (Villainous Potion, Wilted Violet, Seedless Preserves, Spiced Marmalade and Mustard Seed) onto Distress White Heavy cardstock by Ranger using my Beautiful Rainbow Blender Brushes. I added white, silver and black paint splatter with a paintbrush and set it aside to dry.


I used the Tree of Love die on black card stock and glued the cut-out onto the coloured background. I then added some white gel pen accents to the tree.

The kitty on a broom and pumpkins are from the Trick or Treaters Digital Stamp Collection; the sentiment is from Haunted House; the kitty on the ground is from Kitty Capers. I cut the images out and coloured them with my Copic markers. I added White Gelly Roll Pen accents before adhering them down to the card panel with liquid glue (pumpkins) and double-sided foam tape.


I added the panel to a white heavy stock card base to complete the card.

Thank you so much for reading my blog post, you can use my discount code T4TANNALISA10 when you visit the Time For Tea Designs shop to get 10% off your order.

Friday, 9 September 2022

Wavin' Hello


Hello crafty people, Annalisa here with my latest DT card. This slimline ocean card uses the Beach Buds and Fintastic Friends stamp sets and features a wobbly octopus! I love the interactive element an action wobbler adds to a card.

I die-cut Distress White Heavy cardstock by Ranger with the Snow Flurry Cover Die. I ink-blended the negative pieces with Distress Ink using my Beautiful Rainbow Blender Brushes. 

The colours I used were as follows:
Sand bottom - Scattered Straw with Rusty Hinge splatter,
Ocean - Unchartered Mariner Ink, Salty Ocean & Salvaged Patina Oxide, 
Sky - Tumbled Glass. 


I adhered the stitched wavy die-cut to a slimline card base with liquid glue and added the ink-blended portions.

I stamped and coloured the sea creatures and other elements from Fintastic Friends and Beach Buds with Copic markers and added white Gelly Roll accents. I then used the coordinating dies to cut them out. I used liquid glue and double-sided foam tape to adhere the elements to the card. For the octopus, I added an action wobbler for added dimension and an interactive element.


I added the sentiment that I stamped with Versafine Onyx Black and cut out with its' coordinating die. I added Glossy Accents to the octopus and some fish to complete the card.


Thank you so much for reading my blog post, you can use my discount code T4TANNALISA10 when you visit the Time For Tea Designs shop to get 10% off your order.


Friday, 27 May 2022

Hey, Hello, Hi Rainbow

Happy Friday, everyone. DT Annalisa here sharing a bright and welcoming card featuring the new Hey, Hello, Hi Dies and the Flirty Flowers Stencil from Time For Tea Designs. I love these extra-large sentiment dies.

I used several Distress Oxide inks (Abandoned Coral, Spiced Marmalade, Mustard Seed, Cracked Pistachio, Mermaid Lagoon and Wilted Violet) on the flirty Flowers Stencil using my Beautiful Rainbow Blender Brushes. I removed the stencil and lightly blended the same colours over the entire panel in the appropriate sections so the cardstock wasn't stark white.


I glued the largest border die from the A2 Nesting Frame Dies to the card to frame the stencilled card stock. I then placed this panel onto an A2 card base. 

I ink blended white card stock with Abandoned Coral and Spiced Marmalade and die-cut out 'hey.' I blended the same colours onto vellum and then die-cut the shadow. I followed this same process for the other words and their shadows, using Mustard Seed and Squeezed Lemonade for 'hello' and Mermaid Lagoon and Wilted Violet for 'hi.' I added some white gel pen accents to the letters.


I glued down each word and their shadow die pieces, to complete the card.

Thank you so much for reading my blog post, you can use my discount code T4TANNALISA10 when you visit the Time For Tea Designs shop to get 10% off your order.


Friday, 29 April 2022

Sending You Love Snails


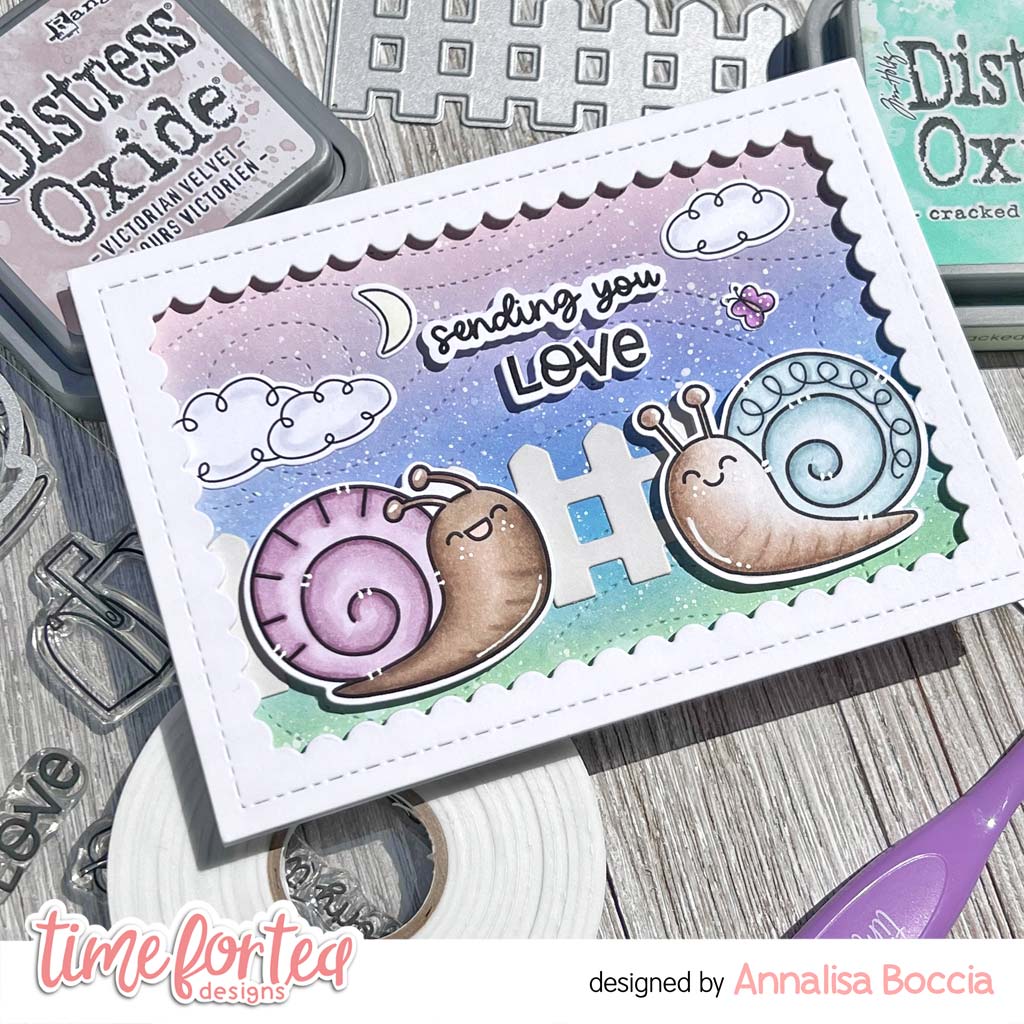
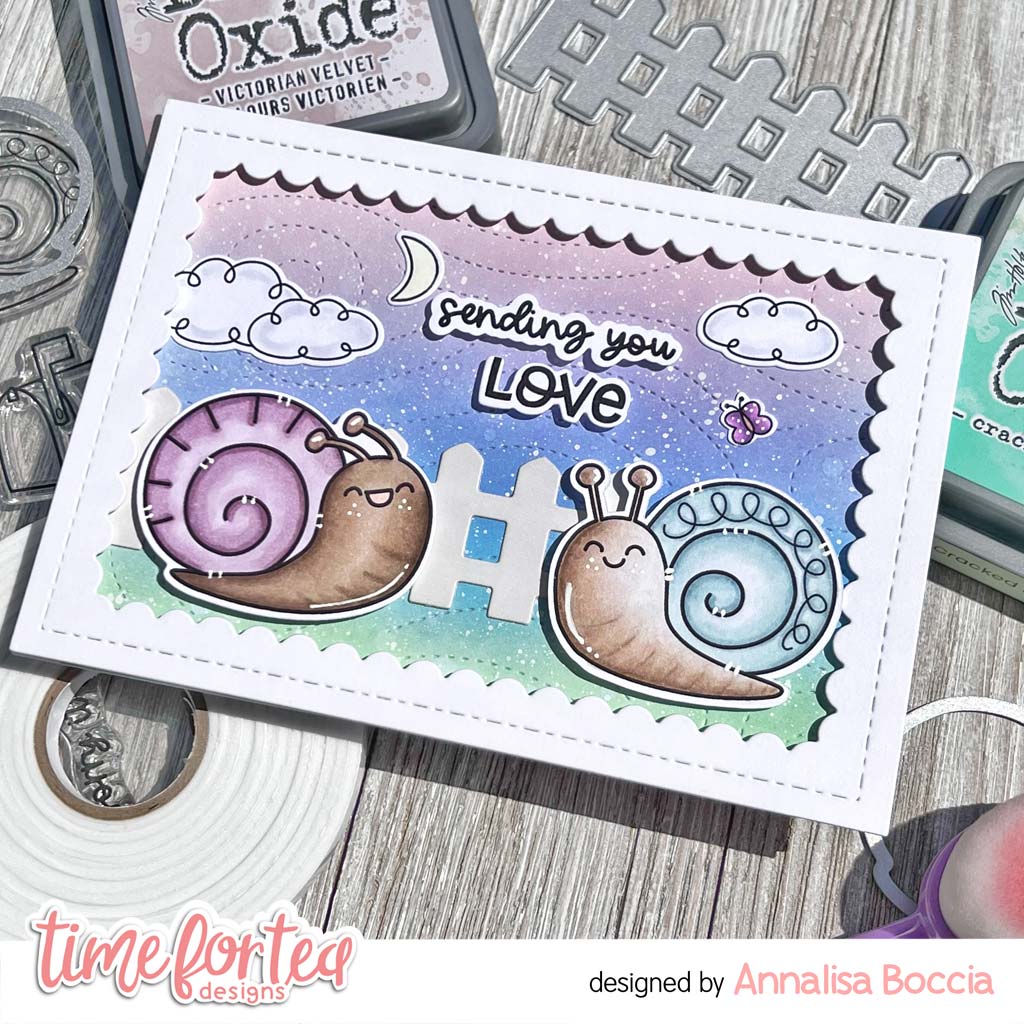
Happy Friday! DT Annalisa here sharing a card featuring the You’ve Got Mail clear stamp set and the coordinating dies. These snails are so fun to colour!

To start, I ink blended Distress Oxides (Victorian Velvet, Shaded Lilac, Salty Ocean and Cracked Pistachio) onto Distress White Heavy cardstock by Ranger with the Beautiful Rainbow Blender Brushes. I die-cut this panel with the Snow Flurry Cover Die and added white splatter to add inter


I die cut the fence from the Windmill Add On and lightly ink blended on some Weathered Wood Distress Oxide. I used liquid glue to stick this down to the ink-blended panel. I placed this onto a card base using liquid glue.

I stamped, coloured and die cut the snails from 'You've Got Mail.' I did the same with the clouds (Paper Plane Pals), butterfly (Be Slothy) and moon (Hillside Village). I used liquid glue to adhere the moon, clouds and butterfly to the panel. 


I used the larger frame in the Smile Inverted Scallop Frame Dies to die-cut some heavy white cardstock added foam tape to the back and stuck it to the panel. 

To complete the card, I added foam tape to the back of the snails and the sentiments and stuck them down.


Thank you so much for reading my blog post, you can use my discount code T4TANNALISA10 when you visit the Time For Tea Designs shop to get 10% off your order.

I hope you get some time to get inky and creative this weekend and that it makes you as happy as it does me!


Friday, 1 April 2022

Slothy Hugs


Happy Friday! DT Annalisa here today, I have a slimline sloth card to share with you. It features the Be Slothy stamp set and the Slimline Scalloped Trio Circle Nesting Dies from Time For Tea Designs.

 I started by using an older T4T stencil (Tropic Like It’s Hot) and ink blending on Distress Oxides in the colours Twisted Citron and Mowed Lawn using my Beautiful Rainbow Blender Brushes. I added some water and white paint splatters for interest.

Next, I die-cut out the panel using the middle rectangle die and the three scalloped circles die. I added foam tape to the back of this panel and set it aside.

I then stamped, Copic coloured and die cut the Sloths using the Be Slothy coordinating die set. I glued parts of the branches to the back of the green stencilled panel and added foam tape to the rest.

On an 8 1/8 by 3 1/8 inch card panel, I ink blended Tumbled Glass Distress Oxide to the clouds section of the Slimline Scene Builder Stencil and then added some white splatter. I then added the popped-up slimline panel and sloths to the card.

I stamped the small flower in blue and pink ink, die-cut them and glued them to the branches. I then stamped, copic coloured and die cut three butterflies and glued them to the card.

To complete the card, I added the hugs sentiment from Paper Plane Pals and then added some glossy accents to the flowers and butterflies.

Thank you so much for reading my blog post, you can use my discount code T4TANNALISA10 when you visit the Time For Tea Designs shop to get 10% off your order.


Other Posts You Might Like