Pages

Showing posts with label Brighter Days Sentiment Cards | White on Black. Show all posts

Friday, 12 June 2026

Love Ya Lots


Happy Friday, everyone! DT Annalisa here, and today I’m sharing an icy blue mini slimline card featuring the adorable Walrus Be Friends stamp set from Time For Tea Designs.

To create the background, I trimmed a piece of Distress Watercolour Paper to 6" x 3" and sprayed it with Peacock Feathers Distress Spritz. Once dry, I blended Peacock Feathers and Salvaged Patina Distress Ink over the panel to add depth and dimension.


Next, I used a scalloped mini slimline die from my stash to cut a frame from white cardstock. I adhered the frame to the blue panel with liquid glue and then mounted the completed panel onto a 6.5" x 3.5" card base.


For the focal images, I stamped the adorable characters from the Walrus Be Friends stamp set and die-cut them using the coordinating dies. I coloured the images with Copic markers and finished them with white gel pen highlights for added detail and interest.

Finally, I adhered the images to the card front with liquid glue and added a sentiment from the Sentiment Cards – Winter Wonderland White collection.

Thanks so much for stopping by, and I hope this card inspires you to create something fun today! Don’t forget to use my discount code T4TANNALISA10 when you shop at Time For Tea Designs to receive 10% off your order.

Wednesday, 29 May 2024

Under the sea birthday wishes!

 Hey there Tea-timer friends...

DT Ashlee here with a new card using a bunch of supplies from Time for Tea designs!!


I used these T4T products to create this card :

Making this card I started with a blue card stock base that I die cut the large sentiment out of but instead of removing the cut I left it in the card base before adding white pen highlights. 

Using distress oxide ink I added some ink and water splatters to the bottom portion of the card. I then chose a couple of the cute whale images from the get whale soon set and stamped them directly onto the card base before adding some shading with a grey alcohol marker....


To complete the card I added a sub sentiment adhered with foam tape along with a touch of sequins!


That's all from me for today, I hope you like this sea themed birthday card. Until next post happy crafting, hugs Ashlee. 

Wednesday, 22 May 2024

I miss you!

Hey there Tea-timer friends...

DT Ashlee here and this week I have another clean and very simple card to share with you that reminds me of the friends TV show and how people might be feeling since one of the major characters passed.


I used the Home is where the heart is stamp set along with a sentiment from the brighter days sentiment cards....

To create this card I started with a grey cardstock base that I directly stamped the couch image onto. I then added some highlights to it with a white pen and some slight shading with a grey alcohol marker. 

I selected a sentiment from the brighter days sentiment card set and adhered it onto the card base using foam tape to give the card a little dimension. Completing the card with a touch of sequins!


I like how simple these style card are and they are so easy to reproduce for multiples. Thanks for stopping by the blog today I hope you like this card and it inspires you to try a CAS card too!

Happy crafting, hugs Ashlee.


Wednesday, 15 May 2024

So lucky

Hey there tea-timer friends....

I have a new Time for Tea designs card to share with you today and this one uses some beautiful flowers from the Darling daffodils stamp set!


To create this card I started with a yellow card stock base which I directly stamped the large floral image on to using black ink. I then added some slight shading to the flowers and white pen highlights.

To add a sentiment I used one from the brighter days sentiment cards and adhered it to the card base using foam tape giving the card a little dimension. To complete the card I finished it off with some sequins and T4T enamel dots (clear)....


Thankyou for checking out my card today, I hope you enjoy this daffodil inspiration

Until next post, happy crafting. hugs Ashlee.


Wednesday, 1 May 2024

H O O R A Y !

Hey there Tea-timers...

DT Ashlee here with some die cutting Time for a Tea designs card making inspiration! 


I used these T4T products for this card :

- Hooray sentiments and cover plate die

- Brighter days sentiment cards

To create this card I green card base that I die cut using the hooray sentiments cover plate die. I then die cut multiple of the HOORAY letters from different coloured pieces of card so that they could be adhered together slightly offset to create a fun focal sentiment....


The sentiment letters were mounted on the card base using foam tape to add dimension to the card. I then cut a sub sentiment from one of the brighter days sentiment card before adhering to the card base also with foam tape just below the focal sentiment. To complete the card I added a nice touch of sequins to bling it up!

That's all for my card today, I hope you enjoyed this HOORAY themed card. 

Until next post, happy crafting. Hugs Ashlee. 

Thursday, 27 October 2022

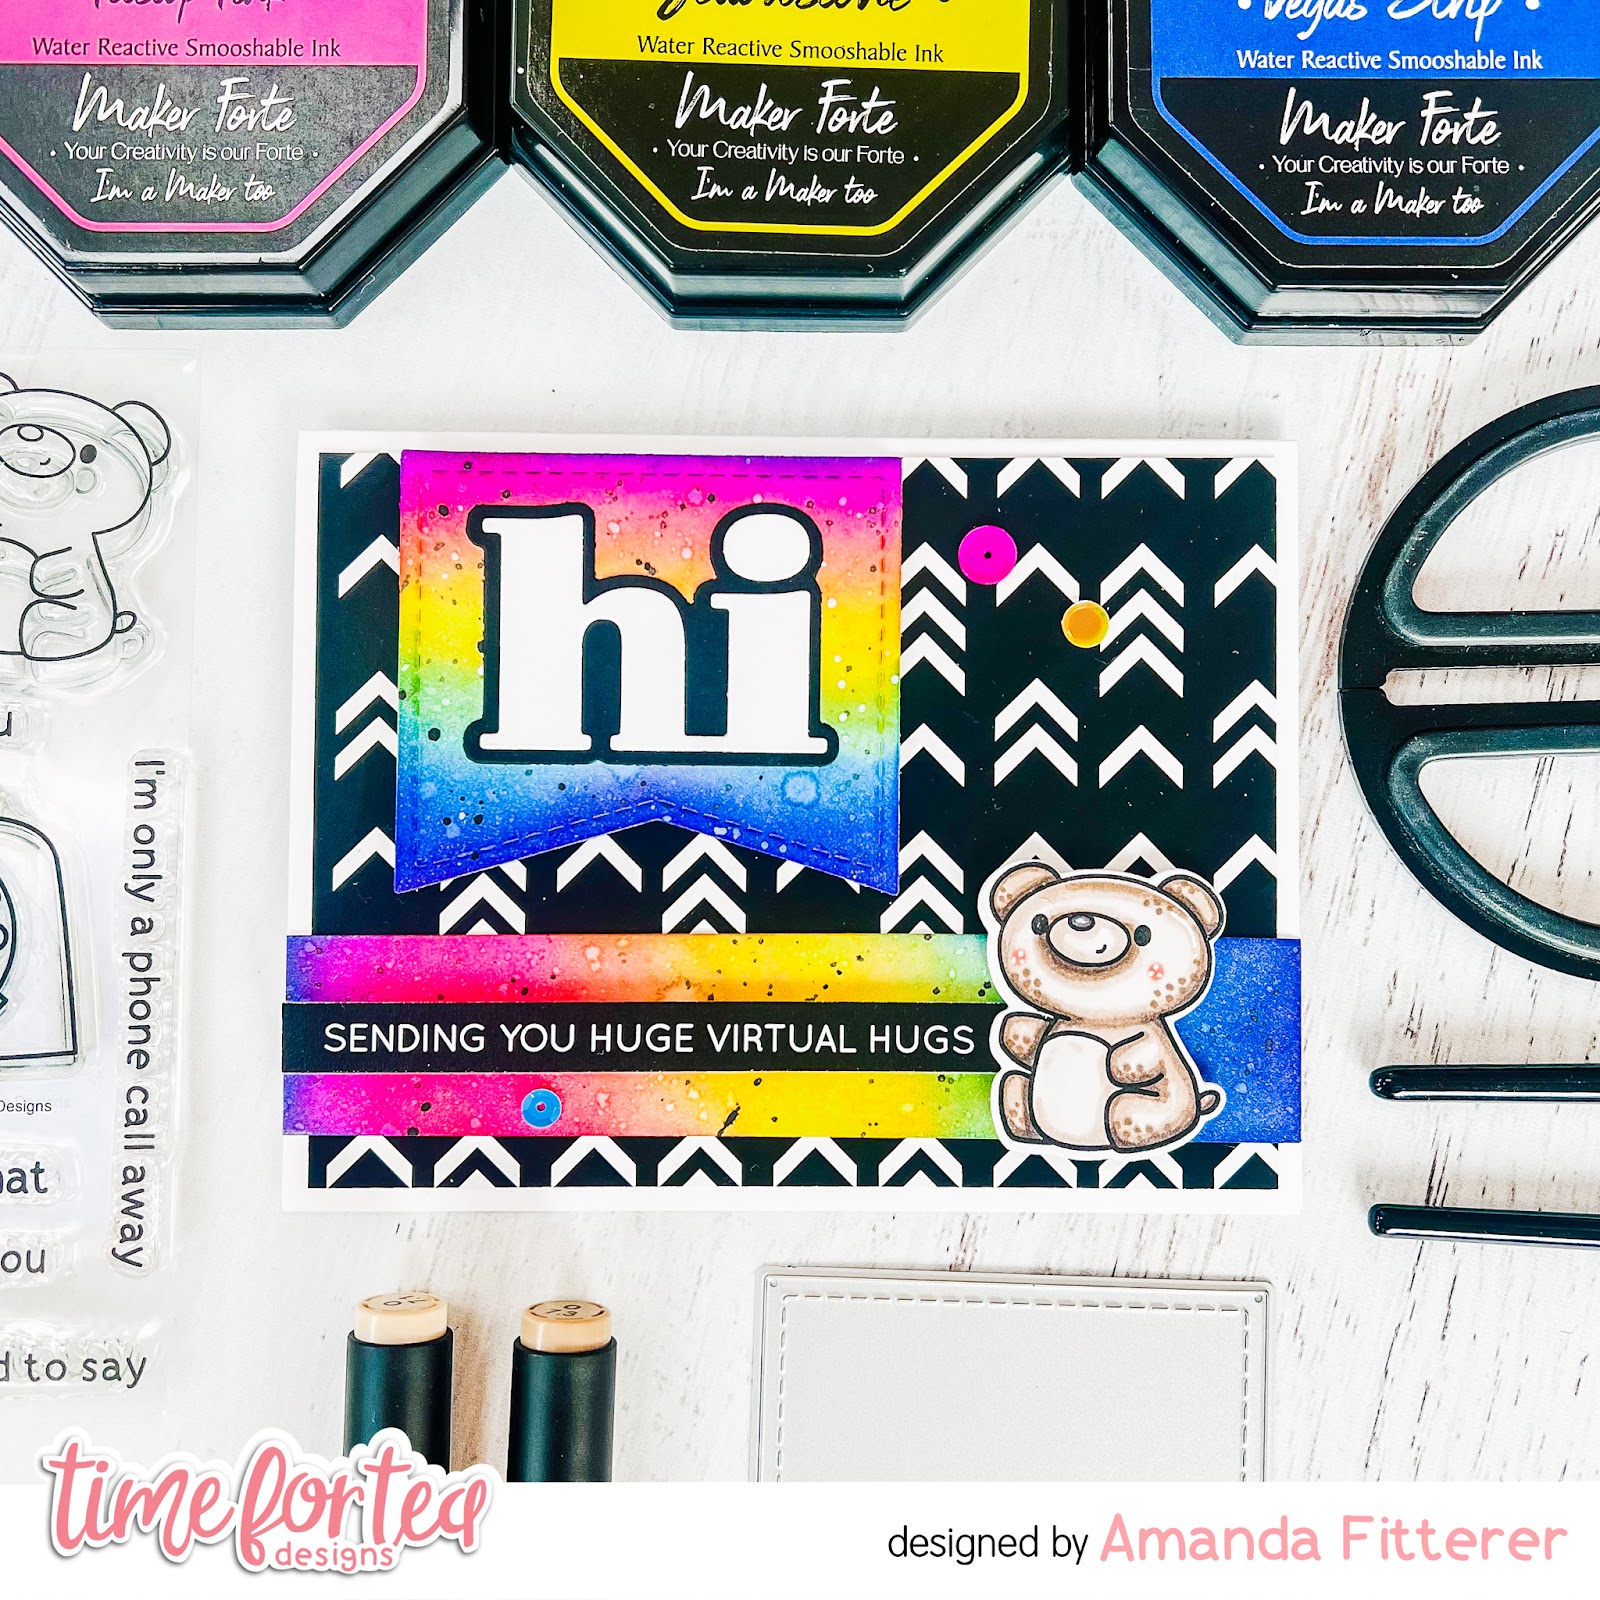
Sending You Virtual Hugs!

Happy Thursday, Tea Timers!  It's Amanda here!  I'm sharing this very happy card today!  I love creating cards that have bright contrast and bright colors - especially when they're rainbow!


To create this card, I stamped my cutie from the Let's Chat Stamp Set and then colored him with OLO markers.
 For my "hi", I used the Hey, Hello, Hi Dies.  The rainbow flag behind it is from the It's Your Day Sentiment Dies.  The other sentiment strip if from the Brighter Days Sentiment Cards.

One of my favorite rainbow ink blends is the one I created on this card!  It's a blend of Pitstop Pink, Yellowstone, and Vegas Strip Color Hive Inks.  I also spritzed my ink blend with water and created some black splatters with black paint.

Thank you so much for stopping by the blog today!  I hope you're feeling inspired by this post!  Come back next week for another happy card!
Xx, Amanda


Thursday, 14 April 2022

Ridiculously Proud of You - Rainbow Blended Background

  Well hey there, Tea Timer! It's Amanda back with the second card using the rainbow background I made in my last post.

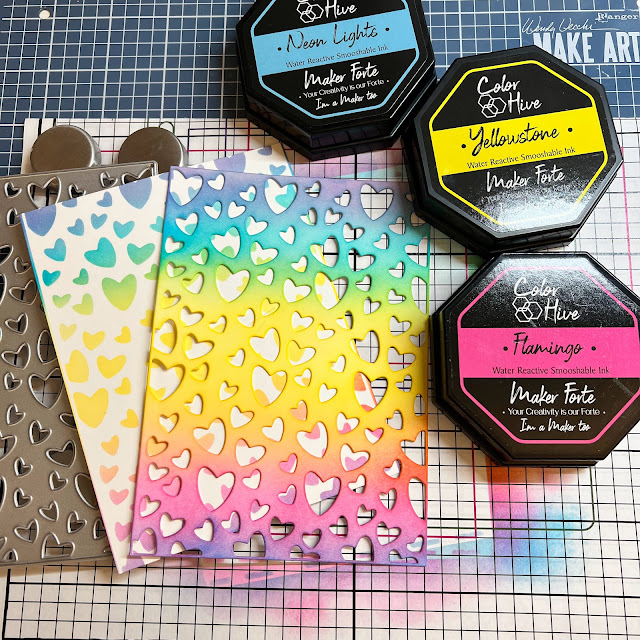
To make this card, I die cut the Scattered Hearts Cover Plate on a piece of white cardstock.  Once cut, I grabbed another piece of white cardstock and placed it underneath my die cut piece.  Then, I blended a rainbow with Maker Forte Flamingo, Yellowstone, and Neon Lights inks.  This gives me TWO backgrounds at once!  

For my sweet pup, I used Enjoy the Little Things stamp set. I colored him with Copic markers and then die cut him with the coordinating dies. I propped him up with 3D foam squares and put him on a piece of round vellum.
For my sentiment, I grabbed my Brighter Days Sentiment Cards and trimmed out the "just so ridiculously proud of you" sentiment.
For the finishing touch, I added some rainbow colored gems!

The next step is was to attach my background to a black card base using liquid glue.
Don't forget, you can use code T4TAMANDA10 to get 10% off your purchase! 

Thursday, 7 April 2022

Rainbow Hopping Hamsters

 Well hey there, Tea Timer! It's Amanda back with this fun rainbow card I made using the Hooray Hamster stamp set!

To make this card, I die cut the Scattered Hearts Cover Plate on a piece of white cardstock.  Once cut, I grabbed another piece of white cardstock and placed it underneath my die cut piece.  Then, I blended a rainbow with Maker Forte Flamingo, Yellowstone, and Neon Lights inks.  This gives me TWO backgrounds at once!


Then, I was ready for my hamsters!  I stamped them with black ink and then colored them in with Copic markers.  I used the coordinating dies to cut them out.
For my sentiments, I grabbed my Brighter Days Sentiment Cards and trimmed out 2 sentiments.


The next step was to attach my heart background to a white card base with liquid glue.  For my hamsters and sentiments, I propped them up with 3D foam squares and strips.


Stay tuned for a card using the extra rainbow background NEXT WEEK!  Woot woot!

Use code T4TAMANDA10 to get 10% off your purchase! 
See you next week!

Xx, Amanda


Thursday, 17 March 2022

Enjoy the Goodies with Amanda Fitterer


Hey friends!  It's Amanda back here again with another card to share with you!
Today's card is a fun Enjoy the Little Things and Cafe Critters card.  I stamped my images with black Copic-friendly ink and then colored them with Copic markers. I also grabbed the hat and sign from the Hooray Hamster  stamp set.  Once I had them all colored in, I used the coordinating dies to quickly cut them out!


To create my faux brick background,  I used the Tiled Wall Stencil and Rockin' Red ink from Catherine Pooler.  I masked off the bottom third of my card panel and used the stencil on the top portion.  Then, I flipped my mask to cover my newly created bricks and used Twilight ink to create a concrete ground.  

For my sentiments, I've trimmed out a few of the sentiments from the Brighter Days Sentiment Cards.  For a finishing touch, I added some of the hearts I had created on my last blog post.


And that is it for me today!  I hope you've enjoyed this post and feel inspired to make something fun!

Don't forget that you can use the code T4TAMANDA10 to get 10% off your purchase! 
Crafty hugs!  Amanda @craftyandcreativevibes


Thursday, 10 March 2022

Good Luck Hamster

 
Hey friends!  It's Amanda back here again with another card to share with you!
Today's card is a fun Hooray Hamster and Scattered Hearts Die card!
I started by blending Serenade and Drive-In inks, focusing the darker color on the edges.  Then, I die cut the Scattered Hearts Die and trimmed it down to 4" x 5.25".  I also trimmed down a piece of black cardstock to 4" x 5.25".

Next, I stamped my images from the Hooray Hamster stamp set and colored them with Copic markers.

I grabbed my Brighter Days Sentiment Cards and cut out the "Wishing you lots of luck" sentiment.  I used my scissors to cut out little triangles on the edges.

I saved all my cut out hearts and propped up a few with 3D foam squares.  I also saved them for some upcoming cards!  ;)


I used glue and 3D foam squares to assemble the entire card!

And that is it for me today!  I hope you've enjoyed this post and feel inspired to make something fun!
Crafty hugs!  Amanda


Thursday, 18 November 2021

Sending Virtual Hugs

Hi crafty friends, Kitty here! I have my latest card o share with you today. I went for something colourful. It is actually a bit brighter in real life but I struggled to get a good photo this morning. I used my fav stamp set...crocs!

For this card I used the Time For Tea Designs Snappy Before Coffee Stamp Set. I stamped all the images, coloured them in with Copics and cut them out with the Snappy Before Coffee Co-ordinating Dies. I created a blended background using my Distress Oxide Inks. The colours I used are; Peacock Feathers, Cracked Pistachio, Antique Linen and Spun Sugar. I created a die cut fence using the die from the Windmill Add On Die Set. I die cut the word smile from black and white card using the smile die from the Smile Inverted Scallop Frames Dies. I added a strip of Stripes Washi Tape at the bottom then added a slither of black card to make it look mounted. I added a couple of die cut sentiments from the Brighter Days Sentiment Cards. To finish I added a few Clear Drops.


Don't forget you can use my discount code T4TKITTY10 to get yourself 10% off your order at Time For Tea Designs.

Kitty xx

Friday, 9 July 2021

Mini Slimline Blue Birds


Happy Friday! DT Annalisa here with a cheerful mini slimline card using the awesome Mini Slimline Scallop Dies. It is my first time using this stand-alone die and I love it! It is perfect for a smaller card that doesn't require a long time to create. These bright colours just make me happy and I loved making this card.

To start, I created the background using the Diamond Burst 6 x6 " Stencil and my Beautiful Rainbow Blender Brushes. I used distress oxides in the colours: Picked Raspberry, Squeezed Lemonade, Spiced Marmalade and Salty Ocean. I added a light colour over the white areas using the same oxides, added splatter, and then trimmed the cardstock to fit behind the scalloped frame.


For the stamps, I used Blooming Bunnies (flower bouquet, yellow sunflowers), Brighter Days (birds), and Be Slothy (small flower) which I stamped, cut out and coloured with my Copics.

I die cut the scalloped frame twice from some white card stock and the outer simple frame (both from the Mini Slimline Scallop Dies) from some pink paper. I adhered the two scalloped frames together with some liquid glue to add a bit of dimension. I adhered the stencilled patterned paper to the pink paper and then glued the scalloped frames on top.


I used foam tape and liquid glue to adhere the elements to the card, including a small heart I die cut and coloured with my Copics to match the background. I used the 'love ya lots!' from the Brighter Days Sentiment Cards | White on Black, which I popped up on some foam tape to finish the card.

You can save 10% off your Time For Tea Designs order using the T4TANNALISA10 at the checkout.


Thursday, 8 July 2021

Sending you hugs

 Hello Tea Timers!!! Silvia's here and I have a colorful card to share with you today.

I started ink blending a white panel with dried marigold, carved pumpkin, ripe persimmon and fired brick Distress Oxide inks, I splattered with clean water and some tone on tone inks and I die cut it with the "Sun Ray Cover Plate" die. 

I then die cut a grassy border using the "Slimline Hillside Scene Builder" die and I ink blended it with mowed lawn and rustic wilderness Distress Oxide inks and I splattered with clean water, brown and white inks and a bit of gold. I also cut a light Blue patterned paper from the "Brighter Days" 6x6" paper pad.

I stamped two of the cute bunnies from the "Blooming Bunnies" stamp set, I colored them with alcohol markers and I cut them with coordinating dies.

For the sentiment I die cut the hugs word with the "Hugs Sentiment" die set two times from white cardstock and one from white glitter cardstock. I glued one above the other and I colored it with dark greys alcohol markers.

I put everything together, I added one of the "Brighter Days Sentiment Card" and that's all.

Thank you so much for stopping by today and remember you can get a 10% off your Time for Tea order with the code T4TSILVIA10.

Hugs, Silvia.


Friday, 11 June 2021

Brighter Days Are Ahead


Hello everyone, happy Friday! DT Annalisa here showcasing the awesome Tree of Love Cover Plate Die from Time For Tea Designs. This die is a show stopper! When Jo revealed it to the design team, I couldn't wait to get my hands on it and start creating.

I knew it had to stand on its' own for the first card that I made using it, so I decided to pull out the alcohol inks. I don't use these very often as I get frustrated that they have a mind of their own. As a perfectionist, this is HARD.


I used some Ranger Alcohol Ink Yupo along with the following alcohol inks: Flamingo, Patina, Turquoise (Ranger) and Y11, BG13 (Copic Reinkers). In terms of technique, I added a base layer of 99% Isopropyl Alcohol to the yupo paper and then applied the various colours. I did a mixture of blowing with the Distress Marker Spritzer, moving the paper around and adding Tim Holtz Alcohol Blending Solution to get the inks mixing and moving.

I used a fan to help with air circulation, but by the end of the night of doing this with alcohol inks, I felt a little dizzy. They aren't kidding when they say to do this in a well-ventilated area! Next time, I might do this outside.


Once the cardstock was dry I used the Tree of Love Cover Plate Die to cut the Yupo, I used a metal shim due to the thickness of the Yupo and it cut beautifully. I then grabbed some shiny paper from my stash to add to the background of the tree.

Next, I added the 'brighter days ahead' sentiment from the Brighter Days Sentiment Cards | White on Black. To complete the card, I added the panel to a white card base.

Thank you so much for visiting the Time For Tea Designs blog, you can use code T4TANNALISA10 when you visit the shop to get a 10% discount on your entire order.


Other Posts You Might Like