Pages

Showing posts with label Llama tell you stamp and co-ordinating die collection.. Show all posts

Saturday, 6 April 2024

Birthday bunny with Kaja

 Hi all,

It's Kaja from Kajcyika crafts and today I am back with another cute birthday card!

Take a look:


This time, I started off the card by creating masked rectangles at the top of my card base using post it note stickies. You could use a stencil for this, but I wanted to have some some random shapes instead of a standard shape forms.

I went with a simple grass and sky look for which I used Bundled sage and Tumbled glass distress inks. 

Once the background was done, I removed the masks and started stamping out the images I wanted to use on the card.

I went all in on the images, so I used 4 stamp sets: Warm hugs, Love is in the air, Llama tell you and Eggstra special birthday. I colored everything in using alcohol markers and to add a special touch, I used a white gel pen.

Next, I added the sentiment from the Warm hugs stamp set that reads 'it's your birthday you deserve a treat'. I used black ink and stamp it out at the bottom of my little scene.

The last thing I did, was that I glued everything on a card base using double sided foam squares and liquid glue.

Hugs,
Kaja

Saturday, 16 March 2024

Birthday llama with Kaja

Hi all,

It's Kaja from Kajcyika crafts and today I am showcasing a cute and simple card that features an adorable little llame.

Take a look:


First thing I did when making this card, was to cut out a piece of kraft cardstock and stamp background images of mountains and clouds. I used brown ink to try to blend the images a bit better with the cardstock. 

Next, I stamped out the llama from the same stamp set called Llama tell you, but this time I used white cardstock and black ink. 

I colored the llama in using alcohol markers and since I wanted to have a bit of a contrast, I used orange tones for it.


Next, I cut down a piece of green paper with clouds from the Brighter days paper pad. I trimmed it down to be slightly bigger than the kraft cardstock piece.

I stamped out the sentiment in the same brown ink and this time I decided to go with a simple 'happy birthday'.

I glued everything on the square card base using double sided foam squares and liquid glue.

Hugs,
Kaja

Saturday, 2 March 2024

Llama tell you with Kaja

Hi all,

It's Kaja from Kajcyika crafts and today I am showcasing a card with the most adorable llamas out there!

Take a look:


This time, I started creating the card by stamping out the cute little images from Llama tell you stamp set.  I inked and stamped two llamas, two hills and a sombrero, which I then all colored in using alcohol markers.

I decided to use soft colors, so I used pastel green for the hills and soft brown for the lammas. I didn't want both llamas to look exactly the same, so I colored them a bit differently.


I finished the coloring off, by adding some white gel pen details.

Then, I stamped out the sentiment in black ink that reads 'llama telll you it's your birhtday' that can be found in Llama tell you stamp set. I used white paper which I positioned to the top part of the card base.


To make sure that the llamas really pop out of the card, I added some patterned paper at the top and the bottom of the card. I used the rainbow paper from the Brighter days paper pad.

I glued everything on the horizontal card base using double sided foam squares and liquid glue.

Hugs,
Kaja

Saturday, 28 January 2023

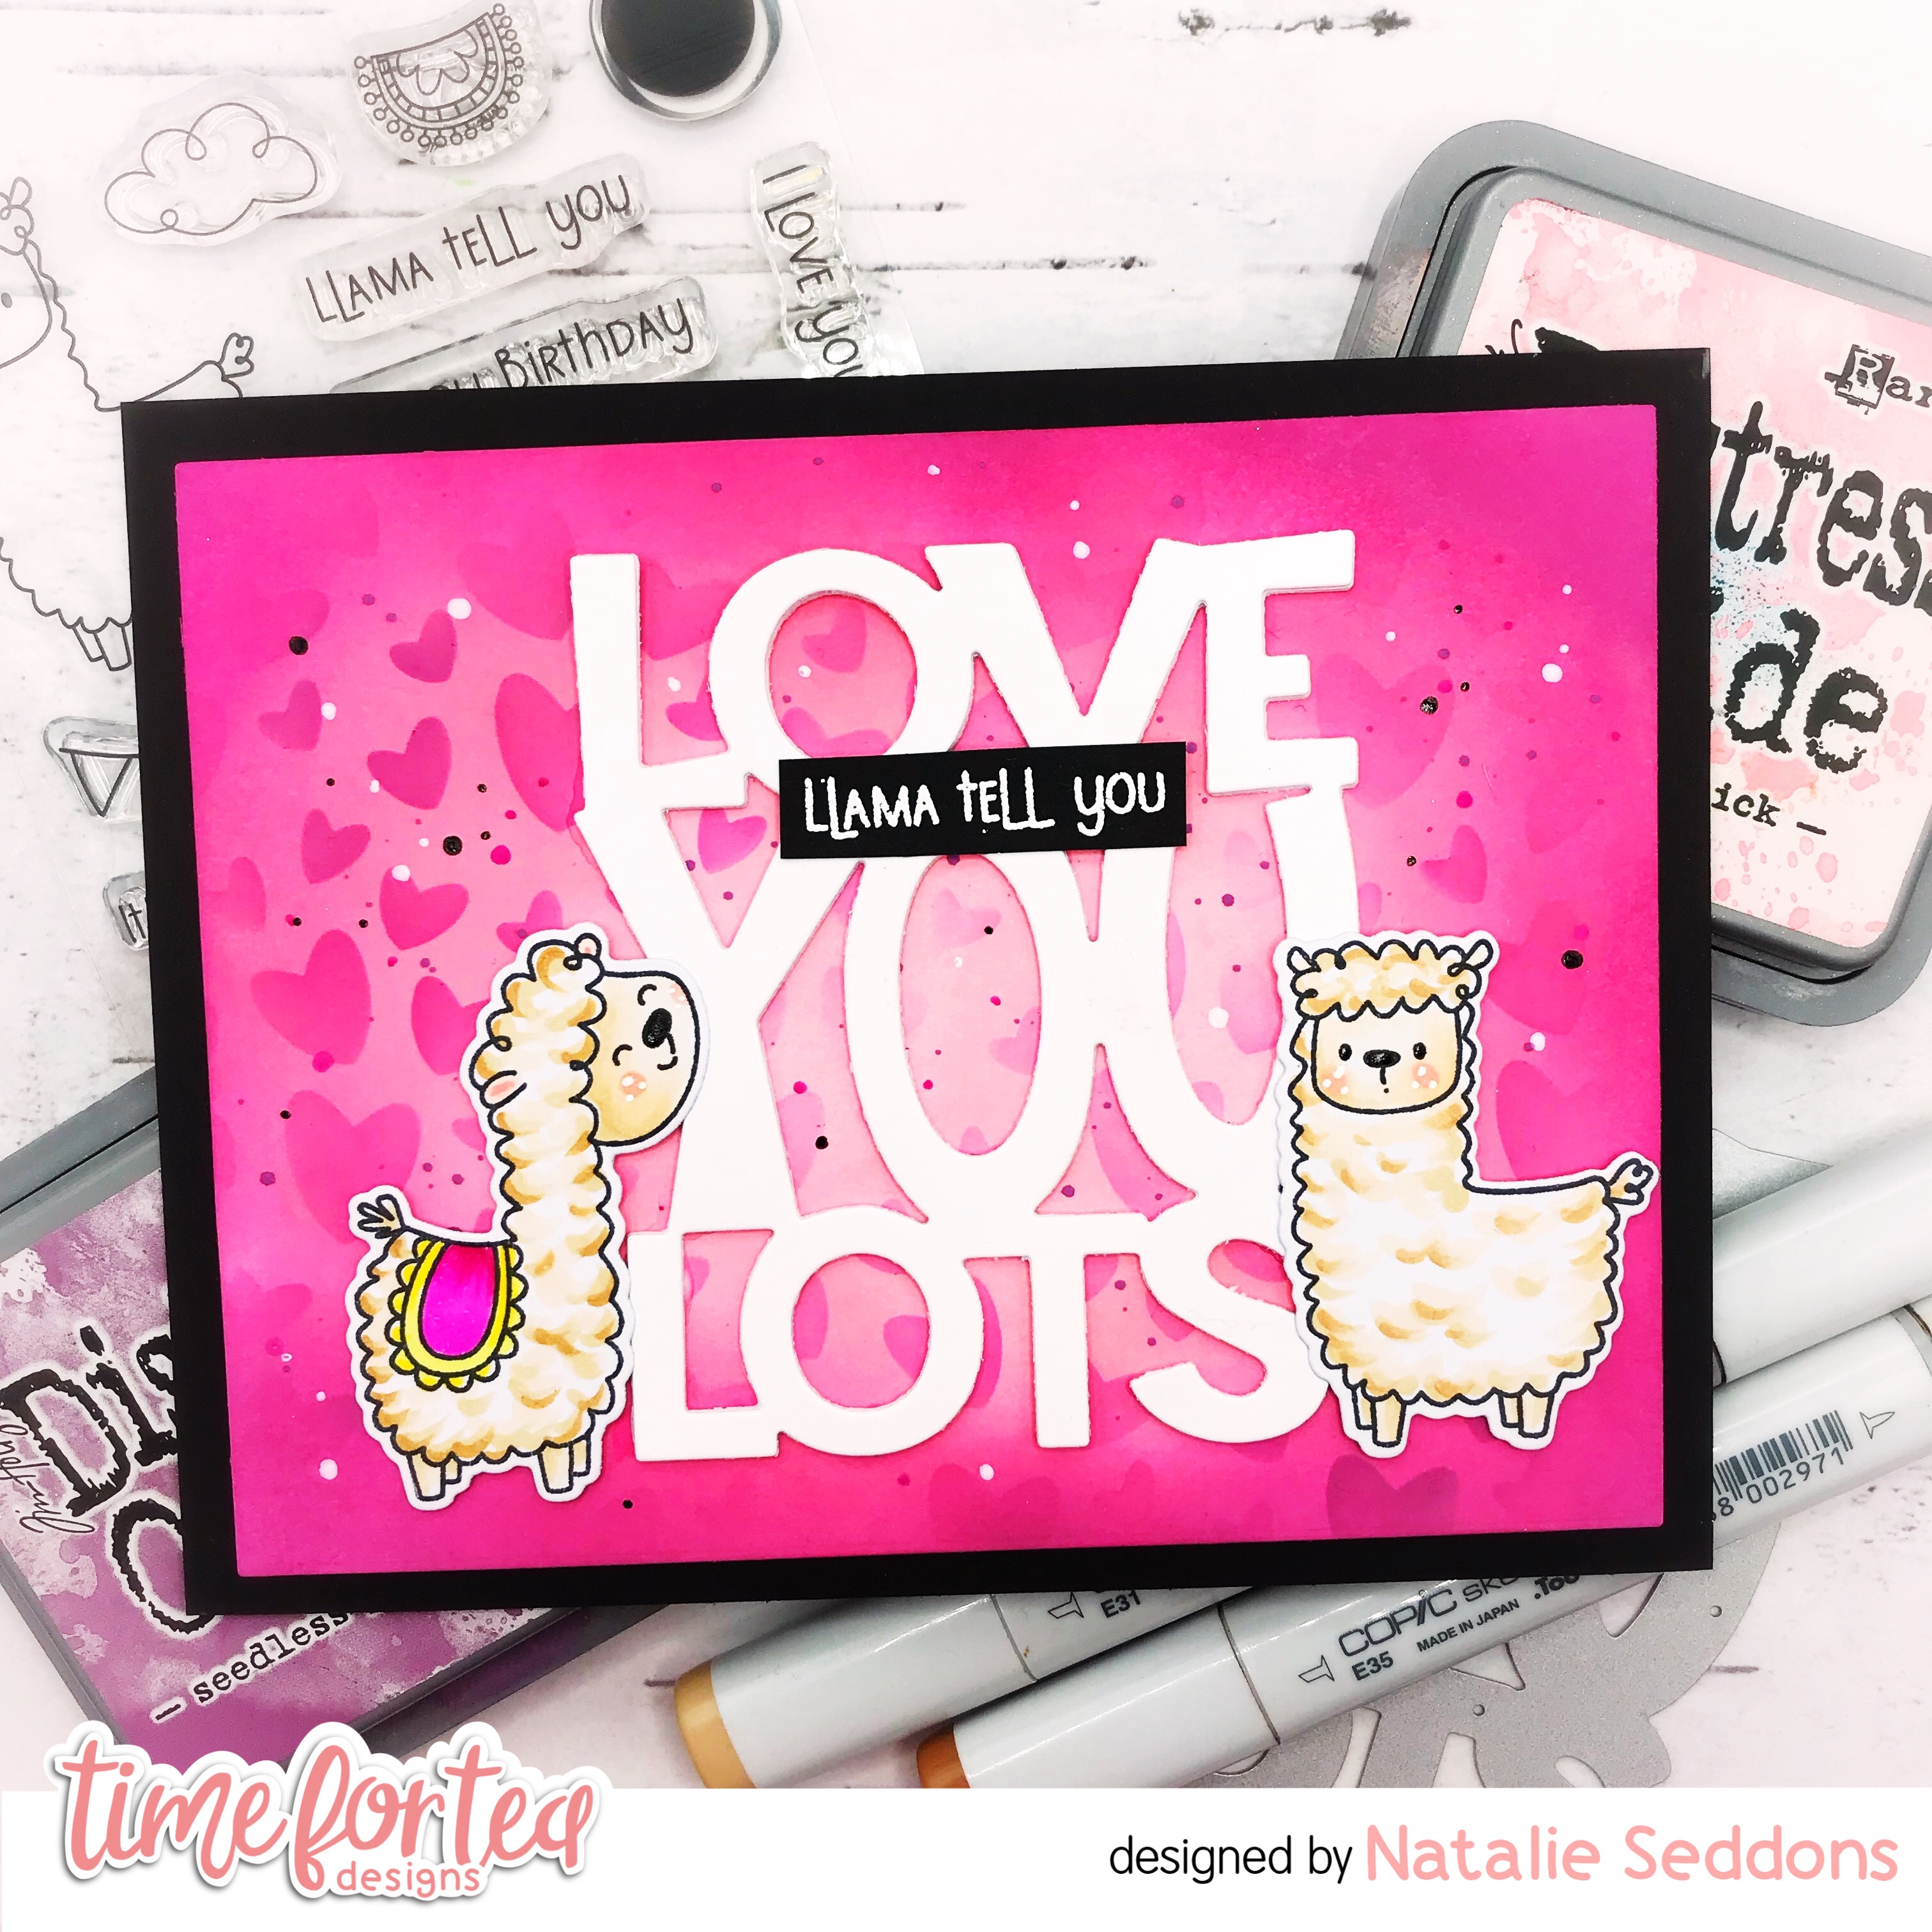
Llama tell you, love you lots!


Happy Saturday Teatimer's I have a cute llama card for you today for the Valentines inspiration week. It's a pretty quick card to make, with not much colouring so great when time is short.  
I began by cutting out the largest rectangle die from the Metric Sized Layering Dies and inked it up with Kitsch Flamingo, Worn Lipstick and Wilted Violet Distress Oxide inks. Then I layered the Scattered Hearts Stencil over the top and used the Wilted Violet to create the hearts. 


The adorable llamas are from the Llama Tell You clear stamp set which is full of cute stamps. I chose just to use the llamas today but there loads of images to create a full scene. I coloured them up with copic markers and tried to create a fluffy coat on them by adding dark little U's and blending them out a little. 
Setting them aside I created my sentiment by cutting out the Love You Lots Large Sentiment Die three times out of white card and layering it together to create some extra depth. Then added the smaller sentiment from the llama stamp set which I heat embossed in white onto black card so it stood out more with it being so small. 
I adhered everything together and added some extra details using a black and white gelli roll pen. I like these as they work well over the top of the oxide inks you just have to be careful not to smudge them whilst still wet. 
That was my last official Time for Tea card as I step down after having a wonderful couple of years on the team. I hope you have liked all the cards I've made you know I love the products though so I will still be creating with them so be sure to check back on my instagram for more inspiration. 
Thanks so much to Jo for keeping me around so long and thanks to all the Teatimer's for your love and support. 
Lllama Tell You, love you lots Natalie!

Wednesday, 31 August 2022

Llama tell you....

 Hey Tea-timers...

DT Ashlee here with some new Time for tea designs inspiration for you using products from the latest release...


For this card I used these T4T products...

To create my card I started by die cutting the waves cover die twice. Once from a piece of green cardstock and then once from a piece of cardstock I had inked blended/splattered using distress oxide inks.

I adhered the green frame to a piece of card before then laying in the wave pieces using different levels of foam tape to give it fun dimension. This completed the card base....


Now that the base was complete it was time to add some llamas...

I stamped, coloured and die cut three llamas along with a mountain and some sentiments. These were all adhered to the card using foam tape. To finish it all off in true Ashlee style there was of course some sequins for a touch of bling!!

What do you think of this llama mountain scene? I hope you like it...
Thanks for stopping by today, happy crafting hugs Ashlee. 


(Want to do some shopping at the T4T store? You can use my discount code T4TASHLEE10 for 10% off your order)

Tuesday, 23 August 2022

Birthday CAS card

Hi tea timers!

Welcome back to the blog! It's Miki here from the Design Team and I'm so excited to share with you today's card using the new release. Today I have a CAS card to share with you using the Llama tell you stamp & die collection. I also filmed a reel which will be available on my instagram.


To start with I stamped and die cut one of the llamas in the Llama tell you stamp set. I coloured it in using some pencils and alcohol markers.

I then took a white card panel slightly smaller than an A2 card size. I added it to my misti and I used the mountain stamp. I first masked off the cacti bit and only stamped the mountains towards the right side of the panel. I then repositioned the stamp and masked off the right part of the mountains. This doesn't have to be perfect as the llama will go on top where they meet. I chose to do some masking and off set stamping to make my scene a bit bigger.

Next, I stamped the It's your birthday sentiment from the same set just below the scene. I then used alcohol markers to colour in the scene. I went with some light greens for the grass and a light blue for the sky. Once I was happy with my colouring I added the Llama on top using foam tape and added one of the party hats to its head. I then glued the panel to an A2 card base made out of kraft paper.

I added some gems all around for extra details and that was it. I hope you like this CAS card, it was super easy to put together.

Hugs,
Miki

Thursday, 4 August 2022

Llama tell you happy birthday!

Hi tea timers!

It's Miki here from the Design Team and I'm so excited to share with you my first card using the new release. I absolutely loved playing with the new products and I can't wait to share all my projects with you!

For today's card I started by working on the sky. I took a piece of card stock and ink blended it in the following Distress Oxide colours:

  • Wilted Violet
  • Shaded Lilac
  • Kitsch Flamingo
  • Spun Sugar
I then added some splatters using a mix of water and perfect pearls and picked up the excess with a tissue. This adds some interest. I then used the Waves Cover Die to cut it and left them aside.

For the sand I used Scattered Straw and again added some splatters with a mix of water and perfect pearls and cut it with the Waves Cover Die.

I also used the Waves Cover Die to cut the border from white cardstock and glued that to an A6 card base. I wanted some white space between my waves so instead of using all 6 parts I discarded the bottom one and cut the next one up at a straight angle. This way I had more space to play with. I then took my waves and glued them inside the border trying to make sure there's equal spacing between them.

For the images I used the adorable Llama Tell You stamp & die collection. I stamped two of the llamas and some accessories and coloured them in with a mix of pencils and markers. I used the matching dies to cut them out. I then stamped the mountains twice and coloured them in with alcohol markers. I cut them with the matching dies and for one of them I cut off the bit linking to the cactuses as I wanted it to go behind the other set of mountains. I also stamped, coloured and die cut some clouds.

I then started working on my scene. I started by glueing down my first set of mountains, the ones without the cactus towards the right side of the card. I then glued down the second set, slightly off set to the left. I think this adds more depth and dimension to the card. I added the llamas and clouds with some foam tape. 

I then stamped and embossed two of the sentiments in white embossing powder on black cardstock and cut them with the matching dies. I added them to my panel using some thin foam tape.

That finishes off my card for today. I hope you like it and remember you can use your products in so many different ways to create different results!

Hugs,
Miki

Wednesday, 3 August 2022

Llama tell you....!!

 Hey Tea-timers...

Who's seen the brand new release at Time for Tea designs?!

 Isn't it SUPER awesome, I am totally loving it all...

I've got a card to share with you that I made using some of the new goodies...


Here is what I used from the release :

- Llama tell you stamp and co-ordinating die collection

To create this card I started with a white card base that I did a bit of ink blending and splatter on using distress oxide inks. I then stamped, coloured and die cut a bunch of images from the Llama tell you set. (These were all coloured using Copic/alcohol markers)

I adhered all the images to the card base using varying levels of foam tape creating dimension and a fun scene of llamas and mountains!!

To complete the card I added some stamped/die cut sentiments and a touch of sequins for that little bit of bling...

What do you think?! I hope you enjoyed my card for today, I will be back with more inspiration using the new release very soon. Happy crafting, hugs Ashlee. 


Want to do some shopping at the T4T store? You can use my discount for 10% off your order...

- T4TASHLEE10 -
Other Posts You Might Like