Pages

Showing posts with label New Release. Show all posts

Friday, 20 June 2025

Summer Gardening Scene


Happy first day of Summer 2025! DT Annalisa here and I’m excited to share a fun gardening-themed card featuring the new Cacti Critters from Time For Tea Designs. I absolutely love the bunny with his watering can!

To create the background, I sprayed Twisted Citron and Mowed Lawn Distress Spray onto the Flirty Flowers Stencil and then pressed it onto watercolour paper. After removing the stencil, I spritzed the panel with water and added splatters using Mowed Lawn Distress Watercolour Pencil.


Next, I die-cut white cardstock with the Five Windows Cover Die to create a white frame, which I adhered to the green panel using liquid glue. I then attached this to a card base.

For the soil area, I used Ground Espresso, Walnut Stain, and Scorched Timber Distress Watercolour Pencils on watercolour paper. I glued a slim strip of this paper to the bottom of the largest window frame.


I stamped several images, colored them with Copic markers, and added white gel pen accents. The sets I used, along with their coordinating dies, include Cacti Critters, Boat Buddies, Hey There Critters, Fruitful Friends, Ewe Are The Best, and Ewe Are Moovellous.

Finally, I used liquid glue and double-sided foam tape to attach the images to the card base, and I added Stickles to some of them to complete the card.


Thank you so much for reading my blog post. Don’t forget to use my discount code T4TANNALISA10 when you shop at Time For Tea Designs to receive 10% off your order.

Friday, 30 May 2025

Hope Your Birthday is on Point


Happy New Release Friday! It is DT Annalisa here, and I'm excited about the latest stamps and dies from Time For Tea Designs! For my first card featuring these new products, I chose to work with the Cacti Critters set and the Rounded Corner Stitched Rectangle Dies. Gardening, just like card making, is my 'happy place,' so I felt inspired to create this card as my debut project.


To start, I used a palette knife to spread Distress Crackle Paste through the I Really Dig You Stencil onto Distress Watercolour Paper. I allowed this to dry overnight before colouring the panel with Distress Watercolour Pencils in the colours Ground Espresso, Scorched Timber, Hickory Smoke, and Peacock Feathers.

Next, I adhered the background to a card base using double-sided tape.


I then die-cut a frame from white cardstock using two of the Rounded Corner Stitched Rectangle Dies and attached it to the card base with liquid glue.

For the focal point, I stamped the images and sentiment from the Cacti Critters set, colored them with Copics, and used the coordinating dies to cut them out. To add some details, I used a white gel pen for highlights.


Finally, I used double-sided foam tape to attach the images and sentiment to the card base.

I absolutely love the texture on the background of this card!


Thank you so much for reading my blog post! Be sure to use my discount code T4TANNALISA10 when you visit the Time For Tea Designs shop to get 10% off your order.

Friday, 1 September 2023

Party Time

Hello, and happy Friday from DT Annalisa! Today, I share a fun party card that would be great to invite someone to a birthday party. It features the brand new Let’s Party stamp set.

Onto an A6 card base, I ink-blended peacock feathers, picked raspberry, spiced marmalade, mustard seed, twisted citron, and squeezed lemonade Distress Oxides through the Confetti 6 x6" Stencil using my Beautiful Rainbow Blender Brushes. I stamped confetti in varying colours of the same ink using stamps from the Let's Party stamp set.


I die-cut the large outer scalloped frame from the Smile Inverted Scallop Frame Dies from white cardstock and used liquid glue to stick it down to the ink-blended card base. 

I stamped and coloured (with Copics) several images from the Let’s Party stamp set and cut them out with my Brother Scan N Cut SDX125e. I added white gel pen accents with a Gelly Roll Pen. 


I used Anthony's Alpha Dies to die-cut the letters for 'party' and coloured each letter using my Copics to match the colours used on the background and stamps.

I used double-sided foam tape to stick the critters, letters, etc. to the cardbase to complete the card.

Thank you so much for visiting my blog. Remember to use my discount code T4TANNALISA10 when you visit the Time For Tea Designs shop to get 10% off your order.

Thursday, 31 August 2023

Lovin' the New Release! Let's Party!


Hey there, Tea Timers!!  It's Amanda here with a very versatile card using some products from the New Release!  I am just loving all these new cute critters, aren't you?!

For this celebration card, I used the new Birthday Fox Stamps and Dies!
I created a frame using the new Simple Square Nesting Dies.  I love that there are SOOO many dies in this set!  You could create frames, shaker frames, multiple layers, tiny squares, and so much more!  
For my back layer, I ink blended Catherine Pooler's Catching Rays.  And then I added a small amount of Limoncello in the center of my front layer.

I cut out the new Let's Party Large Sentiment Die and added some white highlights to it.  Then, I adhered all the elements to my card base.
Here are a few more photos of the finished card!


That is it for me today, friends!  Thank you so much for stopping by the Time for Tea Designs blog today!  Don't forget to order your new crafty supplies from the New Release!


Friday, 31 March 2023

Holy Moley Birthday

 
Happy Friday! DT Annalisa here sharing my first card using the I Really Dig You stamp set that is part of the brand-new release! It is one of my favourite sets from the new release. I LOVE to garden so, the little garden tools and the little critters in the set stole my heart as soon as I saw them. 

I created the background using Distress Watercolor Cardstock by Ranger that I cut to a 5.5 by 4.25-inch piece using dies from the Landscape Edge Standalone Die Set. I ink-blended Distress Oxide Inks onto the different sections using Beautiful Rainbow Blender Brushes. 

Soil: Tea Die, Antique Linen; Vintage Photo splatter
Grass: Twisted Citron, Mowed Lawn; Rustic Wilderness splatter
Sky: Tumbled Glass, Salty Ocean; Uncharted Mariner splatter
Clouds: Weathered Wood


I also added splatters of water to create texture for the scene. I used liquid glue to adhere the sections onto an A2 card base. It was fun puzzle-piecing them all together.

I stamped the sentiment using my MISIT to get a crisp impression.

I stamped the characters and accessories (how cute are the bee and the worm!) with Lawn Fawn Jet Black Ink. I coloured them with Copics and added white gel pen accents with a Gelly Roll Pen. I used my Brother Scan N Cut SDX125e to cut out the images. 

I used liquid glue to adhere the planter, mole in a hole and tulip to the card. I used double-sided foam tape on the remainder of the images. I added Glossy Accents to some of the flowers, the bee, the butterfly and gardening tools to complete the card.


Thank you so much for reading my blog post, you can use my discount code T4TANNALISA10 when you visit the Time For Tea Designs shop to get 10% off your order.

Friday, 18 November 2022

Road Trip Bears


Happy Friday! DT Annalisa here sharing a stitched window card featuring the brand-new Happy Trails stamp set and coordinating dies from Time For Tea Designs. I love the little map in this set, as it makes me think of the many hikes my husband and I go on. We are not campers, but we LOVE to hike and go on road trips to find new areas to explore. 


I used my Beautiful Blender Brushes to ink-blended Salty Ocean, Dusty Concord, Fired Brick and Scattered Straw Distress Oxides onto an A2 card base. I added water, silver metallic droplets, and white ink splatter for interest. 


I used the Stitched Window Cover Die to die-cut white card stock that I then glued to the ink-blended card base. I stamped the bears and other elements from the Happy Trails Clear Stamp Set and coloured them with my copics. I added white gel pen accents and then die-cut them out with the coordinating die set. The small dog in the car is from the Sweet Village Clear Stamp Set; the tiny heart comes from Unicorn In Training.


Once everything was coloured and die cut, I adhered them to the card base using doubled sided foam tape for some and liquid glue for others.


Thank you so much for reading my blog post, you can use my discount code T4TANNALISA10 when you visit the Time For Tea Designs shop to get 10% off your order.


Friday, 11 November 2022

New Release: Brew Can Do It


DT Annalisa here today! Hello, and welcome to a brand new release! As a huge coffee fan, I had to share a coffee-themed card first! This release has EIGHT new stamp sets and coordinating designs, ranging in type from gingerbread characters to snowmen, penguins, seals and more. 

I stamped all the cups/mugs in the Pumpkin Spice stamp set and coloured them with my Copic markers. I added white gel pen accents and used the coordinating dies to cut them out.

I cut white cardstock with the 4 1/8 x 4 1/8 inch die from the Square Label Dies and ink blended on salvaged patina distress oxide using my teal Beautiful Blender Brush. I used the 5 x 5 inch die in the same set to cut patterned paper from the Brighter Days 6x6' Paper Pad. I also created a card base using the same-sized die.

I used liquid glue to adhere the patterned paper to the card base. I stamped the 'brew can do it' sentiment from The Perfect Blend stamp set to the teal panel and then stuck this panel to the card with double-sided foam tape.  


I added foam tape to the back of each mug and placed them on the card. I adhered three "Clear Bubbles enamel dots" to complete the card. These clear bubbles are absolutely beautiful and my photos don't do them justice!

Thank you so much for reading my blog post, you can use my discount code T4TANNALISA10 when you visit the Time For Tea Designs shop to get 10% off your order.

Friday, 5 August 2022

Have a Whale of a Time


Hello and welcome! DT Annalisa with another card I created using the brand new release! For my card, I experimented with watercolour and used the Fintastic Friends and Beach Buds stamp and die sets for this underwater-themed card.

I used my A2 Layering dies to cut down a piece of Tim Holtz Distress Watercolor Cardstock 4 5/16 by 3 3/4 inch panel. I pressed some Peacock Feathers Distress Ink onto my glass mat and sprayed it with a bit of water. I added some clean water with a paintbrush to the water colour panel and added some Peacock Feathers Distress Ink with my paintbrush. This created the water background for the scene. I also added some water bubbles and splatter.

A big thanks to Jenn Shurkus and Lawn Fawn and their 'Create with Us' series for the inspiration and how-to for this watercolour technique. As a perfectionist, I struggle with water colouring, but Jenn shows you how in this terrific 'pool party' class which you can watch anytime on replay.

I stamped (with Ink on 3 Blackout detail ink) and coloured (with Copics) the images and then die-cut them with their coordinating dies. I heat embossed the sentiments onto black cardstock using white Alabaster ultra fine embossing powder by Brutus Monroe. I then die-cut the sentiments out with their coordinating dies. I really like the wavy dies in the Beach Buds coordinating dies set!

I added foam tape to the sentiments, whale and dolphin and adhered them to the panel. I used liquid glue for the remainder of the elements.


The A2 card base was created using light blue card stock. I added the sea panel to this with foam tape.

I added glossy accents to the whale, small fish and water bubbles to complete the card.

Thank you so much for checkout out my blog post. Don't forget to use my discount code T4TANNALISA10 when you visit the Time For Tea Designs shop to get 10% off your order.


Thursday, 16 June 2022

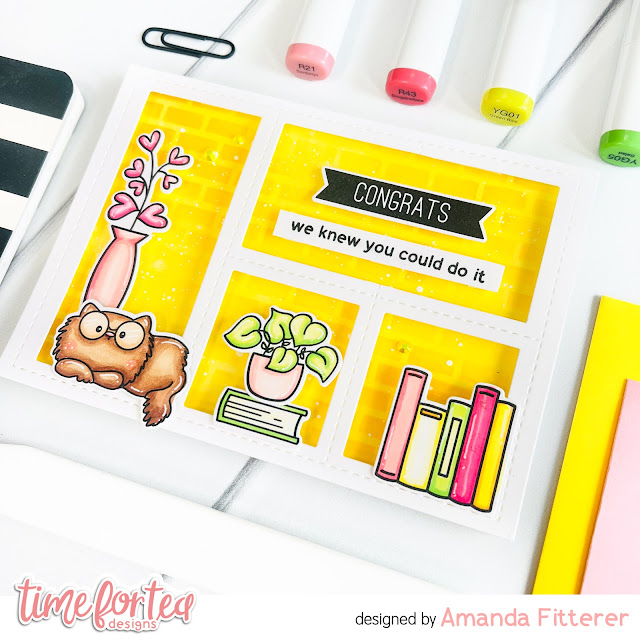
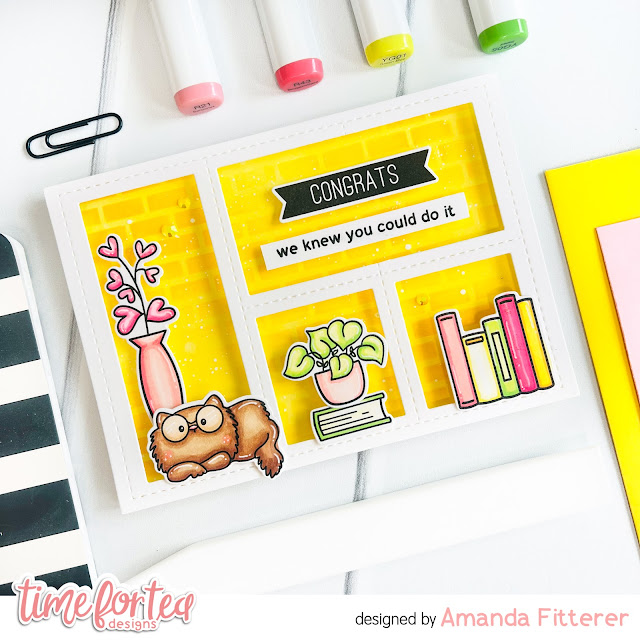
Congrats Smarty Cat!


Happy Thursday, Tea Timers!  It's Amanda back with another fun project using items from the NEW RELEASE!  

Today, I'm sharing this Congrats card I made altering the Stitched Window Cover Die.  Don't you just love when a die is versatile and can be used many ways?!

For this card, I needed 2 larger windows instead of 1 large window and 4 smaller windows.  I simply cut out the small strip dividing 2 of the smaller windows!
I've also grabbed my favorite Tiled Wall Stencil to create my background.


The images I have stamped are from the Purrfect Day Stamp Set. I've colored them with Copic markers and will die cut them using the coordinating dies!


To create dimension, I've propped up my window frame with 3D foam tape.  I've also propped up my images and sentiments with 3D foam squares.


That's it for me today!
Don't forget, you can use code T4TAMANDA10 to get 10% off your purchase!
Until next week.... Xx, Amanda 


Friday, 20 May 2022

Thinking of You Kitty


Happy Friday, DT Annalisa here today sharing a sympathy card for someone who has sadly lost a kitty. Jo designed this die while her kitty Clyde was ill. He sadly passed away and I love that this will forever commemorate him.

To start, I ink blended a rainbow of stripes in the Distress Oxide colours of Wilted Violet, Mermaid Lagoon, Cracked Pistachio, Mustard Seed, Spiced Marmalade and Abandoned Coral. 


I used a stitched square die to cut out a 3 1/4 by 3 1/4 inch white card panel that I cut again with the medium-sized paw print from the Pawsome Dies. I then stamped the 'thinking of you' sentiment from the Grateful For You Landscape Clear Stamp Set.

I then used a 4 1/2 by 4 1/2 stitched square die to cut a piece of beautiful patterned paper from the Pawsome Rainbows 6x6' Paper Pad. I thought the colourful paw prints in this pattern worked perfectly for this card. I adhered the patterned paper to a square card base.

I glued the ink-blended panel to the center of the card and used foam tape to stick the paw print panel on top of it. 

I stamped and coloured the kitty from the Sweet Village Clear Stamp Set and cut her out. I used foam tape to stick the kitty in the middle of the paw print cut out to complete the card.  

Thank you so much for reading my blog post, you can use my discount code T4TANNALISA10 when you visit the Time For Tea Designs shop to get 10% off your order.


Friday, 13 May 2022

It's Release Day & the Main Attraction Is Finally Here!!

  Hey there Tea Timers!! Happy New Release Day


Get ready to fill your carts with all the great new products from our May Release!

If you've not seen the Countdown to the New Release on our YouTube Channel, be sure to check them out and make note of all the treats you want to add into your T4TD collection.


Looking for inspiration from the New Release? Want a chance to win a Gift Certificate to spend on your new favourite stamps and dies?
Then Look no further!


Jo will be crafting LIVE on both Facebook and YouTube this weekend, Saturday 14th May at 4PM BST. 
Follow along & comment during the LIVE to be in with a chance of winning a Gift Certificate to spend in store.


Happy Shopping!!

Crafty Hugs Jo

Other Posts You Might Like