
Pages

Showing posts with label Windmill add on. Show all posts

Friday, 29 April 2022

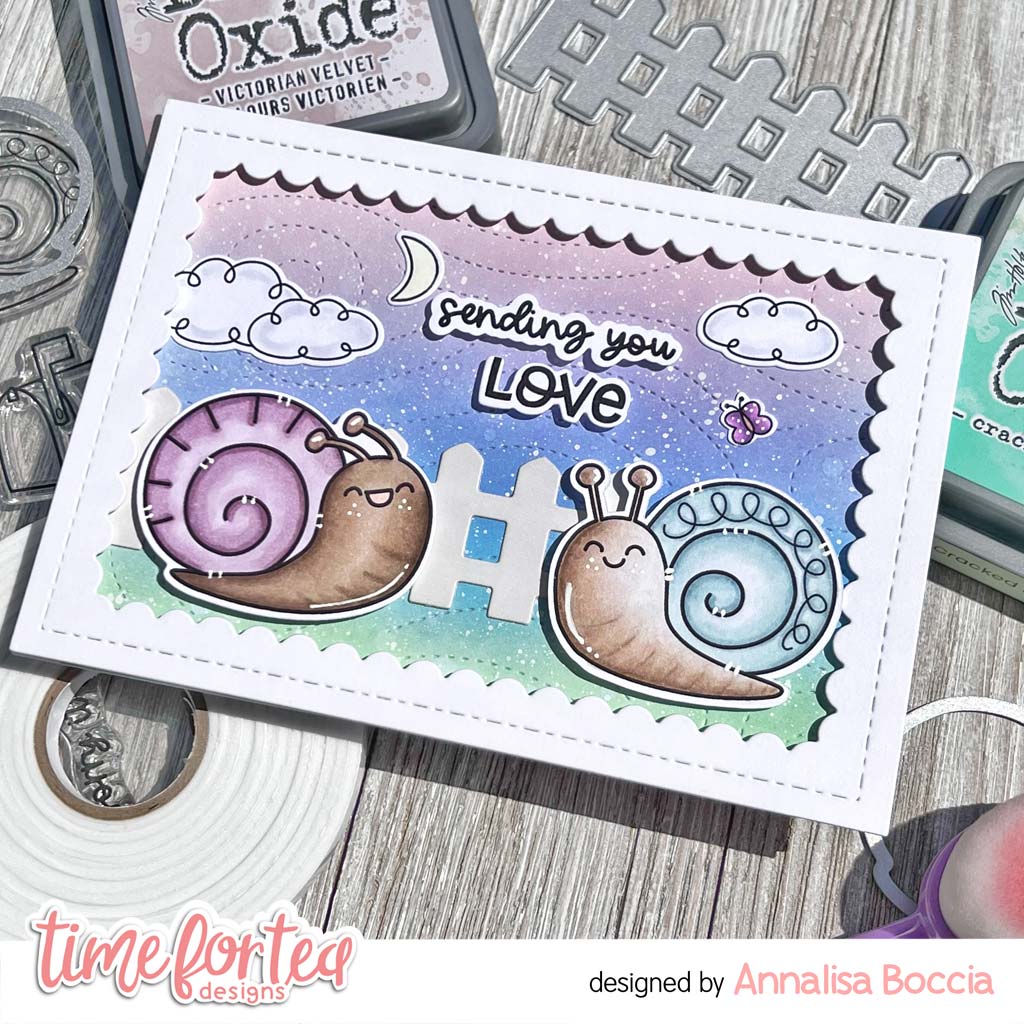
Sending You Love Snails


Happy Friday! DT Annalisa here sharing a card featuring the You’ve Got Mail clear stamp set and the coordinating dies. These snails are so fun to colour!

To start, I ink blended Distress Oxides (Victorian Velvet, Shaded Lilac, Salty Ocean and Cracked Pistachio) onto Distress White Heavy cardstock by Ranger with the Beautiful Rainbow Blender Brushes. I die-cut this panel with the Snow Flurry Cover Die and added white splatter to add inter


I die cut the fence from the Windmill Add On and lightly ink blended on some Weathered Wood Distress Oxide. I used liquid glue to stick this down to the ink-blended panel. I placed this onto a card base using liquid glue.

I stamped, coloured and die cut the snails from 'You've Got Mail.' I did the same with the clouds (Paper Plane Pals), butterfly (Be Slothy) and moon (Hillside Village). I used liquid glue to adhere the moon, clouds and butterfly to the panel. 
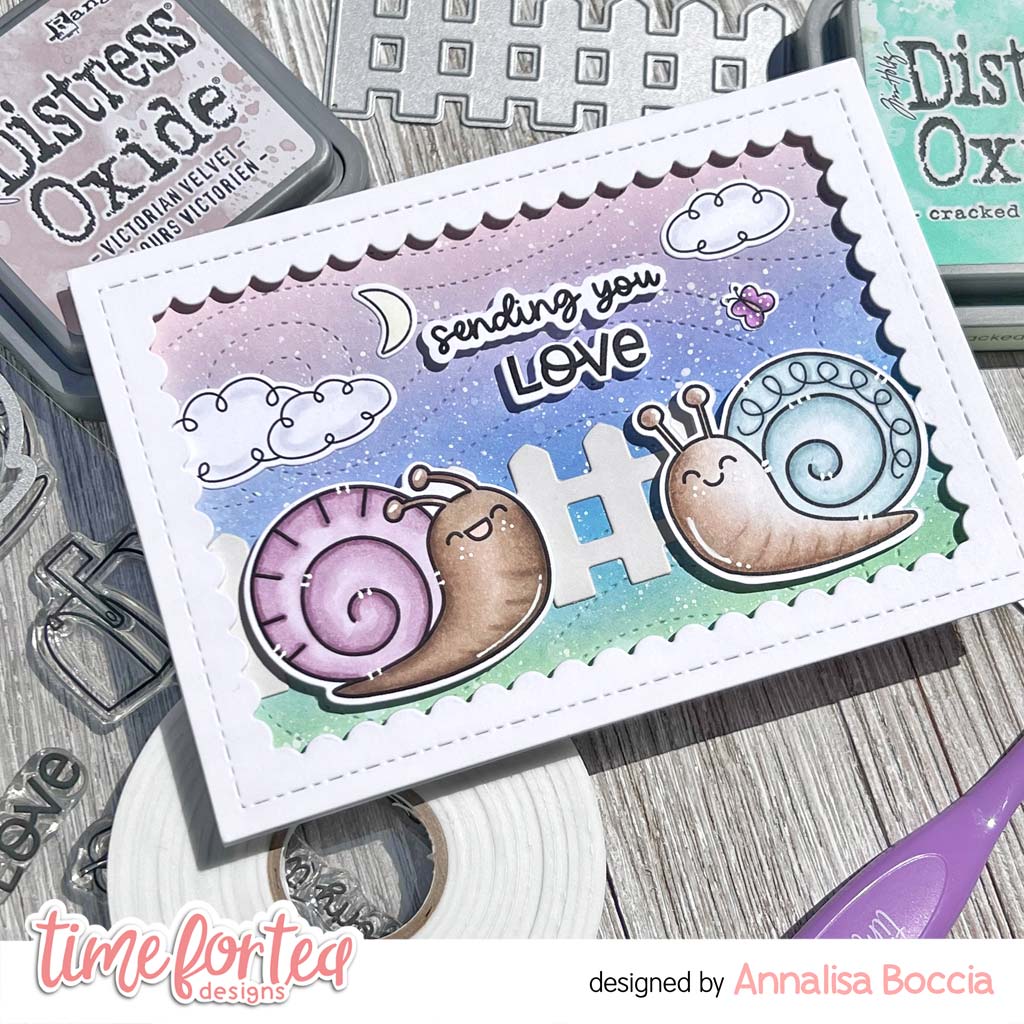

I used the larger frame in the Smile Inverted Scallop Frame Dies to die-cut some heavy white cardstock added foam tape to the back and stuck it to the panel. 

To complete the card, I added foam tape to the back of the snails and the sentiments and stuck them down.

Thank you so much for reading my blog post, you can use my discount code T4TANNALISA10 when you visit the Time For Tea Designs shop to get 10% off your order.

I hope you get some time to get inky and creative this weekend and that it makes you as happy as it does me!


Wednesday, 20 April 2022

VIDEO: Lucky Duck Mother's Day Display Card

Hi, Friends! Lauren here and I'm back with a new video tutorial on YouTube! This month I am sharing a sweet scene using the fabulous Die-namic Display Card Dies. I just love how this die makes scene building with perspective and dimension easy!

While Mother's Day has already passed this year for the UK, it is coming up in May for those in the US and I wanted to use the super cute sentiments from the Lucky Ducks stamp set. Especially since they have their own die cuts! Plus, those cute little ducks are just so adorable... Don't you agree?

There are lots of fun details using other dies (Windmill Add On Die Set and Landscape Edge Standalone Die Set) but I think my flying bee with acetate is my favorite part of the card!

Click the image below to start the video and make sure to leave a comment if you have any questions!


Here is a quick list of the Time For Tea Designs supplies I used and make sure to enter my code T4TLAUREN10 at checkout for 10% off your order!

• Lucky Ducks Clear Stamp Set

• Lucky Ducks Coordinating Die Set

• Windmill Add On Die Set

• Landscape Edge Standalone Die Set

• Die-namic Display Card Dies

Thanks for joining me today and see you next month!

XO. Lauren

Find me on my social media here!

Tuesday, 12 April 2022

I blooming love you


Hi Tea Timers,

Welcome back to the blog! It's Miki here and today I have a cute scene to share with you. Since Easter is approaching fast I thought I'd bring out the bunnies from the Blooming Bunnies set.

As always, I started my card by working on the background. I took an A2 sized card front and ink blended it with the following oxides:
  • Picked Raspberry
  • Kitsch Flamingo
  • Spun Sugar
I then sprayed it with a mixture of water and perfect pearls - this gives any ink blended background such a nice sparkly finish. If there's too much water on the paper you can use a paper towel to lift it. 

Next, I used the Blooming Bunnies set to stamp the images. I started off with one of the bunnies and the flower bunch. I then made a stamp for the flowers and cut it along the bottom. I masked them off and stamped the wheelbarrow to make it look like the flowers were just spilling along the edges. I then stamped the second bunny and the flower he's holding. I fussy cut all the images and coloured them in using my Spectrum Noir Illustrator markers.

I made sure that my background was dry and stamped the sentiment towards the top in Versafine Ink. I added white embossing powder and used the WOW! heat tool to set it. I then used the Windmill Add On Die Set to cut the fence and 3 clouds from white card stock. I glued them on the panel and added the images on top with foam tape. 

I then made an A2 card base and glued the panel on top using the corner of my misti. I always glue my backgrounds using the misti because I am terrible at aligning things properly, hehe!

I hope you like today's card and I wish you a Happy Easter! Make sure to check out my Instagram to see the full process of making this card and don't forget you can get 10% off your T4T order using the code T4TMIKI10.

Hugs,
Miki

Friday, 25 March 2022

Spring Celebration


Hello and happy Friday! Annalisa here today, have you seen the amazing sale going on over at Time For Tea Designs!? The SPRING CLEAN SALE is on until Monday, March 28th with 70% OFF selected items. Use SPRINGCLEAN22 at checkout, and your discount will be applied. I used several die sets, including Spring Blooms (part of the sale), to create this spring card.

To start, I used the Spring Blooms dies to cut out several flowers from coloured card stock. Next, I die-cut the letters 'Spring' using Anthony's Alpha Dies from some blue card stock. I added some Mermaid Lagoon Distress Oxide using my Beautiful Blender Brush to the bottom of the letters. I also cut the bunny elements using the Bunny Builder Dies using pink, black and white card stock and assembled the bunny using liquid glue. 


I had a fence cut from white card stock in my stash (you could use the one in the Windmill Add On) and ink blended on some Weathered Wood Distress Oxide.

I used the Mini Slimline Scallop Dies to die-cut the scalloped frame and the outer panel. I added Dusty Concord Distress Oxide to the outer panel using my Beautiful Rainbow Blender Brush and then adhered it to a 6.5 by 3.5-inch card base.


I cut down a piece of yellow patterned paper from the  Sweet Summer 6x6' Paper Pad and added some Wild Honey Distress Oxide to the edges. I glued the fence to this paper and then both of these to the purple panel.

I added foam tape to the back of the scalloped frame and adhered it to the purple panel. Next, I added the flowers using liquid glue. I stuck the bunny down using a combination of foam tape and liquid glue. For the letters, I added tiny pieces of foam tape to the back of each letter and added them to the panel in an off-kilter fashion - this was SUPER hard for my logical brain! 


I cut out 'let's celebrate' from the Brighter Days Sentiment Cards | White on Grey and used foam tape to adhere it to the card. 

To complete the card, I used my white gel pen to add dashed lines to the purple panel and some white accents to various elements on the card.

Thank you so much for reading my blog, you can use my discount code T4TANNALISA10 when you visit the Time For Tea Designs shop to get 10% off your order.


Wednesday, 16 March 2022

Video: Create a Floral Spring Scene with Blooming Bunnies!

Hi, Friends! My name is Lauren and I'm so excited to be a part of the Time for Tea Designs Video Team! I have my first video today and I thought I would I would share a tutorial of a typical card I love to create - a scene with lots of perspective and layering.

For this card I grabbed my Blooming Bunnies stamp set and dies, then went through my die sets to help me create a floral, Spring scene.

In the video I share which dies I use and how I add depth to die cut pieces of colored cardstock. Then I will walk through how I create each layer of the card using foam squares to create more dimension and perspective on the card.

Click the image below to start the video and make sure to leave a comment if you have any questions that I can help with in creating a scene!


Here is a quick list of the Time For Tea Designs supplies I used and make sure to enter my code T4TLAUREN10 at checkout for 10% off your order!

• Blooming Bunnies Clear Stamp Set

• Blooming Bunnies Coordinating Die Set

• Windmill Add On Die Set

• Landscape Edge Standalone Die Set

Thanks for joining me today and see you next month!

XO. Lauren

Find me on my social media here!

Tuesday, 1 March 2022

Let's catch up - Cafe Critters Scene


Hello tea timers! 

It's Miki here and today I have an extra cute scene card to share with you. I am obsessed with the Cafe Critters stamp and die collection and of course I had to make a little scene with them.

As you know by now, I start my projects by working on the background. For the sky I used the Fluffy Clouds stencil with Shaded Lilac and Spun Sugar distress oxides. I ink blended it on a card panel slightly smaller than A2 - 4"x5.25". Next up I used the Landscape Edge dies to cut two hills and some grass. I ink blended those in Twisted Citron and Mowed Lawn and added some splatters in both colours. I glued my grassy hills directly on the sky panel and left the grass one aside. 

Next, I used the Windmill add-on die to cut the fence. I ink blended it using Memento Toffee Crunch and stamped the Woodgrain A5 Stamp on top for added detail. I glued my fence on top of the grassy hill on the card panel.

I stamped the cafe and some of the images from the Cafe Critters set and coloured them in with my Spectrum Noir Illustrator markers. I used the matching dies to cut them out and added some details with a white gel pen.


I arranged my images on the card panel and glued them down. I only used foam tape for the critters, while for the other images I used liquid glue. I then took my grassy panel I created at the start and added it with foam tape at the bottom of my scene to give the illusion of them sitting in the grass. 

For the sentiment I picked the Let's catch up phrase form the Cafe set and embossed it in white on black cardstock. I used the matching die to cut it out and added it to the top of my card panel using foam tape. I then made an A2 card base and glued my panel on top.

I had so much fun creating this scene and I hope you try it out, I love all the little details and the critters are just too cute! Please remember if you shop in the T4TD store, you can use the code T4TMIKI10 for 10% off your order.

I wish you all a wonderful 1st of March and I'll see you back here next week with a new post!

Hugs,
Miki 

Thursday, 17 February 2022

Enjoy the little things!

Hi there and welcome back to Time for Tea's blog. Silvia's here today.

I started cutting a white rectangle and I ink blended it with mermaid lagoon, prize ribbon and villainous potion Distress Oxide inks. I spalttered with clean water and tone on tone inks.

I then cut a grassy border and I ink bleded it with lucky clover and rustic wilderness Distress Oxide inks and I splattered with clean water and tone on tone inks.

I stamped images from the new "Enjoy the Little Things" and "Sweet Village" stamp sets with black ink, I colored them with alcohol markers and I cut them with coordinating dies (you can find them here and here).

I put everything together with a mix of liquid glue and foam tape, I added two white puffy clouds that I cut with the "Windmill Add On" die set, I stamped one of the sentiment from the "Enjoy the Little Things" stamp set and that's all.


I hope you'll enjoy the card and don't forget you can get a 10% off your Time for Tea orders with the code T4TSILVIA10.

I wish you an amazing day and thank you so much for stopping by.

Big hugs, Silvia.

Thursday, 30 September 2021

A Howling Good Day

Afternoon, DT Kitty here. It's time for my weeklycard. I decided to use the new Dog Gone Mutts Stamp Set as the doggies in it are just so cute! I went for a strong bright colour background...


I used the Dog Gone Mutts Stamps and coloured them in with my Copics. I then die cut the image with the coordinating Dog Gone Mutts Dies. I created the backrgound by blending Chipped Sapphire, Blueprint Sketch & Mermaid Lagoon Distress Oxide Inks. I then blended Mowed Lawn & Twisted Citron onto a strip of card and die cut it using the grass die from the Landscape Edge Dies. I die cut the panel using the Square Label Frame Dies and attached it onto kraft card. I used the fence, clouds and hedges from the Windmill Add On Dies. I blended some ink onto the hedges before adding them. I stamped the sentiment onto black card and heat embossed it in white then die cut it. I fixed everything onto the card with foam pads and added some gems to finish.


Dont' forget you can use my discount code T4TKITTY10 to get 10% off your order on the Time For Tea Designs website.

Kitty xx

Saturday, 11 September 2021


 Happy Saturday Teatimers! So release day came did you get anything? What's your favourite product? 

As usual Jo has rocked it with this release there's cute critters, a fab new standalone die which I've used so much! Then who doesn't love coffee products!
As soon as I saw the cute Dog Gone Mutts Stamp set I knew I had to create a cute scene card with a white picket fence and the red dog kennel. 
I stamped out all the critters, accessories and the sentiment and set them aside then began to work on my card base. I used the middle sized Slimline Scallop Nesting Dies to cut out the card base. I cut it twice out of 360gsm white card stock and on the back one scored a line one scallop down all the way across the top to create the fold for the card and taped it using strong double sided tape. 
For the scene part I used the rectangle from the Slimline Postage Stamp Frame Dies but it was a tad too long so I just chopped off about 5mm's off the edge. I ink blended this with Tumbled Glass and hint Chipped Sapphire around the edges to darken it up a little. I also added a few Chipped Sapphire splatters for a little bit of interest. The grass I cut another rectangle out and used the Landscape Edge Standalone Die I just had to cut half and then line it up to cut the other half as they aren't quite long enough. I did this twice and then inked them up using Twisted Citron and Mowed Grass Distress oxides. Then for the last part of the background I used the clouds and Picket Fence from the Windmill Add on Die set. I just cut them from white card stock and left as is. 
When I'm colouring I try not to use too many colours so it's not too hectic so used a range of browns and warm greys for the dogs. Then used the same brown for the wood on the kennel and a warm red for the rest of it and pop of yellow for the ball. I like how the final colouring turned out and I didn't need loads of colours to get them all looking different apart from two of the dogs but they aren't next to each other so I think it works ok. 
Once they were all coloured and die cut I just stuck everything together as the grass was a bit longer than the sky panel I just flipped it over once it was stuck and used the edge to guide my scissors. 
I love the final look of the card and I hope you do too! If you haven't treated yourselves yet you can get 10% off in the shop using code T4TNATALIE10. 
Hope you have a great weekend and I will see you again next week. 


Friday, 3 September 2021

Have a Cool Birthday


Hello everyone! DT Annalisa here sharing an ice cream-themed birthday card featuring the Cool Critters Clear Stamp Set from Time For Tea Designs.

To start I stamped, coloured and then die cut the elements from Cool Critters using the coordinating die set. The branch is from Be Owlsome, the butterfly is from Up, Up & Away and the flower is from Brighter Days. I also stamped and die cut the sentiments. I do love how there is a beautiful white and rounded border around these with the coordinating dies.

I created my background using an older stencil (Sunny Side up Again) from T4T and my Beautiful Rainbow Blender Brushes and Distress Oxides in the colours Speckled Egg, Tumbled Glass, Squeezed Lemonade and Mowed Lawn. 


I die cut out the panel with a stitched rectangle die in my stash, then used my paper trimmer to cut down the dotted patterned paper from the Sweet Summer 6x6' Paper Pad. I used liquid glue to adhere the panel down to the patterned paper and then began adding all of the elements of the card. The extra cloud in the sky was die-cut using the Windmill Add On die.

To finish off my card, I used some foam tape to pop up the kitty, raccoon and the sentiments. 

Thank you so much for reading my blog post, I hope it inspires you to make your own ice cream-themed cards! Don't forget, you can use code T4TANNALISA10 when you visit the shop to get a 10% discount on your entire order.


Friday, 27 August 2021

Sending Paper Hugs


Hello everyone, Annalisa here sharing the INSIDE of a card rather than the outside, (shocking I know!) because the inside is the show stopper on this card. I love how this pop-up card turned out using the Happy Mail Critters from Time For Tea Designs.

I used my Brother Scan N Cut SDX125e to cut a card base and inside the pop-up area for the card base. I purchased the design from Lori Whitlock's SVG Shop (Mailbox Pop-Up Card) and adapted it to create my card. The sky was ink blended using Salty Ocean Distress Oxide Ink and the grass was from some green patterned paper I had. I coloured the tree and leaves with Copic markers.


The mailbox, bird and heart envelope are from the Happy Mail Critters, the planters, bush and small leaves and flowers are from the Windmill Add On die, the mouse is from Treat Yourself, the cat is from the Smitten Kitten and the flower and butterfly are from Be Slothy.

I stamped, coloured (with Copics) all of the elements and die cut them out. The Windmill Add On die elements were coloured using Distress Oxides (Mowed Lawn, Lucky Clover, Picked Raspberry, Vintage Photo, Peacock Feathers, Squeezed Lemonade, Faded Jeans.) I added a green splatter to the greenery and some white gel pen highlights to some of the elements.

I used liquid glue to adhere the critters and other items to the inside of the card. I finished up the inside by stamping the sentiment 'hello, sending paper hugs."

Thank you so much for visiting the T4T blog, you can use code T4TANNALISA10 when you visit the shop to get a 10% discount on your entire order.


Sunday, 1 August 2021

Big Birthday Wishes

 Good afternoon everyone, 

Happy Sunday, Lyndsey here and today I'm sharing some inspiration from our new summer release that went live on Thursday. If you haven't seen it yet (why not!?!) you need to check it out. Jo has once again worked her magic with an amazing selection of adorable images and fabulous die sets. This cute card has been made with the fabulous Birthday Bear stamp and die set.


To start as always I stamped and coloured my images using my Spectrum Noir markers (colours listed below in order of lightest to darkest)

Bear Body - EB1, EB2, GB8, GB10 

Bear Stomach and Nose - GB10, EB3, EB8, 

Balloon (red) - CR7, CR9, CR11, DR7

Balloon (blue) - TB1, TB3, TB4, TB5

Balloon (yellow) - CT1, CT2, CT4, GB5 

Butterflies - PP1, PL2, LV1


So I decided to make a little scene card and this little fella if off to surprise his friend with a bunch of brightly coloured balloons.

I used the 2nd largest of the A2 Layering Dies to cut a piece if white card, and used the Slimline Scene Builder Stencil and Peacock Feathers distress ink to create my background.

I cut some grass strips from green card using the Landscape Edge Dies and added the cute little picket fence from the Windmill Add On Dies.

The Big Birthday Wishes Die was cut from black card 4 times for dimension and added towards the top section of the card.

I finished off adding a few flying critters in the sky.


Thank you for joining me here on the blog today, if you haven't ordered your new release items yet, why not get yourself across to the store and use my code T4TLYNDSEY10 for 10% off your order.

Enjoy the rest of your weekend 

Lyndsey x

Tuesday, 13 July 2021

Guest Designer Mika shares her gorgeous bunny shaker card!


Hello Crafty Friends!

 It’s Miki here today and I’m super excited to be Guest Designing for Time For Tea Designs this month! 


  I’ve been wanting to get this Kite die set for so long now and it finally happened so if you want to find out how I made this card please keep reading! :)


 The die is so easy to use, you get 3 different ones - one for the kite itself, one for the backing and a slightly smaller one for the acetate. I used the kite die 7 times and glued 6 of them together to create enough room for the sequins to move. Once that was done I added the acetate on top and another white kite, on top of the acetate. I added the sequins in the 4 compartments - more is more in this case haha! and sealed it off with an orange backing. I then die cut the string from white card stock and the bows from orange and assembled them. - I just think the bows are so cute, I couldn’t only add one! From the same set I used the hi die cut and did 3 layers of that.


Next, I focused on the background. For this I used the Birch Forest Stencil with the following oxides:
  • Seedless Preserves
  • Spiced Marmalade
  • Wild Honey

  • I love this colour combo so much for a summerish sun-set! Next, I die cut the grass from white card stock and used the following oxides:
  • Twisted Citron
  • Mowed Lawn

  • If I’m totally honest I wish I had done 2 layers of grass but it’s no biggie! To add some interest to it I used the flower dies from the Windmill Add On Die Set (this set is great!) and cut them multiple times from ink blended card stock (I used the same colours as the sky for this).
    Next up is the cute bunny! This is from the Blooming Bunnies set. I simply stamped one of the critters and coloured it using the following Spectrum Noir Illustrator markers:
  • RB4, RB3, RB2, RB1 - fur
  • PP1 - blush
  • TN9 - nose

  • I fussy cut the bunny and it was time to assemble the card. I used some dimension for the critter and for the rest of the elements I just used liquid glue as the kite already had a lot of dimension. I felt like something was still missing and I remembered that the All Occasions Critters set has this cute bear with bees flying around which die cut individually so I had to add a couple of bees! At the end I added some white highlights to the critter, bees & flowers and that’s it!

    I do hope you like this card and I hope it encourages you to mix and match your sets - I love stretching my supplies and coming up with new ideas!

    Until next time!

    Hugs,
    Miki ♥ 

    Friday, 25 June 2021

    It's A Beautiful Day


    Happy Friday, DT Annalisa here, sharing a sun-filled scene using several Time For Tea Designs stamps and dies. 
    Just a heads up, starting today, a 30% off super Summer sale on all stand-alone dies! Now is a great time to grab any of those dies you have had your eye on!

    For the card base, I used my Brother Scan N Cut SDX125e to cut a card base design from Lori Whitlock's SVG Shop (Center Box Card Beautiful Day), which I adapted to create my card. I used the new Brighter Days 6x6' Paper Pad for the sky panels of this card as it is perfect for this scene. The tree and grass areas are also from the SVG file and I coloured them with Lucky Clover Distress Oxide ink and Twisted Citron using my Beautiful Rainbow Blender Brushes.

    You can easily create this card using the Die-namic Display Card Dies. I just don't happen to have it in my stash. It is such a great die when creating adorable scenes. 

    With the card base ready, it was time to get my elements ready to go. I used the Windmill Add On die for the flowers, pots and fence, which I coloured with Distress Oxides. I can't tell you how useful this set is, I use it SO much. I cut out two fences and glued them down to the grass area and added a pot and green bush in front to make it look like it was one big fence.

    For the critters and other elements, I used the following stamp sets: You’ve Got Mail, Happy Mail Critters, Happy Mail Critters Digi Stamp Add On Collection, Up, Up & Away, Be Owlsome and Buzzing For You A7 clear stamp set. I coloured them all with Copics, added white highlights with my trusty white Gelly Roll Pen and cut them out. Once everything was ready, the fun part of slowly adding everything to the card and making it come to life began. This part is when I am in my happy place - how could I not be with all of these adorable critters?!


    To finish the card, I added the sentiment from the Be Kind Be You Clear Stamp Set which I stamped and cut out using the coordinating dies.

    Thanks so much for reading along, I so appreciate it. You can use code T4TANNALISA10 when you visit the Time For Tea Designs shop to get a 10% discount on your entire order.


    Other Posts You Might Like