Pages

Showing posts with label Zig Zag Frame & Tag Set. Show all posts

Friday, 2 January 2026

New Year's Cheers!


Happy New Year! DT Annalisa here, starting 2026 with a golden-themed celebration card using several Time For Tea Designs stamps and dies. These two adorable bunnies are ringing in the new year with some bubbly!

For the background, I used Scattered Straw Distress Watercolour Pencil on Distress Watercolour Paper, applying a layering technique to create an organic watercolour effect. Each layer is slightly smaller than the last, with increasing pigment concentration. I learned this technique in Jenn Shurkus' "Watercolour Pencil Part 2" class. I gained so many insights from this class and highly recommend it if you’ve invested in Distress Watercolour Pencils.

Once the background dried, I added some splatter using a paintbrush and Antique Linen Distress Spritz for a lovely sparkle effect. Afterward, I adhered the background to an A2 card base.

Next, I cut some gold glitter cardstock using the Zig Zag Frame and Tag Die (an oldie but a goodie from T4T!). I used liquid glue to attach this frame to the card base.

For the sentiment, I used the Happy New Year Sentiment Die cut from gold-patterned paper. To add dimension, I die-cut the same sentiment from white cardstock and stacked the layers using liquid glue. Then, I adhered the stacked sentiment to the card.

I stamped and colored images from several stamp sets, using Copic markers and adding highlights with a white gel pen. The stamp sets I used were: Fruitful Friends, Happy New Year Critters, Blooming Bunnies, Seasons Tweetings, and Santa’s Nice List. To add extra sparkle, I highlighted the edges of some images with a Quickie Glue Pen and Lawn Fawn Prisma Glitter.


Finally, I attached the images to the card base using liquid glue and foam tape for extra dimension.

Thank you so much for reading my post! Don’t forget to use my discount code T4TANNALISA10 at Time For Tea Designs for 10% off your order!


Friday, 17 November 2023

You are the Pumpkin Spice in my Latte


Happy Friday, DT Annalisa here! November can be dark and dreary, so why not treat yourself to a caffeinated beverage! My card today is happiness in a mug - for me, that is an iced latte or a cappuccino, while others enjoy a pumpkin spice latte. I combined the Takeout Coffee Cup Dies with the Pumpkin Spice stamp set to create this coffee-themed card.

I used the Zig Zag Frame & Tag Dies and die-cut watercolour paper. I used carved pumpkin Distress Oxide Spray for the inner panel, and tea-dye Distress Oxide Spray for the frame. To darken the edges of the frame, I ink blended on ground espresso Distress Ink with a blender brush. 

I used liquid glue to stick both pieces of watercolour paper to an A2 card base.


I die-cut the coffee cup sections from watercolour paper. I used tea-dye Distress Oxide Spray on the cup base, lid and whipped cream. I then ink-blended on ground espresso to the cup and lid with a blender brush. I ink blended ground espresso onto craft cardstock for the cup sleeve. I glued all the cup elements to the card base using liquid glue.

I stamped and coloured (with Copics) the pumpkin (Pumpkin Spice), acorns (Jumping With Joy) and kitty in the pumpkin (Trick or Treaters Digital Stamp Collection) and cut them out. I added white gel pen accents with a Gelly Roll Pen. 


I stamped the sentiment from Pumpkin Spice, cut out some of the words with the coordinating die set, and trimmed those without dies. I used liquid glue to stick everything to the card base. I added three orange Summer Haze Designer Enamel Dots to complete the card. 

 Thank you so much for reading my blog post, be sure to use my discount code T4TANNALISA10 when you visit the Time For Tea Designs shop to get 10% off your order.


Friday, 4 August 2023

Movie Night Under the Stars


Happy August, DT Annalisa here! It is a beautiful time of year to watch a movie under the stars so I created this fun scene of friends watching a movie outside. It features the Movie Night Clear Stamp Set and coordinating die set.

I ink-blended Chipped Sapphire, Prize Ribbon, Faded Jeans, Peacock Feathers, and Salvaged Patina Distress Oxides onto Distress White Heavy cardstock by Ranger using my Beautiful Blender Brush.


Next, I applied Lawn Fawn's Fairy Dust stencil paste over the Movie Star 6 x6" Stencil on top of the ink-blended panel. A word of warning for those who have purchased this, it dries out in the container quickly so use it up as soon as you can! Once the paste was dry, I added white splatter with a paintbrush, water and Copic opaque white.

I die-cut the Zig Zag Frame & Tag Dies (retired) to frame the scene and used liquid glue to adhere it to the panel.   


I stamped and coloured (with Copics) several images from the Movie Night stamp set and cut them out with their coordinating dies. I added white gel pen accents with a Gelly Roll Pen.

I stamped the 'you're a reel star’ sentiment and cut it out with its coordinating die.

I stuck the images to the card base using a combination of liquid glue and double-sided foam tape for dimension.


Thank you so much for visiting my blog, be sure to use my discount code T4TANNALISA10 when you visit the Time For Tea Designs shop to get 10% off your order.


Friday, 17 February 2023

Big Bunny Hello


Happy Friday! DT Annalisa here today sharing a no-line coloured card featuring several Time For Tea Designs products. I don't often use this technique with my Copics as it is out of my comfort zone, but I am glad I did.

For the background, I added Saltwater Taffy, Abandoned Coral and Picked Raspberry Distress Oxide ink to watercolour paper with a paintbrush. I added some splatter and spots with a paintbrush for added interest.

Once the panel was dry, I used the Dotty Hearts Panel Die to add the pretty stitched hearts. I adhered this to an A2 card base (8.5 by 4 1/4 inches) with double-sided tape. I die-cut the frame from the Zig Zag Frame & Tag Dies and glued it to the panel.


I stamped the bunny and phone from Let's Chat with pale Fadeout ink from Ink on 3, which works well for no-line colouring. I used my Copics, adding darker tones near the edges of the images; this helped to ensure that the lines were no longer visible once the image was coloured in. I added white gel pen accents before using double-sided foam tape to adhere the images to the card base.

I stamped the sentiments from Let's Chat with Versafine Onyx Black and cut them out with the coordinating die set.


I used the large heart die from the Slimline Postage Stamp Frame Dies to die-cut three hearts. I ink-blended them with Salvaged Patina, Stormy Sky and Faded Jeans Distress Ink using my Beautiful Blender Brushes. I added white splatter using a paintbrush and Copic opaque white.

I used liquid glue to adhere the three coloured hearts to the card. I then used double-sided foam tape to stick the sentiments to the card. I add three blue Festive Fun Designer Enamel Dots for the final touch.


Thank you so much for reading my blog post, you can use my discount code T4TANNALISA10 when you visit the Time For Tea Designs shop to get 10% off your order.

Friday, 23 December 2022

Have a Sweet Christmas


Happy Friday! DT Annalisa here, with Christmas only a few days away (eek!) I am sharing a sweet scene that features the Gingerbread Family - Our House to Yours stamp set and their coordinating dies. I love the adorable gingerbread house and people, but the kitty is my favourite (surprise).

To create the background panel, I ink-blended Speckled Egg, Stormy Sky, Faded Jeans and Prize Ribbon Distress Oxides using my Beautiful Rainbow Blender Brushes onto Distress White Heavy cardstock by Ranger. I added white splatter with Copic opaque white.


I die-cut white cardstock with the frame from the  Zig Zag Frame & Tag Dies and the Slimline Mini Village Die. I used scissors to cut out the little houses from the slimline mini village and used liquid glue to adhere this piece to the blue panel. I adhered the panel to an A2 card base.

I added double-sided foam tape to the back of the zig-zag frame and stuck it down to the card.


I stamped, coloured and die-cut all the images and added white gel pen accents. I applied glue to small areas of each image with a Quickie Glue Pen, dipped these areas into Lawn Fawn Prisma Glitter and tapped off the excess. The moon and trio of stars are from the Happy Trails stamp set, the single larger star is from Snow Much Fun and the rest are from the Gingerbread Family - Our House to Yours.


I stamped "have a sweet Christmas' and die-cut it out with the coordinating dies. I used the sentiment die to cut out two more pieces of white cardstock and glued them together for some dimension. I then adhered the sentiment to the card.  


Thank you so much for reading my blog post, you can use my discount code T4TANNALISA10 when you visit the Time For Tea Designs shop to get 10% off your order.


Friday, 1 July 2022

Eat The Cake


Hello and happy Friday. DT Annalisa here, for my weekly project, I created a celebration card for any occasion (including Canada Day which we are celebrating today in my neck of the woods!) using the Hello Cupcake stamp set and Eat the Cake Sentiment Die.


I die-cut the frame from the Zig Zag Frame & Tag Dies from some white card stock and set it aside for later. For the background panel (4 1/4 by 5 1/2 inches), I ink blended Shaded Lilac, Kitsch Flamingo and Spun Sugar Distress Oxides using my Beautiful Blender Brushes. I added some white splatter using acrylic paint and a paintbrush. Once it was dry, I used double-sided tape to adhere it to a white card base. 


I stamped and coloured (with Copics) the giant cupcake and the mouse with a strawberry and used my Scan N Cut to cut them out. I added Glossy Accents to the strawberries and set them aside to dry.

I ink blended Peacock Feathers Distress Ink onto some white cardstock with my Aqua Beautiful Blender brush. I used the Eat the Cake die to cut out the sentiment from this. I die-cut the outline into vellum and then glued the sentiment onto this. For the sprinkles, I used the same Distress colours (Peacock Feathers, Shaded Lilac and Spun Sugar) that I cut with the same die set.


I used liquid glue to adhere the Zig Zag frame to the coloured panel. I then used double-sided foam tape to stick down the cupcake and the mouse with a strawberry to add some dimension. Next, I used liquid glue to adhere down everything else. I stuck down some pink and purple jewel embellishments that I have had in my stash for years.


Thank you so much for visiting my blog post. Don't forget to use my discount code T4TANNALISA10 when you visit the Time For Tea Designs shop to get 10% off your order.


Tuesday, 10 May 2022

Let's have coffee shaker card

 Hello Tea Timers!


Welcome back to the blog. We're all super excited for you to see the new release but until then I have a new shaker card to share with you.

To start with, I used the Sweet Summer Paper Pad and cut one of the designs to an A2 card size. I then used the Zig Zag Frame & Tag Die and cut the frame from white cardstock. I glued a sheet of vellum on the back of it and added some thin foam tape all around. I then selected some gems and added them to my vellum window, securing it with the A2 card panel I cut at the start. Using the same paper pad I chose a summery design and cut it using the side of one of the dies in the Slimline Scalloped Trio Circle Nesting Die to give the impression of a Coffee shop front. I then used some foam tape to adhere it at the top of my shaker. 

Next, I stamped and coloured the critters from the Cafe Critters stamp set. I used the matching dies to cut them out, added some white highlights and added them to the shaker using some foam tape. For the sentiment, I used the Coffee word die and die cut it 3 times from pink cardstock and once more from white cardstock. I glued the pink ones together and added the white word at the back, slightly off-set. I then stamped and embossed the let's have sentiment and glued both sentiments at the top of the card. 

It's been super sunny here in London lately so I just felt like creating a summery scene. I hope you like it and stay tuned for the new release this Friday! Don't forget, you can use my discount code T4TMIKI10 for 10% off your whole order (yes, that includes the new release!)


Hugs,

Miki

Tuesday, 5 April 2022

Cupcake Birthday Wishes


Hi Tea Timers!

Welcome back to the blog! It's Miki here with a new card idea for you.

To start with, I took an A2 size panel and lightly ink blended the right hand side in Tumbled Glass and the left hand side in Cracked Pistachio. I then took the Scattered Hearts Stencil and went over it with a heavier hand of both oxides, fading it out towards the top. This creates a tone on tone effect in two shades. 

Next, I used the Zig Zag Frame & Tag Die to cut the panel. I used the negative for my background today. To add some interest to it I sprayed it with a mixture of Perfect Pearls and water. I keep this in a spray bottle and use it on almost all my cards. To pick up the excess water I used a paper towel and left the panel aside to dry.

For the images I used the Hello Cupcake stamp set. I stamped the cupcake on a scrap piece of card stock and coloured it in with the Spectrum Noir Illustrator markers. I then cut it and added some white highlights for extra details.

I used the Birthday Wishes sentiment from the same stamp set and embossed it in WOW White embossing powder towards the bottom. I added foam tape behind the panel and glued it on a top folding A2 card base. I also added foam tape to the back of the image and added it on top of the background panel. Lastly, I used the Ice Crystal Sequin Mix from Little Things by Lucy to add some more sparkle to my card.

This is perfect for a birthday and it was super fun to make. I'll have a reel on my Instagram showing you the process so make sure to check it out! 

If you decide to shop any of the products I used today, I have a 10% discount code site-wide: T4TMIKI10

See you next week with another project! 

Hugs,

Miki

Tuesday, 18 January 2022

You make me snow happy - shaker card


Hello Tea Timers!

It's Miki here and today I'm back with some new inspiration for T4TD. This time around I made a shaker with the cute Skating By Penguins and I have a cool alcohol ink technique to share with you.

To start with, I took some photo paper - I use this as an equivalent to Yupo as it's more accessible and works just as well for today's technique. I then picked my alcohol inks in the following colours: Flamingo, Sailboat Blue and Silver Alloy. I took some blending solution and added it to my glass mat, then added droplets of my ink and used the blower to disperse them. I then took my photo paper and went right on top of the inks on my glass mat with the glossy side down. I added more colour as I needed but you can stop when you're happy. I left the background aside while I focused on the rest of the card. I'm sorry if I'm not doing too good of a job at explaining this, I filmed a reel which I'll post on my profile tomorrow so stay tuned for that.

For the images, I stamped two of the penguins from the Skating By Penguins and the snowballs and die cut them using the matching dies. I coloured them in with my Spectrum Noir Illustrator markers, added Crystal Stickles on the penguins' hats and the snow balls and some white highlights for extra details.

Next, I used the Zig Zag Frame & Tag Die to cut the frame. I did this 6 times from white cardstock and glued 5 of them together. I then cut a sheet of acetate slightly smaller than my frame outline and glued it on top of the 5 layer stack. Next, I white embossed my sentiment towards the top of the acetate sheet. TIP: make sure you apply your anti static powder in a generous layer as acetate tends to hold on to your embossing powder any chance it gets! I then added my 6th frame on top. From one of the negatives of the frame die I cut some snowy hills using the Landscape Edge Dies and glued them inside the frame, on top of the acetate.

I then cut my alcohol ink background to the same size as the frame, added some sequins on top and glued my card front over it. I added the penguins and snow balls on top using foam tape and that was it.

I had a lot of fun creating this little scene and I hope you like it!

Please remember if you shop on the T4T website, you can use T4TMIKI10 for 10% off your whole order!
See you on Friday for the new release reveal!

Hugs,
Miki

Friday, 31 December 2021

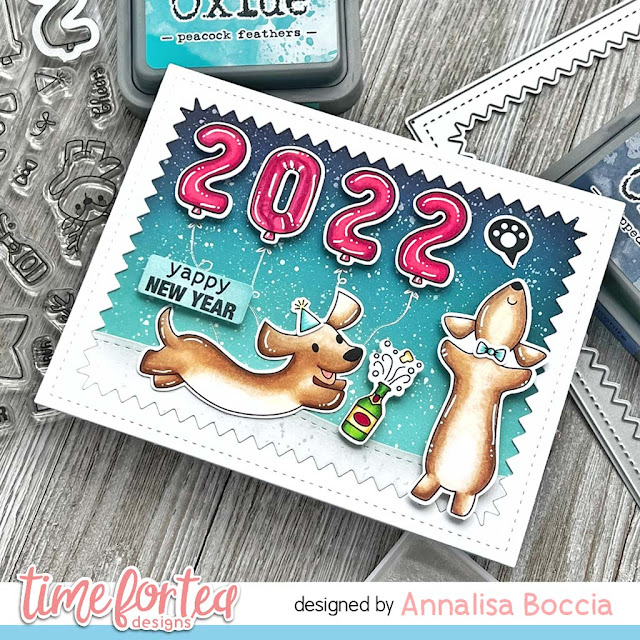
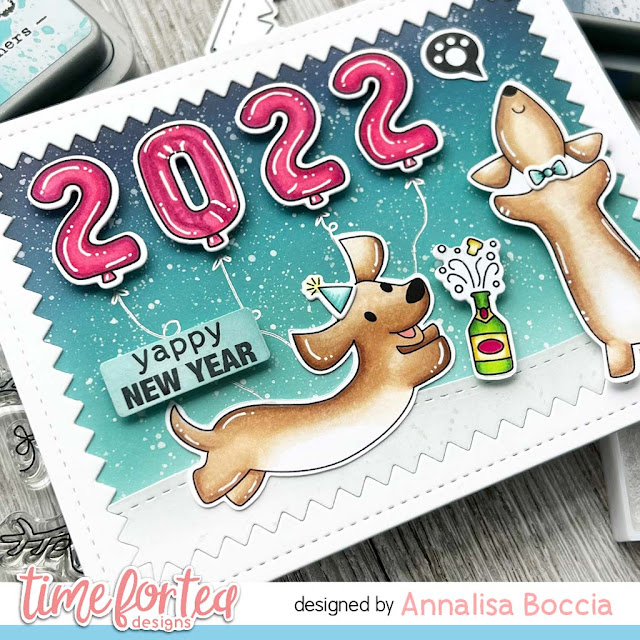
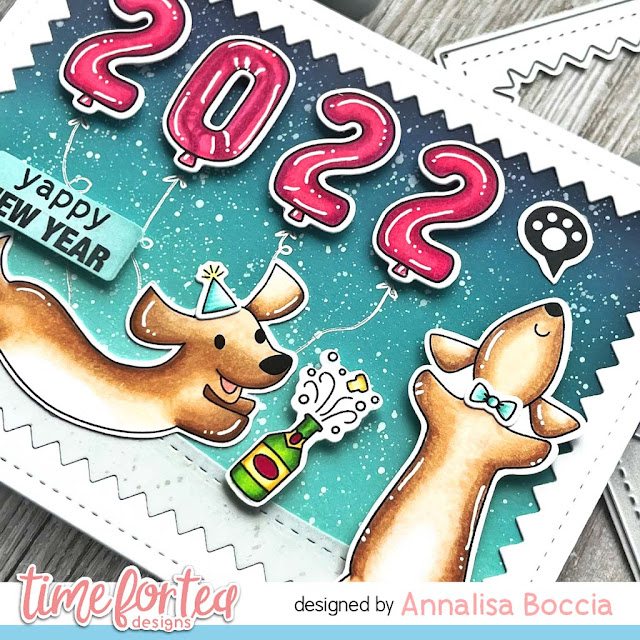
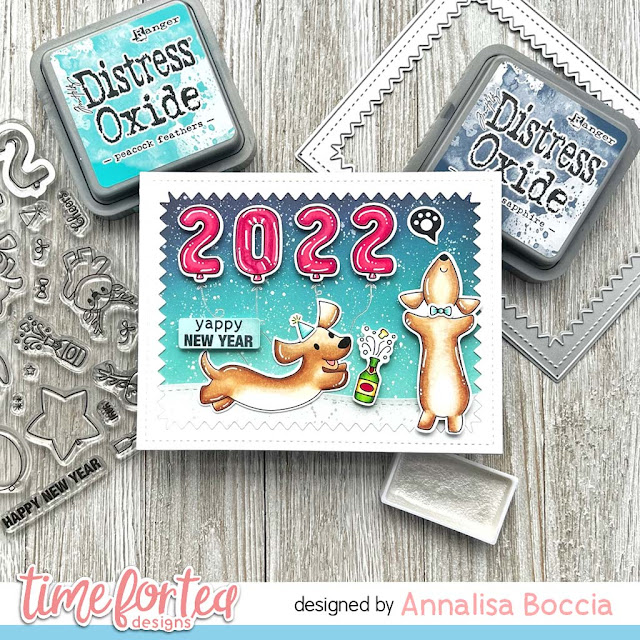
Yappy New Year


Hello everyone, DT Annalisa here. I am sharing a 'yappy' New Year card on this last Friday of 2021! I can't believe that we are headed into 2022 tomorrow, I hope that next year holds happiness and health for all of us as we have been through so much in the last few years.

I blended on Salvaged Patina, Peacock Feathers, Chipped Sapphire and Black Soot Distress Oxides to some white card stock using my Beautiful Rainbow Blender Brushes. I then added some white paint splatter with a paintbrush and set this aside to dry.


I die-cut out a frame using the Zig Zag Frame & Tag Dies and some white card stock. I used the Slimline Hillside Scene Dies to cut out a snowbank which I then die cut again with the Zig Zag frame. To this, I added splatter with some shimmery white watercolour and set it aside to dry.

I stamped all of the elements and coloured them with my Copics. I used the following stamps sets: Happy New Year Critters, Santa Paws and Stop Dachshund Around. I combined the sentiment 'yappy' from the Santa Paws stamp set with the 'New Year' from the New Year Critters stamp set as I thought it was quite punny!


To assemble the card, I glued down the zig-zag frame and the snowbank to the ink blended background. I popped up the numbers, sentiment, champaign bottle and doggie on the right with some foam tape, I then used liquid glue to adhere the rest of the elements. 


Thank you so much for reading my blog posts throughout the year, I so appreciate it, you can use my discount code T4TANNALISA10 when you visit the Time For Tea Designs shop to get 10% off your order.

Monday, 6 December 2021

Stinkin' hugs!

Hello, Tea Timers! 
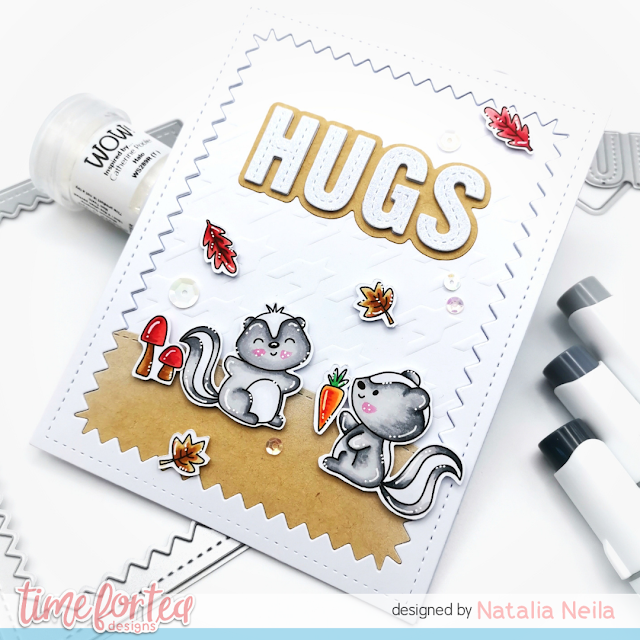
It is Natalia with you here today. How are you liking the new Time for Tea release? I know I am biased but I can't get enough of the cute critters! These skunks from the Stinkin' Cute set are so sweet!

I really enjoyed colouring them with my Ohuhu alcohol ink markers, and then adding some highlights with a white gel pen.

For my background, I did some dry embossing with the new Houndstooth stencil. As you know, I love a lot of white space on a card, so doing some dry embossing is a great way of adding some dimension of interest while still preserving that white space.


I die cut the hill from craft cardstock with the die from the Slimline Hillside Scene set. This is my go to set for scenes, no doubt! I don't often use craft card but this time I thought it was nice with the autumn colours. I did do a bit of ink blending on the top of the hill with Hero Arts unicorn white ink. It is subtle, but it makes a difference, I think!

For the sentiment, I used the Hugs Stitched Sentiment die. I die cut it three times from white cardstock and then once more from shinny white cardstock which I made with Halo WOW! embossing powder.

And finally, I used a newly acquired frame die from the Zig Zag Frame & tag dies set. I will certainly use this often because I absolutely love how it finishes off a card!

I will post a reel on my IG account this week, so look out for it if you want to see the process! I also really changed my mind after the reel so the card there looks a tad different. 

Use the code T4TNEILA10 for a 10% off the shop! 

Sending hugs,
Natalia


Friday, 6 August 2021

Big Birthday Sundae


Hello everyone, and happy Friday. Annalisa here today, sharing a birthday card featuring some awesome new products that were released last week. I just love the Big Birthday Wishes Sentiment Die and how it fills up a card! I paired this with the kitty and the ice cream sundae from the Sundae Sweeties set and love the result.


To start, I stamped, coloured (with Copics) and die cut the kitty and ice cream sundae. I coloured some card stock with Kitsch Flamingo Distress Oxide (using my Beautiful Blender Brush) and used it to die cut out the Big Birthday Wishes sentiment and the small hearts. I also die-cut the sentiment die from some black card stock. I glued the pink sentiment to the black one, slightly offset to create a shadow effect.

For the background, I used a two-part ice cream stencil that I had in my stash, which I thought was perfect for this card. I used Kitsch Flamingo and Vintage Photo Distress Oxides for the ice cream and the cone. To get the glittery ice cream tops, I added some translucent embossing paste and then topped this with distress glitter once I removed the stencil.


I used some of the new Sweet Summer 6x6' Paper Pad with the Zig Zag Frame & Tag Dies to create a pretty frame for the card. I die cut this frame twice from white card stock and glued them together with liquid glue. I then added the patterned paper frame on top of these. I glued these to the ice cream background and added the kitty and sundae with some foam tape. Next, I added the sentiment and the hearts. 

To complete the card, I added some Stickles and white gel pen accents.

Don't forget, you can save 10% off your Time For Tea Designs order using the T4TANNALISA10 at the checkout.


Wednesday, 3 February 2021

Wintery Paper Hugs

Happy Wednesday!

It's DT Shabneez sharing a card made using the Happy Mail Critters Stamp & Die Set.  It's such a cute set and is perfect for when you need to tell someone you are thinking of them, especially with the current lock down.


I used a sheet of the Winter Wonderland Paper Pad as the background as it went so well with the images on the stamp set and framed it with the Zig Zag Frame & Tag Die Set.


All my images were coloured with my Chameleon pens and I made a scene where the cat had to stand on a box to reach the letter box and help the bird post the letter.  I added hearts and a sentiment to finish.

You can get 10% off anything in store using my code T4TSHABNEEZ10.  Happy crafting!


Monday, 4 January 2021

Happy New Year

Happy New Year everyone! This is it we are in the first proper week of this new year. It's so exciting. I always like new year as its like a clean slate. 2020 taught me a lot though, I am lucky as there are some great people in my life that really made a very tough year a lot better. That includes all of you reading this. Thank you for all of your love and support for my creating. I am so happy to be on this DT. So this card is for you as well as them :D


For this card I have used the brand new Cosy Winter stamp set and combined it with a sentiment from the Winter Wonderland Sentiment Card set.

The background is cut from a piece of the Winter Wonderland 6x6 paper and then I layered the trees from the Winter Background stamp set on top of the snowy background paper before framing it all with the frame from the Zig Zag frame and tag die set. Oh and the big foam roll made it so much easier to put that frame on my card! I die cut all the images with the co-ordinating dies after colouring them with Spectrum Noir tri-blend pens. If you want to get anything from the Time For Tea Designs store don't forget you can use my code T4TAMY10 to get 10% off your order.

I hope you are all well and staying safe.

Loads of love

Amy xx 


Other Posts You Might Like