Pages

Showing posts with label Takeout Coffee Cup Dies. Show all posts

Friday, 1 August 2025

All Aboard the FriendSHIP Art Journal


Happy Friday, DT Annalisa here! I'm excited to share another page from my mixed media art journal, featuring the new Boat Buddies stamp set, along with some older sea-themed stamps from Time For Tea Designs. I’m really pleased with how it turned out!

I started by applying a base layer of white gesso to my page, followed by a pastel blue paint from Hero Arts for the sky. For the ocean, I used the Making Waves stencil along with Distress Paints in Peacock Feathers, Salty Ocean, and Prize Ribbon, topped with white acrylic paint. I layered on several coats of paint, and for the top layer, I used a baby wipe on the bubbles area of the stencil to reveal the lighter Salty Ocean color underneath.


In the sky area, I applied white acrylic paint over a cloud stencil using a sponge. I created the sandy area using brown acrylic paint and a textured sponge, then added white paint splatters over the background.

For the shape and texture of the island, I used the Takeout Coffee Cup Dies, the Snow Flurry Cover Die, and scissors. I added color with Mowed Lawn and Twisted Citron Distress Paint.


I stamped several images from the Boat Buddies stamp set, colored them with Copics, and cut them out using the coordinating dies. I added white gel pen accents with a Gelly Roll Pen. Additionally, I incorporated images from the Seasons Tweetings (seaweed), Sealed With A Kiss (fish), and Beach Buds (crab, shells, turtle, palm tree), and Get Whale Soon (whale) stamp sets.

To adhere all the stamped elements, I used liquid glue. Lastly, I completed the card by adding white dots with a 0.7mm Posca Pen, which I had never used before, but I highly recommend it!

Thank you so much for visiting my blog! Don’t forget to use my discount code T4TANNALISA10 when you shop at Time For Tea Designs to receive 10% off your order.


Friday, 8 November 2024

Dies Only Coffee Card


Happy Friday, everyone! DT Annalisa here and I’m excited to share a card I created using only dies from Time For Tea Designs. While I typically prefer using stamps, I think these four die sets are terrific, and I wanted to make a card featuring them.

I added several drops of Dried Marigold Distress Paint onto my glass mat and sprayed it with water. I then pressed watercolour cardstock into the paint multiple times to create a vibrant orange background. After heat-setting the panel, I added Carved Pumpkin and Lumberjack Plaid Distress Oxide Spray.


Once the panel was dry, I die-cut it using the Snow Flurry Cover Die and adhered it to a panel of black cardstock that I had die-cut with the Sweet Scalloped Dies using liquid glue.

For the sentiment, I applied Salvaged Patina Distress Spray Stain to watercolour cardstock, heat-set it, and then die-cut it with the Warm Hugs Large Sentiment Die. I also die-cut the sentiment from White Silver metallic cardstock by Neenah. I used liquid glue to adhere the two die-cut sentiments with a slight offset before attaching them to the card base.

Next, I used the Takeout Coffee Cup Dies to cut the elements from watercolour cardstock and coloured them with Distress Oxides, inks, and sprays. Below are the colours I used for each part of the coffee cup:

- Milk Foam: Tea Dye Oxide Spray and Ink
- Coffee Cup Base: Lost Shadow Distress Oxide Spray and Hickory
Smoke Distress Ink
- Sleeve: Tea Dye Oxide Spray
- Heart: Salvaged Patina Distress Spray Stain
- Cup Lid: Lost Shadow Distress Oxide

I assembled the coffee cups with liquid glue and attached them to the card beneath the 'Warm Hugs' sentiment.

I added three Designer Enamel Dots from the Sweet Summer collection, to complete the card.

Thank you so much for reading my blog post. Remember to use my discount code T4TANNALISA10 when you visit the Time For Tea Designs shop to get 10% off your order.
Friday, 17 November 2023

You are the Pumpkin Spice in my Latte


Happy Friday, DT Annalisa here! November can be dark and dreary, so why not treat yourself to a caffeinated beverage! My card today is happiness in a mug - for me, that is an iced latte or a cappuccino, while others enjoy a pumpkin spice latte. I combined the Takeout Coffee Cup Dies with the Pumpkin Spice stamp set to create this coffee-themed card.

I used the Zig Zag Frame & Tag Dies and die-cut watercolour paper. I used carved pumpkin Distress Oxide Spray for the inner panel, and tea-dye Distress Oxide Spray for the frame. To darken the edges of the frame, I ink blended on ground espresso Distress Ink with a blender brush. 

I used liquid glue to stick both pieces of watercolour paper to an A2 card base.


I die-cut the coffee cup sections from watercolour paper. I used tea-dye Distress Oxide Spray on the cup base, lid and whipped cream. I then ink-blended on ground espresso to the cup and lid with a blender brush. I ink blended ground espresso onto craft cardstock for the cup sleeve. I glued all the cup elements to the card base using liquid glue.

I stamped and coloured (with Copics) the pumpkin (Pumpkin Spice), acorns (Jumping With Joy) and kitty in the pumpkin (Trick or Treaters Digital Stamp Collection) and cut them out. I added white gel pen accents with a Gelly Roll Pen. 


I stamped the sentiment from Pumpkin Spice, cut out some of the words with the coordinating die set, and trimmed those without dies. I used liquid glue to stick everything to the card base. I added three orange Summer Haze Designer Enamel Dots to complete the card. 

 Thank you so much for reading my blog post, be sure to use my discount code T4TANNALISA10 when you visit the Time For Tea Designs shop to get 10% off your order.


Wednesday, 4 October 2023

Sweet wishes

Hey Tea-timers...

DT Ashlee here with some new Time for Tea designs inspiration for you! 

I really enjoyed creating with just dies for my card last week so I thought I'd do another one and create a sweet themed card (I did sneak in a couple stamps this week for my sentiment hehe). 


Dies I used for this card :
- T4T cover plate (I think this one is retired)

To create this card I die cut the cover plate from a teal blue cardstock and then backed it with a light grey to fill in the open spaces. I then die cut all the pieces I needed to create two milkshake cups from a mix of different coloured card before adhering them all together. I added white stripes to the straws with a white gel pen before adhering them to the card base with foam tape. To finish off the card a "sweet wishes" sentiment that I stamped and die cut with the co-ordinating dies and a touch of pretty sequins!


A sweet card full of sweet wishes....


I hope you like this yummy themed card, happy crafting. Hugs Ashlee. 

Wednesday, 21 December 2022

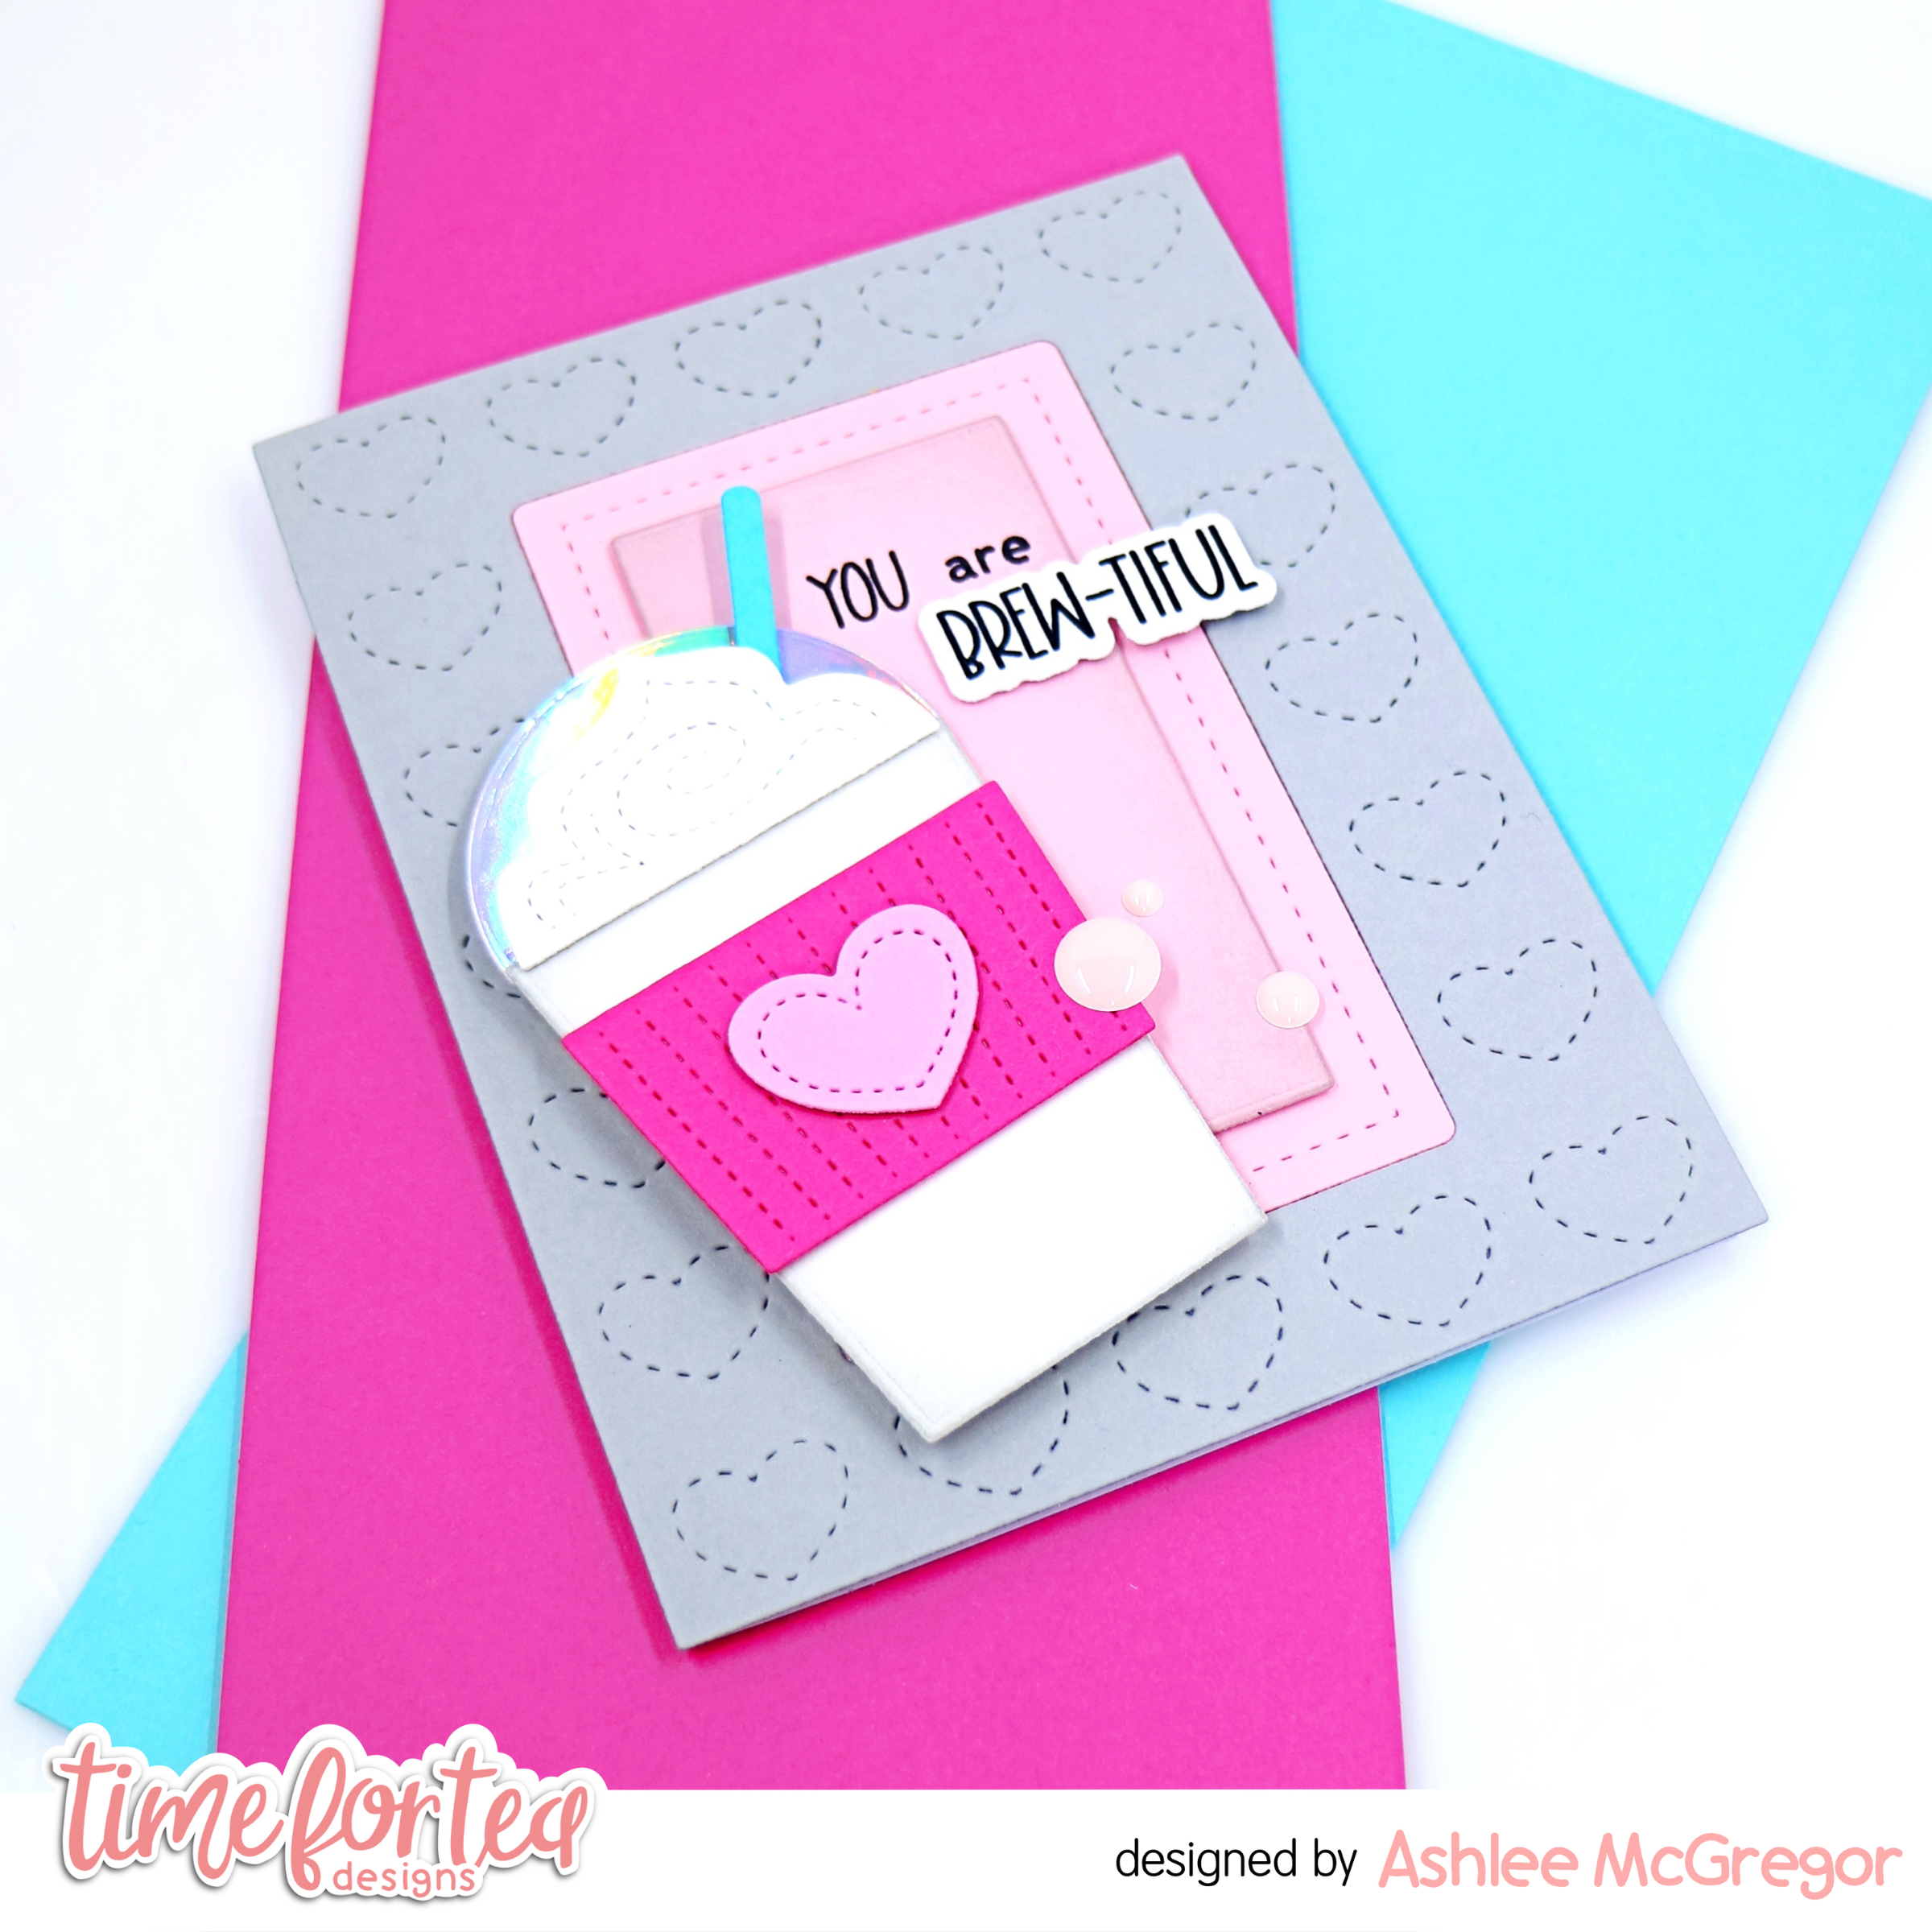
Brew-tiful....!!

 Hey there Tea-timer friends....

Who loves a nice brew of iced coffee topped with cream?! I know I do and this card is totally inspired by delicious coffee....


I used the fabulous T4T Takeout coffee cup die to die cut all the pieces for the takeout coffee cup and adhered them together with liquid glue and foam tape ready for my card base. 


To create the base of my card I used the A2 Stitched hearts cover die and die cut it from grey cardstock I then used the centre dies from that same piece to die cut the pink frames for the centre. 

I added a stamped and die cut sentiment from the Pumpkin spice collection!

To complete the card a touch of Time for Tea designs Festive fun enamel dots...
A brew-tiful card perfect for the coffee lover!


This is the last card for me for 2022 on the T4T blog, I hope you have enjoyed my creations this year. I look forward to sharing more T4T inspiration with you all in 2023. Happy crafting, hugs DT Ashlee. 

Saturday, 8 October 2022

Love you a Latte!


 Happy Saturday Teatimer’s hope you have had a great week. It’s DT member Natalie here with a sweet Pumpkin Spiced Latte Halloween card. I had so much fun with this one as I’m sure you can tell. I really enjoy playing around with the Take Out Coffee Cup Dies and I’ve done a few different scenes with it including a Black Forest Hot Chocolate winter scene and a Very Berry Summer themed card as well which you can also find on the blog. It’s just so versatile it’s also super easy to turn into a shaker card as well as you can see in my tutorial for the Black Forest Hot Chocolate card. 

 I used the Snow Flurry Die to create my background and ink blended a range of pink and purple distress oxide inks. To which I added some clouds using the Cloud Dies and the Windmill Add on Die Set. For the outline clouds I added some velum behind to add a soft texture. 

I added some black grass using the Slimline Hillside Dies and then began on the coffee cup. I cut out the main body and did some ink smooshing with orange and brown distress oxides. Setting that aside to dry I cut out the rest of the elements. 

For the stamped images I combined the Spooktacular, the little mouse from Hey There Critters and the toadstools from Life's Up's and Down's which is another great Autumn set. I coloured all the images up with Copic markers and die cut them all, except the big pumpkin which I fussy cut. the reason being I didn't want a white edge as I wanted it to look like it was part of the sleeve for the cup.

After adhering everything together I added some stars to the sky using a range of colours of gelly roll pens, they are great for just adding finishing touches to your card. I hope you like my card for this week don't forget to check back for more inspiration and if you want to purchase anything in the Time for Tea Shop you can get 10% off your orders using code T4TNATALIE10. Have a great weekend!

Saturday, 2 April 2022

You are so Sweet!

Happy Saturday Teatimer's it's Natalie here with a super fun summer shaker card. If you can remember back at Christmas I made a similar card turning the Take Out Coffee Cups Dies into a shaker card. 


You can find all the details on how I made the shaker here. 
I thought a bright, summer milkshake version would be super fun.  I wanted to show you how you could make two of the same cards but change a few elements like the colour and shaker bits and you get a completely different look for a new season. 
Instead of sequins I used small fruit shaker elements and some tiny ice cubes then instead of snow I added grass and went for pops of pink, yellow and orange as opposed to the cold blues I used for the winter card. 
As you can see two completely different but similar cards, I just love how it turned out. 
If you want to recreate your own version you can find all the supplies in the Time for Tea Shop and get 10% off any orders using code T4TNATALIE10. 

Friday, 7 January 2022

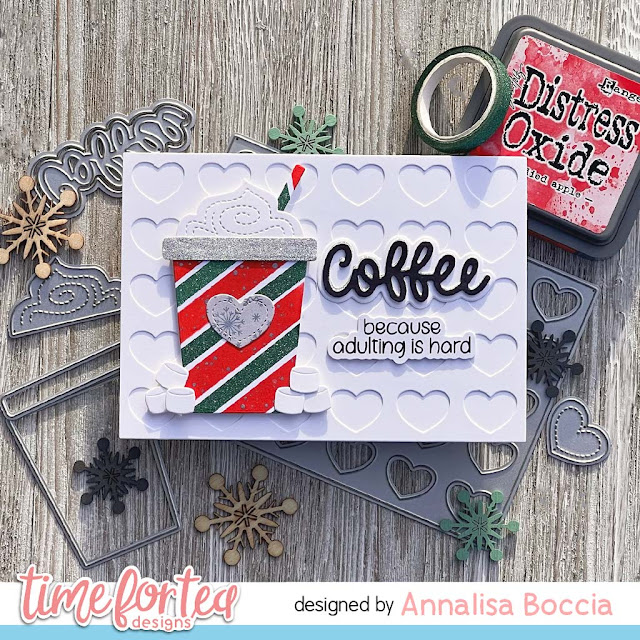
Coffee Because Adulting is Hard


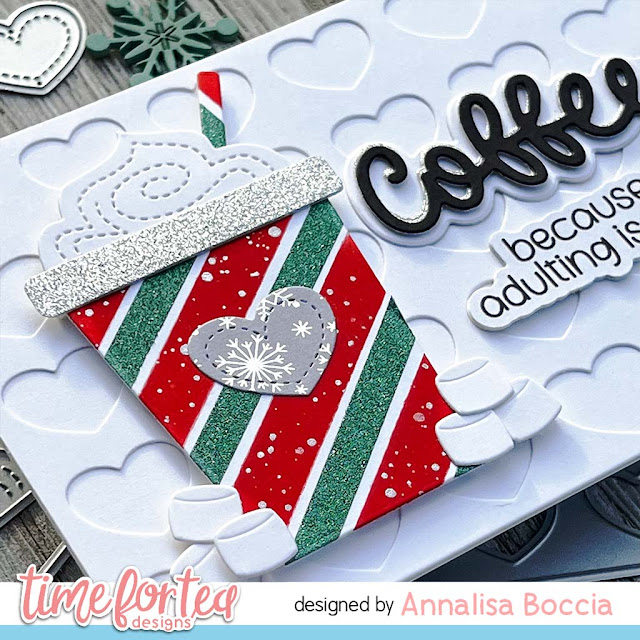
Hello crafty peeps, DT Annalisa here, I trust that you have survived the first week of 2022. I don't know about you, but I definitely need my daily coffee fix to keep me going! My drink of choice is an iced latte, how about you? I have said it before, and I will say it again, I just LOVE the Takeout Coffee Cup Dies. I can't get enough of them! 

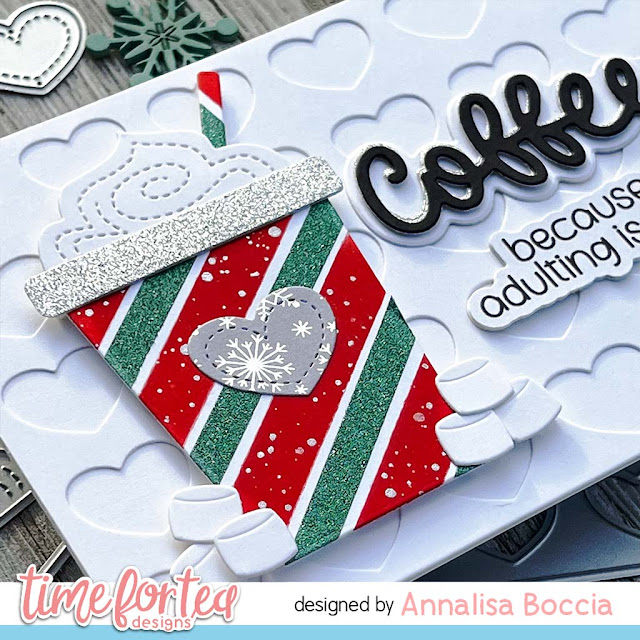
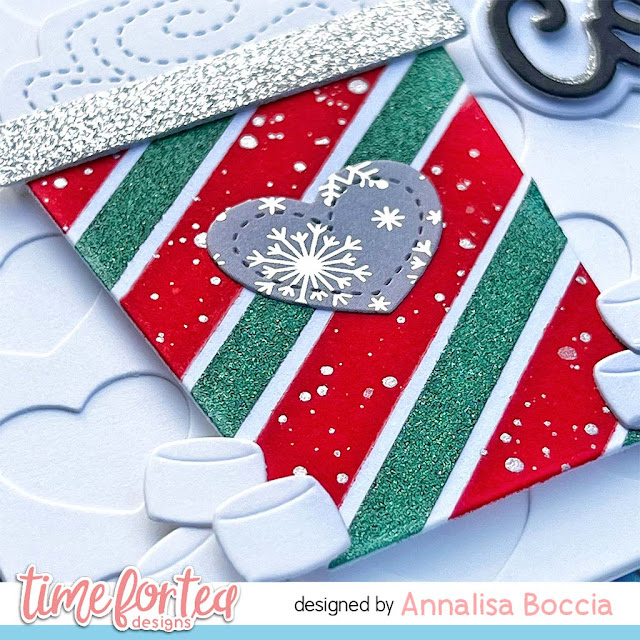
I began by using the Simple Stripes 6 x6" Stencil and applying Candied Apple Distress Oxide on white card stock using my Beautiful Blender Brush. I used some green glitter washi tape and added it in between the red stripes that I had created by the stencil. I then used the cup and straw dies to cut out this patterned paper that I had created. I am a little obsessed with Starbucks, and this pattern looks like it could be one of their cups! 


I cut the cup lid from some glitter cardstock and the heart from some foiled patterned paper. I assembled the cup using liquid glue and then set it aside.

I used the Coffee Lover Clear Stamp Set for the 'because adulting is hard' sentiment, which I stamped and then die cut out using the coordinating dies. I cut out another two pieces of cardstock with the coordinating die and glued the sentiment on top of them for a bit of dimension. I then used the Coffee Sentiment Die to die cut out black and silver glitter cardstock. I glued the black sentiment on top of the silver one and overlapped them a bit so you can see a little of the silver peeking through. I die cut out the shadow of the word coffee and adhered the sentiment to it. 


Next, I took an A2 base and adhered a panel to it that I created by die-cutting some white cardstock with the Lots of Love Horizontal Cover Plate Die. 

I assembled the card by adding some foam tape to the back of the coffee cup and placing it down. I then glued the sentiments down with liquid glue. For the marshmallows, I used a combination of foam tape and liquid glue to adhere them to the card and cup. The marshmallows just make me smile every time I use them! 


Thank you so much for visiting my blog, you can use my discount code T4TANNALISA10 when you visit the Time For Tea Designs shop to get 10% off your order.
Thursday, 23 December 2021

Jolly Coffee Christmas


Happy Christmas Eve everyone! I hope you all have a wonderful day and a happy Christmas tomorrow. Thank you so much for your support throughout the year.

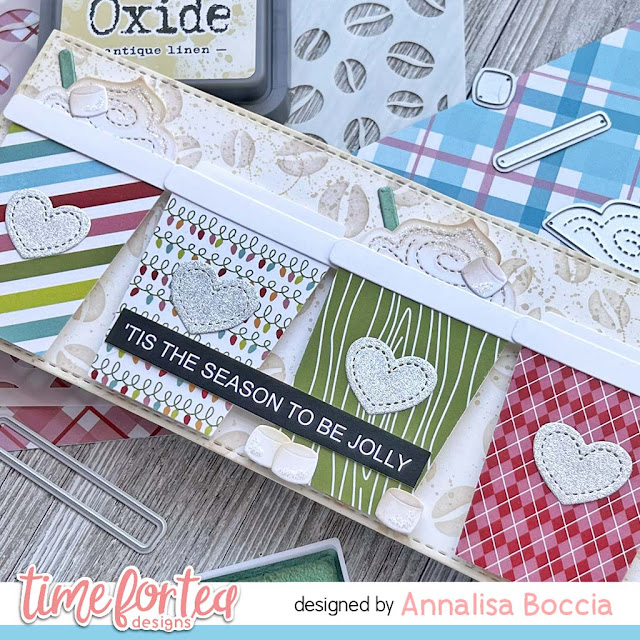
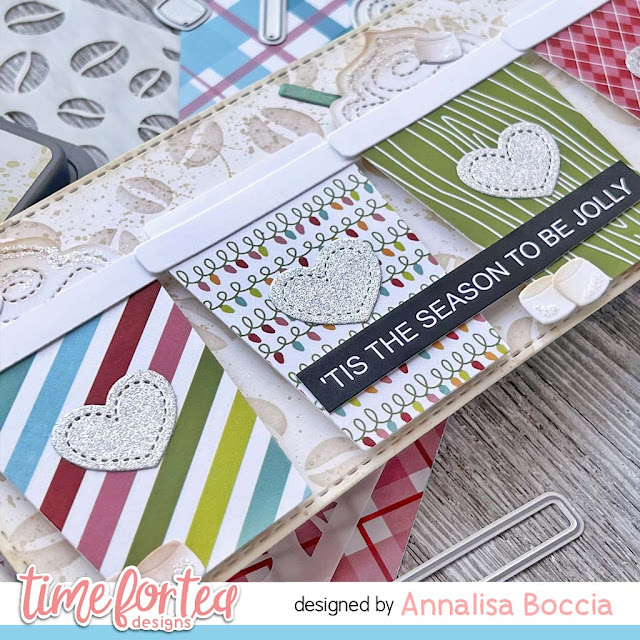
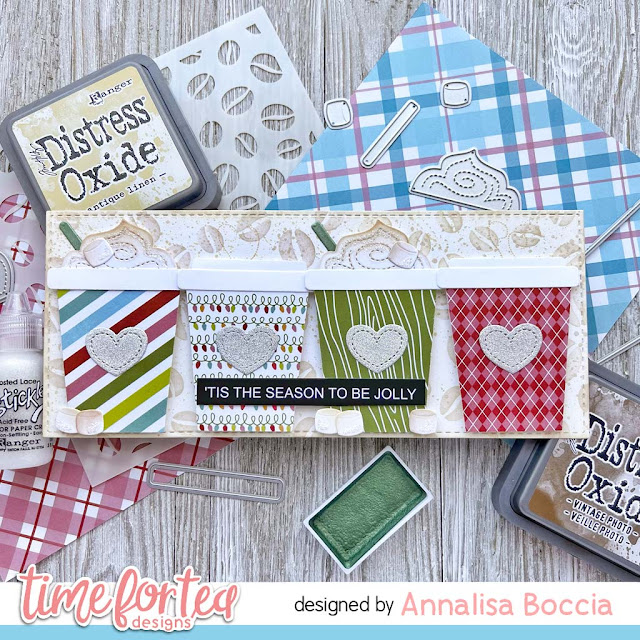
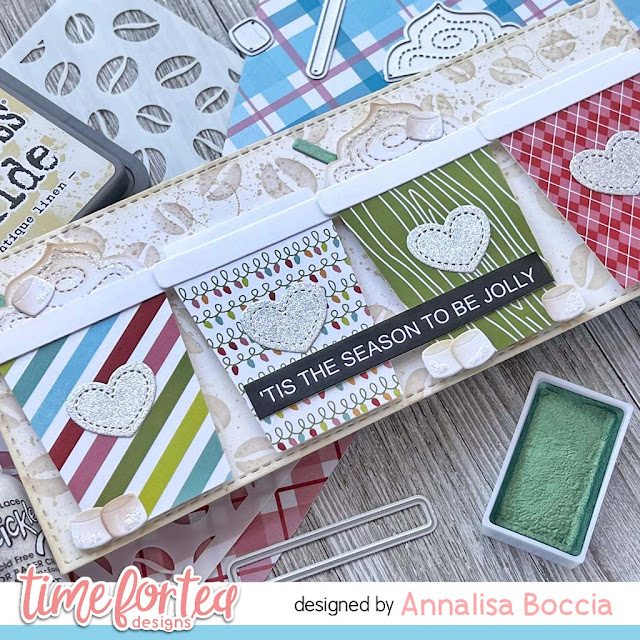
I am sharing a festive coffee card featuring the new Joyful Winter Paper Pad, when I saw these beautiful patterns I knew I needed to make them into coffee cups!

I started by creating the background, I die-cut a slimline base using the Slimline Scalloped Trio Circle Nesting Dies and then used the Coffee Beans 6 x6" Stencil to which I added Antique Linen, Vintage Photo and Ground Espresso Distress Oxides using my Beautiful Blender Brushes. I filled in the white areas by blending lightly with my blender brush and some of the leftover Antique Linen left on my blender brush. I added some splatter of Antique Linen Distress Oxide with a paintbrush. Once the panel was dry, I added it to an 8.5 x 3.5-inch card base.

I started creating the cups by cutting the patterned paper using the Takeout Coffee Cup Dies for the cup base. I then cut out the cup toppers. marshmallows and whip cream with white cardstock, I ink blended on a little Antique Linen onto the whipped cream and marshmallows to add some yummy colour! I die cut the hearts using the silver glitter card stock from my scraps.

I used some shimmery green watercolour to paint the straw once it had been die-cut. I glued the cup elements together using liquid glue and then added double-sided foam tape to the back of each of them.


I attached the cups side-by-side, to the coffee stencilled panel. I then used a combination of liquid glue and foam tape to adhere to the marshmallows and straws. To finish off the card, I added some Stickles to the marshmallows and whipped cream.  


Thank you so much for reading my blog post, you can use my discount code T4TANNALISA10 when you visit the Time For Tea Designs shop to get 10% off your order.
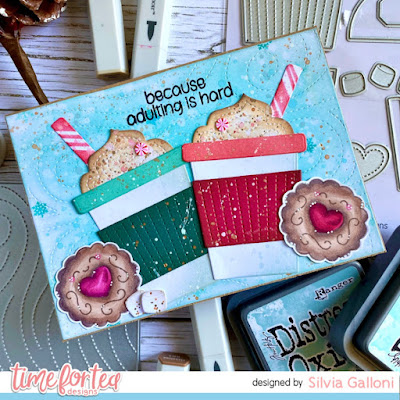
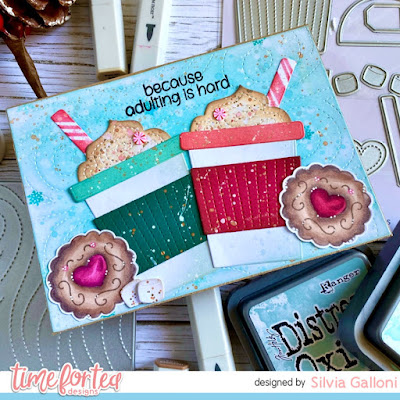
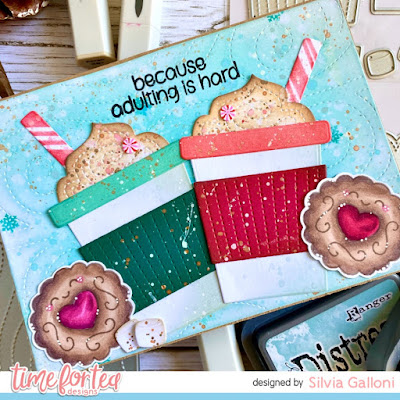
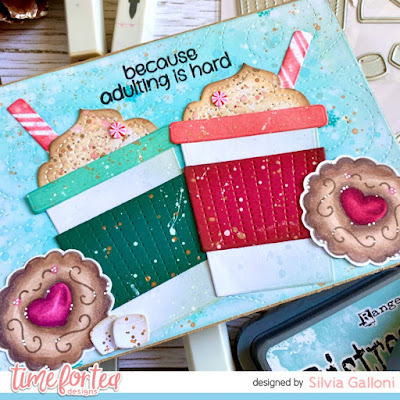
Because adulting is hard

 Hello crafty friends and welcome back to Time for Tea blog!

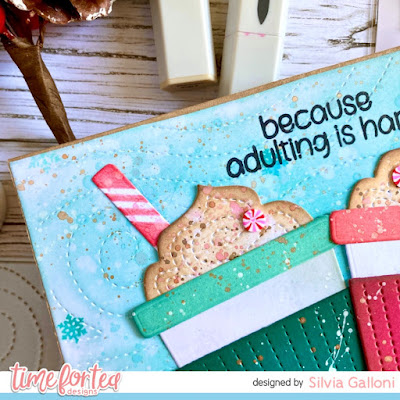
You know, I’m a hot cocoa lover on chilly days and I this sentiment from the “Coffee Lover" stamp set is so perfect for chocolate too.

I started my card die cutting a white panel with the “Snow Flurry Cover die" and I ink blended it with salvaged patina and tumbled glass Distress Oxide inks, I splattered with clean water and speckled egg, picket fence and antique bronze Distress paint. I also stamped some snowflakes from the “Stop Dachshund around" stamp set with peacock feathers Distress Oxide ink.

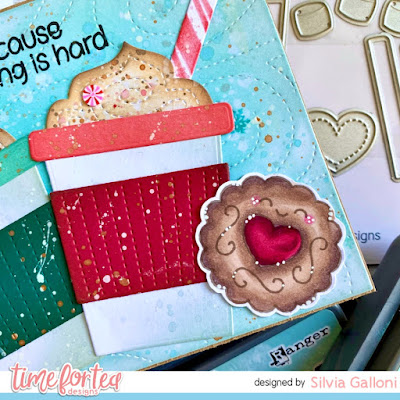
I then die cut all the pieces of the “Takeout Coffee Cup" die set from white and colored cardstock and I glued all of them together.

I stamped some images from the “Tearrific Pals" stamp set with brown ink, I colored them with alcohol markers and I cut them with coordinating dies.

I put everything together and that’s all.


I hope you’ll enjoy this card. 

Thank you so much for passing by today and see you next week.

Don’t forget you can get a 10% off your Time for Tea order with the code T4TSILVIA10.

I wish you a very merry Christmas full of joy and love! Big hugs, Silvia.

Saturday, 18 December 2021

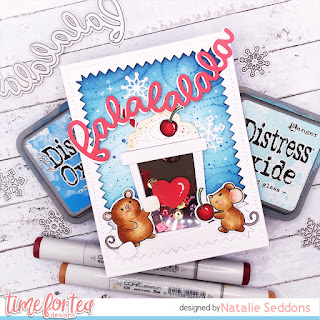
Falalalala Coffee Shaker Card


Happy Saturday everyone, I have been so excited to make a shaker card with the new Take Out Coffee Cup Dies. It was really easy to do too but you never know maybe one day Jo will do an add on set for us 😉
The rest of the card was pretty simple to do so to avoid a lengthy blog post I'll let you know how I made the shaker part. I began by cutting out the cup part out of 360 gsm white card twice, once out of brown paper and then again from white fun foam. I adhered the brown paper onto one and then on the second one I needed to cut out a window for the shaker. So using a ruler I measured 5 mm from the edge all around using dots to guide me then just joined them up using the ruler so it was all nice and straight. 
Then using the line as a guide I cut out the inside using my craft knife you want to make sure your blade is nice and sharp to get a clean cut, I used this then as a guide to cut out the middle of the fun foam and adhered them together with a piece of acetate sandwiched between them. 
I found it was easier to add the sequins into this part and adhering the brown paper onto the back. I used a mix of chocolate, gold and burgundy sequins as I was thinking about the Costa Coffee Black Forest Hot Chocolate when I was making this one. If i did it again though I feel like a pop of cream would have been great in there too!
Once this part was put together I added the rim of the cup in the same white card and cut out the cream for the top adding a little colour with some brown Distress Inks. I also cut the cream out of fun foam too so that it sat at the same height as the cup. I finished it up with a cherry and a heart die for a little extra detail. 
I just love how this one turned out and again I got to mix sets old and new which you know I love, Time for Tea stamps just work so well together which is what I love about them, it means you can still keep using your old favourites but adding a new twist with new designs!
For the rest of the card I used the Baked with more Love stamps, Hello Cupcake Stamps, Zig Zag Frame and Tag Dies, Falalala Scalloped Slimline Dies, Slimline Hillside Scene Dies  and the new Snow Flurry Cover Plate Die. I told you I liked to mix and match my sets didn't I 😂
I hope you like my card for today if you want to purchase any of the items in the Time for Tea Shop you can get 10% off your orders using code T4TNATALIE10 . Happy crafting and have a great weekend!


Wednesday, 15 December 2021

Take Out Coffee Cup

 Hello!

Today I'm sharing a card I created using the Take Out Coffee Cup dies, the Coffee Sentiment die and the Simple Stripes stencil.


I chose some favourite colour inks - not your usual coffee colours but I love them - and inked up a plaid pattern using the Simple Stripes stencil.


I then used the Take Out Coffee Cup die placed in the middle of the stencilled card to cut the coffee cup and used the rest as a border mat. I inked up pieces of card in the lighter pink and orange to complete the top of the coffee cup and the frosting.


I finished off my card by inking up a piece of card in the darkest colour and die cutting the heart from the Take Out Coffee Cup set and the sentiment from the Coffee Sentiment die.

I hope you like my card using the awesome products from the November release. If you'd like to purchase any items from T4TD you can get 10% off by using my code - T4TJANE10.

Thanks for looking today. 
Stay safe and keep crafting!

Jane
x

Friday, 3 December 2021

Wishing You Holiday Cheer


Happy December everyone! DT Annalisa here sharing a card wishing you holiday cheer! To create this card, I used the Takeout Coffee Cup Dies and the Tiled Wall 6 x6" Stencil. This die set was made for me as I am such a huge fan of coffee so, during December, I will be sharing not one but three cards using this die set!


I started creating my background using my Beautiful Blender Brush to apply Hickory Smoke Distress Oxide ink to the tiled wall stencil on a white card stock panel that I die cut with a stitched die. I added what remained on the brush down in between the tiles so that the grout didn't look so stark white in comparison to the tiles. Next, I added some white pigment ink on top of a snowfall stencil using a blender brush. Once the ink was dry, I also applied some Wendy Vecchi embossing paste using a spatula. 


For the coffee cups and hearts on the cups, I used the Let it Shine patterned paper from Lawn Fawn - don't worry, I will be sharing two cards using the new T4T beautiful papers! For the cup sleeves, I die-cut some Neenah Desert Storm kraft card stock and added some Vintage Photo Distress Oxide to the sides using a blender brush. After die cutting the coffee cup lids out of white card stock, I glued them down to the coffee cup using liquid glue. I also glued down the cup sleeves and hearts.

I added double-sided foam tape to the back of the coffee cups and placed them down on top of the tiled panel. I then used one of the greetings from the Sentiment Cards - Winter Wonderland | Black, to which I added foam tape to adhere it to the panel.


I placed the coffee cup panel on top of some glitter card stock that I die cut using the A2 Layering dies. I placed these on top of an A2 card base to complete the card.

Thank you so much for reading my blog post, you can use T4TANNALISA10 when you visit the Time For Tea Designs shop to get a 10% discount on your order.


Other Posts You Might Like