Pages

Tuesday, 6 May 2025

Lime All Yours


Hey all! Jill (@tinytreasureworkshop) here with today's card! I used the Squeeze the Day stampset to create this citrus filled card! 

To create this card, I first took an A2 white panel and stamped the row of citrus fruits in yellow, orange, and green in an alternating pattern. This will be our background.

Next, I stamped three citrus wedges (I decided to make mine limes) and one circle citrus. I colored them in various shades of green and yellow-green to resemble limes. After coloring and diecutting these out, I placed them on the left side of the panel with foam tape for dimension. I stamped the sentiment with white embossing powder on a black cardstock for contrast. This is my favorite way to show sentiments (if you can't tell already!)

Lastly I added some dots of yellow and green on the left for some added interest.

Thanks for stopping by!
Jill

Monday, 5 May 2025

Hello Stars


Hi. Design team member 
Koren Wiskman here. I hope that I can inspire you to create something fun with all of these awesome T4T supplies. Today I am using the Time for Tea Designs Let's Chat Stamp Set along with the Stars Stitched Cover Die to create this project. 


The card size is A2 (4.25in x5.5in.) The front panel is cut to 3.25in x 4.75in. This is my favorite size card to create. I have tried so many others but this size is the one that keeps my heart happy. My card bases are typically made using a neutral gray cardstock. These two details about my cards rarely change. 


Background

For this card I grabbed some interesting patterned paper that coordinates colorfully. I took my 3 1/4 by 4 3/4 card panel and placed it onto the T4TD Stars Stitched Cover Die before running it through the die cutting machine. I know my panel is smaller than the die. I love how it cuts off. I find imperfect things incredibly interesting. later, I adhered the different papers behind each star to allow it to be set back from the panel using foam squares. 


Sentiment

Before popping up the patterned paper, I used the T4TD Let's Chat Stamp set to add "hello" and "thank you" to my card panel. I stamped them using waterproof black ink. 


I hope that I've inspired you to create something today. Check out the Let's Chat Stamp Set or the Stars Stitched Cover Die in the T4TD shop


Koren

Sunday, 4 May 2025

Beach Fun!

Hello Tea Timers!

Michelle from the Design Team here. This week, I have been enjoying some glorious sunshine and when I see sun, I always think of the sea, the beach and lots of fun which is today’s card theme!


First, I stamped my images from the Beach Buds and Snappy Before Coffee stamp sets. I coloured them with alcohol markers and added highlights with a white gel pen. 

Using the Square Label Nesting dies, I cut out 4 panels in layering sizes - 2 of the larger one from craft cardstock (this was to create the card base), the middle layer from cream cardstock and the smallest one from white cardstock.


With the small white panel, I ink blended sun rays using Mustard Seed Distress Oxide and splattered gold water colour on top creating the background.

Next, using the Ocean Waves die set, I die cut out a wave from white cardstock and ink blended with Peacock Feathers Distress Oxide and splattered blue metallic water colour.


For the beach section, I die cut out 2 hillsides from white cardstock and ink blended with Brushed Corduroy Distress Oxide and splattered with Ground Espresso Distress Oxide watered down white acrylic paint. 


Once the waves and the beach parts were dry, I took the same Square Label Nesting die that was used on the background scene to die cut the bottom of one of the beach hillsides so that it followed the square label shape. I then I adhered all the layers and images down with liquid glue to create the playful scene.


For the sentiment, this is from the Baked With More Love stamp set. I heat embossed this using white embossing powder on teal coloured card-stock and cut it out using the coordinating die.


As a finishing touch, I added clear glitter glue to the top of the waves, the clouds and the sea shells. 


The crocodiles have to be one of my favourite critters from Time for Tea Designs and I have loved showing them having the best time. You’ll probably see a lot more of them and their adventures in future!


Happy Crafting,

Michelle

Saturday, 3 May 2025

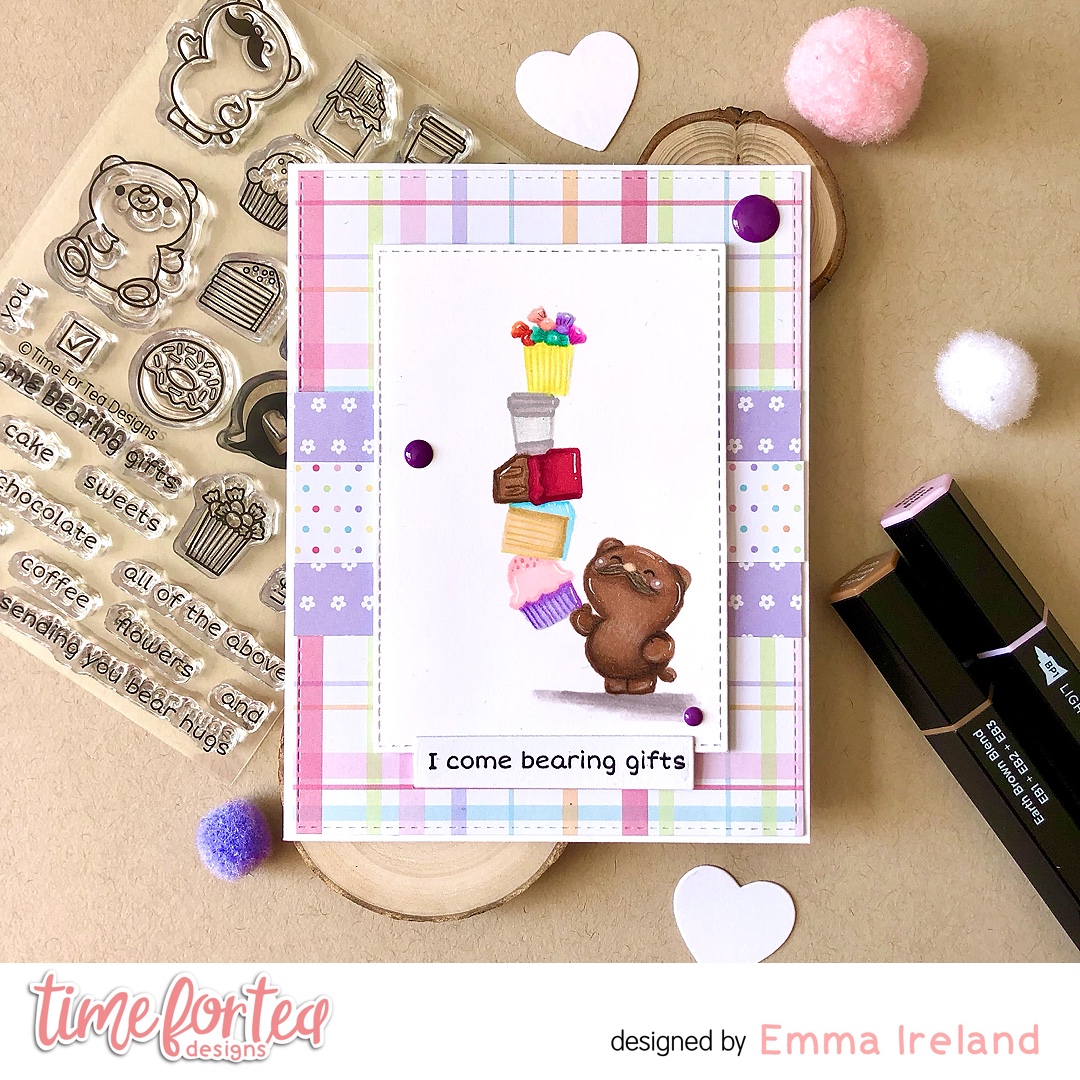
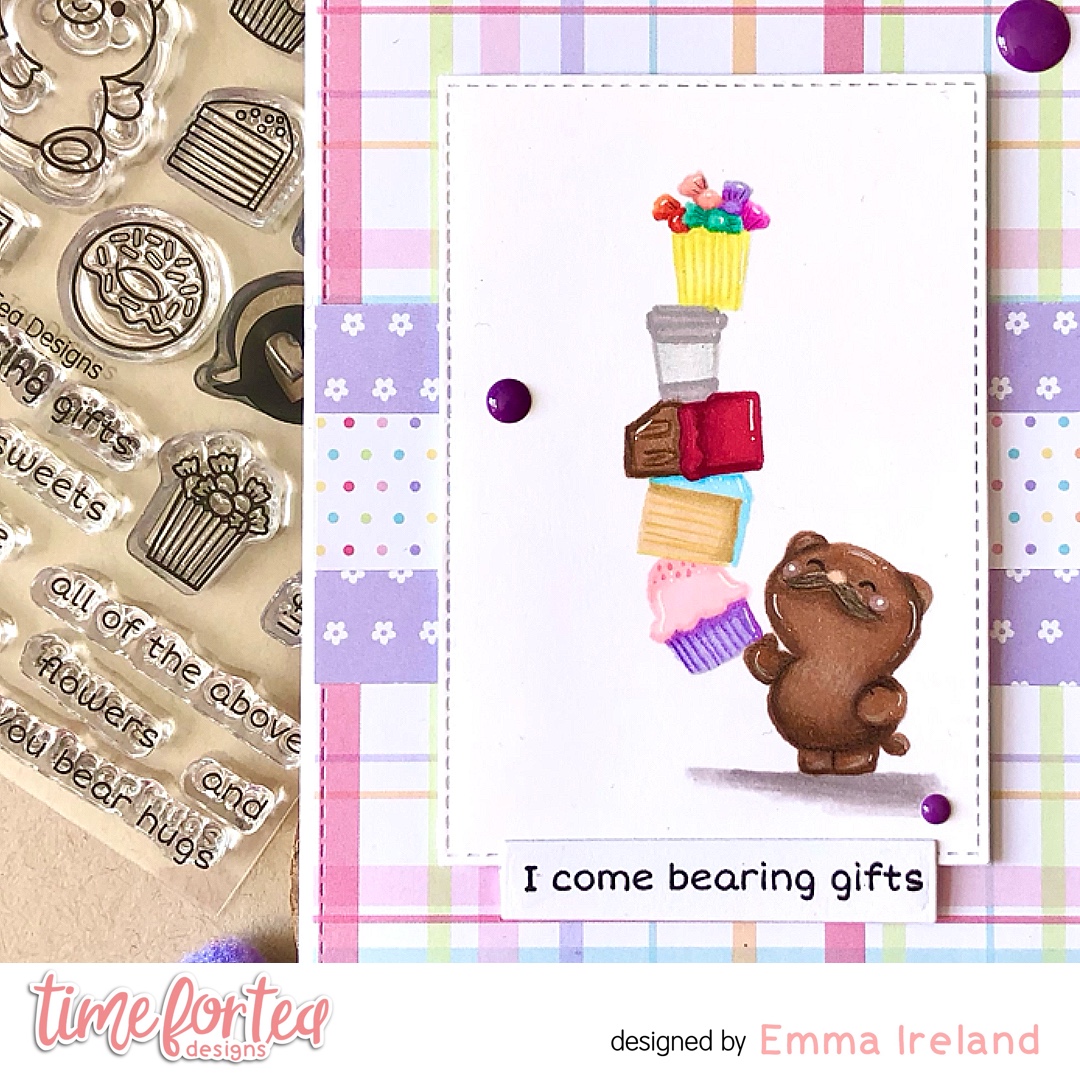
🍭 Sweet Treats! 🍭

Hello Tea Timers! I hope you’re all having a great weekend so far!

Today I’m sharing with you a clean and simple card using a masking method. I’m using the ‘Bearing Gifts‘ stamp set and coordinating dies alongside the ‘Pretty Pastels‘ 6×6 paper pad.

To find ideas for my cards I tend to choose a set and then take a moment to think of how the images would fit together and create a scene. This is how I came up with today’s inspiration.

Making the card:

To create this card I have cut out a piece of Crafters Companion Solar White card stock. I stamped my images with MFT Cement Grey ink, masking off each image as I added a new one to the stack. I then coloured them in with my Spectrum Noir Tri-Blend markers. For the sentiment I have stamped it with Versafine Onyx Black ink and cut it out with my paper trimmer. 

To create the layers I have used 3 sheets from the T4TD ‘Pretty pastels‘ 6×6 paper pad and cut them at differnt sizes. I adhered them with double sided tape, but for my main layer I popped it up on some foam tape.

For a finishing touch I added some T4TD ‘Festive Fun’ enamel dots. 


Thank you for visiting the T4TD blog today. For a 10% discount on your order, use T4TIRELAND10

Hugs, Emma xxx

Friday, 2 May 2025

Thank Ewe Farm Friends


Happy Friday! It's DT Annalisa, and I'm excited to share a spring farm scene I created using the Ewe Are Moovellous and Ewe Are The Best stamp sets from Time For Tea Designs.

To create the sky section, I used Mermaid Lagoon Distress Spray Stain on watercolour paper. For the grass section, I applied Twisted Citron Distress Paint as a base layer. I added the paint to my glass mat, sprayed it with water, and then repeatedly pressed the watercolour paper onto the glass mat, drying it in between each application. To add texture, I included splatters of Mowed Lawn and Rusty Wilderness Distress Watercolour Pencils.


Next, I die-cut the sky and grass sections using the Waves Cover Die. I also die-cut white cardstock with the same die to create a white outer frame. I adhered this frame to a card base using liquid glue. Then, I added the grass and sky sections inside the frame with additional liquid glue.

I stamped several images from the Ewe Are Moovellous, Ewe Are The Best, and Oops a Daisy stamp sets. After colouring them with Copics, I cut them out using their coordinating dies and added white gel pen accents with a Gelly Roll Pen.


Finally, I attached the images to the card base using either liquid glue or double-sided foam tape.

Thank you so much for reading my blog post! Don’t forget to use my discount code T4TANNALISA10 when you shop at Time For Tea Designs to get 10% off your order.


Other Posts You Might Like