Pages

Saturday 30 April 2022

Big Birthday Wishes!


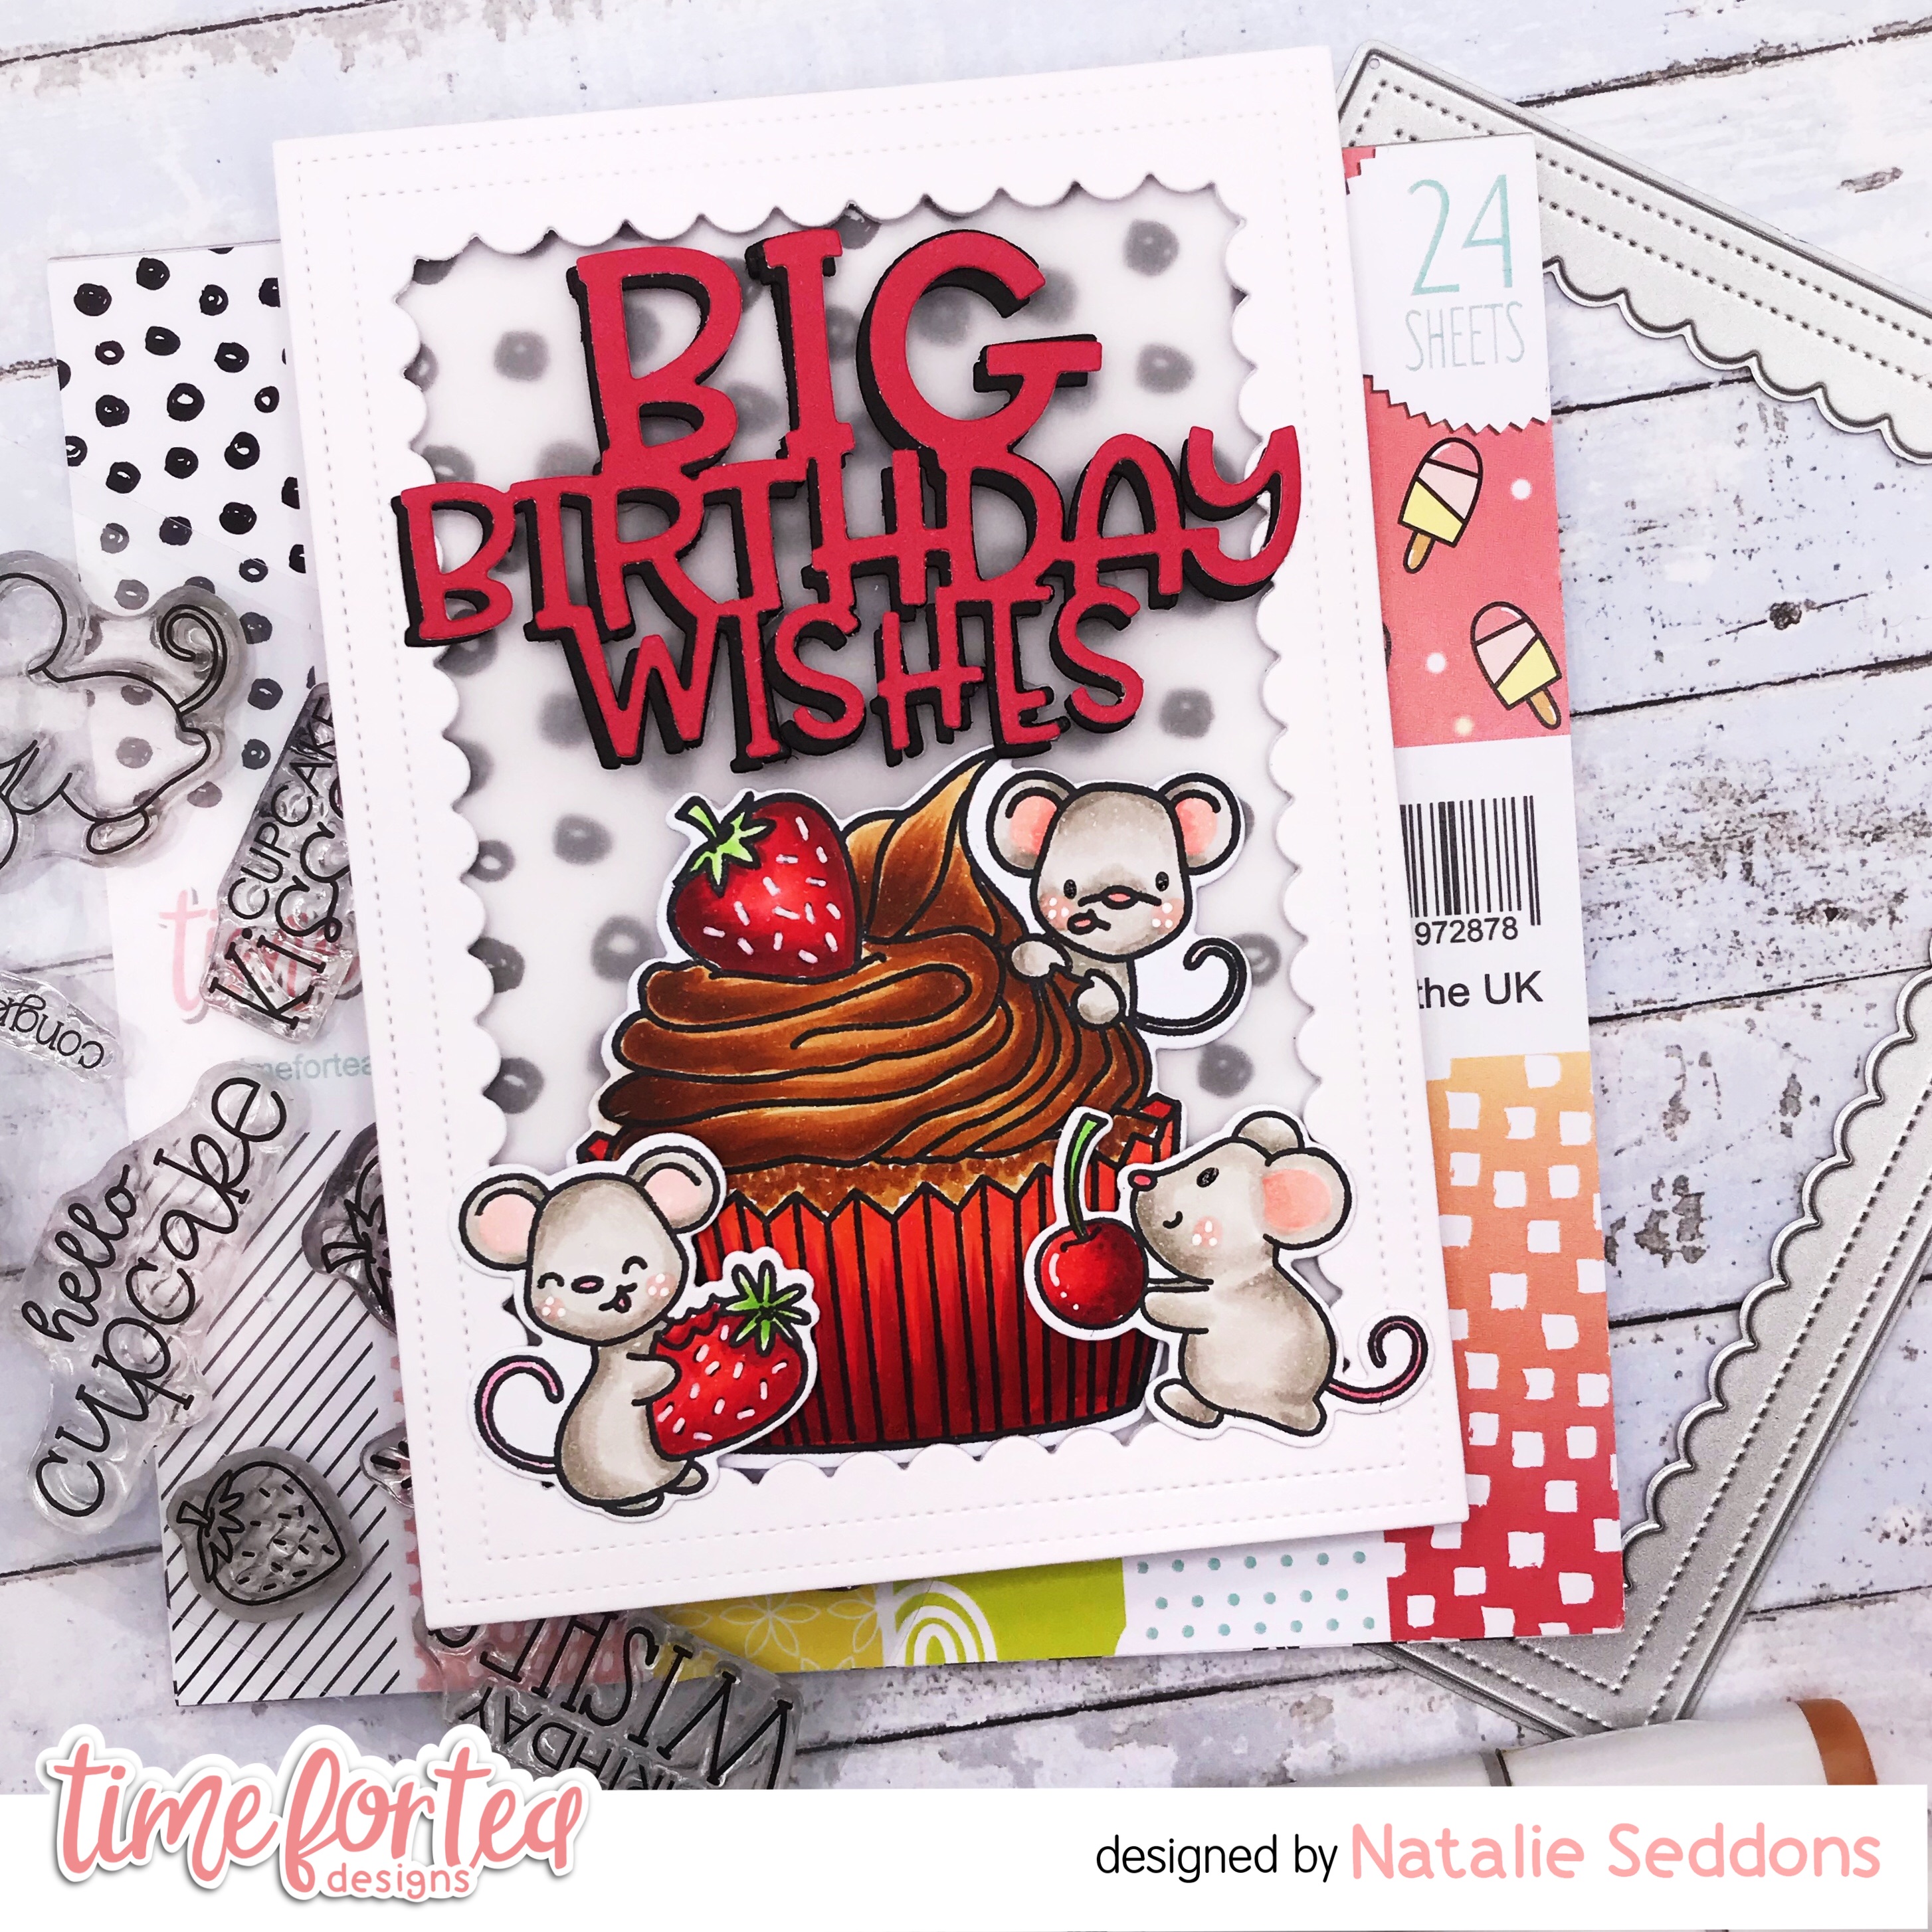
The weekend is finally here again, have you anything nice planned? I’m hoping for a crafty day 🤞 I’ve been trying to build up my Birthday card stash as I can never seem to find one when I need one and the Hello Cupcake Stamp Set with the Big Birthday Wishes Sentiment Die is a perfect combination for this. 

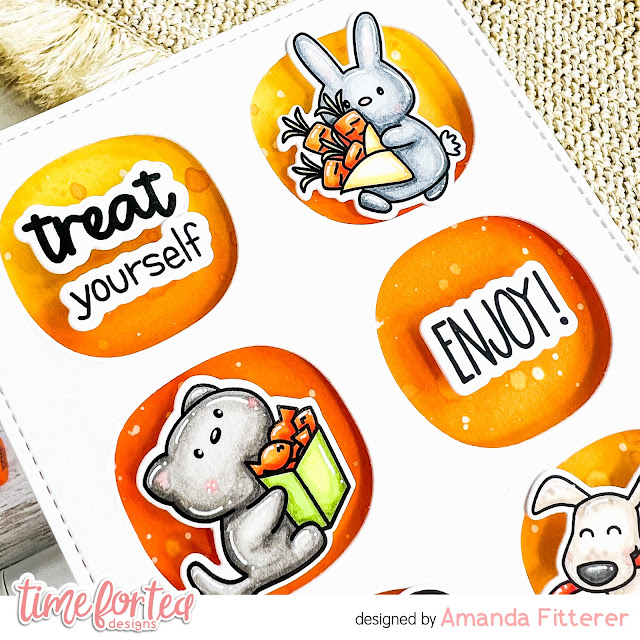
I really wanted to create a rich chocolate cupcake and combined it with red since strawberries are red. Creating an almost monochrome look for my card. I love how mixing up the colours gives a completely different to your card. Here's one I made a couple of months ago with the same set using a range of pink tones.


The pinks make it really sweet and cute where I feel the rich red and brown combined with the monochrome background give it a more sophisticated grown up feel. 
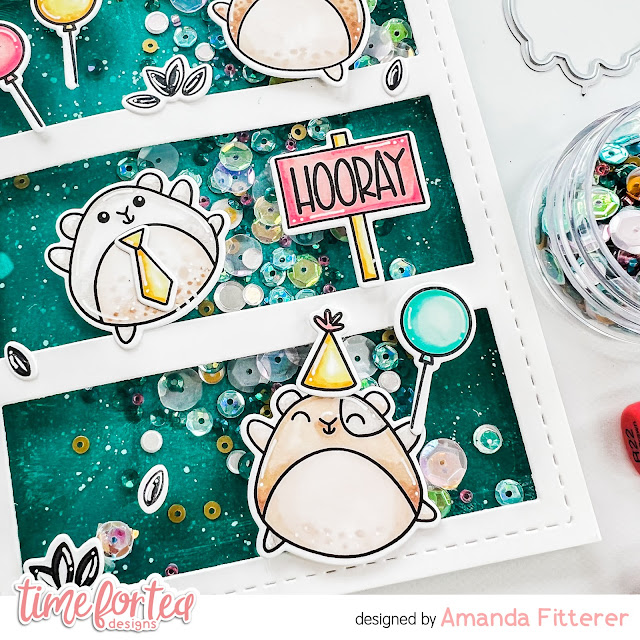
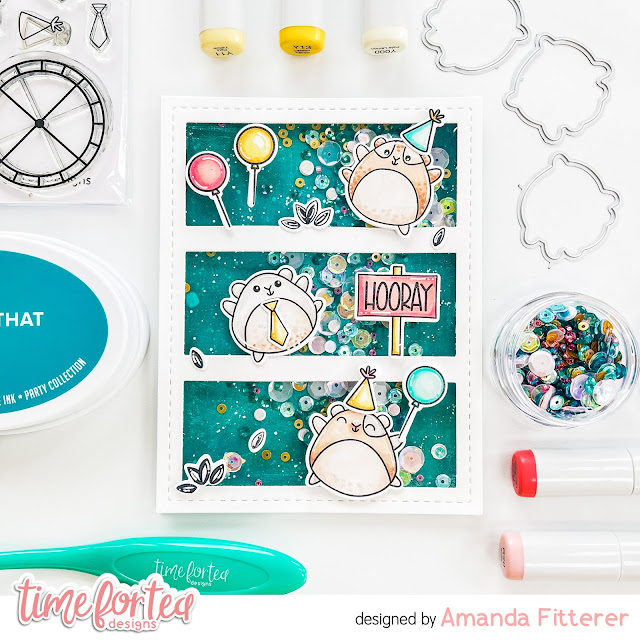
For my latest card I used the Smile Inverted Frame Dies to create a frame for my card and layered the cute polka dot paper from the Sweet Summer 6x6 Paper Pad and layered some Velum over the top to tone it down a little. It's a great technique for adding some interest to the background but toning it down so it isn't quite so busy. 
Once the background was layered up I just popped on the rest of the images. For the Big Birthday Wishes Sentiment I layered red card over the top of the black for a little added interest. 
I love how my card turned out and my Birthday card stash is slowly coming together. This one is such a quick and easy card to make and you could easily mix up the colours for a whole different look. 
If you want to purchase any of the items you can find them in the Time for Tea Shop and get 10% off your order using code T4TNATALIE10 
Thanks for reading and have a lovely weekend!


Friday 29 April 2022

Sending You Love Snails


Happy Friday! DT Annalisa here sharing a card featuring the You’ve Got Mail clear stamp set and the coordinating dies. These snails are so fun to colour!

To start, I ink blended Distress Oxides (Victorian Velvet, Shaded Lilac, Salty Ocean and Cracked Pistachio) onto Distress White Heavy cardstock by Ranger with the Beautiful Rainbow Blender Brushes. I die-cut this panel with the Snow Flurry Cover Die and added white splatter to add inter


I die cut the fence from the Windmill Add On and lightly ink blended on some Weathered Wood Distress Oxide. I used liquid glue to stick this down to the ink-blended panel. I placed this onto a card base using liquid glue.

I stamped, coloured and die cut the snails from 'You've Got Mail.' I did the same with the clouds (Paper Plane Pals), butterfly (Be Slothy) and moon (Hillside Village). I used liquid glue to adhere the moon, clouds and butterfly to the panel. 


I used the larger frame in the Smile Inverted Scallop Frame Dies to die-cut some heavy white cardstock added foam tape to the back and stuck it to the panel. 

To complete the card, I added foam tape to the back of the snails and the sentiments and stuck them down.


Thank you so much for reading my blog post, you can use my discount code T4TANNALISA10 when you visit the Time For Tea Designs shop to get 10% off your order.

I hope you get some time to get inky and creative this weekend and that it makes you as happy as it does me!


Thursday 28 April 2022

Shaker Card with Hooray Hamsters


Hey, crafty friend! Are you ready for a shaker card today??  Me too!  
This card is super fun to make and super fun to shake!
I used a piece of A2 white cardstock and blended the background with All that Jazz ink.  Then, I used the darker Uptown ink around the edges to create some depth.  I spritzed the background with water and splattered a bit of white paint on it as well.  

I die cut my frame and placed a piece of clear acetate behind it.  Then, I added some deep foam tape around the edges.  This tape will hold my shakers inside the card.  I placed my sequins on my ink blended background, directly into the center.  Then, I placed my frame on top, being careful to avoid the sequins getting trapped under my foam tape.

I stamped my cute images from the Hooray Hamsters stamp set, colored them with Copic markers, and then die cut them out with the coordinating dies.  Then, I simply attached them to the front of the card with liquid glue and 3D foam squares.


That's it for me this week, friends!  I hope you loved this happy shaker card and it inspires you to make something fun today!

Don't forget, you can use code T4TAMANDA10 to get 10% off your purchase!
Until next week.... Xx, Amanda 

Wednesday 27 April 2022

We knew you could do it....!!

Hey T4T friends...

DT Ashlee here with you today and I've got some inspiration to share using these fabulous T4T products...

- Hooray Hamsters / co-ordinating dies

- Hooray sentiment and cover plate die 


To create this card I started with a base of white cardstock that was die cut from the cover plate then using Distress oxide inks in the shades Squeezed lemonade, Mustard seed and Twisted citron created a nice blend of colour...

Using opaque white paint mixed with a little water I added some splatters!!

Using another piece of white cardstock and the same Distress oxide inks I did another blend but then used that piece to die cut the HOORAY sentiment. I also die cut the sentiment from a piece of black foam so I could adhere it slightly off centre creating a shadow and dimension to the word. 


It was then time to colour up all the hamsters from the Hooray hamster set and die cut them with the co-ordinating dies...

I  added little party hats, popped them all up with foam tape and adhered to the card base!!

The card was then complete with a heat embossed sub sentiment using WOW! Opaque bright white embossing powder on black cardstock and of course a touch of sequins for bling...

Thankyou for stopping by and checking out my card, I hope you enjoyed it and it inspired you to get crafty!! Happy crafting, hugs Ashlee.


Want to grab some of these T4T products for yourself, here's a discount code for the Time for tea store 
- T4TASHLEE10 - 

Monday 25 April 2022

Build A Tree in Minutes!

Good Morning Everyone and Happy Monday! Today I am excited to share the plush tree I created using just two die sets. The tree only takes a couple minutes to cut out and assemble.


I used the Autumn Scene Cover Plate Die set and the Landscape Edge Standalone Die set. I first cut out the trunk from the cover plate and blended it with Gathered Twigs and Walnut Stain distress oxides. I took a rectangle die and cut it out 3 times. I used the curvy grass die from the Landscape set and started cutting out corners of the cards in various sizes. I then blended it with Pine Needles and Evergreen Bough distress oxides. I splattered it with some water on a paint brush to give it some dimension. 

I adhered the largest corner piece first onto the card. I then glued the tree trunk and the remaining corner pieces on top of the trunk to complete the tree. The tree trunk did not reach the bottom of the card and so I cut out a grass using the other die in the Landscape set and blended it with Rustic Wilderness and Mowed Lawn.


I then stamped out the image from the Up, Up & Away Stamp set and cut it out using the Coordinating Die set. I used the following Copic Markers to color the image: C1, C2, C3, C4. E50, E51 E53, E55, BG10, BG11, BG13, BG15, RV10, RV11, RV13, RV14.


Before adhering the image, I stamped the sentiment directly onto the card. I then used foam tape to add the image.

I hope you enjoyed this blog post and will recreate the tree in future projects. Thank you for joining me today and don't forget to use the code T4TRANDY10 to save on your next purchase in the shop! 


Sunday 24 April 2022

Sending you Happy Mail

 Good afternoon Teatimers,

Today I thought I'd share this rather sunny happy card with you featuring the super smiley You Got Mail Stamp and Die set. These adorable snails delivering their happy Mail will certainly bring a smile to anyones face!😊

To start I stamped and coloured my images using my Ohuhu Markers in the following colours (listed in order of lightest to darkest)

Snails - YG040, YG080, E300

Purple - VO20, V040, V160

Green - GY1, GY2, G190

Red - R1, R4, R8

Brown - E300, E310, BR1

Grey - CG020, CG050

To create my background I die cut a piece of white card using the A2 Layering Dies  and using the Slimline Scene Builder Stencil and Salty Ocean distress ink created a cloudy background. I then took a Sunray Stencil with Squeezed Lemonade distress ink to add the sun.

I die cut 2 pieces of grass using the Landscape Edge Dies and added colour with Twisted Citron and Mowed Lawn distress inks. I added the curved section flat to the background panel and straight section with foam pads for dimension.

I created my scene with the stamped critters sticking some flat with glue and others raised on foam pads. 

I stamped the 'sending you' and 'mail' sentiments directly onto the card and die cut the 'Happy' from the Happy Mail Add On Die Set three time from white card and once from black and added this between the stamped sentiments.

Thank you for joining me here on the blog today, I hope I have inspired you with my card. You can use my code T4TLYNDSEY10 for 10% off your order in store.

Enjoy the rest of your weekend

 Lyndsey x

Friday 22 April 2022

Sweet Slimline Scene

 
Happy Friday! Today, I am sharing a fun seaside slimline scene that features the adorable Sweet Village Clear Stamp Set and Stitched Slimline Slopes Dies from Time For Tea Designs. I also used the Café Critters and their coordinating dies as I wanted these critter friends to enjoy some coffee beverages during their day at the sea. Who wouldn't want to enjoy an iced coffee in the ocean or an ice cream cone on the beach?

I used the Stitched Slimline Slope dies to trim some white cardstock. I then ink blended the inner pieces separately using Distress Oxides with my Beautiful Rainbow Blender BrushesThe colours were as follows: Salvaged Patina and Tumbled Glass(sky), Twisted Citron and Mowed Lawn (lawn area); Antique Linen, Fossilized Amber and Rusty Hinge (sand); Salty Ocean, Prize Ribbon and Peacock Feathers (ocean). For the splatter on the different sections, I used Salty Ocean (sky), Rustic Wilderness (grass), Vintage Photo (sand) and water (ocean).

I used liquid glue to adhere the white outline to a 3.5 by 8.5-inch card base, followed by the coloured inserts. I used a small stitched die from my stash to add little waves and hills to the water and sand.


Next, I stamped and coloured the houses, critters and accessories with my Copics. Once they were die-cut, I added some white accents and glued them down to the scene.

I stamped the bird trio from the Paper Plane Pals set and die-cut them out with the coordinating dies. To finish the card, I stamped the sentiment from the Cool Critters Clear Stamp Set and die-cut it out using the coordinating die.


Thank you so much for reading my blog post, you can use my discount code T4TANNALISA10 when you visit the Time For Tea Designs shop to get 10% off your order.

Thursday 21 April 2022

Treat Yourself Cuties


Well hey there, Tea Timer! It's Amanda back with a fun Enjoy the Little Things card!

To make this bright and cheery card, I blended a piece of white A2 sized cardstock with Limoncello and Glitz inks.


 Then, I stamped out my cuties from the Enjoy the Little Things stamp set and colored them with Copic markers.  I, then, cut them with out with their coordinating dies.


Then, I adhered a white frame on top of the blended background using 3D foam tape.  I placed my stamped images and sentiments in the frames using 3D foam squares.

Here are a few more close-up photos of the finished card!
That's it for me today, friends!  I hope you loved this card!
Don't forget, you can use code T4TAMANDA10 to get 10% off your purchase!
Until next week.... Xx, Amanda 


Wednesday 20 April 2022

VIDEO: Lucky Duck Mother's Day Display Card

Hi, Friends! Lauren here and I'm back with a new video tutorial on YouTube! This month I am sharing a sweet scene using the fabulous Die-namic Display Card Dies. I just love how this die makes scene building with perspective and dimension easy!

While Mother's Day has already passed this year for the UK, it is coming up in May for those in the US and I wanted to use the super cute sentiments from the Lucky Ducks stamp set. Especially since they have their own die cuts! Plus, those cute little ducks are just so adorable... Don't you agree?

There are lots of fun details using other dies (Windmill Add On Die Set and Landscape Edge Standalone Die Set) but I think my flying bee with acetate is my favorite part of the card!

Click the image below to start the video and make sure to leave a comment if you have any questions!


Here is a quick list of the Time For Tea Designs supplies I used and make sure to enter my code T4TLAUREN10 at checkout for 10% off your order!

Lucky Ducks Clear Stamp Set

Lucky Ducks Coordinating Die Set

Windmill Add On Die Set

Landscape Edge Standalone Die Set

Die-namic Display Card Dies

Thanks for joining me today and see you next month!

XO. Lauren

Find me on my social media here!

Happy mail...

 Hi friends...

It's Ashlee here with my first post as part of the T4T design team and I am super duper excited to start sharing my creations with you all!!

For today's card I made a gift card holder using the Happy mail gift card holder and add on's...

I am absolutely loving these die sets, so much fun and so many different ways that they can be made!!


To create this one I started by folding a piece of white cardstock in half and then placing the largest portion of the mail box die slightly over the edge before running through my die machine to create the mail box card base. I then die cut the same part of the mail box from black cardstock and adhered over the front of the folded panel. This completed the base part of my card ready to decorate!


Now it was time to ink blend some distress oxide inks to create a cardstock panel that I could use to die cut layers of my mail box...

I inked up the piece of cardstock using Twisted citron,  Salty Ocean and Mermaid lagoon. Once the inking was complete I used a black from my Gansai Tambi paint palette mixed with a little water to add some splatters!!

Yippee time for the die cutting/mailbox building to start....

This set is so easy to put together, the mail box door opens and you can pop in a gift card or I thought you could even pop in some cash for a birthday gift!!


It was so fun to die cut all the add on pieces and elements to fill my mail box....
Hehe how cute is the little face!!

I hope you have enjoyed my first post as part of the team, I will be back next week with some more inspiration for you!!

Happy crafting, hugs Ashlee. 


P.S If you want to do some shopping at the T4T store here is a code for you to get a discount off your order
T4TASHLEE10

Monday 18 April 2022

Baked with Love - Mini Slimline Card

 Hi everyone, I am super excited to be a part of the Time for Tea Design Team. I have been a fan of the sets for so long and it is such a dream come true to design for this amazing brand.

Today I am working with the Baked with Love Stamp and Die sets. The additional materials that I used was a mini slimline die, brick stencil and Distress Oxides for ink blending.

I first stamped out all the images and used the following Copic colors for the images:

  • Mice: C0, C1, C4, C5, C6
  • Cheese: Y11, Y13, Y15
  • Platter and bowl: BG11, BG13, BG15
  • Spatula and Whisk RV11, RV13, RV15


I then die cut the images using the coordinating dies and set them to the side. For my background, I cut out a mini slimline cardbase from cardstock. I had a brick stencil in my stash and a blended Tattered Rose, Saltwater Taffy and Worn Lipstick.

I then stamped the two sentiments directly onto the card. To finish off the card, I assembled the images using adhesive and foam tape.


Thank you so much for joining me today with my blog post. Don't forget to use the code T4TRANDY10 to save on your next purchase in the store. Have an amazing day!

Sunday 17 April 2022

You're awesome!

 Good afternoon Teatimers 

Happy Easter to you all, I figured you'd probably seen enough Easter Cards over the past week so today I want to share this cute little spring themed card with you using the adorable Lucky Ducks stamp set.  We all know the saying about  "April showers" and these pair look like they're having a ball splashing about in the rain.

To start I coloured my images using my Spectrum Noir Markers (colours listed below in order of lightest to darkest)

Ducks - BG1, BG3, BG5 

Yellow - CT1, CT3,CT4, GB5 

Red - CR11, DR4, DR5 

Brown - EB3, EB8 

Green - LG2, LG3, LG5 

Blue - TB1, TB2, TB3, TB4 

To create my background I die cut a piece of white card using the 2nd largest die from the A2 Layering Dies and covered with distress inks in Salty Ocean and Blueprint sketch. I then took the Scattered Raindrops Stencil and used the same colours to add the pattern.

I die cut clouds and grass from white card using the Landscape Edge Dies and added colour to the grass with distress inks in Twisted Citron and Mowed Lawn.

I arranged the ducks on the pond from the Skating By Penguins set to look like they were having fun splashing around in a puddle.

I die cut the 'Friend' from the Slimline Nesting Dies set 3 times from white card and once from black to give dimension, stamping the test of the sentiment straight onto the panel.

The whole panel was matted to a black piece of card die cut using the largest die from the A2 Layering Dies and added to a 6x6 card blank cut down to size. I finished off with a few clear drops scattered across the card.

Thank you for joining me here on the blog today, you can use my code T4TLYNDSEY10 for 10% off your order in store.

Enjoy the rest of your Bank Holiday weekend 

Lyndsey x

Saturday 16 April 2022

You are so Sweet!


 Happy Saturday everyone, it’s DT member Natalie here. Have you got anything planned for the bank holiday weekend? I’m so excited to have three whole days off, it doesn’t happen very often so I’ll definitely be making the most of it 🥰 
It only seemed fitting for a sunny day to have a fun ice cream card. I used the Sundae Sweeties stamp set to create my card and combined it with the Geometric Snowflakes dies to create like an ice cream cone background. Then using the A2 stitched Hearts Cover plate die to create a blank space for my kitty so it didn’t get lost in the busy background. 
For the dripping ice cream I cut out a rectangle the same size as the background. Then using the 6 x 6 Splish Splash Stencil I lined up on the corner and drew and outline to create my shape. I didn’t want the drips to rip so I inked it up first using distress oxides and layered the confetti stencil over the top. Once that was finished I cut it out and layered it onto my card. 
I had to finish up my card with some white gelly roll stars and some sprinkles on the ice cream. 
It’s such a fun card and I love how it turned out. You can find all the products in the Time for Tea shop and get 10% off using code T4TNATALIE10 ❤️ 

Friday 15 April 2022

Hoppy Easter


Happy Friday, DT Annalisa here. Easter is upon us as I share this cute bunny card using several supplies from Time For Tea Designs.

To start, I cut some of the Sweet Summer 6x6' Paper Pad down to 6 by 4 1/4 and glued this down to a card base of the same size. I die-cut out the letters 'Hoppy Easter' using Anthony's Alpha Dies from some white card stock twice. I glued the letters together with liquid glue to add some dimension.


I die-cut and assembled the bunny holding the carrot using white, orange and two different colours of green cardstock. I added some white gelly pen accents and set the bunny aside.

I cut some cardstock to 3 5/8 by 2 3/4 inches and ink blended on some Salvaged Patina Distress Oxide using my teal Beautiful Blender Brush. I then glued the small scalloped frame from Smile Inverted Scallop Frame Dies to this teal panel. I added some foam tape to the back and adhered it to the card base.


I then glued the bunny and letters to the card. To finish the card, I die cut some hearts, glued them on and added some Lawn Fawn Prisma Glitter to add some shine.


Thank you so much for reading my blog post, you can use my discount code T4TANNALISA10 when you visit the Time For Tea Designs shop to get 10% off your order.


Thursday 14 April 2022

Ridiculously Proud of You - Rainbow Blended Background

  Well hey there, Tea Timer! It's Amanda back with the second card using the rainbow background I made in my last post.

To make this card, I die cut the Scattered Hearts Cover Plate on a piece of white cardstock.  Once cut, I grabbed another piece of white cardstock and placed it underneath my die cut piece.  Then, I blended a rainbow with Maker Forte Flamingo, Yellowstone, and Neon Lights inks.  This gives me TWO backgrounds at once!  

For my sweet pup, I used Enjoy the Little Things stamp set. I colored him with Copic markers and then die cut him with the coordinating dies. I propped him up with 3D foam squares and put him on a piece of round vellum.
For my sentiment, I grabbed my Brighter Days Sentiment Cards and trimmed out the "just so ridiculously proud of you" sentiment.
For the finishing touch, I added some rainbow colored gems!

The next step is was to attach my background to a black card base using liquid glue.
Don't forget, you can use code T4TAMANDA10 to get 10% off your purchase! 

Wednesday 13 April 2022

Circle Easter Card Video Tutorial

 Hi DT Vic here today and I have a fun Easter card video tutorial. 


I wanted to make a circle card and also build up a little scene on my card. 


For my card I have used mostly dies and the only stamp I used was the greeting that said Hoppy. I love using dies and I wanted to create a card using mostly dies because we sometimes forget what dies we have and its fun to get all our dies out and make a cute card.

Products Used:
                                                  Carolling Critters Clear Stamp Set 

 Puffy Alphabet Stickers


In my video I will take you through each step and also show you how I made the circle card blanks with a little tip to stop them rocking from side to side. 


Don't forget you can save 10% off your purchases using the code: T4TVICKI10 at checkout. 

I hope you have a great Easter!!


Vic 

New Memory Keeping Live - New Product Reveal and Flip Through

 We have a NEW video memory keeping video on our YouTube Channel today showing lots of fabulous NEW products that are now in store for your photo albums and scrapbooks.

I also do a flip through of my completed album pages for the month of February. This was a tough month for us but I'm so glad I got to document it and have those stories & pictures to look back on in the future.


I used a combination of my stamps, journaling cards and sentiment cards to embellish my photos and create my title card for the month. I picked colours from my photos to create a colour palette for my embellishments that help pull the whole layout together.


I love adding extra photos in between my pocket pages for special moments.


I backed the thank you card for baby Henry onto some clear acetate. This allows me to punch holes without damaging the original card. It also protects the reverse of the card too. Alternatively you could laminate this & cut slightly larger along the punched edge.


I also really enjoy adding flip ups to add extra photos and to conceal journaling. I just use some scraps of paper to create my hinge & then cover the mechanism with a journal card or photo.


The spreads in my album that focus on Clyde passing away were really special to me and I wanted to spend time recording this story in a different way.


Again I pulled colours from the photos for my embellishments, but kept them minimal as I didn't want to take away from the pictures themselves.


This half circle piece was created on my PC as a template. I typed out the poem 'The Last Battle' and then printed on velum.


Underneath the velum is this photo of me holding Clyde's paw while at the vets. I wanted to hide this under the soft velum as it still makes me so sad. I really am pleased with the final piece.


On the reverse of the half circle I placed this picture of a beautiful rainbow on a miserable day. This seemed an appropriate photo as we often talk about meeting our furry companions over the rainbow bridge one day.


Opposite the circle I printed a large photo of Clyde and I having a very typical cuddle. I love this photo. I used it to conceal some journaling of a personal message to Clyde. I used my craft knife to cut along the edge of my arm. I then added my tape runner adhesive to the back of the image but left a strip big enough for the journaling card I created, to slide in and out of the opening easily.


On the reverse of my large photo, I added several small square photos, 3 of which had flip ups with journaling on the back.


Again I kept embellishments to a minimum, simply using some tabs, patterned papers and a paw print stamp.


Our pocket pages also allow you to slot in other items of ephemera or journaling, which I did with the receipts from the vets.


Instagram is a great way of document how you feel in the moment. After Clyde passed away I posted on social media how I was feeling and I used these posts as the basis of some journaling under a filler card that I designed myself. The sentiment on the card is from Dickens and is so true.


I hope that you enjoyed this closer look at my February Album. You can see the video flip through as part of a Live video over on YouTube. The link is below.
All of the products used are from our Memory Keeping Collection.


Other Posts You Might Like