Pages

Friday 31 December 2021

Yappy New Year


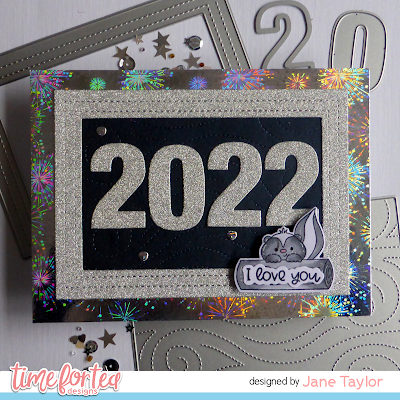
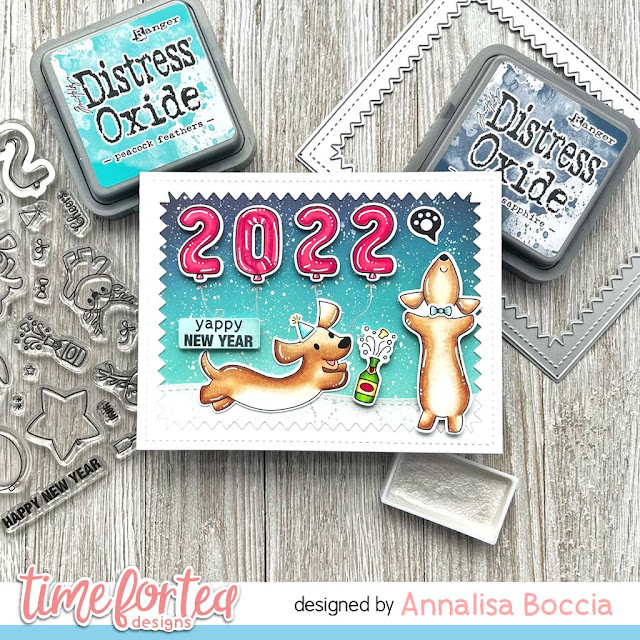
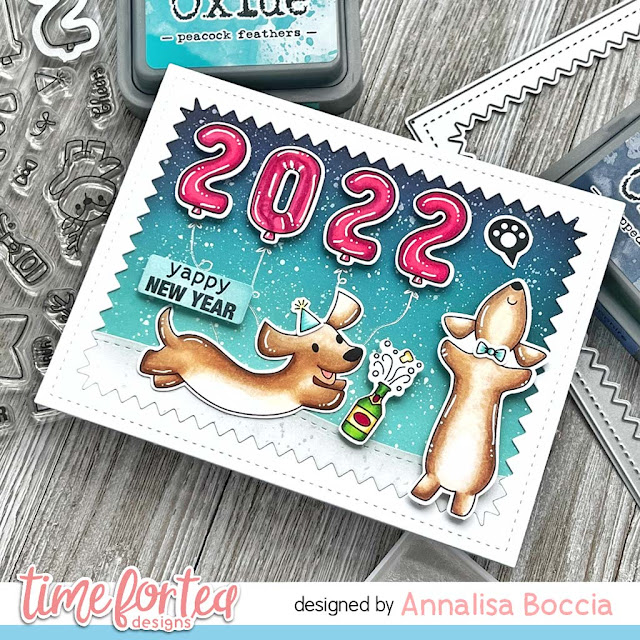
Hello everyone, DT Annalisa here. I am sharing a 'yappy' New Year card on this last Friday of 2021! I can't believe that we are headed into 2022 tomorrow, I hope that next year holds happiness and health for all of us as we have been through so much in the last few years.

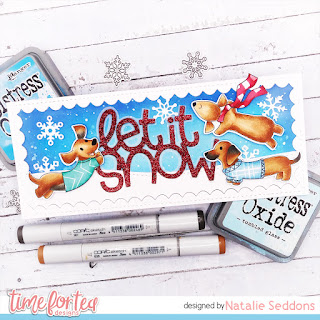
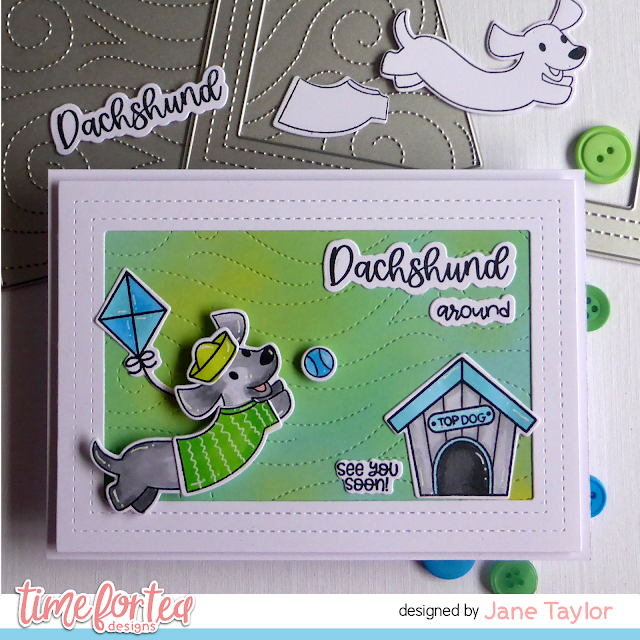
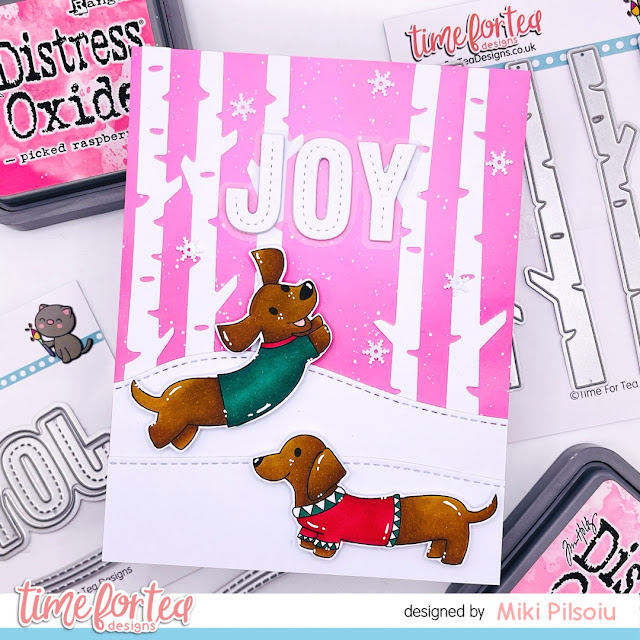
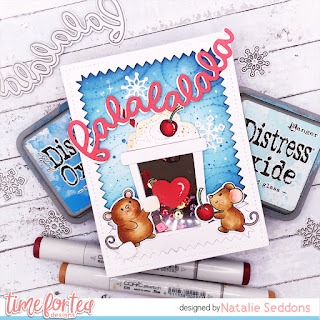
I blended on Salvaged Patina, Peacock Feathers, Chipped Sapphire and Black Soot Distress Oxides to some white card stock using my Beautiful Rainbow Blender Brushes. I then added some white paint splatter with a paintbrush and set this aside to dry.


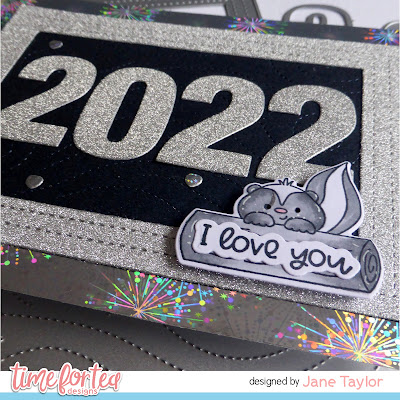
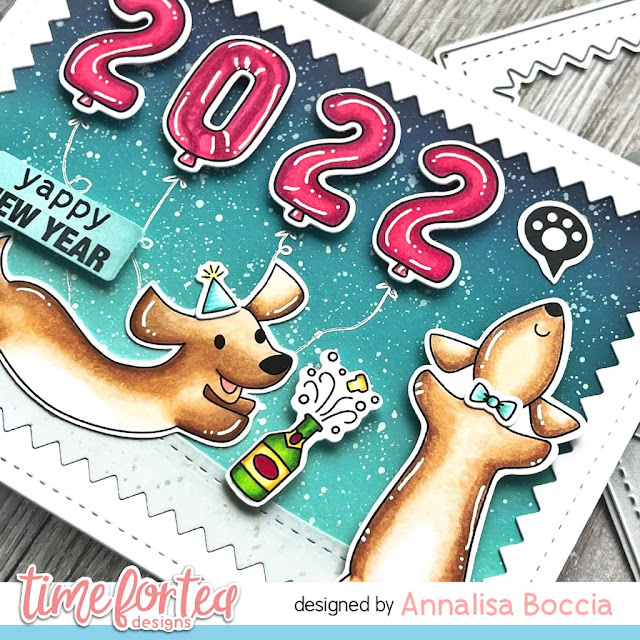
I die-cut out a frame using the Zig Zag Frame & Tag Dies and some white card stock. I used the Slimline Hillside Scene Dies to cut out a snowbank which I then die cut again with the Zig Zag frame. To this, I added splatter with some shimmery white watercolour and set it aside to dry.

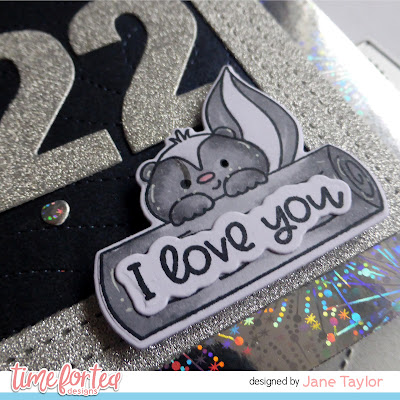
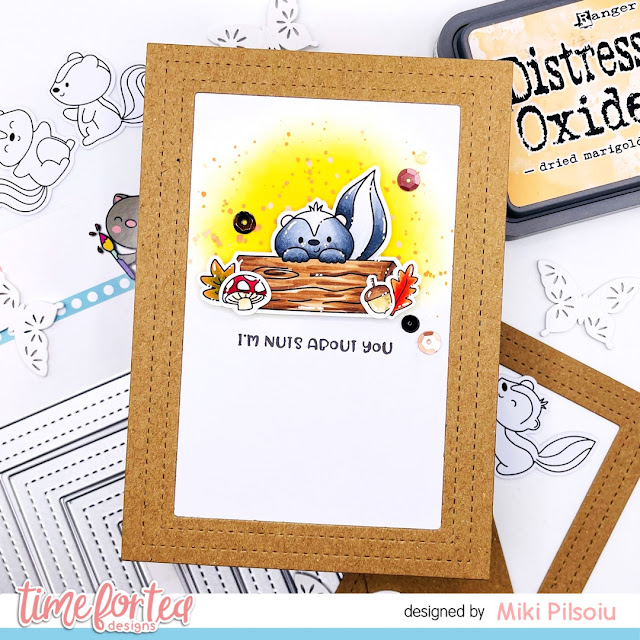
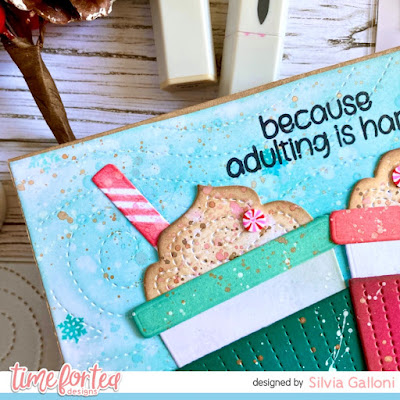
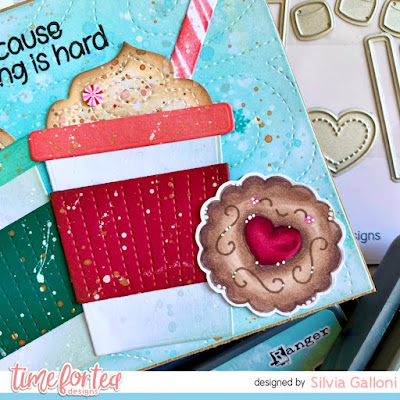
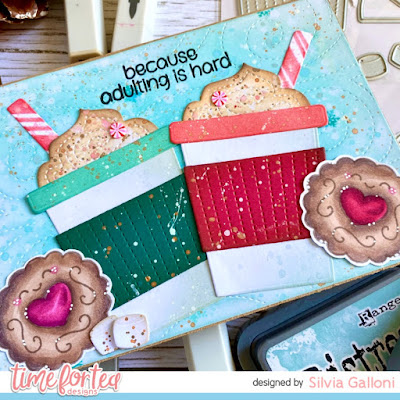
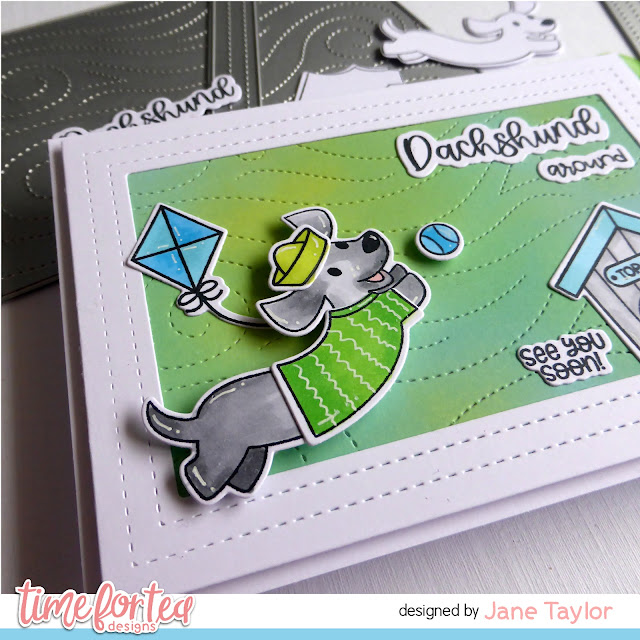
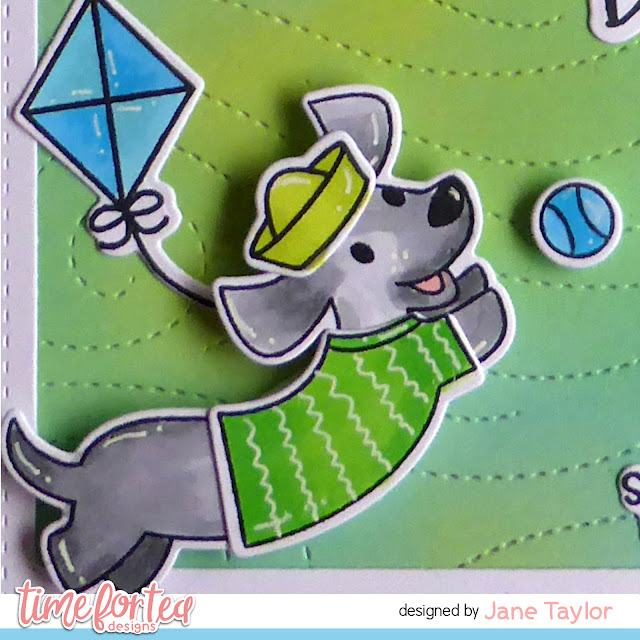
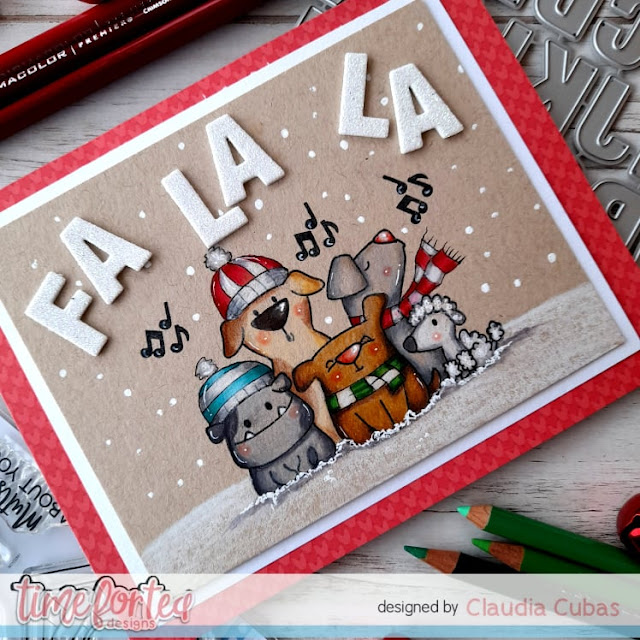
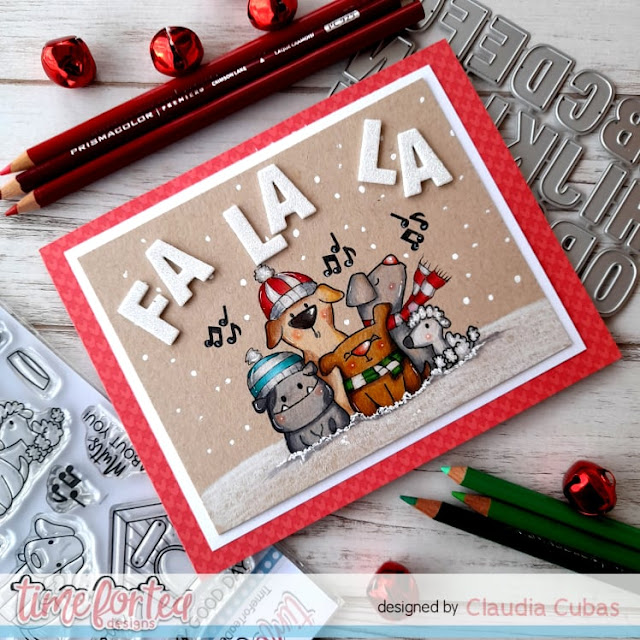
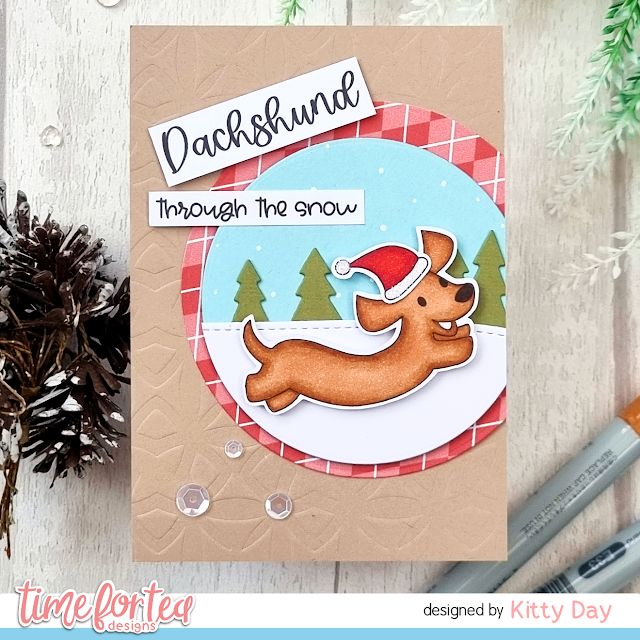
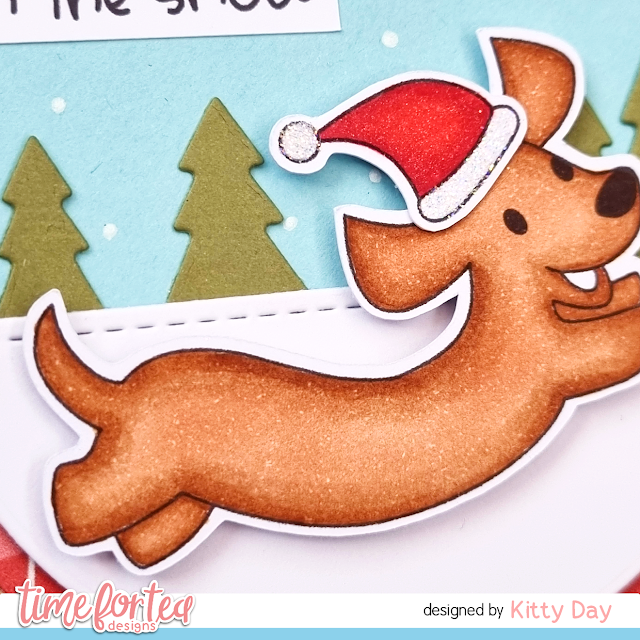
I stamped all of the elements and coloured them with my Copics. I used the following stamps sets: Happy New Year Critters, Santa Paws and Stop Dachshund Around. I combined the sentiment 'yappy' from the Santa Paws stamp set with the 'New Year' from the New Year Critters stamp set as I thought it was quite punny!


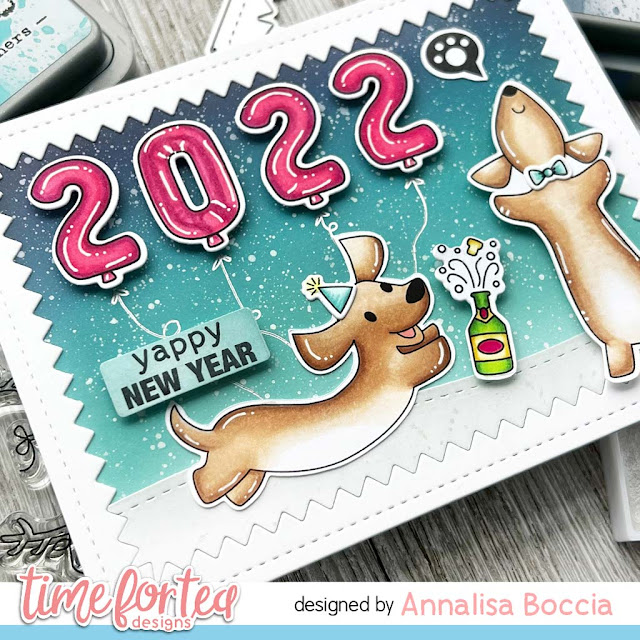
To assemble the card, I glued down the zig-zag frame and the snowbank to the ink blended background. I popped up the numbers, sentiment, champaign bottle and doggie on the right with some foam tape, I then used liquid glue to adhere the rest of the elements. 


Thank you so much for reading my blog posts throughout the year, I so appreciate it, you can use my discount code T4TANNALISA10 when you visit the Time For Tea Designs shop to get 10% off your order.

Thursday 30 December 2021

So Stinkin' Cute

Hello crafty friends, DT Kitty here. I hope you had a fabulous Christmas, I can't believe we are almost in 2022! For my card this week I've created a simple scene with some of the new skunks...

I started out by creating a gently blended background using my Mermaid Lagoon & Salvaged Patina Distress Oxide Inks. I then added some splats of water with a paint brush. I mounted the panel onto a white card with foam. All the images are from the Stinkin' Cute Stamp Set which I stamped and coloured with my Copics. I added some white dots on the mushroom with a white pen. I used the coordinating Stinkin' Cute Dies to cut them out. I heat embossed the sentiments in white onto black card and die cut them with the dies. I arranged all the images onto my panel and attached them in place with glue and foam pads.


Don't forget you can get yourself 10% off anything at Time For Tea Designs using my code T4TKITTY10.

Thank you ever so much for stopping by today, take care and stay safe.

Kitty xx

Hugs

 Hello there! Silvia's here today with a sweet Winter card.

I first die cut a white panel with the new "Snow Flurry Cover" die and I used villainous potion Distress Oxide ink and the "Magical Snowflakes" stencil to create a pattern on it.

I then ink blended edges with prize ribbon Distress Oxide ink, I splattered with clean water, tone on tone ink and some silver acrylic paint.

I stamped the adorable bunnies from "Cosy Winter" stamp set, I colored them with alcohol markers and I fussy cut them (you can use coordinating dies if you prefer).

I used the "Hug Stitched Sentiment" die to cut my sentiment from rose gold cardstock, I put everything together and that's all.

Thank you so much for stopping by and I hope you like the card.

Remember you can get a 10% off your Time for Tea order with the code T4TSILVIA10.

I wish you an amazing New Year full of joy, love, happiness and health.

Big hugs, Silvia.


Wednesday 29 December 2021

New Year Greetings

 Hello!

Today I'm sharing a card I made using some of the T4TD dies and the adorable new Stinkin' Cute stamp and die set.


I started by cutting the 2022 using the Count Me In Large Number dies from silver sparkle card. I then cut a matching frame using the Wide Stitched Frame die set.


I chose a dark blue pearlised card for the background and cut the swirls using the Snow Flurry Cover die. I then matted it all up onto a piece of holographic paper.


And that's where I originally planned to stop. But I just couldn't resist adding one of the T4TD critters. I chose the skunk leaning on a log from Stinkin' Cute popped up on foam pads and added a greeting from the same set. I also die cut some of the tiny hearts from Stinkin' Cute to add even more light catching sparkle.

I hope you like my card using the awesome products from T4TD. If you'd like to purchase any items you can get 10% off by using my code - T4TJANE10.

Thanks for looking today. 
Stay safe and keep crafting!

Jane
x

Tuesday 28 December 2021

Coffee!!!

 Hello dear friends, today I show you my card about coffee. This time I have little animals playing together and I mixed stamps with die cuts to create a fun scene. 


 For this card I used the set  Takeout Coffee Cup Dies  with this so beautiful coffee cup, and I also created a cup cake with the same elements.  In the scene I added some characters from  Snappy Before Coffee  and as a background an adorable stencil   Houndstooth Stencil .


I hope you like my card, and I take this opportunity to make you and your families, dear friends of Time 4 Tea, my best wishes for a wonderful 2022 !!! 
And for your purchases, use the code T4TCLAUDIA10 to get a 10% discount in the shop!!!

Stinkin' Cute


Hi friends! It's Miki here. I hope you've had a lovely Christmas! I came to my parents' house and I'm so glad we got to spend some quality time together! I'm slowly trying to get my brain out of the Christmas mood so today I have a Valentine's themed card to share with you.


To start with, I focused on my background. I ink blended some Dried Marigold Distress Oxide roughly where I thought my critter would go. Then I took it to my splatter box and added some splatters in Wild Honey and Carved Pumpkin, trying to keep them focused where the ink blending is.

Next, I focused on my images. I used the Stinkin' Cute Stamp & Die Set and stamped the cute Sconx hiding behind the log, the mushroom, acorn and two of the leaves. I colored them in using my Spectrum Noir Illustrator markers and used the matching dies to cut them. I then added some white highlights to my images. Before adding them to my card panel I first stamped the sentiment from the Woodland Critters in Memento Espresso Truffle. Then, I added my images using foam tape for added dimension.

I then used the Wide Stitched Frame Die Set and die cut the largest one from craft card stock. I glued it on my card panel and finally added some gems. I glued the card front on a matching card base and that was it!

I hope you like today's card and if you shop on the T4TD website, please remember to use my code T4TMIKI10 for 10% off your whole order.

Crafty Hugs,
Miki


Monday 27 December 2021

Happy 2022!


Hello, Tea Timers! 

I hope you've had a fantastic Christmas together with your loved ones! 

The New Year is so close - do you have any new year's resolutions? Are you good at keeping them?  


I made this card using the happy new year's critter stamp set, which is absolutely adorable! Don't you think? 

I wish you all a wonderful 2022, may all your dreams come true! 

Sending hugs, 

Natalia

Saturday 25 December 2021

Merry Christmas!


Merry Christmas everyone it's DT member Natalie here with a super cute Christmas card for you today. I just had to sneak in a last minute Christmas card with the Dachshunds. 
It was a pretty quick card to make I already had the Dachshunds coloured up. I love having pre coloured images ready it makes my life so much easier especially when time is short around this time of year. These cuties are new in the shop and are called Stop Dachshund Around. I also used the Sweet Summer and Brighter Days Paper Pads to paper piece there cute jumpers. 
To make the background I used the 
Falalala Die set to make the base which is one of my favourites at the minute it also includes gorgeous snowflake dies. 
I cut the die out of white card stock and ink blended a combination of blue distress oxides on the inner panel. I finished it off with a spritz of water and added some splatters of white acrylic paint. This just gives some added texture. 
Whilst this was drying I cut out another one of the falalala die again in white card stock and used the Slimline Hillside Border Dies to create the snow bank. With the off cuts I also cut out my snowflakes. 
Then all what was left to make was the sentiment. I love big sentiment dies and the Let it Snow one is so much fun. I cut out the sentiment in red glitter card and used some velum to cut out the back piece. I like the added interest of the velum but that you can still see the background behind. 
Then all was left to do was stick everything together I only glued the velum behind the sentiment so that you couldn’t see the glue and I added some foam dots to the dogs to give them some dimension and that was my card finished up. 
I hope you have a wonderful Christmas and a Happy New Year. Also don’t forget if you want to treat yourself in the shop you can get 10% off any orders using code T4TNATALIE10 ❤️ 

Thursday 23 December 2021

Jolly Coffee Christmas


Happy Christmas Eve everyone! I hope you all have a wonderful day and a happy Christmas tomorrow. Thank you so much for your support throughout the year.

I am sharing a festive coffee card featuring the new Joyful Winter Paper Pad, when I saw these beautiful patterns I knew I needed to make them into coffee cups!

I started by creating the background, I die-cut a slimline base using the Slimline Scalloped Trio Circle Nesting Dies and then used the Coffee Beans 6 x6" Stencil to which I added Antique Linen, Vintage Photo and Ground Espresso Distress Oxides using my Beautiful Blender Brushes. I filled in the white areas by blending lightly with my blender brush and some of the leftover Antique Linen left on my blender brush. I added some splatter of Antique Linen Distress Oxide with a paintbrush. Once the panel was dry, I added it to an 8.5 x 3.5-inch card base.

I started creating the cups by cutting the patterned paper using the Takeout Coffee Cup Dies for the cup base. I then cut out the cup toppers. marshmallows and whip cream with white cardstock, I ink blended on a little Antique Linen onto the whipped cream and marshmallows to add some yummy colour! I die cut the hearts using the silver glitter card stock from my scraps.

I used some shimmery green watercolour to paint the straw once it had been die-cut. I glued the cup elements together using liquid glue and then added double-sided foam tape to the back of each of them.


I attached the cups side-by-side, to the coffee stencilled panel. I then used a combination of liquid glue and foam tape to adhere to the marshmallows and straws. To finish off the card, I added some Stickles to the marshmallows and whipped cream.  


Thank you so much for reading my blog post, you can use my discount code T4TANNALISA10 when you visit the Time For Tea Designs shop to get 10% off your order.

Because adulting is hard

 Hello crafty friends and welcome back to Time for Tea blog!

You know, I’m a hot cocoa lover on chilly days and I this sentiment from the “Coffee Lover" stamp set is so perfect for chocolate too.

I started my card die cutting a white panel with the “Snow Flurry Cover die" and I ink blended it with salvaged patina and tumbled glass Distress Oxide inks, I splattered with clean water and speckled egg, picket fence and antique bronze Distress paint. I also stamped some snowflakes from the “Stop Dachshund around" stamp set with peacock feathers Distress Oxide ink.

I then die cut all the pieces of the “Takeout Coffee Cup" die set from white and colored cardstock and I glued all of them together.

I stamped some images from the “Tearrific Pals" stamp set with brown ink, I colored them with alcohol markers and I cut them with coordinating dies.

I put everything together and that’s all.


I hope you’ll enjoy this card. 

Thank you so much for passing by today and see you next week.

Don’t forget you can get a 10% off your Time for Tea order with the code T4TSILVIA10.

I wish you a very merry Christmas full of joy and love! Big hugs, Silvia.

Wednesday 22 December 2021

Stop Dachshund Around

 Hello!

Today I'm sharing a card I created using the T4TD Stop Dachshund Around stamp and die set, the Snow Flurry Cover and Wide Stitched Frame dies from the November release.


I started by inking up a piece of card with three distress oxide colours and then used the Snow Flurry Cover die to create some texture and pattern.


I framed the background in white using one of the Wide Stitched Frame dies. I then had fun stamping, colouring and die cutting the images from Stop Dachshund AroundDog Gone Mutts and Elephantastic. The 'see you soon' sentiment is from Car Critters.


I finished off my dachshund by adding a wavy pattern to his jumper using a white gel pen.

I hope you like my card using the awesome products from T4TD. If you'd like to purchase any items you can get 10% off by using my code - T4TJANE10.

Thanks for looking today. 
Stay safe and keep crafting!

Jane
x

Tuesday 21 December 2021

JOY - Non-traditional Christmas Card


Hi friends! It's Miki here and today I'm back with a cute Christmas scene for T4TD. I kept it very clean by using a lot of white and I decided to use pink as my primary colour which might be a bit non-traditional for Christmas, but listen I love pink!


To start with, I ink blended a background using Kitsch Flamingo and Picked Raspberry. I then added some white splatters to it to mimmic snow. Next up, I used the Winter Trees dies to cut 5 trees from white cardstock for my wintery forest and glued them to my background. I then used the Landscape Edge Standalone Dies to cut two white hills and glued them at the bottom of my card front.

For my critters I used the adorable Stop Daschshund Around Stamp set. I did some masking for the little sweaters so I started by stamping them. I then stamped them on a post it note and cut them on the black line so I could mask. Once the masks were on, I stamped the daschshunds. I really like this technique for stuff like this as it looks more natural in y opinion. Because of the masking I couldn't use the matching dies so I just cut them out by hand. I then used my Spectrum Noir Illustrator markers and colored them in. Next, I added some white highlights using a gel pen and added them to my card using foam tape for added dimension.

For the sentiment I picked the Joy Stitched Sentiment Die. I cut the letters 3 times from white card stock and glued them together and cut the shadow from Vellum. I assembled it together and glued it on my card. To finish it off, I added some snowflake shaped gems to my background.

I hope you like today's card, I have to say it's one of my favourites from the new release but I might be biased haha. If you shop on the T4TD website, please remember to use my code T4TMIKI10 for 10% off your whole order.

I wish you all a wonderful Christmas!

Crafty hugs,
Miki

Fa la la!!!

 Hello dear tea timers, Claudia here with some new inspiration. We are in the week of Christmas and songs are being heard around, I love them and these little dogs are singing them too!


For this card I used the stamp set Dog Gone Mutts which I find really fun, and I was inspired by a card from my friend Jayne Vaughan who put hats on these sweet little dogs. 


Here I stamped on craft paper and colored with Copics and pencils to create a winter scene. I added the Fa La La sentiment using the dies set Anthony's Alpha   I hope you all enjoy! 

Wishing you all, dear friends, a very Merry Christmas together with the people you love most!

 I remind you to use the code T4TCLAUDIA10 to get a 10% discount in the shop!

Clean and Simple: Cosy Christmas

Hey everyone, Lien here. Today I am sharing this card on the Time For Tea Designs Youtube Channel. I am featuring the Baked With More Love stamp set along with the Boho Tile Stencil from Time For Tea Designs. I hope you like this simple card idea. xxx


You can click HERE to watch on the Time for Tea Designs Youtube channel.


I started by coloring one of the images from the Baked With More Love stamp set from Time for Tea Designs using my copic markers (listed below). Afterwards, I used the matching dies to cut it out. 


For the background, I trimmed down an A2 sized panel. I used the Boho Tile Stencil from Time For Tea Designs and ink blended some distress inks on this panel. For the sentiment I used the Cosy Sentiment Die and Car Critters from Time for Tea Designs. 


As everything was prepped, I adhered it all together on a card base. I finished the card of using glossy accents on the 'Cosy'. I hope you like the card!


Thinking of buying some T4TD supplies? With T4TLIEN10 you will get 10% of your order at Time For Tea Designs! Happy shopping xxx 


Supplies:
  • Time For Tea Designs - Baked With More Love
  • Time For Tea Designs - Baked With More Love Dies
  • Time For Tea Designs - Car Critters
  • Time For Tea Designs - Car Critters Dies
  • Time For Tea Designs - Cosy Sentiment Die
  • Time For Tea Designs - Boho Tile Stencil
  • Transotype: Perfect Colouring Paper
  • Lawn Fawn Cardstock: Gold
  • Vellum
  • Gina K. Designs Amalgam Ink - Obsidian
  • Copic Markers: E33, E21, E00 / E13, E01, E00
  • Distress Inks: Evergreen Bough, Cracked Pistachio
  • Ranger: Glossy Accents 
  • Little Things from Lucy's Cards: Itty Bitty Stars - Gold
  • NUVO Deluxe Adhesive
  • Tombow MAXI Power Tape
  • Post-It Tape

Monday 20 December 2021

Using your patterned papers


Hello, Tea Timers!

It is Natalia with you today. How are the preparations for Christmas coming along?

Today's card features these little cuties from the Cosy Winter stamp set. I used the Oval Scalloped Nesting die to create the focal point for my card. 

I created a pink sky - there is something about pink skies, don't you think? - with kitsch flamingo distress oxide and perfect pearls water to create shimmery splatters. I stamped the sentiment with my WOW! embossing pad and used white embossing powder.


I then cut the Slimline Mini Village die from white cardstock to create my background scene. 

The patterned paper is from the Joyful Winter 6x6' paper, which I think is SOOO pretty! and very versatile as there's designs in it that you can use all year around. 

I added some stickles to my die cut hearts, because you can never have too much sparkle! I am sure you agree.

I wish you a lovely Christmas, and I will see you next Monday with a new card!

Whether you are getting a Christmas present for a loved one, or yourself, remember to use the code T4TNEILA10 for a 10% off your shop!

Sending hugs,
Natalia

Saturday 18 December 2021

Falalalala Coffee Shaker Card


Happy Saturday everyone, I have been so excited to make a shaker card with the new Take Out Coffee Cup Dies. It was really easy to do too but you never know maybe one day Jo will do an add on set for us 😉
The rest of the card was pretty simple to do so to avoid a lengthy blog post I'll let you know how I made the shaker part. I began by cutting out the cup part out of 360 gsm white card twice, once out of brown paper and then again from white fun foam. I adhered the brown paper onto one and then on the second one I needed to cut out a window for the shaker. So using a ruler I measured 5 mm from the edge all around using dots to guide me then just joined them up using the ruler so it was all nice and straight. 
Then using the line as a guide I cut out the inside using my craft knife you want to make sure your blade is nice and sharp to get a clean cut, I used this then as a guide to cut out the middle of the fun foam and adhered them together with a piece of acetate sandwiched between them. 
I found it was easier to add the sequins into this part and adhering the brown paper onto the back. I used a mix of chocolate, gold and burgundy sequins as I was thinking about the Costa Coffee Black Forest Hot Chocolate when I was making this one. If i did it again though I feel like a pop of cream would have been great in there too!
Once this part was put together I added the rim of the cup in the same white card and cut out the cream for the top adding a little colour with some brown Distress Inks. I also cut the cream out of fun foam too so that it sat at the same height as the cup. I finished it up with a cherry and a heart die for a little extra detail. 
I just love how this one turned out and again I got to mix sets old and new which you know I love, Time for Tea stamps just work so well together which is what I love about them, it means you can still keep using your old favourites but adding a new twist with new designs!
For the rest of the card I used the Baked with more Love stamps, Hello Cupcake StampsZig Zag Frame and Tag DiesFalalala Scalloped Slimline DiesSlimline Hillside Scene Dies  and the new Snow Flurry Cover Plate Die. I told you I liked to mix and match my sets didn't I 😂
I hope you like my card for today if you want to purchase any of the items in the Time for Tea Shop you can get 10% off your orders using code T4TNATALIE10 . Happy crafting and have a great weekend!


Friday 17 December 2021

Cooking Something Sweet Just for You


Happy Friday! Annalisa here, it is a little over a week to go before Christmas, and I am sure many are spending a lot of time cooking up a storm, so I am sharing this fun kitchen scene that I created using the Baked With More Love and Baked With Love Kitchen Add On stamp sets. The mouse carrying the pink macaroons is on an action wobbler, so she better be careful not to drop her treats! 

I stamped down the sentiment, appliances, utensils, eggs, mouse and his coffee cup (some masking was required) and coloured in the scene with my copics. I tried something a little different with the wall and I like how it turned out. I then stamped the macaroon mouse and the other accessories, and coloured them in and then die-cut them. 

I die cut out some white card stock with the Slimline Scallop Nesting Dies and coloured it with Kitsch Flamingo Distress Oxide and my Beautiful Blender Brush. I then glued the kitchen scene panel down on top of this pink card frame. I added foam tape to the kettle and piping bag and added them to the kitchen counter. 


I added an action wobbler to the back of the mouse carrying the macaroons, to add an interactive element.

 Thank you so much for visiting my blog, you can use my discount code T4TANNALISA10 when you visit the Time For Tea Designs shop to get 10% off your order.

Thursday 16 December 2021

Dachshund Through The Snow

Hello fellow crafters. I am still trying to squeeze in a few more Christmas cards. I've actually run out of ready ones so I need to create a few more! It's time for my usual Thursday inspiration post. This time I used one of the new releases featuring some super cute Dachshunds...


I started off by creating the background. I used the Boho Tiles Stencil to create a lightly embossed background onto kraft card. I used one of the papers from the Joyful Winter Paper Pad and die cut it with one of the circle dies from the Simple Circles Dies. I created a mini circle scene using the circle dies again along with some of the trees from the Slimline Mini Village Dies. I used one of the stitched dies from the Landscape Edge Dies. I added some snow to the sky using a white pen. I then used the Stop Dachshund Around Stamp Set for the cute dog. I coloured him with copics and popped him onto foam pads. I added the sentiments from the same stamp set and finished by adding some sequins.


That's all from me today. Don't forget to use the code T4TKITTY10 for 10% your next order at Time For Tea Designs.

Kitty xx

Two-For-One Rainbow Christmas Cards | with Tasha

Hey Crafty People!!!

It's Tasha here, and today I'm sharing a new video tutorial; making two cards for the effort of one! 😉


I was looking through the site recently and I found this Tremendous Christmas Stencil and Let It Snow die set.

I proper fell in love with them and had to get them straight away!!!


So I made these two cards, and I had so much fun making them!!!


I hope you have a lovely, happy, safe and wonderful week!


Stay Crafty!

Byeee!!!

Other Posts You Might Like