Pages

Wednesday 30 November 2022

Let it snow, let it snow....!!

Hey there tea-timer friends... 

DT Ashlee here today to share a new card with you and this one uses more of the new release goodies!!

I am totally loving all the new sets, they are so fun and super adorable too...


This card uses the Snow much fun Stamos and co-ordinating die set along with these previously release T4T products...


To create this card I started with a white card base that I stamped a row of the trees on and coloured with a white glitter pen (sorry I couldn't capture the sparkle in the photo).

I then added a wide stitch frame that was diet from a light blue cardstock. This was mounted with foam tape to add dimension to the base. 


A poppin sentiment was added by die cutting the let it snow sentiment from black and bright pink cardstocks. A sub sentiment was stamped and die cut using the co-ordinating die and added onto the side of the large sentiment. 


I stamped, coloured and die cut a couple of the cute snowmen and added them to the scene. To complete the card I popped on some of the T4T enamel dots.

What do you think of this fun snow scene card? I hope you enjoyed it...


Happy crafting, till next post. Hugs Ashlee. 


Want to do some shopping at the T4T store? You can use the code T4TASHLEE10 for a discount off your order

Monday 28 November 2022

Sending You a Whole Latte Love

Hi Tea Timers, welcome back to the blog. I am sharing a perfect blend of stamp sets with the new Pumpkin Spice and The Perfect Blend sets.

I love the different images of the mugs that are included in the Pumpkin Spice set and the sentients in the Perfect Blend set pair wonderfully!


Sets used:
I've been loving the clean and simple look and wanted to create a simple but cute background for the mugs. I first took an A2 panel and piece of low tack tape that I tore in half and masked off a portion of the panel. I took the coffee bean stamped with embossing ink. I heat embossed it with white embossing powder. With Worn Lipstick, Saltwater Taffy and Tattered Rose Distress Oxides and blended it over the embossed area.


I then stamped out the images and used the following Copic Marker combos to color them:
  • RV10, RV11, RV13
  • BG11, BG13, BG15, BG18
  • R20, R22, R24, R27
  • V01, V04, V05, V06
  • E00, E11, E13
I then fussy cut them out and set them to the side. I then took the sentiment and stamped it directly onto the panel. 


To complete my card, I arranged my mugs how I wanted them on the card and then used liquid adhesive to adhere the images.

I hope you enjoyed this card and love the sets I featured as much as I do. If you want to purchase these sets, check out the shop and use the code T4TRANDY10 for extra savings.

Saturday 26 November 2022

Falalala


Falalala, happy Saturday Teatimer's the weekends keep rolling on fast at the minute don't they! I have another sweet Christmas card for you this week. I had the idea of turning the bears from the Happy Trails stamp set into Polar Bears to create this snowy scene card. 

I used the Falalala Scalloped Slimline Die set to create the base layer cutting it out twice and ink blending on some blue/green distress oxides to create my background. I added some texture with ink splatters and some snow with white acrylic paint splatters. Using the second base I cut out a snow bank using the Slimline Hillside Scene Dies and added some foam tape behind to add some depth. Using foam tape I added a second scallop frame on the top so it matched the height of the snow bank. 
I also cut out some snow flakes and the falalala out of white card adding them to the background then adhering the images on top. 
Their igloo house comes from the It's Penguin-ing to Look a Lot like Christmas Stamp set and the little holly came from the Gingerbread Family Stamp Set
As always I finished up by adding some final touches with a white and black gelly roll pen. I hope you like my card and as always you can get 10% off in the shop using code T4TNATALIE10. 


Friday 25 November 2022

Floating By to say Hey


Hello and happy Friday. DT Annalisa here sharing a fun scalloped card featuring the new Walrus Be Friends stamp set by Time For Tea Designs. I love how the Walrus is waving hello.

To start, I die-cut a piece of Gorgeous Gingham 6x6' Paper Pad with the Large Scallop Celebrate Frame Dies. I ink-blended Spun Sugar Distress Oxide ink to the sides of the paper with my Beautiful Blender Brush. I then adhered this to a card base that I created using the same die. 


I sprayed Distress Mica Stain in Shiny Bauble onto watercolour paper. I love the shine mica stain has. Once it was dry, I die-cut it first with the Snow Flurry Cover Die and then with the tag die found in the Memory Keeping Essential Dies. I also used some of this paper to die-cut the hey sentiment from the Hey, Hello, Hi Dies. I ink blended on Peacock Feathers Distress Ink to the letters to darken them up. 

I cut some white card stock with the Slimline Hillside Scene Dies to create a snowy hill for the Walrus to sit on. I cut it again with the tag die and then glued it on top of the tag. I glued the 'hey' to the base of the tag with liquid glue. I tied a bow onto the tag with some Lawn Fawn teal Lawn Trimmings. 


I stamped the seal and hat from the Walrus Be Friends and coloured them with my Copic markers. I die-cut them with the coordinating dies and added some white gel pen accents. I used liquid glue to adhere the hat to the Walrus and then used double-sided foam tape to stick them to the tag. I then added double-sided foam tape to the back of the tag and placed it on the scalloped card base. 

I stamped and die-cut the sentiment and glued it to the bottom of the card base below the tag. To complete the card, I added "Summer Haze" and "Clear Bubbles" Designer Enamel Dots.


Thank you so much for reading my blog post, you can use my discount code T4TANNALISA10 when you visit the Time For Tea Designs shop to get 10% off your order.


Black Friday Inspiration!


 Today's Cards are from our Facebook/YouTube Live last night. I used some products from our Black Friday Sale, and I really loved how these turned out.


The pink framed version was inspired by one of our Teaspoons Charlotte. 🥰 I think this turned out so cute!! I changed my background a little on this one so that it worked with the pink frame a little better.

If you want to find out more about our Pawsome Sale just head to our Blog and look for the Black Friday Sale Post from Wednesday.
Subscribers also get exclusive offers so if you haven't signed up yet, there is still time to via the T4TD website. 🥳

Look out for more Black Friday Inspiration this weekend and don't forget to join our extra special Live Event tonight on Facebook & YouTube at 8PM.


Happy Shopping!
Jo & Ant xxx


Wednesday 23 November 2022

Who's at the door....?!

 Hey there tea-timers...

DT Ashlee here with a fun and festive card to share with you. I absolutely can not wait for Christmas, what about you?!

This card features a stamp set from the new release at Time for tea designs called Gingerbread family and it is oh SO cute....


I combined the gingerbread family with a couple of previously released dies to make a Christmas door scene...


To create this card I started by making my card base from a creamy tan coloured cardstock die cut from the wide stitched frames. 

I then die cut all the pieces to create the door and Christmas scenery from a bunch of different coloured cardstock before assembling it all onto the card base. 

The sentiment was stamped with Memento tuxedo black ink and die cut with the co-ordinating die. 

I stamped, coloured and die cut the two sweet little gingerbread and added them onto the doorstep with their yummy treats!!
(These were coloured with Spectrum noir tri-blend markers)


To complete the card a touch of sequins adhered using micro glue dots...

I just love how this card came together and I can't wait to create some more with this brand new set!!

Thanks for stopping by the blog today, happy crafting. Hugs Ashlee.


(Want to do some shopping at the T4T store? You can use my discount code T4TASHLEE10 for 10% off your order)

Pawsome Black Friday Sale News!!


 So here it is! The PAWSOME Black Friday Sale news you have been waiting for.


Our Sale starts at 6PM on the 24th November - just a couple of hours before our Thursday night Crafting Live with Jo. This is the ideal opportunity for us to show you some of the great products in the sale and offer you some inspiration at the same time.

There is 25% OFF everything, with the exception of our New Release items.

That's not all though!!
I have set up a separate Black Friday section on the website where everything has 50% OFF!!! 
ABSOLUTELY PAWSOME😆😆!!


As if this wasn't enough, we have more great deals for you!


Join Jo for a Special Live event November 25th at 8pm BST. 
Jo will be revealing some
VERY Limited-Edition Bundles and Mystery Bags
for some retiring Items.
You won't believe the prices on these! 
Believe me when I say numbers are Limited! These great offers will only be available during this LIVE Event so be sure to tune in to find out what's on offer.
Once the Live ends so will the deals!

Click the link to the video below & hit the Notification Bell to be alerted as soon as we go Live so you don't miss a thing!!

 
We hope you enjoy the Black Friday Event. If you haven't already, please subscribe to our Newsletter to find out more about the amazing deals over the weekend plus more crafty inspiration.
Ant & Jo xx

Monday 21 November 2022

It's Penguin-ing to look a lot like Christmas!

Hi Tea Timers and welcome back to the blog. I am excited to share a card that I made using the new "It's Penguin-ing to Look A Lot Like Christmas" stamp and die set. The set features adorable penguins and a fun igloo!

I wanted to create a simple background for these penguins so I could highlight how adorable these images are! You can easily create this card with different ink blends and colors. 

Sets used:

I first stamped out my images and used the following Copic Marker color combinations:

  • C-0, C-1, C-2, C-3, C-4
  • Y13, Y15, Y17
  • YR21, YR23
  • RV21, RV23, RV25
  • B000, B00, B01, B02
  • R20, R22


I used the coordinating dies to cut them out and set them to the side. I then took an A2 Panel and tore a piece of low tack tape. I decided to rip the tape in half to create a different edge and taped off the bottom portion of the panel. I then blended Worn Lipstick, Saltwater Taffy and Tattered Rose. I splattered white water color over the panel.

I then arranged my images onto the panel and used a mixed of liquid adhesive and foam tape. To complete my card, I stamped the sentiments directly onto the cardstock using black ink. 


I hope you enjoyed this quick and easy tutorial. If you love any of the products I used today and want to purchase them, use the code T4TRANDY10 at checkout for extra savings.

Happy crafting!

Saturday 19 November 2022

Have a Sweet Christmas!


 Hi everyone Natalie here with some more Christmas inspiration for my post. It's the sweet Gingerbread Family stamp set again because I had so much fun colouring them up and have a million and one ideas!

I had this idea of the little gingerbread man in the car from the Happy Trails Stamp set pulling up with this huge Christmas Tree on the roof which is also from the same set. 
I love how its bigger then the car, he looks so chuffed with himself don't you think!
The frame for the card I used my new favourites which is the Wide Stitched Frame Dies I ink blended a little to make it feel like a Gingerbread Frame. 
All my images were coloured up using Copic markers and for the background I used Distress Oxide Inks. I finished up by adding some snow using a white Gelly pen and adhered it all together. 
I love how it turned out its just a super fun card and quick and easy if your wanting to batch make as the gingerbread family are all the same colour so quick to colour up and cut out especially if you have the dies too.  I know you all loved them as much as us as they sold out so fast, so I can't wait to see what you all do with them. Keep checking back for more inspiration and if you want to buy anything in the Time for Tea Shop you can get 10% off your orders using code T4TNATALIE10. 


Friday 18 November 2022

Road Trip Bears


Happy Friday! DT Annalisa here sharing a stitched window card featuring the brand-new Happy Trails stamp set and coordinating dies from Time For Tea Designs. I love the little map in this set, as it makes me think of the many hikes my husband and I go on. We are not campers, but we LOVE to hike and go on road trips to find new areas to explore. 


I used my Beautiful Blender Brushes to ink-blended Salty Ocean, Dusty Concord, Fired Brick and Scattered Straw Distress Oxides onto an A2 card base. I added water, silver metallic droplets, and white ink splatter for interest. 


I used the Stitched Window Cover Die to die-cut white card stock that I then glued to the ink-blended card base. I stamped the bears and other elements from the Happy Trails Clear Stamp Set and coloured them with my copics. I added white gel pen accents and then die-cut them out with the coordinating die set. The small dog in the car is from the Sweet Village Clear Stamp Set; the tiny heart comes from Unicorn In Training.


Once everything was coloured and die cut, I adhered them to the card base using doubled sided foam tape for some and liquid glue for others.


Thank you so much for reading my blog post, you can use my discount code T4TANNALISA10 when you visit the Time For Tea Designs shop to get 10% off your order.


A Whole Latte Love for this week's Live!

 We have a fun new video on our YouTube Channel today showing how I 'whole latte lovely' card!!


I picked my colour scheme out first from Pinterest and then used that as my inspiration for the card. Check out our Pinterest Collection to see the colour combinations that inspired me. Time For Tea Designs Pinterest.

You can find the link to the video below.

I love how the colour scheme has changed this stamp set from an autumn theme to a modern Christmas theme.


Make sure to add some sparkle to your projects with some Stickles and our new Clear Bubbles Enamel Dots.

During the Live we also had a card Giveaway. One lucky Prize winner will receive a card Jo made during her Live appearance on HobbyMaker TV.

And the winner is.....
SHARNIE GILBY!!


Sharnie your prize is on its way.
XOXO

See you all next week for another Crafting Live with Jo.


Wednesday 16 November 2022

Lost without you!!

 Hey Tea-timer friends...

It's DT Ashlee and I am so excited to share my card using some products from the brand new release at Time for Tea designs!!

For this one I used the Happy trails stamp and co-ordinating dies collection along with these previously release products. 

- Box clever die set

- Home for Christmas dies


Ohhh I just adore this adorable bear he is too cute. I thought he would go perfect with a little village in the forest scene!!


To create the card I started with a light brown card base that I then added a grey die cut square too that I could set the scene on. This was die cut from the box clever die set.

I then cut out all the pieces to make the village and adhered it using varying levels of foam tape. 

Sentiment was stamped directly onto the card base using Tuxedo black ink!!


I stamped, coloured and die cut the Happy trails bear and his map. (Coloured using Spectrum noir tri-blend markers). The card was completed with a couple of die cut clouds and a touch of sequins!!

I'd definitely help this cute bear if he was lost, what about you?!

Thanks for checking out my post today I hope you enjoyed seeing my first card using the new release. If you haven't checked out all the new goodies available at T4T you should totally have a look, it's a release full of super cute things!! 

Want a discount on your order while your there? You can use code T4TASHLEE10 to save!!

Happy crafting friends, hugs Ashlee. 

Tuesday 15 November 2022

Jo's is back on HobbyMaker TV this Wednesday! Don't Miss the Crafty Fun!


Join Jo for some Christmas Craftiness on HobbyMaker TV this week.

Jo is back on HobbyMaker TV Wednesday November 16 @ 2pm with some more amazing deals and some fun projects and inspiration. You won't want to miss it!


Have a happy crafty day! xx


Monday 14 November 2022

Walrus Winter Wishes

Hi Tea Timers and welcome back to an exciting week on the blog! If you have not heard yet, there is a new release in the shop! Full of fall and winter goodies, the new release has so many sets for the Holiday season and year round as well. You can pair the new stamp sets with any of the previously released Standalone die sets.

Today, I am featuring the new Walrus Be Friends stamp set and pairing it with the Let It Snow sentiment die set. With Christmas quickly coming up and having to complete so many cards to send out to friends and family, I really wanted to create quick and easy cards so that it wasn't so overwhelming for me.


Sets used:

I first stamped out the walrus image resting on the rocks along with the wool hat. I absolutely adore this image as the walrus is just resting peacefully. Adding the hat makes the walrus even cuter! I used E00, E01, E11, E13, E15 to color the Walrus. For the rocks, I used C-0, C-1, C-2, C-3, C-4 and C-5. I decided to fussy cut the image out but there are coordinating dies available as well. 

For the hat, I used R20, R22, and R24. I also used a glitter lacquer pen that I had in my stash to add to the hate to give it a little sparkle and dimension. I set my images to the side.


I then took an A2 Panel and the wave die from Landscape Edge set and cut out the water portion. I blended Mermaid Lagoon and Uncharted Mariner Distress Oxides. I splattered white watercolor over this piece.

I took another A2 Panel and stamped the snowflake images onto the panel with Embossing Ink. I then heat embossed the snowflakes with white Embossing Powder. After I heat embossed the snowflakes, I blended Villainous Potion, Seedless Preserves, Picked Raspberry and Kitsch Flamingo over the panel.


I cut the Let It Snow sentiment from gold cardstock. I used liquid adhesive to adhere all of my elements. To complete my card, I used white paint and a dotting tool to add more snow to my card.

Make sure to check out the entire new release now in the shop and take a look at the new amazing sets. If you liked any of the sets that I used today or the new release, use the code T4TRANDY10 at checkout for some extra savings. Happy crafting!


Sunday 13 November 2022

Wishing you a sweet Christmas!

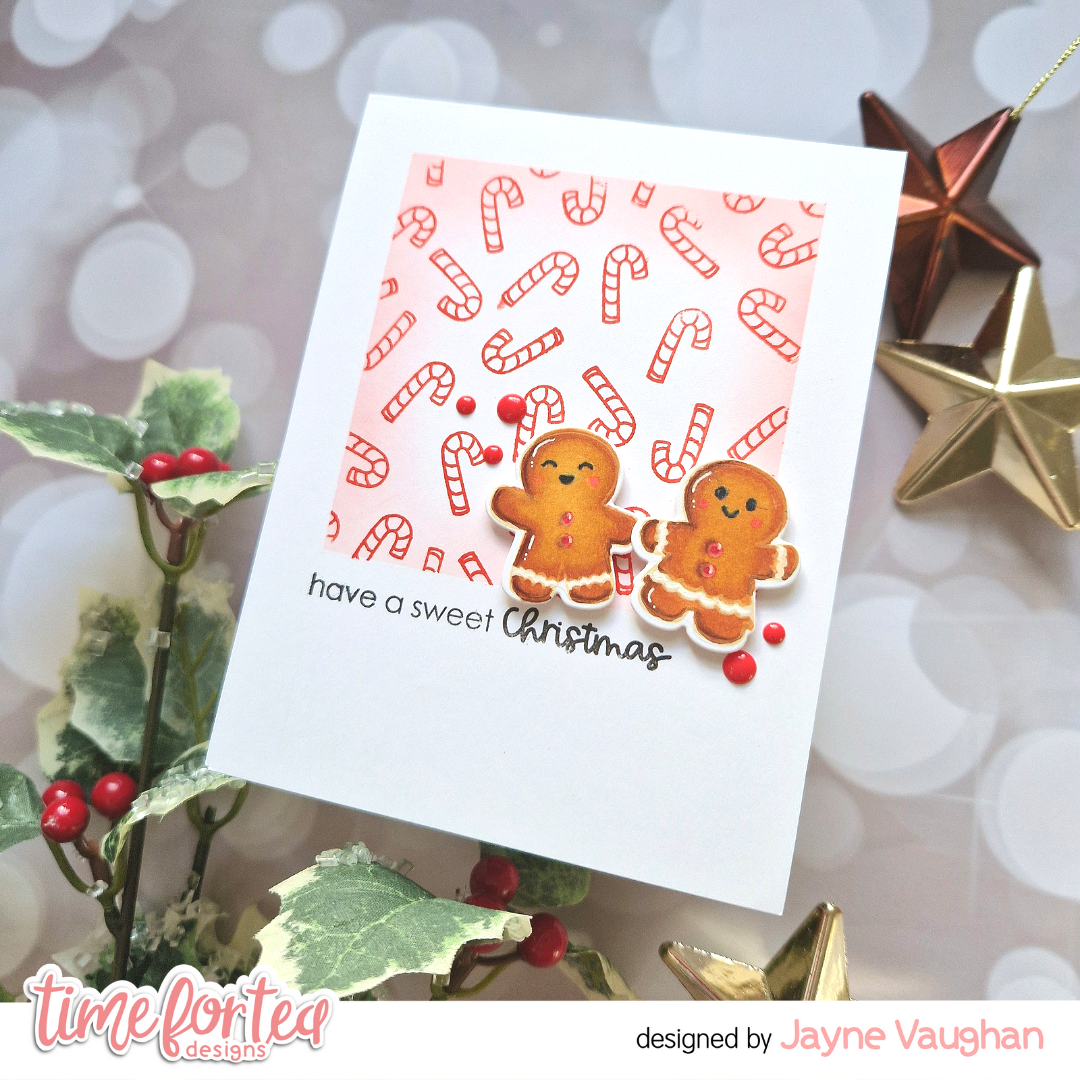
Hi Tea-timers! I'm so excited to share with you my first card using some of the new release goodies! It's such a good winter release, and I think my favourite set has to be the little gingerbread family, who will definitely be featuring on my Christmas cards this year!


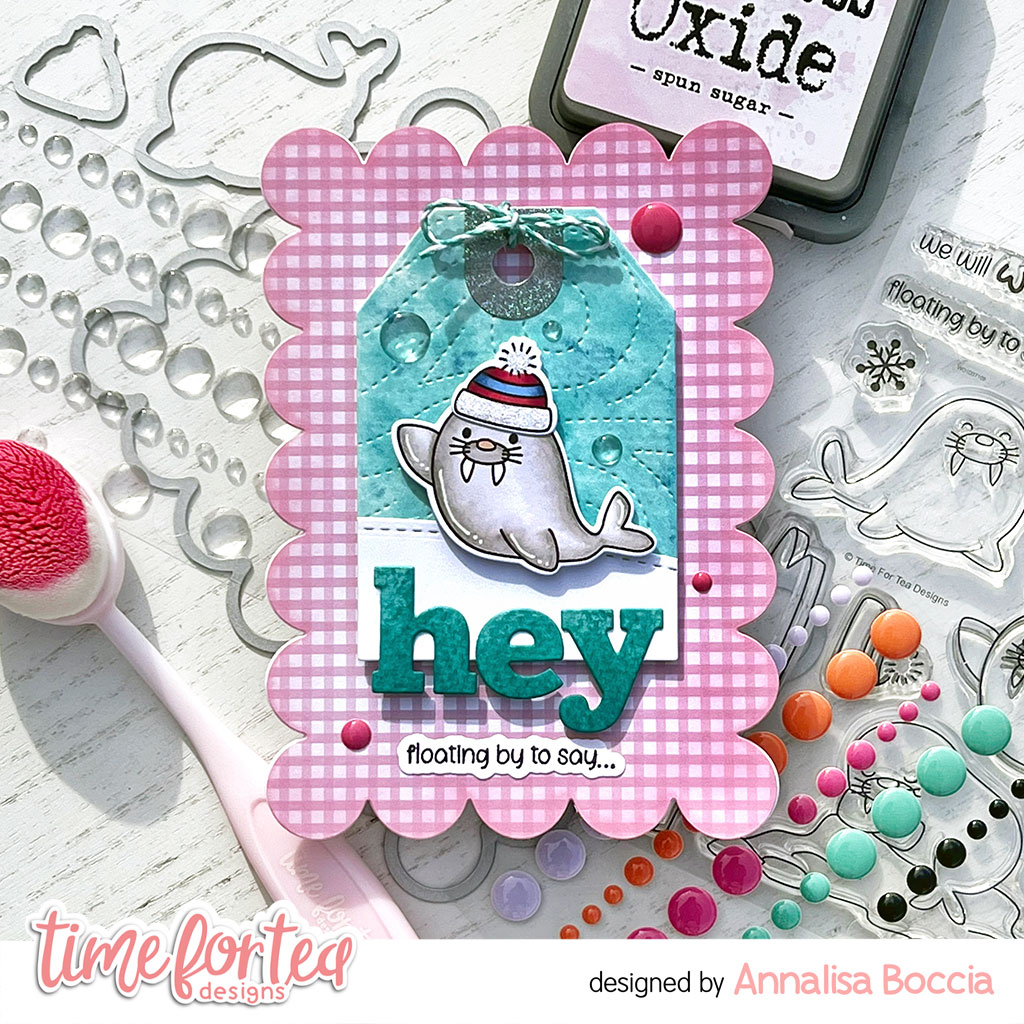
For today's card, I've used one of my favourite techniques of creating your own background by repeatedly stamping a small image - this time, it's the little candy cane from the gingerbread set.

Products used:

- Gingerbread Family - Our Home To Yours stamp set and coordinating dies

- Masking tape

- Red ink for blending, pale ink (eg antique linen Distress Ink) for stamping

- Blender brush

- Acrylic block and (optional) stamping platform

- Foam dots

- Red enamel dots

- White gel pen and black fine liner pen

Instructions:

1. Mask off a square on an A2 card panel. I used a pencil and ruler to draw a 3.25 inch square starting half an inch from the top of the page, and half an inch in from the sides. I rubbed out the lines until they were only very faint, then used them as a guide to place my masking tape on. 


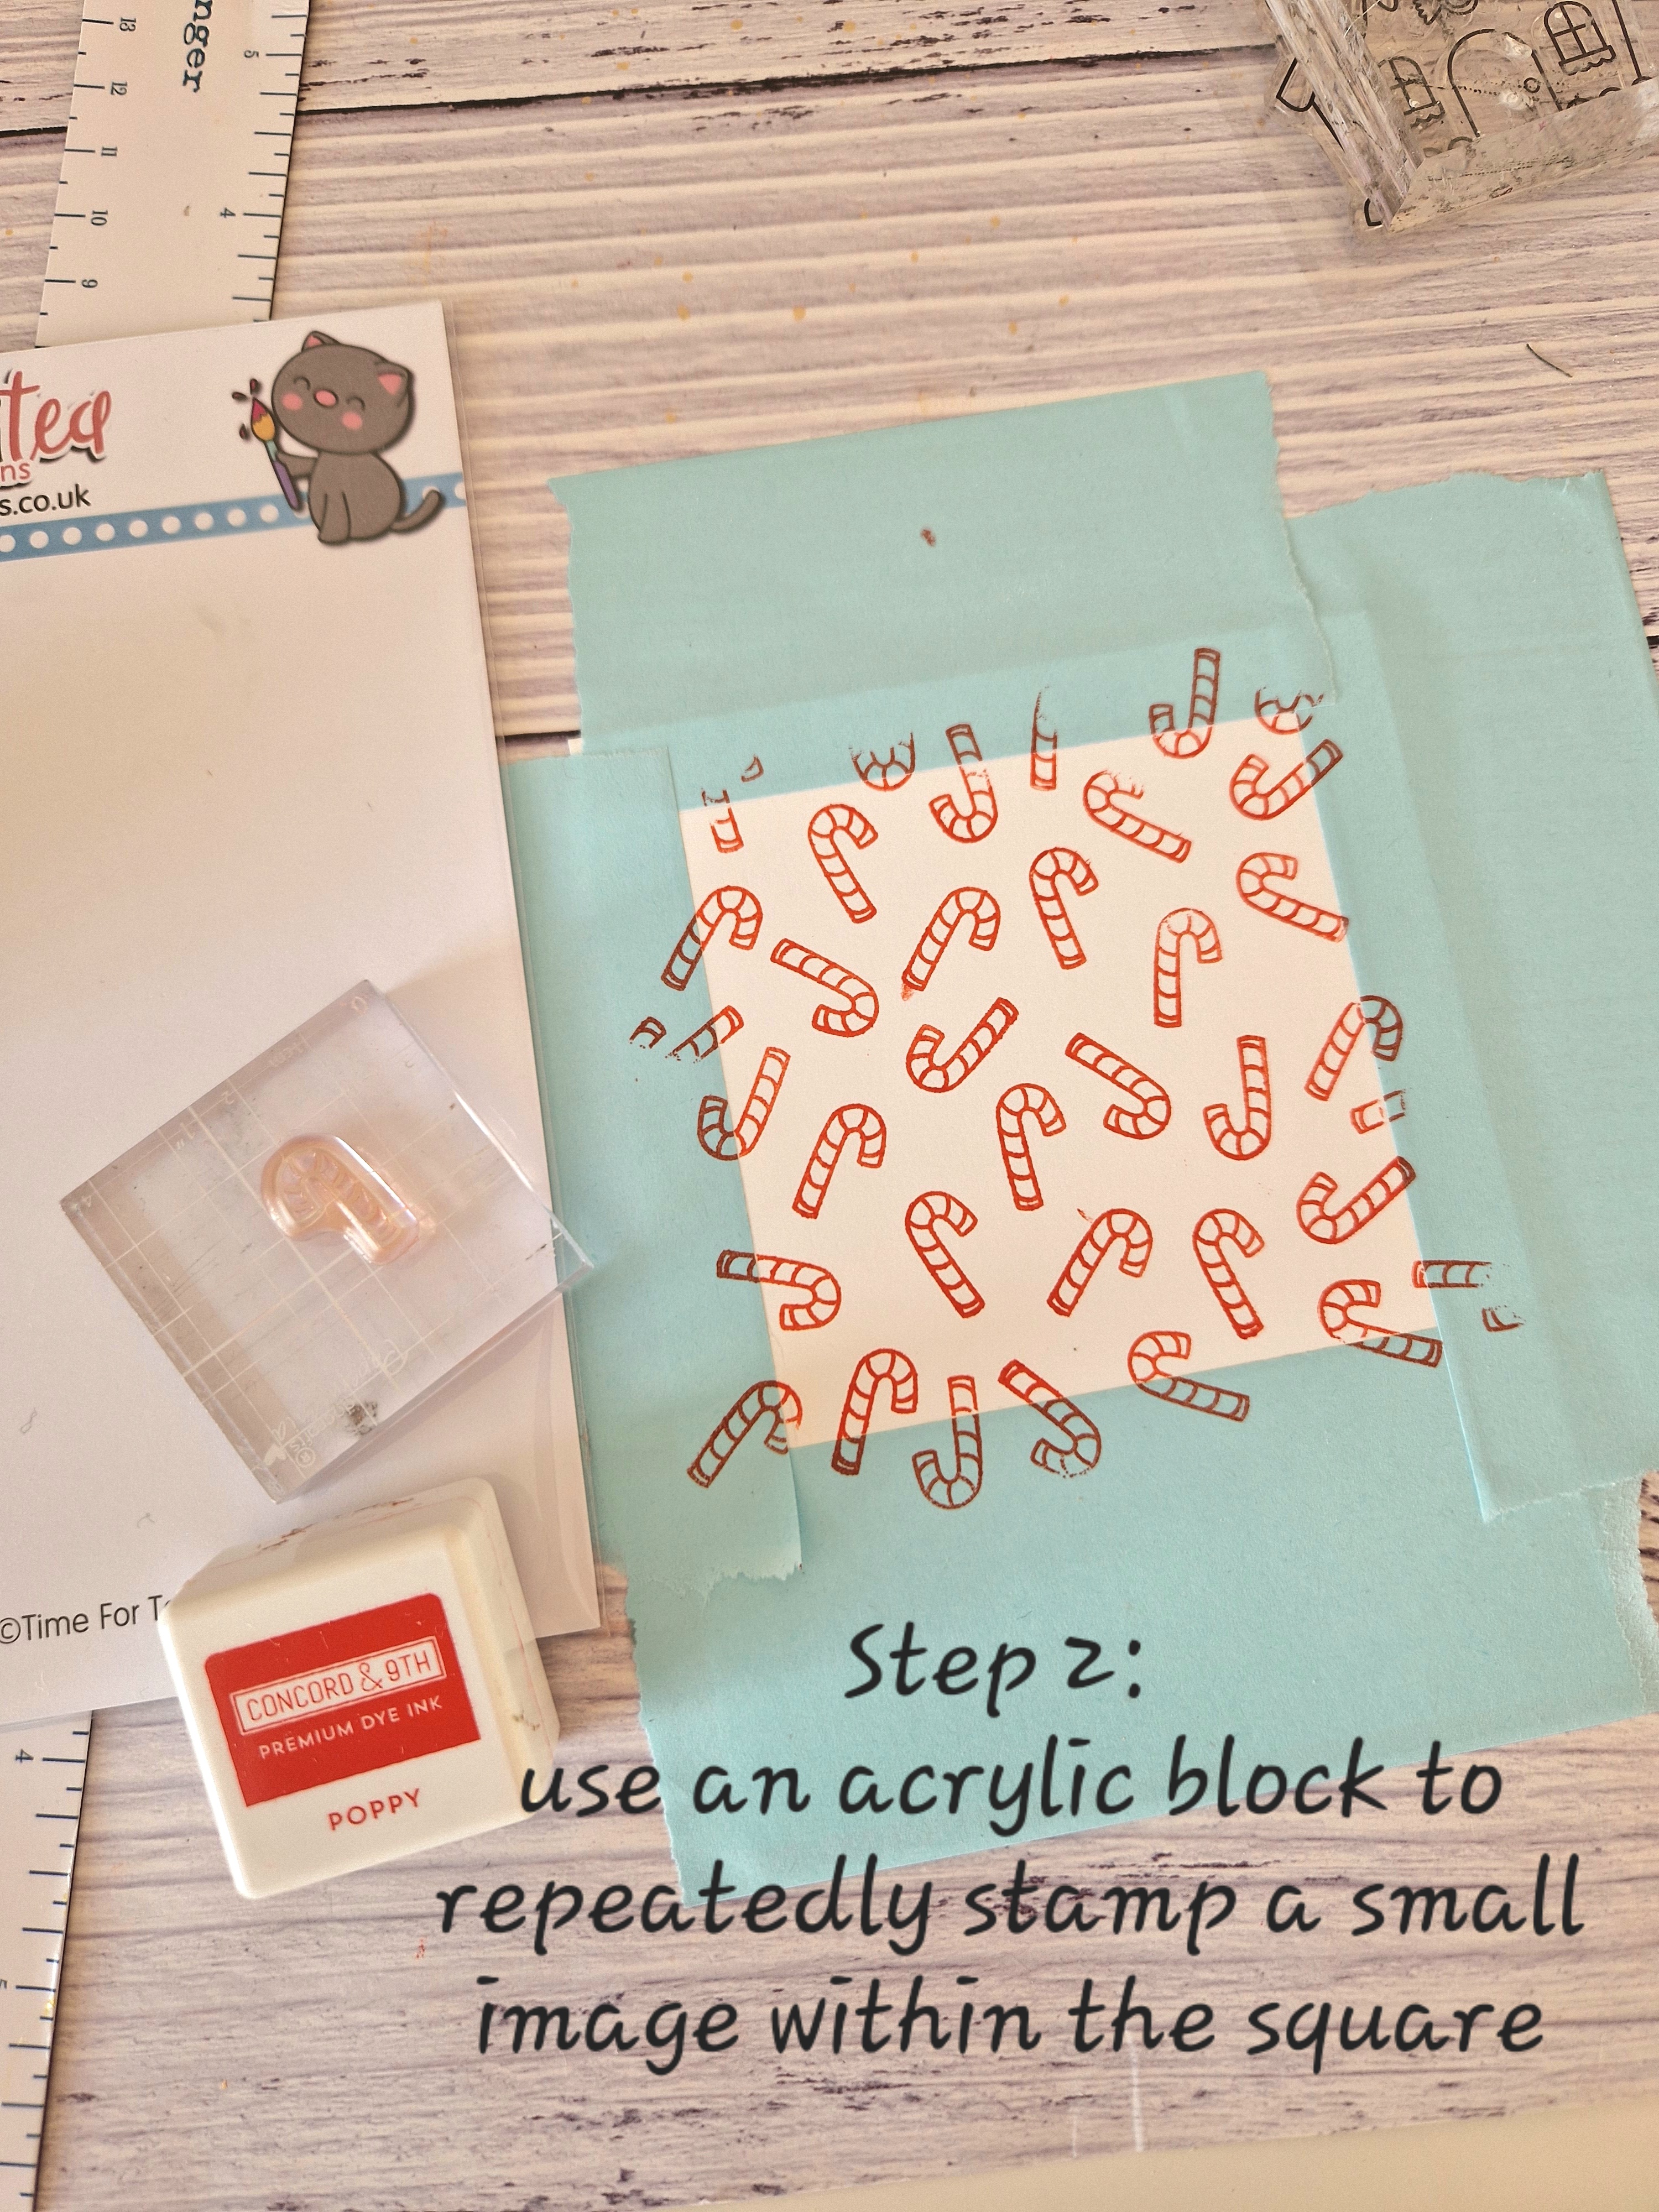
2. Using an acrylic block, repeatedly stamp the candy cane image over the square in red ink. Turn the image in different directions for a whimsical look, and to fill up all the space evenly. 


3. Using the same red ink, lightly blend in from the edges with a blender brush, leaving the centre white. Remove the masking tape and erase any remaining pencil lines.


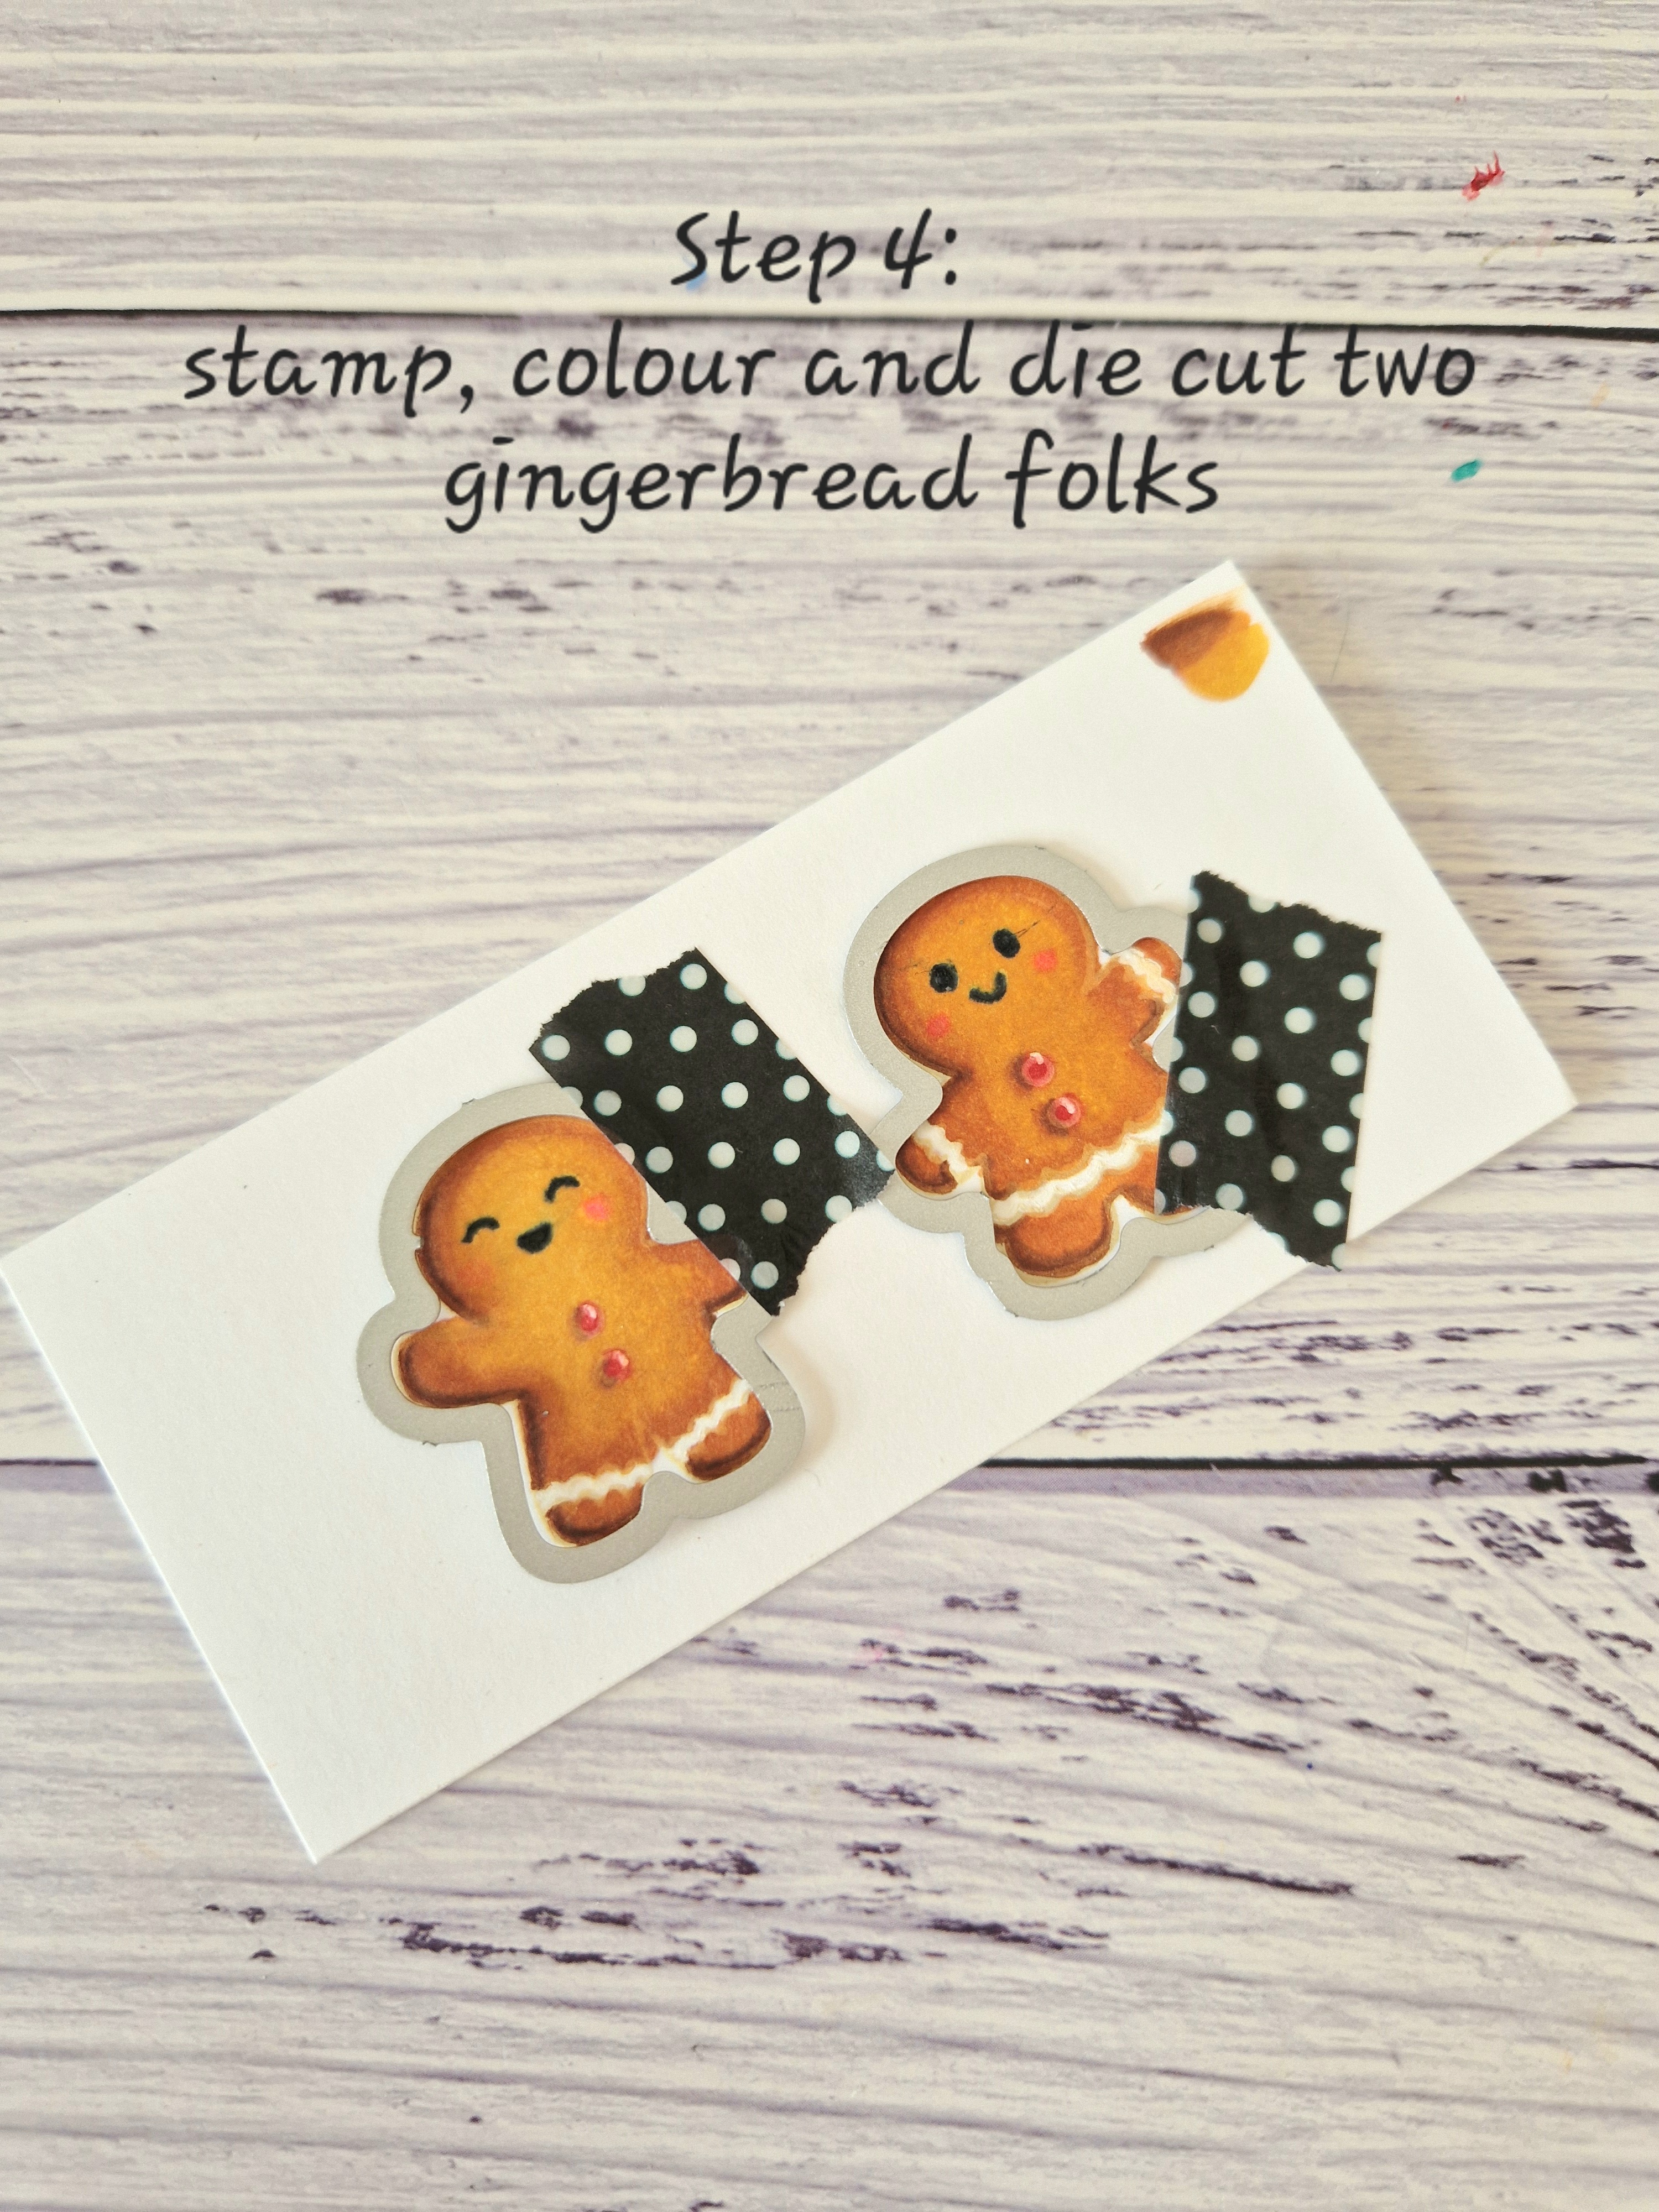
4. Stamp the gingerbread people in a pale ink (I used antique linen distress ink) ready for no-line colouring. I used Copics in the following colours: YR27, YR24, YR14. For the buttons I used R24, for the cheeks R20 and white gel pen for the icing details. I added in the face detail with a black fine liner pen.


5. Stamp the sentiment underneath the background. 


6. Add the gingerbread people with foam dots or tape, then finish by adding some red enamel dots.


Such a sweet little card!


What's your favourite product from the new release?

Don't forget discount code T4TJAYNE10 will get you 10% off your order at the Time for Tea Designs store, including the new release. Happy crafting! 

Other Posts You Might Like