Saturday 29 April 2023
Have a Moovellous Day
Friday 28 April 2023
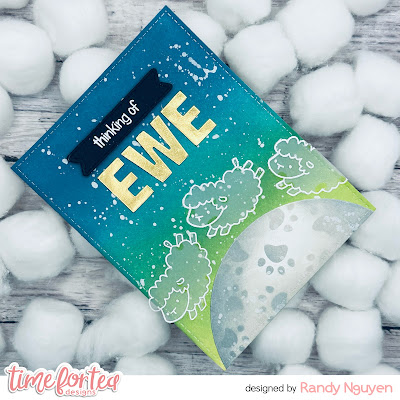
Thank Ewe
Happy Friday, everyone! DT Annalisa is here today sharing a thank 'ewe' card featuring the adorable sheep from the Ewe Are The Best clear stamp set from Time For Tea Designs.
A heads up the latest T4T mini release goes on sale Saturday 29th April at 8am BST. If you would like to see all the new goodies before the release goes live then please join Jo today, Friday 28th April, on Facebook or YouTube at 7pm BST.
For the grass, I used the Slimline Hillside Scene Dies. I ink-blended Twisted Citron and Mowed Lawn and added Lucky Clover Distress Oxide splatter. I used the Landscape Edge Standalone Die Set to die-cut the clouds and ink blended with Weathered Wood Distress Oxide and added some splatter in the same colour. I added silver splatter to the clouds and grassy sections to match the sky.
I stamped, and coloured (with Copics) several images from Ewe Are The Best and cut them out with their coordinating dies. I added white gel pen accents with a Gelly Roll Pen. The tulip, butterfly and bee are from I Really Dig You, I coloured them and cut them out with their coordinating dies.
To assemble the scene, I used liquid glue on the clouds, hillside and some of the images. I used double-sided foam tape on two of the sheep, the butterfly and the bee to pop them up.
I stamped the 'thank EWE' sentiment and cut it out with its' coordinating die, I die cut two more pieces of paper using the die and glued them all together for added dimension.
Thank
you so much for reading my blog post, you can use my discount code T4TANNALISA10 when
you visit the Time For Tea Designs shop to
get 10% off your order.
Thursday 27 April 2023
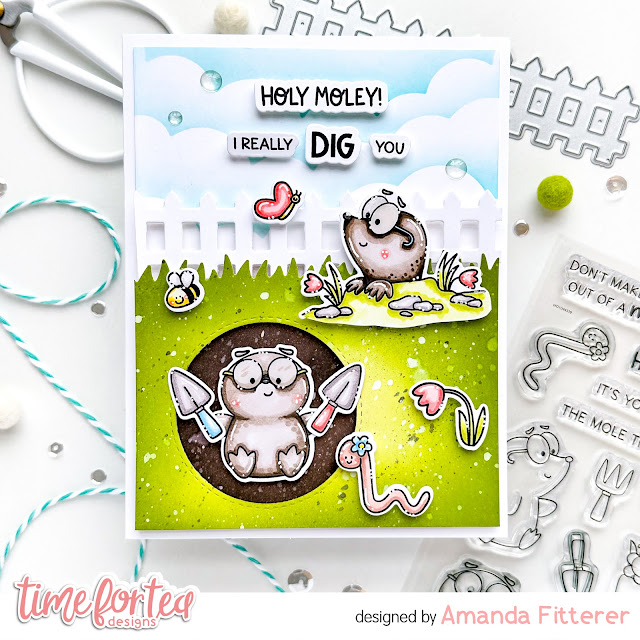
How to Create a Scene Card with Amanda Fitterer
That's it! Such a fun and dimensional scene card! I hope you enjoyed this post and I hope you find some time to get crafty today!!
Wednesday 26 April 2023
The New Mini Release is Coming Soon....
Holy Moley!
Hey there Tea-timer friends...
It's DT Ashlee here with some holy moley inspiration for you using the awesome new I really dig you stamp & co-ordinating die collection!!
For this one I made a birthday card full of cute moles underground and making their way to the surface popping out to give birthday wishes...
Using a white gel pen I added some white highlights!
Tuesday 25 April 2023
Fintastic Friends!!
Hi crafty friends, welcome back to the blog.
DT Miriam here, I hope you are all having a great week!!! I'm excited to be back today with another fun card featuring the Fintastic Friends stamp set. This stamp is full of super cute characters and calls for lots of lovely bright colours. Let's get started on todays card.....
Firstly I started by creating a card base using 110lb white cardstock that measures 4 1/8 x 5.75 inches. I then moved on to stamping all of the images in Copic friendly black ink. I coloured all of the images and once dry I fussy cut them (although there is a coordinating die available) and then added white highlights and dots using a white gel pen.
For today's card I used the following Copic combinations:
Purples - BV02, BV01, BV00, BV000
Reds - R85, R20, R14, R11
Yellows - Y38, Y35, Y11
Blues - B69, B66, B63, B60, B21
Greens - YG07, YG01
Greys - W5, W4, W2, W0, W00
To create the "water" background, I ink blended Mermaid Lagoon and Tumbled Glass Distress Oxide inks onto a panel of white card stock. I splattered with water and dabbed dry to create water marks. I die cut this panel and an additional white panel using the Waves die. I adhered the white border to the card base. I then slightly trimmed the blue sections and glued into place on the card base, leaving a slight gap between each one.
I then glued the die cut images on to the panel and added clear gems. I stamped the sentiment using white pigment ink onto navy cardstock. Added white embossing powder and heat set until melted. Once trimmed, I popped the sentiment in place with foam tape.
That completes the card for today, I hope it inspires you to get crafty this week. Don't forget to visit the Time For Tea Designs shop where you can use my code - T4TMIRI10 - to get 10% off your purchase. See you again soon, happy crafting!!!
Monday 24 April 2023
Thinking of EWE!
Saturday 22 April 2023
Holey Moley! Birthday Card - New Video
I used the Wide Stitched Frame Die to cut the outer frame. I used fun foam to give this some dimension.
I Really Dig You!
Hi everyone, DT Emma here sharing my recent 3D scene card featuring the I Really Dig You stamp set.
To make this card I started by stamping and die cutting my images from the I Really Dig You stamp set. I coloured them with copic markers using the following colours:
Worm: R30 and R32 (flower: Y35)
Mole: E70, E71, E74 (Glasses: BG0000, W7)
Grass: G24 and G99
Flowers: RV11 and RV13
Rocks: E31 and E55
Soil: E23
Bee: Y35 and Y38, BG0000
Fork: W7, W5 and W3 (E55 for the handle)
Butterfly: BV00, BV02 and BV04
I die cut all pop up pieces and then using the I Really Dig You background stencil I ink blended the ground background using distress oxide vintage photo and gathered twigs, then splattered some ground espresso. For the grass pieces I used the landscape edge standalone die to cut grass pieces and ink blended using distress oxide shabby shutters and lucky clover, then splattered some lucky clover over it all.
I cut out the window from the front piece and coloured the inside using copic markers and then adhered my front facing mole to the inside to appear to be digging the hole.
I then adhered all the pieces together creating the scene with the mole sticking his head up in the middle and then the other pieces around them.
I finished the card by propping up the butterfly and bee with thin strips of acetate, stamped the sentiment I Really Dig You on to a banner die piece and adhered it again to the scene with acetate strips.
Hope you love this card as much as I do! If you are shopping this weekend don't forget to use my code T4TEMMA10.
Friday 21 April 2023
Waving Hello from Under the Sea
DT Annalisa waving hello to my fellow card fans today! I have an underwater scene created using stamps, dies and stencils from Time For Tea Designs. I love creating ocean-themed cards and had so much fun making this one.
For the background, I used the Tiger Stripes 6 x6" Stencil. I used Mermaid Lagoon Distress Spray Stain on Distress Watercolor Cardstock by Ranger. I ink-blended Mermaid Lagoon Distress Oxide using my Beautiful Blender Brush to the white areas. I added splatter using a paintbrush, water and Copic opaque white. Once the panel was dry, I used double-sided tape to adhere it to a 4 1/4 by 5 3/4 inch card base.
For the stamp sets, I used Get Whale Soon (plus its' coordinating dies), Beach Buds (plus its' coordinating dies), Sealed With A Kiss (plus its' coordinating dies) and Fintastic Friends (plus its' coordinating dies). I coloured the images with Copic markers and added white gel pen accents with a Gelly Roll Pen.
Next, I added sparkles to the edges of some images with a Quickie Glue Pen and Lawn Fawn Prisma Glitter.
I used double-sided foam tape to adhere the frame I created using the Wide Stitched Frame Dies to the card base. I used liquid glue to stick all the images to the card. I adhered the sentiment using double-sided foam tape.
Thank
you so much for reading my blog post, you can use my discount code T4TANNALISA10 when
you visit the Time For Tea Designs shop to
get 10% off your order.
Thursday 20 April 2023
Ewe are the Best with Fun Ink Blending!
Hi crafty friends!! It's Amanda here sharing a sweet "EWE are the Best" card! This card features the Ewe Are the Best Stamp and Die Set!
I love adding sequins as a finishing touch to a card that just needs one more piece of flair! ;) That's all for me today! I hope you find some time to get crafty today!! Xx, Amanda
Wednesday 19 April 2023
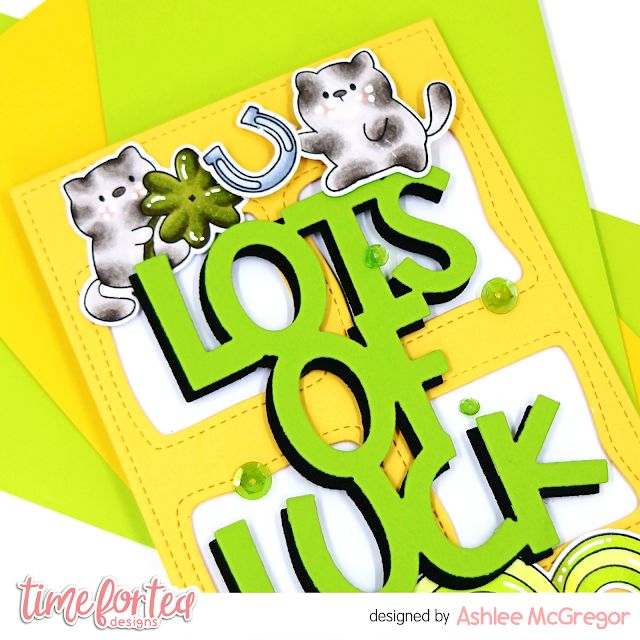
Lots of luck....!!
Hey there Tea-timer friends...
It's DT Ashlee here with some new T4T inspiration for you!
For this one I have used these Time for Tea designs products...
I hope you enjoyed this new card and it brings you lots of luck...
Happy crafting, hugs Ashlee.
Tuesday 18 April 2023
You've Got Mail
Hi crafty friends, I am back today with another design team card featuring the adorable You've Got Mail stamp set - and what a great stamp it is! The images are gorgeous, the sentiments are sweet and even though I make a lot of cards, I can often be late in getting them sent to people, so the "sorry it's late" sentiment really stood out to me. Lets get started on today's card....
I created a card base using lime green card stock to measure 4.25 x 5.5 inches, then I trimmed a piece of white card stock to measure 4 x 5.25 inches. On the white panel I ink blended Twisted Citron Distress Oxide ink using the Wonky Background Stencil. I then moved on to the images.
I stamped the images in copic friendly black ink and coloured with Copic markers. Once the colouring was dry, I fussy cut the images (although there is a coordinating die available) and added white gel pen highlights. The colour combinations I used today are:
Snail - B97, B95, B93, B91, G09, G07, G05, G02
Letterbox - R29, R27, R24, C6, C4, C2, C2
Letter - E51, E50, B95, B93, R29, R27
Ladybird - C8, C6, C4, R29
I glued the images to the panel, leaving a good amount of the wonky stencil showing. I then moved on to the sentiment which I stamped on to pale blue card stock with white pigment ink. I then covered with white embossing powder and heat set until melted. I trimmed the sentiment and popped up on the card panel with foam tape. Lastly, I glued the coloured panel onto the card base.
That completes the card for today. I hope you enjoyed seeing how this card came together. Don't forget to use my coded T4TMIRI10 for 10% off your purchase at the Time For Tea Design shop.
Looking forward to seeing you all again soon x
Other Posts You Might Like
-
Happy Friday, DT Annalisa here, my card today features the brand new Squeeze the Day stamp set. I absolutely loved colouring this set'...
-
Hi Tea Timers, welcome back to the blog. Today, I am sharing another card I created using a set from the latest releases. The 'Fruitfu...
-
Happy Friday! DT Annalisa here sharing my second card that features the new release. I used the Five Windows Cover Die ; a terrific stan...


