Pages

Tuesday 30 November 2021

Cosy Mini Village Card


Hello Tea Timers! 

It's Miki here today with some inspiration for the new release! To go with it, we've organised an Instagram Hop where you have a chance to win the whole release so make sure to check it out! Details on the T4TD Instagram

Ok, now let's talk about the card. I chose to use the Slimline Mini Village Die to create a cosy village scene. I picked 3 different color cardstock and cut them to 4.25" x 5.5" (my final card size). As you can see I went for some less conventional Christmas colors. I started by adhering down the pink one to my A2 cardbase as my card front. I then used the die to cut the darker green cardstock, leaving enough space at the top for my sentiment. This die won't cut the bottom so you can create different size layers. I then glued this down on my card front. Next, I picked the lighter green cardstock and die cut it, just below the houses from my previous layer and adhered that on top. Lastly, I picked a pink scrap and die cut it as the smallest layer on my card and adhered it.

Now that my layers were in place I moved on to the sentiment. I used the Cosy die and die cut the word from Silver mirror cardstock and the largest shadow from Vellum. I went ahead and die cut the word Cosy 3 more times from white cardstock and glued them all together for extra dimension. Once my word was assembled I glued it on the vellum shadow and then the whole sentiment at the top of my card.

To finish it off, I added stickles to all the house and tree tops to mimmic snow.

I hope you like today's card and I can't wait to share with you the rest of my creations using this release!

If you shop on the T4TD website, please remember to use my code T4TMIKI10 for 10% off your whole order.

Happy shopping!
Miki


Stop Dachshund Around

Hello all dear friends, today I have this fun card, here the dachshund who loves to jump and play, I used one of the new stamps from the latest release
  Stop Dachshund Around and some  elements from the set Dog Gone Mutts


I had fun coloring these cute little dogs and creating a split scene. I used the set Slimline Inverted Scallop Frame  and created two shacker cards. 


I set the scene in the snow, because these dachshunds wore their coats!!!


 I still have a thousand ideas with this amazing set, it's so adorable. I hope you enjoy my card, have a wonderful creative week. Remember to use the code T4TCLAUDIA10  for your purchases and you will get 10% off!!!

Monday 29 November 2021

Jumping with Joy!

Hello, Tea Timers!

It is DT Natalia here today. We have a new release over at the Time for Tea shop! Have you seen all the cuteness yet?
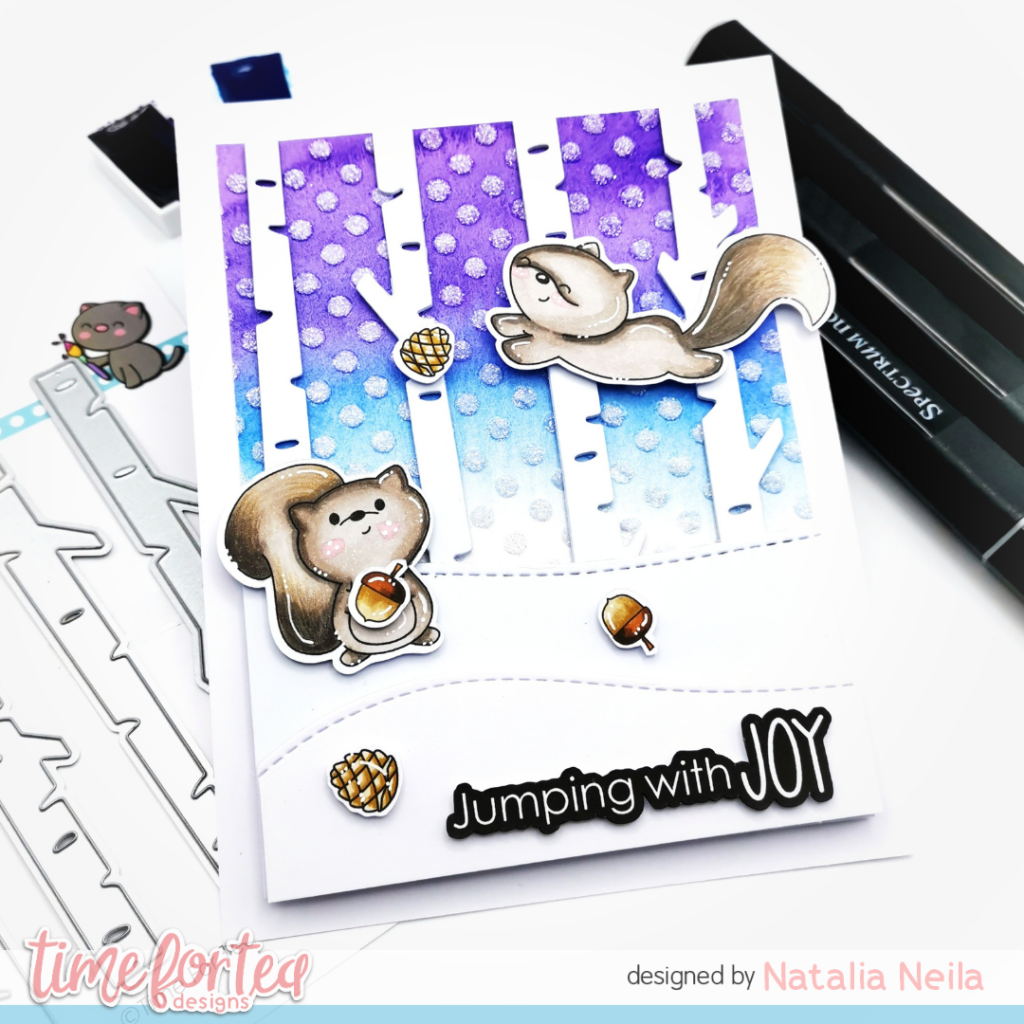
For this card, I created my background with some purples, blues and pearl white Mozart watercolours. I don't use watercolours often, but this background was so quick to make! I then used a stencil with Gina K glitter paste which looks like snow.

I die cut the winter trees 4 times each from white carsdstock and adhered them to my panel using double sided tape. I would have used liquid glue, but I find tape is better when you are trying to stick something to glitter! For the hills, I used the Slimeline Hillside Scene dies and I assembled it all together using double sided foam tape.

My critters and sentiment are from the new Jumping with Joy set, it is such a beautiful set, and the critters are adorable! I coloured them with my Spectrum Noir alcohol markers and pencils and then added some highlights with a white gel pen.

There is more! Head over to the shop to get a 30% from a selection of crafty goodies! Use the code BFCM2021 at checkout. Hurry, it ends tonight!

May be an image of cat and text that says "timefortea Odesigns AWESOME BLACK FRIDAY SALE CODE: BFCM2021 30% OFF* DON'T MISS THE AMAZING DEALS IN OUR BLACK FRIDAY SALE Sale runs from 9AM 26 November- Midnight 29 November *code apples to items in our Black Friday Sale Section only."
You can also use the code T4TNEILA10 for a 10% discount if you don't fancy anything from the Black Friday Sale Section!

I hope you enjoy this release as much as me!

Sending hugs,

Natalia

Sunday 28 November 2021

Cooking something sweet

 Good afternoon Teatimers, 

I hope are all loving the new release, Jo has certainly knocked it out of the park once again! I had so much fun making samples using the adorable Baked with more Love and Kitchen add on sets. I may have been a little bit inspired by new blue kitchen whilst creating this card 😊


To start I coloured my images using my Spectrum Noir Markers (colours listed below in order of lightest to darkest)

Cupboards  - TB5, TB7, TB8

Fridge  - IG1, IG3, IG5 

Mice - BG1, BG3, BG5 - CR3, CR2 

Pie - EB1, EB2, GB8 

Red - CR11, DR5, DR7 

Drk Grey - IG6, IG7, IG9 


To create my background I used the Boho Tiles Stencil  with blueprint sketch distress ink for my floor and the Tiled Wall Stencil with pumice stone distress ink for the wall. Cutting out the panel using the 2nd largest die from the Slimline Scalloped Nesting Dies. I added this to a piece of black card to leave a small border before creating a slimline card to fit.

All the pieces were cut out using the matching dies and I created a little kitchen scene on the panel with the cute little mice as super star bakers! 

Thank you for joining me here on the blog today,  don't forget to use my code T4TLYNDSEY10 for 10% off your order in store.

Enjoy the rest of your weekend 

Lyndsey x

Saturday 27 November 2021

WOW Embossing Powder and Time For Tea Designs Collaboration - WINNERS!


Thank you all for your support & enthusiasm for our recent collaboration with WOW Embossing Powder!

We are super pleased to announce that our winners have been selected!

The £20 Time For Tea Designs Gift Card goes to Meghan Kennihan


The $20/£20 WOW Embossing Powder Gift Card goes to Ionabunny


Please could each winner contact tasha@wowembossingpowder.co.uk to claim your prize!

Congratulations to the winners and thank you again for your support crafty people!

Stay Crafty!

Byeee!

Tasha
@handmadebytasha13

Friday 26 November 2021

Jumping With Joy


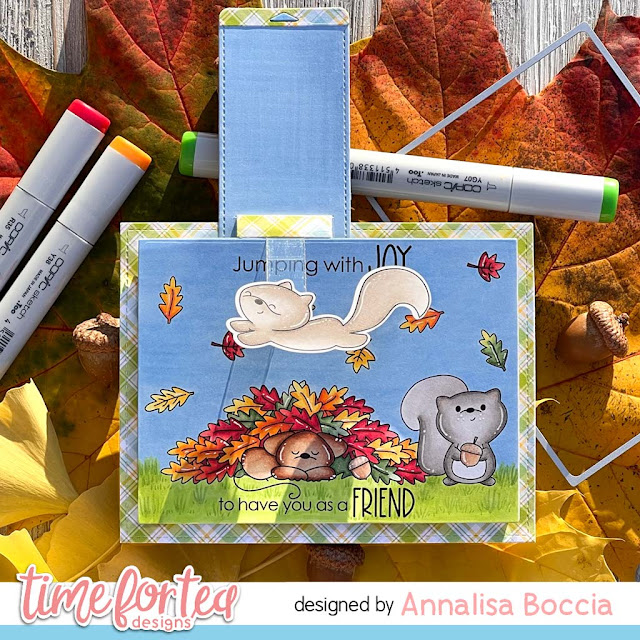
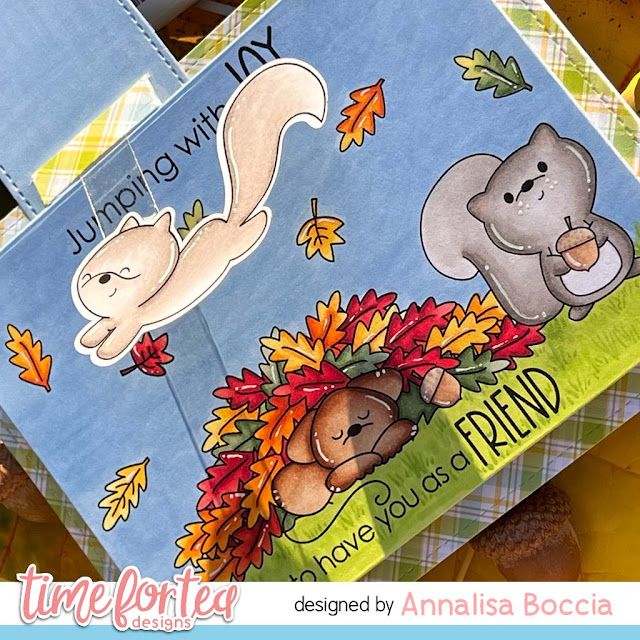
DT Annalisa here, happy new release day! I love new release days, as the design team gets to show you all what we have been working on for the last few weeks. My card today is a fun interactive fall scene featuring the new Jumping With Joy stamp set. I absolutely love squirrels, so when I first saw this stamp set, I knew that I had to make an awesome card with it.


To start, I stamped down the little mouse and acorns, masked these out and stamped the leaves and squirrel. Next, I stamped the leaves in the sky and the sentiment. I then coloured my scene in with copic markers. Separately, I stamped, coloured and die cut the jumping squirrel.

I used the third largest die in the A2 Layering dies set to cut out the scene.


I doubled up some foam tape and added it to the back of the scene, making sure not to block the interactive elements. I adhered this to a card base that I had added some green plaid patterned paper to. I had cut the paper with a stitched die that I had in my stash but you could also use the outer die in the Autumn Scene Cover Plate Die.

I had to use the flippy-flappy several times to get it to 'learn' what it had to do but once it was worn in a bit it worked really well.

Thanks for stopping by and reading my blog post, you can use my discount code T4TANNALISA10 when you visit the Time For Tea Designs shop to get 10% off your order.

Thursday 25 November 2021

Coffee First

Hello crafty friends, DT Kitty here! Are you feeling Christmassy yet? We have just put up all our decs so I'm feeling a bit more festive. Today I am sharing my latest card and this time I went for a simple coffee themed card...

I started off by blending a little Gathered Twigs Distress Ink onto a white panel. I added some hand-drawn borders to create a frame. I then splattered some ink with water onto the panel. I stamped & coloured the coffee cups from the Coffee Lover Stamp Set. I coloured them with Copics then cut them out using the Coffee Lover Die Set. I added them onto the panel with foam pads and added some twine to the bottom of the panel. I mounted it onto brown card then onto a card base. I added a stamped and die cut sentiment then added some Clear Drops to finish.


Thank you for checking out my creation today, I will be back with another next Thursday!
You can get 10% off at Time For Tea Designs using the code T4TKITTY10

Kitty xx

"Everything is more fun with you" binder insert

 Hi there! Silvia's back with a my last memory keeping project for now.

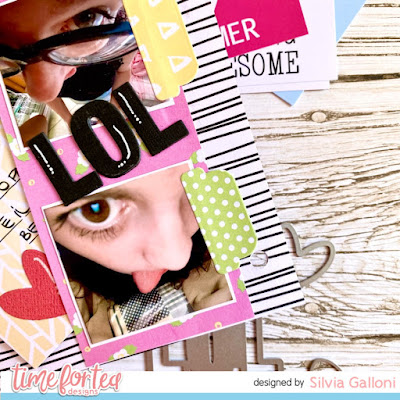
Today I'd like to share with you this fun page I made for my binder and featuring a very happy moment between me and my no more little girl.

As you can see I used some patterned papers from "Brighter Days" and "Sweet Summer" paper pads and I combined with some die cutting pieces I made with the amazing "Memory Keeping Essential " die set and one of the "Sweet Summer Journaling Cards" 

Here are some close-ups.


I hope you'll enjoy this project and thank you so much for passing by today. You can also get a 10% off your Time for Tea order with my code T4TSILVIA10 .

Don't forget that tomorrow is release day and I'm sure you're going to love all the new stamp sets and dies!!!!

Have an amazing day. Big hugs, Silvia.

Wednesday 24 November 2021

Memory Keeping With T4TD

 Hello

I have another project life style scrapbook page to share today using the memory keeping products from T4TD October release.


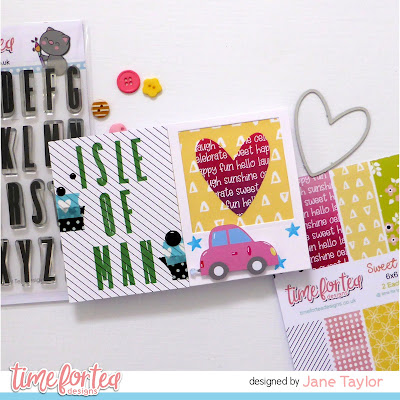
I decided to feature some places explored on the Isle of Man. I used the Memory Keeping Essential dies and Sweet Summer Paper Pad to create the first 4"x6" card. 
I stamped the title using the Tall Alpha stamp set. I then added the car from Sweet Summer Ephemerasome designer washi tape and Enamel Dots.


The Go Explore card from the Sweet Summer Journaling Cards pack was perfect for this page. I simply added some Designer Washi Tape and Enamel Dots with a photo next to the card.


The last pocket on this page followed the same design - a journal card, washi and enamel dots with a photo.


I hope you like my page using the awesome products from the new release. If you'd like to purchase any items from T4TD you can get 10% off by using my code - T4TJANE10.

Thanks for looking today. 
Stay safe and keep crafting!

Jane
x

Tuesday 23 November 2021

Coffee - because adulting is hard!


Hi Tea Timers! Welcome back to the T4TD blog! 

It's Miki here and today I'm back with some new inspiration! If you've been following me for a while you must know I am a coffee addict, hence I LOVE all the coffee sets from Time for Tea Designs. For today's card I picked the Coffee Lover stamp set - it's just so versatile, I had to make a card with it.


For this card I chose to do watercolors - say whaaat!? You might have guessed by now that this isn't my jam but I tried this technique in one of the Online Card Classes many moons ago and I loved it. To start with, I cut a panel of Canson Watercolor Paper and taped it to a board. I then took some thin washi tape and started creating some geometric shapes. Once I was happy with my design, I went in with my watercolors - I use the Mozart Komorebi palette. I tried to pick earthy tones like browns, muddy yellows, dark greens etc. I usually just mix my paints to get new shades and if it doesn't work out the way you think, not to worry! you can just paint over it. Once I was done with my panel I immediately removed all the tape and left it aside to dry. - I filmed a reel while making this background which will be available on my Instagram tomorrow if you're interested to see this in action!

While the panel was drying, I focused on the coffee cups. I picked some beige cardstock and the coffee cup from the Coffee Lover stamp set and embossed it in gold 3 times. I then used the matching die to die cut them. For the sentiment, I decided to use a dark green cardstock and emboss it in clear embossing powder to make it stand out. I love how Jo makes matching sentiment dies in her sets - I think they give such a neat look to a card. I then used the die to cut another 2 times from the same cardstock to add some dimension to my sentiment strip.

Once my panel was dry I picked the largest die from the Mini Slimline Scalloped Dies and die cut my panel. I made a cardbase slightly larger than my panel and adhered my panel to it using foam tape. I then added my 3 coffee cups, again with some foam tape at the back for extra dimension and glued my sentiment down. To finish off the card, of course I added some gems to frame everything.

I hope you like this card and I hope it encourages you to try a technique that you're less comfortable with. I had so much fun playing with watercolors again!

If you shop on the T4TD website, please remember to use my code T4TMIKI10 for 10% off your whole order.

Thanks for tuning in and I'll see you next week with the new release reveal!!

Crafty hugs,
Miki

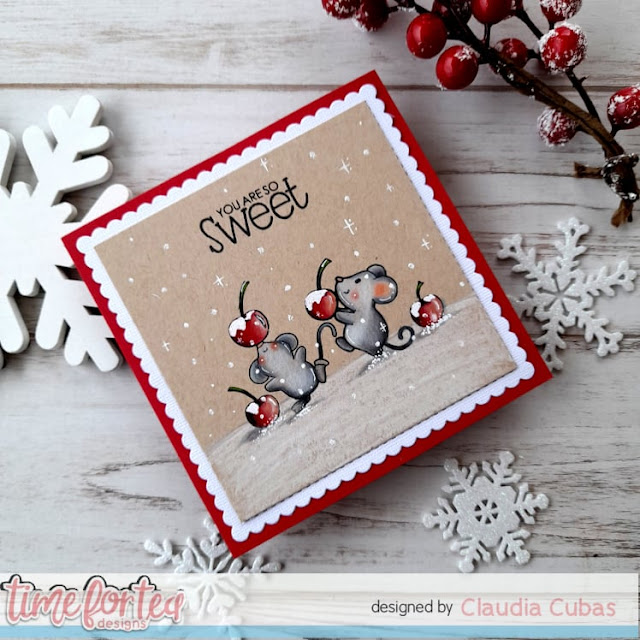
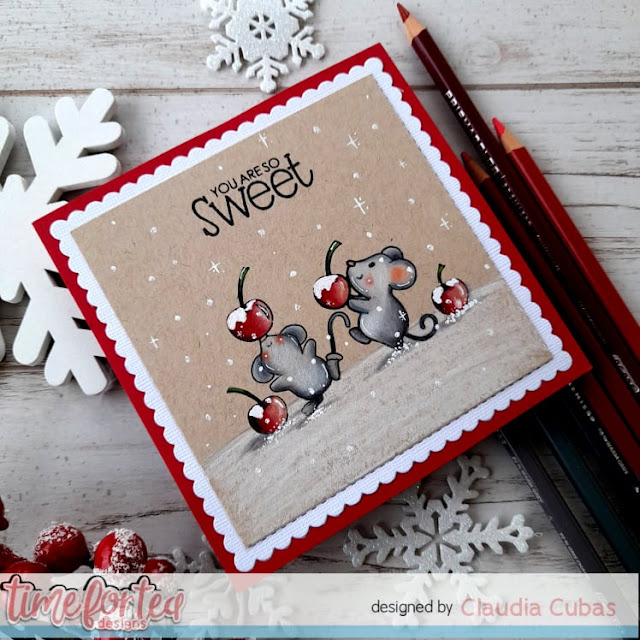
You Are So Sweet

 Hello all Tea Timers, Claudia here with a new inspiration, this time I wanted to color with pencils on craft paper and I chose these adrable little mice of the set  Hello Cupcake  and Sundae SweetiesI like the clean and simple effect.


I wanted to create a scene a little different, so I imagined these two little ones playing in the snow.

 I stamped these two mice and added more cherries, I then created a snowy scene and with the white gel pen I emphasized the snow

Looks like a fun scene to me , hope you like it too!!! 

I wish you a wonderful week and I remind you to use the code T4TCLAUDIA10 to get a 10% discount in the shop!

LOVE CARD: Alter your stamp to get the theme you want

Hey everyone, Lien here. Today I am sharing this card on the Time For Tea Designs Youtube Channel. I am featuring the Bears Picnic stamp set along with the Memory Keeping Essentials Dies from Time For Tea Designs. I hope that I can convince you that you can alter so many stamps you have, to get the theme you need! xxx


You can click HERE to watch on the Time for Tea Designs Youtube channel.


I started by coloring one of the images from the Bears Picnic stamp set from Time for Tea Designs using my copic markers (listed below). Afterwards, I used the matching dies to cut it out. I also cut out the small heart from the Memory Keeping Essentials Dies from Time for Tea Designs (3 times) and colored one of them using red copic markers (listed below).


For the background, I die cut an A2 sized panel out of cranberry card stock. I also die cut a slightly smaller panel than an A2 sized panel. For the sentiment I (partially) used the Coffee Lover stamp set from Time for Tea Designs. Next, I added subtle grounding using Antique Linen (on the smaller panel).


As everything was prepped, I adhered it all together on a card base. I finished the card of using glossy accents on the heart. I hope you like the card!


Thinking of buying some T4TD supplies? With T4TLIEN10 you will get 10% of your order at Time For Tea Designs! Happy shopping xxx 


Supplies:
  • Time For Tea Designs - Bears Picnic
  • Time For Tea Designs - Bears Picnic Die
  • Time For Tea Designs - Coffee Lover
  • Time For Tea Designs - Memory Keeping Essentials Dies
  • Waffle Flower: A2 Layers Die
  • Concord & 9th Cardstock: Cranberry 
  • Transotype: Perfect Colouring Paper
  • Gina K. Designs Amalgam Ink Obsidian 
  • Distress Ink: Antique Linen
  • Copic Markers: E37, E33, E53, E51 / R59, R46, R27, R17
  • Ranger: Glossy Accents
  • Thin Foam Squares from Scrapbook Adhesives
  • NUVO Deluxe Adhesive
  • Tombow MAXI Power Tape
  • Scotch 3M Foam Tape
  • Post-It Tape

Monday 22 November 2021

Cosy winter & embossing powders with stencils!

Hello, Tea Timers!

Did you see the WOW! embossing and T4TD collaboration blog hop? So much inspiration and sparkle! Make sure to check it out for a chance to win a giveaway voucher!

For my card, I used an the Line Em Up stencil with three gorgeous WOW! embossing powder colours: Blue Glitz, Cummerbund and Halo (soooo shinny!!).
I made a reel showing how I made it which you can see here.

I then used the A5 Cosy Winter Stamp set and coordinating dies, which is an awesome set with lots of lovely critters and accessories. I coloured them with my Ohuhu alcohol markers and added some highlights with a white gel pen. Of course I had to add some glitter to their scarves too! It is a Christmas card after all :)


I hope you like it and don't forget to use the code T4TNEILA10 for a 10% off your shop!

Sending hugs,
Natalia

Sunday 21 November 2021

Happy Hamster Wishes

 Good afternoon Teatimers,

Anyone still not started their Christmas Cards yet? I'm seriously procrastinating and need to get a wiggle on so whilst I'm still in denial about how behind I am I  sharing this bright and cheery Hooray Hamsters birthday card with you today. I absolutely love this cute set especially as we have our own cheeky little furry critter.


These guys are here bringing the party to wish you a happy birthday.

I started by colouring my images with my Spectrum Noir Markers (colours listed below in order of lightest to darkest)

Hamster 1 - EB1, EB2, GB8 

Hamster 2 - TN1, TN2, TN3 

Hamster 3 - IG1, IG3, IG5 

Yellow - LY2, LY1, LY3 

Balloon  - LG1,  LG3,  LG5 

Present - TB1, TB3, TB4 

I cut a piece of white card using the middle piece and smallest stitched frame from the Slimline Trio Circle Die and used the next frame size up to cut a piece of peach card for matting.

I added a piece of patterned paper from the Brighter Days 6x6 Pad behind each aperture before adding the the peach panel with foam pads.

I made my card blank from A4 white card scored in half length ways and then cutting to size to fit the panel.

I popped a party Hamster in each of the apertures and added the cute little props to finish them off.

The sentiment is from the Brighter Days Sentiments.

Thank you for joining me here on the blog today,  don't forget to use my code T4TLYNDSEY10 for 10% off your order in store. 

Enjoy the rest of your weekend

 Lyndsey x

Saturday 20 November 2021

Falalalala


Happy Saturday everyone it's DT member Natalie here with a fun Christmas Coffee card for you today. The little reindeer's from the Happy New Year Critters are just one of my favourite designs from Jo and you can guarantee they will appear in so many of my Christmas designs. 
I was unsure what to make for my post today so tipped out all my coloured images I already had and  and had a tonne of the reindeer's left over. There was also the coffee cart and the hippo which got me thinking that the reindeer's might like a caffeine pick me up before they take to the skies on Christmas Eve. The hippo and coffee cart which are from the Snappy Before Coffee stamp set weren't quite the right colours though so I stamped them up and coloured them in more traditional Christmas colours.  
The base for the card is the Falalalala Scalloped Slimline Dies which is another one of my favourite Christmas Dies I added some Chipped Sapphire and Salty Ocean for the sky using the darker colour at the edge and blending it to be brighter in the middle. Once everything was stuck together I felt like it needed a few finishing touches with the snowflakes and I added some white gelly roll for some smaller stars and falling snow. 
I just love how this card turned out its such a fun design and I hope you like it too! You can find the products in the Time for Tea shop and get 10% off any orders using the code T4TNATALIE10
Have a great weekend and I'll see you all next week 💖

Friday 19 November 2021

Merry Bunny Christmas


Hello and happy Friday! Today I am sharing a Christmas card that I created using several different Time For Tea Designs products, including Anthony's Alpha Dies to create the sparkly sentiment. 

I die cut the word 'merry' from thick white card stock using the alpha dies and coloured them with the teal (my favourite!) Beautiful Blender Brush and Salvage Patina Distress Oxide. I put some thin foam tape strips on the back of each letter, added some liquid glue to the front of each letter and dipped them in Lawn' Fawn's Chunky Glitter. I then set them aside to dry.


I used the Sparkle Cover Plate Die to cut out a white card panel and added some silver glitter paper behind it using liquid glue. I glued these to a card base and set it aside.

I stamped the circle and the bunnies from the A5 Cosy Winter Stamp Set and die-cut them with the coordinating dies. I coloured them with my copics and added some snowflakes using my White Gelly Roll Pen. For the sentiment, I stamped 'Christmas' from the Santa Paws Clear Stamp Set and cut it out with the coordinating dies. I coloured in the letters with my copics, added some liquid glue using my Quickie Glue pen and then dipped it into Lawn Fawn's Prisma Glitter. 


I glued down the circle with trees, added foam tape to the back of the bunnies and placed them down on top of it. I then added foam tape to the back of the Christmas sentiment and adhered it to the card. To finish the card I added the 'merry' letters starting in the middle and working outwards. 

I just love all of the sparkles on this card! Thank you so much for reading my blog post, you can use my discount code T4TANNALISA10 when you visit the Time For Tea Designs shop to get 10% off your order.

WOW x T4TD Collab

Hey Crafty People! :D


Today we have a super exciting collaborative hop between Time For Tea Designs & WOW! Embossing Powder.
Members from the Design Teams for each brand will be sharing creations using T4TD & WOW products together!

We've got lots of beautiful inspiration using products from both brands and we can't wait for you to see what we've got for you!


To celebrate this fun collaboration both WOW! Embossing Powder will be giving away a gift voucher for their stores!
WOW! will be offering a £/$20 voucher for either their US or UK sites and Time For Tea Designs will be offering a £20 voucher to their store!
All you need to do to be in with a chance of winning is leave a comment on this blog post by 23/11/21!
For more chances to win, hop through to each designers' post and leave comments there too!
We will choose the winners by 25/11/21 and they will be announced by both brands over on their blog & Instagram.
If you have fallen in love with any of the products from either brand, you'll find money off vouchers throughout the hop for you to use whilst shopping!

The next stop in this hop is the wonderful Marion Emberson at WOW! Embossing Powder's blog.
Be sure to head over and see what inspiration they have to share!

If you get a little lost along the way, then here's the whole lineup for your convenience:


Don't forget to leave comments to be in with a chance of winning one of two prizes!

Have a lovely, happy, safe & wonderful week!

Stay Crafty!

Thursday 18 November 2021

Sending Virtual Hugs

Hi crafty friends, Kitty here! I have my latest card o share with you today. I went for something colourful. It is actually a bit brighter in real life but I struggled to get a good photo this morning. I used my fav stamp set...crocs!

For this card I used the Time For Tea Designs Snappy Before Coffee Stamp Set. I stamped all the images, coloured them in with Copics and cut them out with the Snappy Before Coffee Co-ordinating Dies. I created a blended background using my Distress Oxide Inks. The colours I used are; Peacock Feathers, Cracked Pistachio, Antique Linen and Spun Sugar. I created a die cut fence using the die from the Windmill Add On Die Set. I die cut the word smile from black and white card using the smile die from the Smile Inverted Scallop Frames Dies. I added a strip of Stripes Washi Tape at the bottom then added a slither of black card to make it look mounted. I added a couple of die cut sentiments from the Brighter Days Sentiment Cards. To finish I added a few Clear Drops.


Don't forget you can use my discount code T4TKITTY10 to get yourself 10% off your order at Time For Tea Designs.

Kitty xx

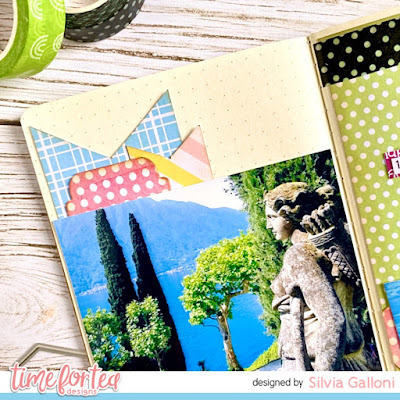
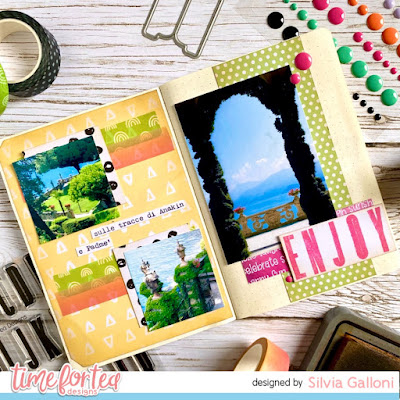
Summer memories: looking for Anakin and Padmé

 Hello crafty friends! Silvia’s back to the Time for Tea Designs blog with some new traveller notebook inspirations.

Last Summer I spend a wonderful morning with my family at Villa del Balbianello on Lake Como and we have so much fun looking for Anakin Skywalker and Padmé Amidala (Star Wars) wedding location. 

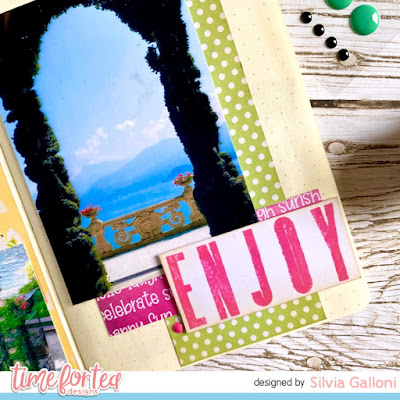
This is really a magical place and I took a lot of photo that I organized in these pages and I decorated them with so many stuff from the October release.


As you can see in the following close-ups I used the amazing "Memory Keeping Essential" die set with the colorful patterned papers from "Sweet Summer" and "Brighter Days" paper pads.


I also used the beautiful washi tapes and enamel dots (a very simple way to add color and interesting in your pages).


For the sentiment I used the new "Tall Alpha" stamp set with picked raspberry Distress Oxide ink.


Well, that's all for today and thank you so much for stopping by . Don't forget that you can get a 10% off yor Time for Tea order with my code, T4TSILVIA10.

Have an amazing day! Hugs, Silvia.


Other Posts You Might Like