Pages

Friday 30 December 2022

Christmas tags with Digis


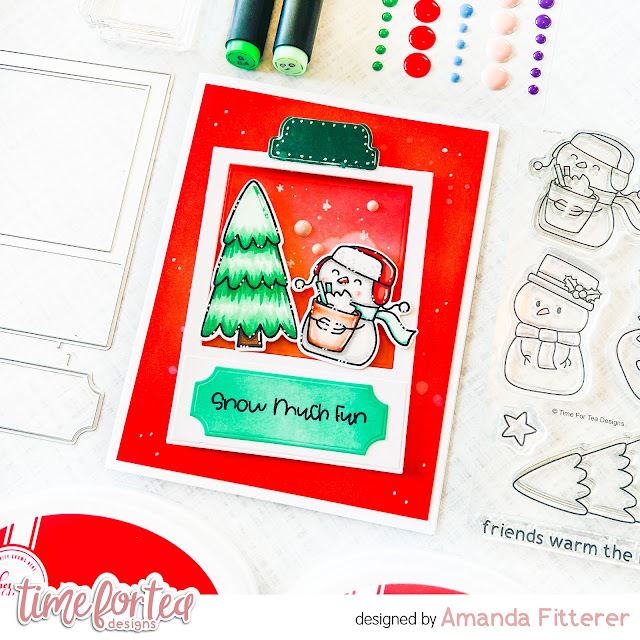
DT Annalisa here sharing my last T4T project of 2022, some Christmas tags I created using the Digital Tag Collection. These images are so adorable; I am particularly fond of Santa. I love his smile and waving hand.

I decreased the size of the digis to 70% in Photoshop, and they fit perfectly inside the tag die from the Memory Keeping Essential Dies. I used the tag-die on some patterned paper from the Winter Wonderland Paper Pad 6x6" and some other paper from my stash. I love how this die-set also has the dies to create the tag hole and supporting pieces.

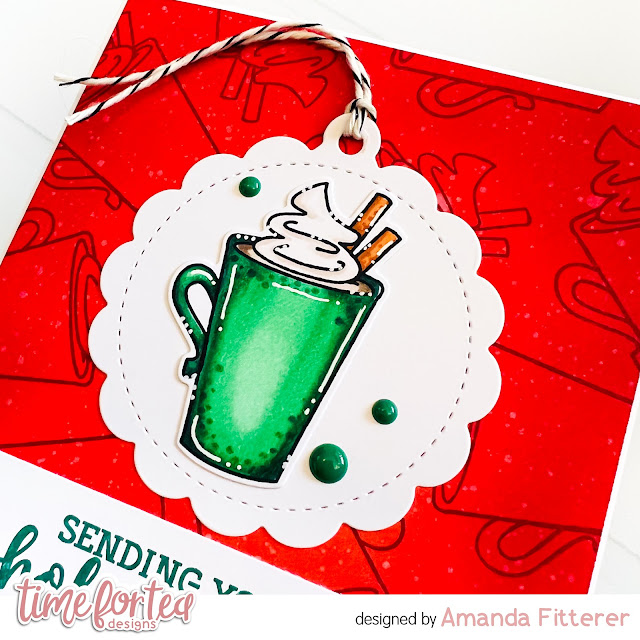
I used my Brother Scan N Cut SDX125e to cut out around the frames surrounding the tag digis and then coloured them with my Copics. I added white gel pen accents using my Gelly Roll Pen.

I used foam tape to adhere the images to the tags after gluing down snowflakes that I cut with dies from the Falalala Scalloped Slimline Dies. I stardust added Stickles and some twine to the Santa tag and left the others plain. 


I enjoyed creating and sharing my various T4T projects throughout the year. Many thanks for reading and following along with my creations this year. I am looking forward to sharing more in 2023.

Thank you so much for reading my blog post, you can use my discount code T4TANNALISA10 when you visit the Time For Tea Designs shop to get 10% off your order.


Thursday 29 December 2022

Snow Much Fun Polaroid Card


Happy Thursday, Tea Timers!  It's Amanda here! Do you love using the polaroid and tab dies from the Memory Keeping Essential Die Set?  If you don't have this die set, you HAVE to get it!  It's not just for memory keeping; that's for sure!  I love using all the elements for cards!

For this card, I grabbed my new Snow Much Fun stamp set and stamped out a few images.  I colored them with OLO markers, added some white highlights with a Gelly Roll pen, and then cut them out with the coordinating dies.

For my background, I blended Bellini and Rockin' Red Catherine Pooler inks and spritzed with water and white paint flecks.

Wondering where my "snow much fun" sentiment frame came from?  It also came from the Memory Keepers Die Set!  Yup!!  How perfect is it?  I used Minted and Aquatini to color the frame before stamping my sentiment.

For my final touches, I added some Festive Fun Enamel Dots!
I hope you have enjoyed this blog post and it makes you feel inspired to make something!  Sending you SNOW MUCH FUN!  Xx, Amanda


Wednesday 28 December 2022

Hey, Hello, Hi it's a rainbow!

 Hey there Tea-timer friends...

I hope you have all been having a fantastic Christmas time. I have been absolutely loving it, its definitely one of my most favourite times of the year! 

I thought I would change things up from Christmas cards for today and share a Hello greeting card...


This card uses these Time for Tea designs products :


To create this card I started bu selecting a piece of rainbow paper and die cutting it from the hooray cover plate. I then die cut all the shadows for the sentiments from black cardstock before die cutting the tops of the sentiments from different coloured card. The sentiment and the shadow were adhered together using liquid glue and then popped onto the card base with foam tape adding dimension. To complete the card I added clear bubbles enamel dots. 

I love how bright and cheerful this card is, perfect for a happy hello to a friend!!

Thanks for checking out today's card, I hope it inspired you to use a rainbow of colour on your next creation.

Happy holidays everyone, hugs Ashlee. 

Monday 26 December 2022

Happy Trails... to you!

Hi Tea Timers! With the year almost ending a fresh new year incoming, I can't help but think of all the new destinations I want to travel to next year. I've always wanted to try camping and thought it would be fun to create a cute camping scene using the Happy Trails set.


Sets used:


I first stamped out the images and used the following Copic Marker colors for the images:
  • Bears: E00, E01, E11, E13, E15
  • Car: R20, R22, R24, R27, B97, B99, V05, V06, N-4, N-5
  • Cup: RV21, RV23
  • Sweater: B97, B99, V05, V06
  • Fire: E23, E25, Y13, Y15, Y17
  • Stars: Y11,  Y13
I then die cut the images out using the coordinating dies and set them to the side. I took an A2 Panel and blended Uncharted Mariner and Faded Jeans. I splattered white water color over it. I then took another A2 Panel and used the hill die to cut out the bottom portion. I blended Pine Needles and Evergreen Bough. I splattered white water color over it too.


With the Winter Trees die set, I die cut it out of black cardstock. I then arranged all my images and used liquid adhesive to adhere the images onto the panels. To complete my card, I heat embossed the sentiment using white embossing powder onto the bottom panel.

I hope you are rounding out the year nicely and ready for the new year. If you like any of the products that I used today, check out the shop and use the code T4TRANDY10 at checkout.

Friday 23 December 2022

Have a Sweet Christmas


Happy Friday! DT Annalisa here, with Christmas only a few days away (eek!) I am sharing a sweet scene that features the Gingerbread Family - Our House to Yours stamp set and their coordinating dies. I love the adorable gingerbread house and people, but the kitty is my favourite (surprise).

To create the background panel, I ink-blended Speckled Egg, Stormy Sky, Faded Jeans and Prize Ribbon Distress Oxides using my Beautiful Rainbow Blender Brushes onto Distress White Heavy cardstock by Ranger. I added white splatter with Copic opaque white.


I die-cut white cardstock with the frame from the  Zig Zag Frame & Tag Dies and the Slimline Mini Village Die. I used scissors to cut out the little houses from the slimline mini village and used liquid glue to adhere this piece to the blue panel. I adhered the panel to an A2 card base.

I added double-sided foam tape to the back of the zig-zag frame and stuck it down to the card.


I stamped, coloured and die-cut all the images and added white gel pen accents. I applied glue to small areas of each image with a Quickie Glue Pen, dipped these areas into Lawn Fawn Prisma Glitter and tapped off the excess. The moon and trio of stars are from the Happy Trails stamp set, the single larger star is from Snow Much Fun and the rest are from the Gingerbread Family - Our House to Yours.


I stamped "have a sweet Christmas' and die-cut it out with the coordinating dies. I used the sentiment die to cut out two more pieces of white cardstock and glued them together for some dimension. I then adhered the sentiment to the card.  


Thank you so much for reading my blog post, you can use my discount code T4TANNALISA10 when you visit the Time For Tea Designs shop to get 10% off your order.


Thursday 22 December 2022

How to Make the Pumpkin Spice Stamp Set Work for a Holiday Card!


Happy Thursday, Tea Timers!  It's Amanda here!  I'm sharing this card I made for a family friend!  I wanted to use the Pumpkin Spice Stamp Set, but I needed it to work for Holiday card!

The first thing I did was create a vibrant red background using red cardstock and then ink blending only the edges with a dark red ink.  I stamped some mugs around the entire background with dark red ink as well.

Next, I stamped my mug image on white cardstock and then colored it in with OLO markers.  I die cut it out, as well as a little tag die.  I placed some Festive Fun Enamel Dots on the tag as well.  I stamped my sentiment on a white strip and added that to the front of my card.

This was such an easy and quick card to make!  I love that the Pumpkin Spice stamp set can be used for a winter card, don't you?!

Thank you so much for stopping by the blog today!  I hope you find time to get crafty today!!  Xx, Amanda


Wednesday 21 December 2022

Brew-tiful....!!

 Hey there Tea-timer friends....

Who loves a nice brew of iced coffee topped with cream?! I know I do and this card is totally inspired by delicious coffee....


I used the fabulous T4T Takeout coffee cup die to die cut all the pieces for the takeout coffee cup and adhered them together with liquid glue and foam tape ready for my card base. 


To create the base of my card I used the A2 Stitched hearts cover die and die cut it from grey cardstock I then used the centre dies from that same piece to die cut the pink frames for the centre. 

I added a stamped and die cut sentiment from the Pumpkin spice collection!

To complete the card a touch of Time for Tea designs Festive fun enamel dots...
A brew-tiful card perfect for the coffee lover!


This is the last card for me for 2022 on the T4T blog, I hope you have enjoyed my creations this year. I look forward to sharing more T4T inspiration with you all in 2023. Happy crafting, hugs DT Ashlee. 

Monday 19 December 2022

Have A Sweet Christmas!

Hi Tea Timers, we are getting so close to Christmas!! With the exciting Holiday just days away, I am sharing one more fun Christmas card featuring the new Gingerbread Family set and the older Baked With Love Kitchen Add On stamp set. 

This card was super fun to make and also uses the DIY frame I previously created in another post.


Sets used:
To create the frame, you just need to cut out the A2 Panel and take one of the circle dies and diecut out the three spots you would like to have the images stand out.

I wanted to have a fun baking background on my frame. I took the images from the Baked with Love set and stamped it directly onto the frame using grey ink. I then took the sentiment and stamped onto the frame using black ink.


I then stamped out the images and used the following Copic Marker colors to color them: E00, E11, E13, RV21, RV23, RV25, YG21, YG23, Y11, Y13, BG11, BG13 and BG15. I then fussy cut my images out and set them to the side.

With another A2 Panel, I lightly drew lines where the circles were going to be. I took Peacock Feathers and Salvaged Patina, Cracked Pistachio and Twisted Citron and Worn Lipstick and Saltwater Taffy Distress Oxides to blend onto the background. I really wanted to make the images pop and these color combinations helps. 


I then glued the frame onto my background and used foam adhesive to adhere the images to complete my card. 

I hope you enjoyed this blog post today and are one stop closer to finishing up your holiday cards. If you ever in need of some new holiday stamps, check out the shop and use the code T4TRANDY10 at checkout for extra savings!

Happy Holidays!


Friday 16 December 2022

Interactive Snow Much Fun


Happy Friday! DT Annalisa here and today I share a fun interactive card featuring the Snow Much Fun stamp set and coordinating die set from Time For Tea Designs. I love how the snowmen in this set are all dressed up and getting ready for Christmas! It was so fun being able to have the snowman pop up and decorate the tree.


I used the beautiful Winter Wonderland Paper Pad 6x6 for the foreground and background of this card. I cut the patterned paper with the Peekaboo Pop-Up interactive die from Lawn Fawn. I used the Slimline Mini Village Die on white card stock, removed the little houses and glued this down to the background of the scene. I used the middle tab for the interactive element and glued it inside in the appropriate area. There are several videos on YouTube showing you how to use this die. 


I stamped, coloured and die-cut all of the adorable images and added white gel pen accents. I used my Quickie Glue Pen by Sakura to apply glue and then dipped the glued areas into Lawn Fawn Prisma Glitter and tapped off the excess. 

I used liquid glue to adhere all the snowmen and other elements to the card. I used the 'snow much fun' sentiment to complete the card.


Thank you so much for reading my blog post, you can use my discount code T4TANNALISA10 when you visit the Time For Tea Designs shop to get 10% off your order.


Thursday 15 December 2022

Let it Snow Penguins


Happy Thursday, Tea Timers!  It's Amanda here!  Today, I get to share with you the cutest little penguins from the It's Penguin-ing to Look A Lot Like Christmas stamp set!

To create this card, I created a beautiful background blend using Catherine Pooler's Pucker Up and Chiffon ink pads.  I used the Snow Flurry Cover Die to create a fun texture in the background!  Although it may look subtle, it really helps pull the card together, doesn't it?!


I used the NEW Let it Snow Sentiment Die Set to create my sentiment.
I stamped and then colored my cuties from the It's Penguin-ing to Look A Lot Like Christmas stamp set.  I used OLO markers to color my images and then used a White Gelly Roll pen to add some highlights and dots.


I had SO much fun making this bright and cheery card and I hope you enjoyed it too!


Thank you so much for stopping by the blog today!  I hope you're feeling inspired by this post!  Come back next week for another happy card!
Xx, Amanda

Wednesday 14 December 2022

Happy trails

 Hey there Tea-timer friends...

DT Ashlee here with some new inspiration for you featuring the Happy trails stamp & co-ordinating die collection from Time for Tea designs!


This card uses these Time for Tea designs products...


To create this card I started with a white card base and added a die cut stitched window cover over the top using foam tape to pop it up a little.

I then added a little die cut mountain scene...

Images were stamps, coloured and die cut from the happy trails set and added to the card base to create a card full of adventure! All images were coloured using alcohol markers. Using a white pen I added some white pen highlights!


To complete the card I added the happy trails sentiment and T4T clear bubbles enamel dots...

Does this card make you excited for an adventutre? 

I hope you enjoyed my latest creation, I will be back soon with more to inspire you! Happy crafting, hugs Ashlee. 


Monday 12 December 2022

Fa La La La La... Snow Much Fun!

Hi Tea Timers, welcome back to the blog. I am excited to share a new slimline card I created using the new Snow Much Fun stamp set and some older standalone dies. I love that you can use some of the older die sets to pair with the Christmas release.


Sets used:
I stamped out my snow people and tree and used the following Copic Marker Colors to color them: B000, B00, B01, YG21, YG23, RV21, RV23, RV25, BG10, BG11, BG13, BG15, YG11, YG13, YG17. I then diecut them out using the coordinating dies and set them to the side.


I then took the largest slimline die from the Scalloped Trio Circle Nesting die set and cut out 2 panels from white cardstock. With the first panel, I blended Tattered Rose, Saltwater Taffy and Worn Liptstick Distress Oxides. I then splattered white water color over it to give it the snow effect.

With the second panel, I cut out the mini village. The Falalalala sentiment, I cut it out of gold cardstock. I arranged how I wanted all of my elements to look on the panel. After I finally decided on how I wanted them to look, I used liquid adhesive to adhere all the pieces.


I hope you enjoyed this blog post today. If you liked any of the products I used today and want to purchase them, use the code T4TRANDY10 at checkout for some savings.

25 Days of Christmas with Time for Tea Designs & WOW!


We are excited to be taking part in a collaboration with Wow to help them celebrate Christmas!


Even better they are also offering customers a code for 15% off right up until Christmas Day!! woop!

You can see our Reel on the Time for Tea Designs Instagram page or the WOW page today!

I also thought you might like to see some more close up pictures of the finished card so here they are. :)


I used our New Gingerbread Family to make this super cute tower all on top of a WOW embossed shaker card! Sparkly heaven!


Watch the reel to see how I put this Christmas cracker of a card together! :)


Merry Christmas to you all from Jo & Ant and all the T4TD Team! xxx


Sunday 11 December 2022

Let It Snow shaker card

Hey crafty friends, how are you? I hope you're having a wonderful December and finding some time in the festive chaos to make some Christmas cards! For December's step by step tutorial, I'm sharing a flat shaker card featuring the new Snow Much Fun stamp & die set!


To make one, you'll need:

- Snow Much Fun Stamp & Die set

- Copic markers or other colouring medium

- Acetate or other clear packaging

- Blue ink and ink blending tool (I used blender brushes)

- Walrus Be Friends stamp set

- Let It Snow Sentiment die

- Glitter cardstock

- White 6x6 card base

- Glitter pen and white gel pen

- Shaker filling

- Embossing ink, white/clear embossing powder, heat tool

- Vellum

- Double sided tape


Instructions

1. On a piece of 5.5 x 5.5" card stock, stamp the snowflakes from the Walrus be Friends set around the edges and toward the middle, in embossing ink. Cover with white or clear embossing powder and heat set.

2. Ink blend blue ink from the edges inwards, applying a heavier amount around the edges, and leaving white in the middle.

3. Die cut the "let it snow" sentiment from glitter cardstock, and the shadow die from vellum. Glue the glitter sentiment over the top of the vellum shadow.

4. Take a piece of acetate or clear packaging slightly larger than the card panel, and fold around the back on three sides. Burnish with a bone folder if you have one. Secure the acetate/packaging to the reverse of the card panel with double sided tape.

5. Pour the shaker filling into the shaker pocket using the one remaining open side, then fold the final side to the reverse and secure with double sided tape, completing the shaker pocket.

6. Stamp, colour and die cut two of the snowmen from the Snow Much Fun stamp set. I used Copics, and added highlights with white gel pen. I then coloured the string of lights and the bauble with a glitter pen.

7. Add the die cut sentiment and snowmen to the front of the shaker pocket, then add the pocket to a white card blank with foam tape.

I hope you've enjoyed this month's tutorial and it inspires you to try a flat shaker of your own!

Have a wonderful Christmas, Tea-Timers. If you're treating yourself (or a loved one is!), make sure you get a 10% discount with code T4TJAYNE10.


Saturday 10 December 2022

Gingerbread Latte Time!


Happy Saturday Teatimer's it's DT member Natalie here with another cute Gingerbread card. I had to get another one in before Christmas and I also wanted to create another coffee card. This one is a Gingerbread latte card you can check back on my other posts for a couple other coffee cards, including a black forest hot chocolate and a summery berry shaker card. 
This one I kept quite simple as a didn't feel it needed to be a shaker card as I wanted the focus to be on the Gingerbread Family. 
I started by cutting out the largest of the Eu Layering Dies  twice. I inked up one with some blue/green distress oxide inks and spritzed on some water for texture and splattered on some white acrylic paint to look like snow flakes. The second one I used to cut out the snow bank at the bottom using the Slimline Hillside Scene Dies. I layered this onto the base using some foam tape to create some depth. 
For the main features I used the Takeout Coffee Cup Dies  I used brown Distress Oxides to create the cup and a added a little splatters on the cream with the same colours. For the straw I coloured it with red copic markers and added stripes using a white gelly roll pen. 
The Gingerbread are from the new Gingerbread Family Stamp set I coloured them up with Copic markers and added some extra details with black and white gelly roll pens. Once these were all layered on I could see where I needed to place the big sentiment and snowflakes. These are both from the Falalala Scalloped Dies I adhered these and added some extra snow dots using my white gelly roll pen and that was my card finished up. I hope you like it dont't forget to check back for more inspiration and you can also get 10% off in the Time for Tea Shop using code T4TNATALIE10. 
 

Other Posts You Might Like