Pages

Wednesday 31 May 2023

Every daisy

Hey Tea-timer friends...

It's DT Ashlee here today with some new inspiration using the Oops a daisy set from Time for Tea designs!!


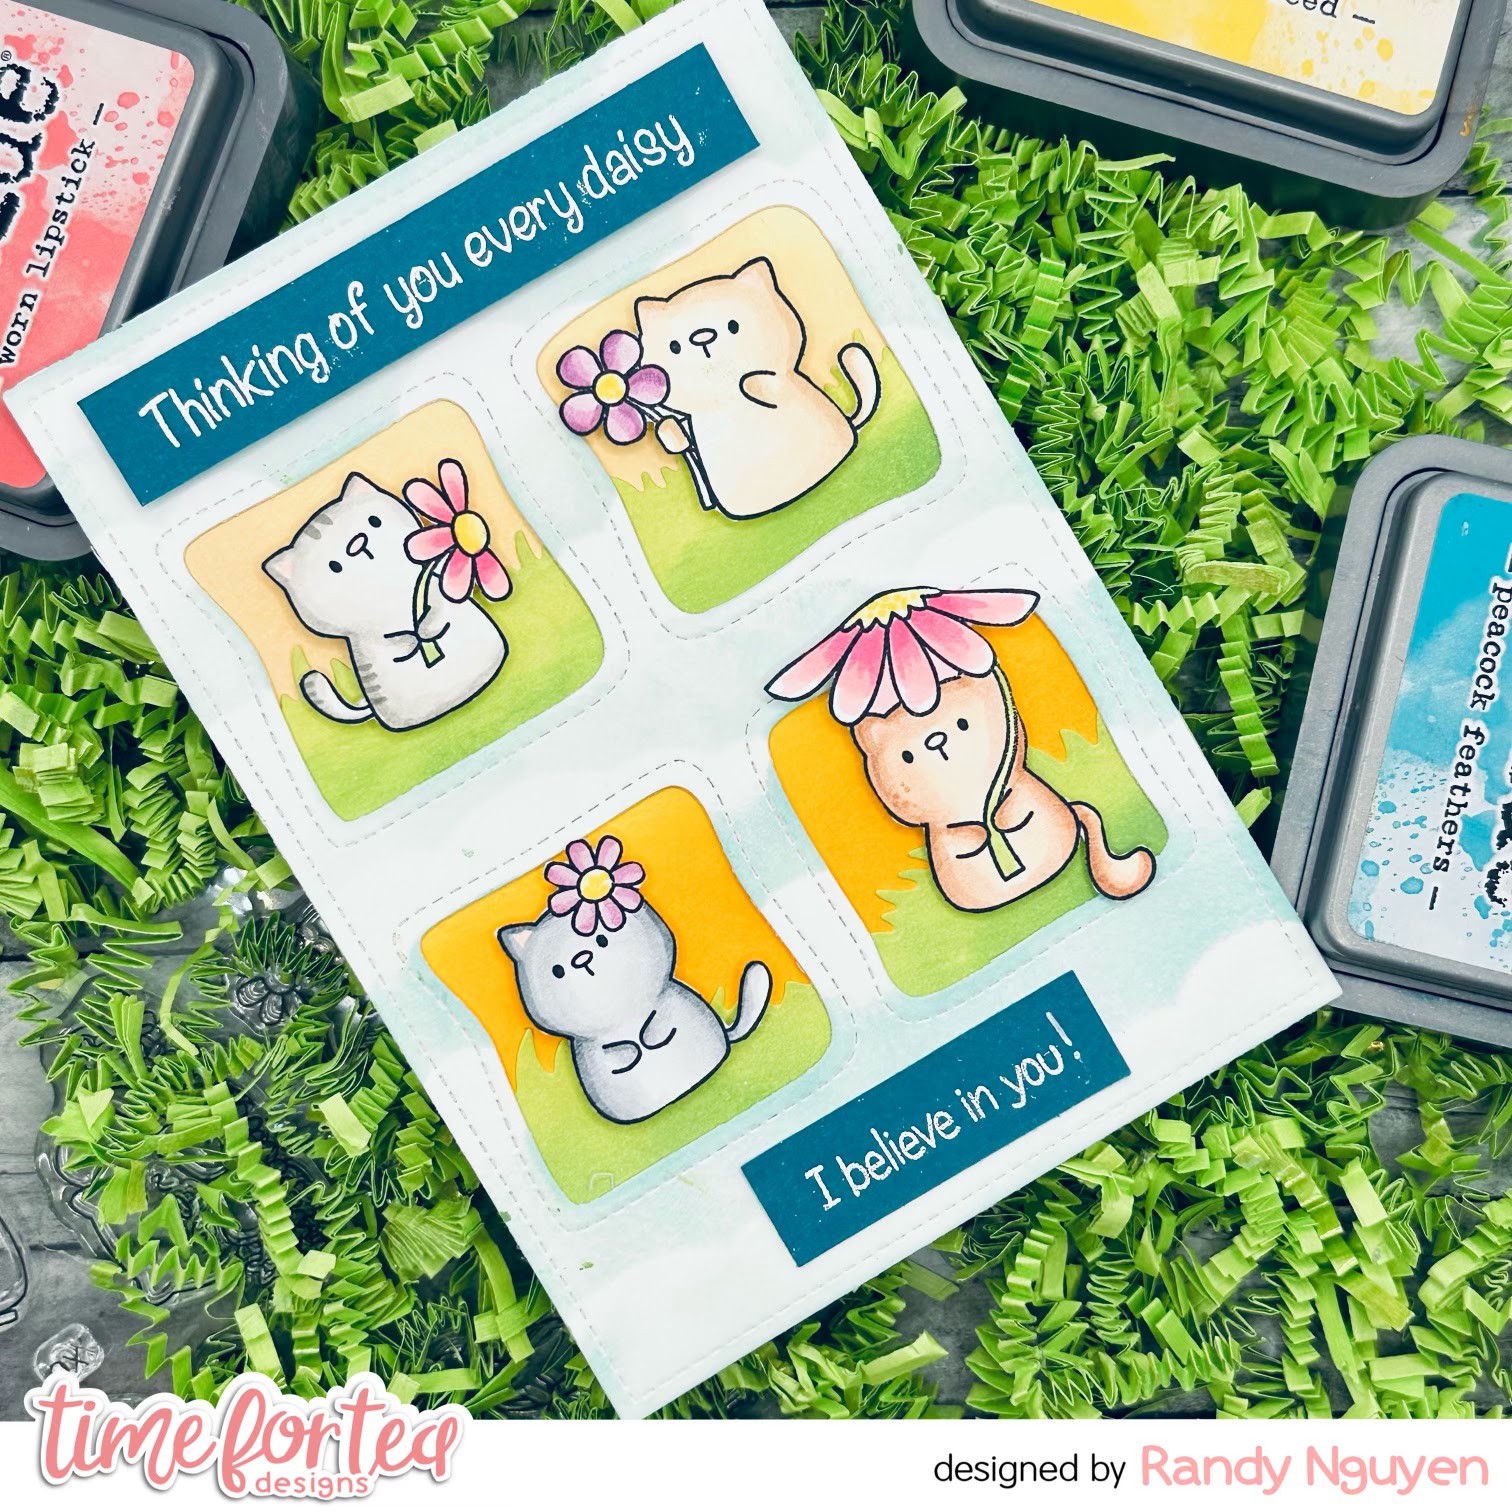
To create this card I started with a yellow cardstock that I added some cute paw prints to using the Pawsome prints stencil. I then die cut a circle frame from the Slimline porthole dies and adhered it to the base using foam tape....

A sentiment "Thinking of you every daisy" was stamped onto the base using Memento tuxedo back ink. 


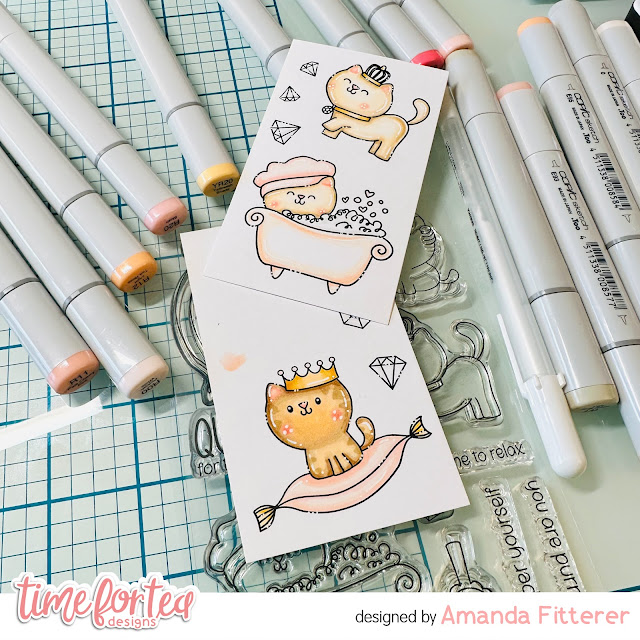
I stamped two kitty cats and a couple bee's from the Oops a daisy set and coloured them in with Spectrum noir tri-blend markers along with Shimmer drops paint. I love adding some painted elements to my images, it's so shiny and beautiful!!

To complete the card I added one tiny little sequin as a finishing touch...


I hope you enjoyed today's inspiration. Happy crafting, Hugs Ashlee. 


(You can use discount code T4TASHLEE10 for a discount off your order in the T4T shop if you would like to do a little crafty shopping). 

Tuesday 30 May 2023

I'm Quackers About You....

Hi friends, it's DT Miri here and I am delighted to be back with another card today. It's cold and dreary here in Melbourne, Australia so what better than a fun, spring coloured card. For today's card I am using the super cute Lucky Duck stamp set. I mean how adorable are those little ducks!! So let's get started on the card........


I started off by getting the card base and panels prepared. I cut and scored a deep pink cardstock to create a card base that measured 4.25 x 5.5 inches. I then cut two panels of white cardstock, one slightly smaller than the card base and the second one, slightly smaller again. I then moved onto the images.


I stamped two of the ducks and one flower in Copic friendly dye ink. I then stamped the grass image twice across the smallest white panel. I coloured everything with Copic markers and once dry I fussy cut the ducks and flower, although there are coordinating dies available. I then added white highlights to all of the images with a white gel pen.


I used the following Copic marker combinations for today's card - 

Y38, Y35, Y15, Y13, Y11, YR16, YR12, R85, R83, R81, BV13, BV02, BV00, 
G02, G00, G000, G0000

I then added an ink blended sky about the stamped flowers using Tumbled Glass and Salty Ocean Distress Oxide Inks and stamped the bee image onto the background with black dye ink. I then stamped the sentiment in deep pink dye ink and added the ducks and flower to the panel with foam tape and liquid glue. Finally I added all of the panels to the card base.


That completes the card for today. I hope you are inspired to make a fun, spring card sometime soon. Don't forget to use my code - T4TMIRI10 - for 10% off when you head over to the Time For Tea Designs online shop. Happy crafting.

See you next Tuesday xx


Monday 29 May 2023

Thinking of You Every Daisy

 Hi Tea Timers, welcome back to the blog and Happy Monday! One of my favorite sets in the new release is the Oops A Daisy stamp set that features the cutest cats with pretty daisies! 

Sets used:

(Coordinating dies available here)
(Stamp and die set combo available here)

I first stamped out the 4 cats and used Copic Markers to color them and the sweet daisies as well. I fussy cut them out and set them to the side.

I then took the Wonky Windows die and cut it out of white cardstock. I wanted to create a sky on the panel. I blended Salvaged Patina with a cloud stencil directly onto the panel.


I then took a second cardstock and trimmed it down to fit the back of the window panel. I blended Mustard Seed and Scattered Straw onto the background. I took another cardstock and die cut out 2 grass pieces. I blended the grass pieces with Mowed Lawn and Twisted Citron Distress Oxides. 

I took the two sentiments and heat embossed them onto teal cardstock and trimmed them down.

To assemble my card, I placed the window panel onto the background and added the grass pieces on top of the background. I trimmed off any excess pieces. I then adhered the window panel onto the background.


To complete my card, I adhered the 4 cats into each window using foam adhesive. I then adhered the sentiments using liquid adhesive and foam tape.

Aren't these cats just the cutest? I hope you enjoyed this blog post today and love this set as much as I do. If you want to purchase this set, head to the shop and use the code T4TRANDY10 at check out for extra savings.

Happy Crafting!

Saturday 27 May 2023

Wedding polaroids


Hi everyone, DT Emma here sharing with you how I made this "Just Married" card featuring the Just Married stamp set from the new release. For this card I really wanted to create polaroid photos as if sharing pictures from the special day. 

For the polaroids I used the dies in the Memory Keeping Essentials Die set to die cut four photo borders (on one of the pieces I stamped out the sentiment "Just Married" from the stamp set in black archival ink).

I cut out four clear acetate pieces to the size of the outer edge of the photo borders and adhered each of them to a photo border. I then mounted two of the photo border pieces with foam tape (making sure to put foam tape to the edges and also around the window section. I then popped clay love heart shaker elements in the window section before adhering the back layer to create the shaker polaroids.  

I then stamped and die cut the images from the stamp set and used the following copic colours to colour them in:

The Wedding Car: T5, T4, T2, T1, Y38 and BG0000
The Two Bears: E23, E55, E31, R32 and R30
Champagne glass: E51
Flower Crown: RV13 and Y35
Rings: R27, T0, T1 and T2
Church: (Window Frames) R27, (Door) E74, (Windows) BG0000, (Walls) W1 and W3

I used archival ink in pink to stamp the love heart registration plate. I adhered the coloured images to the polaroids to create a cute church scene and a wedding car scene. 


I adhered the two polaroid pictures of the card base using foam squares so that they would overlap each other on the card. 

I hope everyone loves this card as much as I do! Have a lovely weekend. 

If you are shopping on the site this weekend don't forget to use my code T4TEMMA10. 
 

Friday 26 May 2023

3 Card Ideas with One Stamp set - New Video


Watch our latest video on YouTube or Facebook to discover 3 ideas using one stamp set.

Hi Tea Timers!
Jo here with some more weekly inspiration. This week I used one stamp set to give you 3 different card ideas.


I used a combination of ideas that I shared during the Live to make my final project.


This was a super simple card to create.
The background was created with our Pretty Pastels Paper Pad.


The window is from the Purrfect Day Scene Builder Dies and the cactus from the Home is Where the Heart is stamp set.


I added all the images I'd coloured and die cut from the Loads of Love stamp set. I added some to the shelf and the cactus to the window sill. I love how many ways the washing machine can be put together to make it interactive.  


I finished the design off with the die cut sentiment 'with you, even chores are fun'.

You can watch the video in full via the link below including the other 2 card ideas.


I hope you enjoy this video and the card ideas.

See you for the next one.

Happy Crafting

Jo XOXO


Sending Loads of Love


Happy Friday! DT Annalisa here sharing a cute laundry scene created using the new Loads of Love stamp set paired with some Time For Tea Designs stencils.

I used the Tiled Wall 6 x6" and I Really Dig You stencils. I masked off the bottom of an A2 white card base using mint masking tape and ink-blended Hickory Smoke Distress Oxide with my Beautiful Blender Brush over the Tiled Wall 6 x6"  stencil. I added ink splatter with water and a paintbrush using the same colour. 


I removed the mint tape and used it to mask the tiled wall area and ink-blended Speckled Egg on through the I Really Dig You stencil. I added Broken China Distress Oxide ink splatter.

I stamped, and coloured (with Copics) several images from the Loads of Love stamp set; the window is from Home Is Where The Heart Is, and the shelf is from Baked With Love Kitchen Add On. After die-cutting the images, I added white gel pen accents with a Gelly Roll Pen

I stuck the images to the card base using a combination of liquid glue and double-sided foam tape for dimension.

Thank you so much for reading my blog post. Remember to use my discount code T4TANNALISA10 when you visit the Time For Tea Designs shop to get 10% off your order.

Thursday 25 May 2023

Holy Moley - Check out this birthday card!

Hey there, Tea Timers!!  It's Amanda here with a really cute birthday card featuring the I Really Dig You stamp and die set!

For my background, I used the Scene Builder Stencil.  I blended the background with All That Jazz and Matcha.

I stamped my images and then colored them with Copic markers.

After die cutting the images out with the coordinating dies, I used 3D foam squares to attach them to the card panel.  Then, I glued my panel to the A2 card base.


That's all for me today!  I hope you find some time to get crafty today!  Xx, Amanda


Wednesday 24 May 2023

QUEEN

 Hey there Tea-timer friends....

DT Ashlee here with you today sharing a Time for Tea designs card fit for a QUEEN!


I used these T4T products :

To create this card I started with a light pink cardstock that I die cut from the quilted cover die. I added some pink shading to the bottom with a darker pink ink. I then die cut the letters to spell QUEEN from pink and black cardstock so I could adhere them together creating a shadow! I adhered the sentiment to the card base using foam tape and then added a stamped/die cut sub sentiment underneath....


I stamped, coloured and die cut a bunch of the sweet images from the Queen for the day set. These were coloured using Spectrum noir tri-blend markers. I added WOW! glitter to the tub water along with gloss on the mirror/cats jewel!!

now its ready for the QUEEN....


Thanks for checking out my latest card, I hope you enjoyed it. 
Happy crafting, hugs Ashlee. 

Monday 22 May 2023

Ewe Are Moovellous......

 Hello crafty friends, DT Miri here! It's great  that you have stopped by again today. Today I am back with another card using the Ewe Are Moovellous stamp from the recent new release. This is such a gorgeous stamp with lots of cute images that can be used in many different ways. I mean look at that cow....... adorable!!! So let's get started on the card.....


I started by creating a card base in a medium green cardstock to measure 4.25 x 5.5 inches. I then trimmed a panel of white cardstock to measure slightly smaller, on this panel I ink blended Tumbled Glass Distress Oxide Ink for the sky. Using the Landscape Edge Die I die cut a piece of white cardstock using the cloud die and another using the grass die. On the cloud die cut I added some Tumbled Glass Ink to the edges and glued to the panel. I then ink blended Mowed Lawn and Cracked Pistachio Distress Oxide Ink to the grass die cut. Once dry, I splattered with water and green liquid water colour paint. Once the piece was dry, I added to the panel, only gluing the sides and bottom sections of the die cut.


I then stamped the images in Copic friendly die ink and coloured with Copic markers. For these images, I have used the following colours:

Greens - YG07, YG05, YG01
Greys - W2, W0, W00
Browns - E57, E55, E53, E51, E09, E07
Yellows - YR04, Y38, Y35, Y11


I fussy cut the images, although there is a coordinating die available and added then to the panel and  glued the panel to the card base.

That completes the card for today, I hope you love it and are inspired to get crafting time in sometime soon. Don't forget to head over to the Time For Tea Designs online store to see the whole new release and remember to use my code - T4TMIRI10 - to get 10% off.

See you next week for another card xx


You're Engaged!

Hi Tea Timers and welcome back to the blog. My friends just got engaged and I wanted to create a fun engagement scene underneath the stars, just how the engagement happened! Thankfully the You're Engaged Stamp set had all the images I needed to recreate the scene.


Sets used:
(Coordinating dies available here)
(Stamp and Die combo available here)

I first took an A2 Panel and blended the Movie Star Stencil with clear embossing ink. I poured white embossing powder over the ink and heat embossed it. 

With Uncharted Mariner, Seedless Preserves and Picked Raspberry Distress Oxides, I blended over the embossed area. Once completed, I took a napkin and rubbed it over the blended area so the stars could shine through a bit more.


I took another panel and cut out the hill piece. I then heat embossed my sentiment with gold embossing powder on the bottom of the piece. I blended Mowed Lawn and Forest Moss Distress Oxides over this piece.

I stamped out the images of the cats and the car and fussy cut them out. I made sure to leave a little area underneath each critter so I could glue them behind the car easily. I used YR00, YR12, YR14, YR18, E00, E01, E11, E13, B91, B93, B95, B97, B99, C-0, C-1, C-2, C-3, C-6, C-7, C-8 Copic Markers to color the images.


I first adhered the hill piece with liquid adhesive. I then glued the critters behind the card and adhered the car onto the panel using foam tape. 

I hope you enjoyed this tutorial today. My friends absolutely loved the engagement card and I hope you do as well. Check out the links to all the products that I used today and don't forget the code T4TRANDY10 if you decide to purchase some new sets! Happy Crafting!

Saturday 20 May 2023

Oops I forgot your birthday...


Hi everyone, DT Emma here sharing how I made this belated birthday card using the Oops a Daisy stamp set. 

First I started by die cutting my slimline pieces using the Slimline Scalloped Trio Circle Nesting Dies. I die cut the largest rectangle from kraft cardstock and the mid sized rectangle from Neenah solar white cardstock. 

For the main background I took the white slimline piece and ink blended Distress Oxide Dried Marigold from the bottom up and then Distress Oxide Kitsch Flamingo from the top down leaving a faint white separation between the colours. I then used a wet paint brush with some Kitsch Flamingo to create the splatters. 

For the images I used the two cats holding daisies looking away from each other, stamped them with alcohol friendly ink along with two of the individual daisy flowers and then coloured with copic markers. 

For the sentiment I wanted to use the "Oops a Daisy I forgot your birthday" sentiment but wanted to make a statement feature, so I ink blended a scrap of white cardstock with Distress Oxide Picked Raspberry to a faded blend. I then used my alpha dies to die cut the letters for "Oops". Once I had the letters cut I put glue on the bottom half and poured chunky glitter over them to add some sparkle to the blended fade. When they were dry I propped them up with foam strips and adhered them to the centre of the blended background. 

I stamped the rest of the sentiment using the Oops a Daisy stamp set on white card stock in plain black ink and cut round with my trimmer. 

I put the whole card together, with the cats either side of the Oops and then adhered that piece to the Kraft slimline background and then onto a plain white card blank. 


Hope you all love this card as much as I do. Have a great weekend! 

Friday 19 May 2023

Sending Kitty Love


Happy Friday! DT Annalisa here sharing a floral kitty card I created using the Oops a Daisy stamp set from Time For Tea Designs. I love these adorable kitties so much and loved colouring them up to look like my cats Bella and Luna! 

I began by die-cutting white cardstock with the Flirty Flowers Cover Die. I trimmed a piece of the Pretty Pastels 6x6 Paper Pad to fit an A6 card base (5 13/16 by 4 1/8 inches). I used double-sided tape to adhere the patterned paper to an A6 card base. I then used liquid glue to stick the Flirty Flowers panel onto the card base.

I used the small scalloped frame from the Smile Inverted Scallop Frame Dies to cut a frame from white cardstock. I trimmed a panel from white cardstock to fit behind the frame. Onto this, I glued patterned paper from the same Pretty Pastels Paper Pad. I used the Landscape Edge Standalone Die Set to trim the green floral patterned paper. 

I adhered the frame to the panel and then used double-sided foam tape to stick this to the card base. Before adhering this panel to the card base, I stamped the 'sending love' sentiment with Versafine Onyx Black. 

I stamped, and coloured (with Copics) the cats from Oops a Daisy. I added white gel pen accents with a Gelly Roll Pen. The butterfly and bee are from I Really Dig You, and the heart flowers are from Ewe Are The Best.

I used liquid glue and foam tape to adhere the images and added Glossy Accents to some of them.

Thank you so much for reading my blog post, you can use my discount code T4TANNALISA10 when you visit the Time For Tea Designs shop to get 10% off your order.


Thursday 18 May 2023

THREE Mother's Day Cards with Amanda

Hey there, Tea Timers!!  It's Amanda here with THREE Mother's Day cards using the Queen for the Day stamp set.

To make these cards, I cut some patterned paper down to 4"x5.25" and then glued them to my A2 card bases.
Next, I die cut some gold vellum and white cardstock with some oval dies and propped them up with white foam tape.
Then, I stamped my images and colored them in with Copic markers.  I die cut them out with the coordinating dies.
Here are a few more photos of the finished cards!


I hope you find some time to get crafty today!  Xx, Amanda


Other Posts You Might Like