Pages

Friday 31 May 2024

Sweet Shaker Hearts


Happy Friday, DT Annalisa here today! I recently got my hands on the Heart Nesting Dies 
from Time For Tea Designs and had to make a shaker with them and the cute little characters from Sweet Cart Critters.

I used my Beautiful Blender Brushes to ink-blend several colours onto an A6 white card base. The colours were as follows: yellow; squeezed lemonade Distress Ink, Butter Bar Hero Arts Shadow Ink, blue; tumbled glass Distress Ink, Surf and Ocean Simon Says Stamp Pawsitively Saturated inks, green; Altenew Limeade Bamboo.


For added interest, I added splatter with water, silver metallic watercolour and a paintbrush and set it aside to dry.


I used the largest Simple Nesting Dies – A6 to cut patterned paper from the Pawsome Rainbows 6x6' Paper Pad. I used two dies from the Heart Nesting Dies to cut three open areas in this patterned paper piece. I placed the openings in the areas where I had ink blended.


I added acetate to the back of the patterned paper with double-sided tape. Then I added 3mm double-sided tape to the back of this and stuck it down to the inked card base. I had placed clear and coloured sequins in the appropriate areas before adhering down the hearts panel.


I stamped and coloured (with Copics) several images from Sweet Cart Critters and cut them out with their coordinating dies. I added white gel pen accents with a Gelly Roll Pen.


The two sentiment stamps were from Warm Hugs and cut out with the coordinating die set.  


Thank you so much for reading my blog post. Remember to use my discount code T4TANNALISA10 when you visit the Time For Tea Designs shop to get 10% off your order.  

Wednesday 29 May 2024

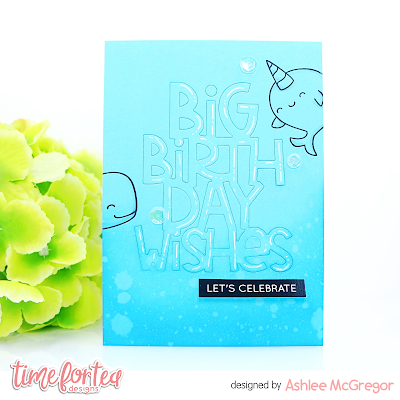
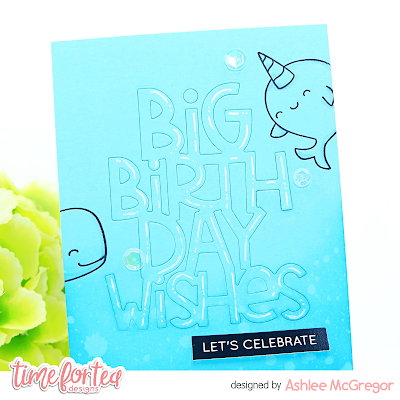
Under the sea birthday wishes!

 Hey there Tea-timer friends...

DT Ashlee here with a new card using a bunch of supplies from Time for Tea designs!!


I used these T4T products to create this card :

Making this card I started with a blue card stock base that I die cut the large sentiment out of but instead of removing the cut I left it in the card base before adding white pen highlights. 

Using distress oxide ink I added some ink and water splatters to the bottom portion of the card. I then chose a couple of the cute whale images from the get whale soon set and stamped them directly onto the card base before adding some shading with a grey alcohol marker....


To complete the card I added a sub sentiment adhered with foam tape along with a touch of sequins!


That's all from me for today, I hope you like this sea themed birthday card. Until next post happy crafting, hugs Ashlee. 

Tuesday 28 May 2024

A Latte Love

Back to my favorite topic: coffee ☕

I like, no love, all kinds of coffee but a good cappuccino or latte macchiatto is a real treat for me. I'm also a big fan of coffee related puns. And T4T has got the perfect stampset with all kinds of cute sentiments to use on your crafty projects. So this time, I started out looking at which sentiment I wanted to use from the Perfect Blend Clear Stamp Set. Sending you a whole latte love was the winner!


I paired them up with the Takeout Coffee Cup Dies, ran those through my die-cutting maching using different colors of smooth cardstock. I emphasized the round shape of the cup by using Distress oxide on the sides (tea dye).

Borrowed some basic shapes from different die sets to make a smiley face. I used a white gelly roll pen and glossy accents on the heart eyes. 


Whilst the eyes were drying, I created the background. I die cut 3 panels with the Simple Nesting Dies - A6, one out of ochre cardstock, 1 out of white cardstock and a slightly larger one out of old pink. I took the white cardstock and colored it entirely with distress oxide tattered rose. After that, I used the Confetti 6 x6" Stencil and distress oxide saltwater taffy. With the border out of the Sweet Scalloped Dies set I made a scalloped edge about one third from the bottom of the panel. I layered all 3 panels on top of each other and adhered them with double sided tape onto a white cardbase. Stamped on the sentiment and adhered the cute coffee cup with 3D foam tape.


Finished it by sticking om some Time For Tea Designs Designer Enamel Dots (festive fun set) in the same color as the panel (tattered rose) and the card is ready to send off to someone who can use a little latte love!

Hope you enjoy your day!
All the best,


Monday 27 May 2024

"Hope Your Day is Sweet!"

 Hi Tea Timers, welcome back to the blog. With summer drawing near, I wanted to create a fun beach card to welcome in the new season. I love ice cream and thought the 'Cool Critters' stamp set was perfect for the summer vibes.

Sets used:

I first stamped out the images and used the coordinating die set to cut them out. I then used Copic Markers to color the images. Once completed, I set them to the side and worked on my background.

I took a cloud stencil and blended it with Salvaged Patina and Scattered Straw Distress Oxides onto an A2 Panel.

I then took another A2 panel and die cut out the hill pieces. One piece I wanted to use for the sand. The second piece I wanted to use for the water.

For the water piece, I blended it with Peacock Feather Distress Oxides and splattered it with white water color.

For the sand piece, I blended it with Antique Linen and Tea Dye Distress Oxides and splattered it with brown and white water color. 

To assemble the card, I adhered the water piece first and then the sand piece with liquid adhesive. I then added the two palm trees behind the sand piece with liquid adhesive.

I added the ice cream truck using liquid adhesive as well. Before I added the two critters with foam tape, I heat embossed the sentiment directly onto the card using embossing ink and bronze embossing powder.

Once I heat embossed the sentiment, I added the 2 critters with foam tape.

I hope you are ready for summer like I am. Hopefully it won't be too hot but that would just mean more time to craft! All the items that I used are linked above. Don't forget to use the code T4TRANDY10 at checkout for extra savings. 

Saturday 25 May 2024

Wavy celebration with Kaja

 Hi all,

It's Kaja from Kajcyika crafts and today I am back with an adorable card that can be used for any celebration.

Take a look:

This time, I knew that I wanted to make a summer card, so I started off by creating the background. For it, I used distress inks with which I watercolored directly on a piece of a watercolor card stock that is slightly smaller than my card base. 

To make the waves a tiny bit more realistic, I added some white gel pen details. I used the same pen to then create a stitched border around the outside edge of the panel.

Next, I stamped out a bunch of images from the Beach buds stamp set which I colored in using alcohol markers. I decided to go with the colors that are a bit more neutral, so the background really pops out.

Even though I wanted the focus on the background, I still found it a bit too busy, so I die cut a rectangle and two hearts from white cardstock using dies from the Stitched hearts cover die set. 

The last thing that I had to add was the sentiment that reads 'let's shellebrate' and can be found in Beach buds stamp set.

Then, I just glued everything on a card base using double sided foam squares and liquid glue and the card was all finished.

Hugs,
Kaja

Friday 24 May 2024

Warm Caffeinated Hugs


Happy Friday! DT Annalisa here with a coffee-themed card I created using the Warm Hugs stamp set and the Warm Hugs Large Sentiment Die. This card would be perfect to send to a coffee-loving friend going through a hard time.

I applied tea dye Distress Oxide spray to Neenah Smooth Classic Cream 80-pound cardstock. Once dry, I die-cut it with a 5 1/4 inch by 4-inch stitched rectangle die and ink-blended tea dye Distress Oxide from the edges using my Beautiful Blender Brush.


I took three teal Simon Says Stamp colours of Pawsitively Saturated inks - Seafoam (lightest), Surf and Ocean (darkest) and applied them directly onto white card stock from light to dark overlapping slightly between each colour. I die-cut into this inked panel with the Warm Hugs Large Sentiment Die and added white gel pen accents with a Gelly Roll Pen.

I die-cut Neenah Metallic card stock with the same sentiment die and used liquid glue to stick the two text layers slightly offset to create a shadow. I then glued a third sentiment layer behind these two for added dimension and stuck these down to the card base.


I stamped and coloured (with Copics) several images from the Warm Hugs stamp set and cut them out with their coordinating dies. I added white gel pen accents with a Gelly Roll Pen.

A 1 mm double-sided foam tape was added to the two critters and coffee cups and they were then added to the card below the sentiment. Next, I die-cut two small hearts from the same teal paper as the card base, added white gel pen accents and used double-sided tape to stick them to the card beside each critter. I used liquid glue to adhere the coffee beans to complete the card.


Thank you so much for reading my blog post, be sure to use my discount code T4TANNALISA10 when you visit the Time For Tea Designs shop to get 10% off your order.


Wednesday 22 May 2024

I miss you!

Hey there Tea-timer friends...

DT Ashlee here and this week I have another clean and very simple card to share with you that reminds me of the friends TV show and how people might be feeling since one of the major characters passed.


I used the Home is where the heart is stamp set along with a sentiment from the brighter days sentiment cards....

To create this card I started with a grey cardstock base that I directly stamped the couch image onto. I then added some highlights to it with a white pen and some slight shading with a grey alcohol marker. 

I selected a sentiment from the brighter days sentiment card set and adhered it onto the card base using foam tape to give the card a little dimension. Completing the card with a touch of sequins!


I like how simple these style card are and they are so easy to reproduce for multiples. Thanks for stopping by the blog today I hope you like this card and it inspires you to try a CAS card too!

Happy crafting, hugs Ashlee.


Tuesday 21 May 2024

Crafty friends are the best!

What would we be without crafty friends? Besides the fact that they understand the need (not want) to have much craft supplies, they are also very inspirational! I received a gorgeous card from one of my crafty friends and was inspired by her background. So much, that I used this inspiration and recreated a version of my own for this card I'd like to show today.

I used the T4T crafty cats stamp set and stamped the images onto white coloring cardstock. Using my Copic alcohol markers, I colored the critters and their little crafty accessories. Ran them through my Scan 'n Cut machine to cut them out.

I took out the Tiled Wall 6 x6" Stencil and stenciled a wall onto a slimline panel with Distress oxide tattered rose. Next up, I made a floor using Distress oxides tea dye and aged mahogany. Now for the fun part, or at least the most fun part for this card, I used all kinds of different distress colours and made splatters, using a Lawn Fawn stencil, on top of the tiled wall. Doesn't that look festive!


Using 3D foam tape, i adhered the critters and accessories onto the panel. I stamped on the sentiment with the help of a stamping tool. Because the background is very loud, I chose a lighter slimline panel to adhere the entire scene onto. Added a white base card and left it at that!


Have a crafty day everyone!

~Ilona~


Monday 20 May 2024

BIG Birthday Wishes - Shaker Card

 Hi Tea Timers, welcome back to the blog. Today, I wanted to build a card around the 'Big Birthday Wishes Large Sentiment die' and decided to make a shaker card for some extra birthday fun.

Sets used:


I generally would stamp and die cut out the images to add to the front of the card, but thought it would be fun and different to create a special background pattern for the shaker card.

I took an A2 panel and stamped the images repeatedly over the panel using black ink. Once I had my background completed, I took Copic Markers and used them to color in the images. 


To create my frame, I took one of the rectangle dies and die cut it out of gold cardstock. I then took a second rectangle die, 2 sizes smaller, and die cut out the middle.

I then took the large die again and die cut out the acetate to fit behind the frame. With tape runner, I adhered the acetate to the frame.

I then die cut out the large sentiment from the same gold cardstock. I added tape runner to it as well and adhered it to the frame.


With foam tape, I added it to the back of the frame, around the perimeter. I then took the anti-static powder and rubbed it on the sides of the foam tape to help get rid of the stickiness.

I then took a sequins mix that I had in my stash and added it into the frame. Once I had the desired amount, I adhered the background to the frame to complete my card.

I hope you enjoyed this super easy tutorial today. All of the items that I used are linked above. Don't forget to use the code T4TRANDY10 at checkout for extra savings. Happy Crafting!

Friday 17 May 2024

3D Birthday Wishes


Happy Friday, everyone! DT Annalisa here sharing a 3D birthday card with the adorable I Really Dig You stamp set and the coordinating dies.  I love this cute gardening scene; it makes me want to go outside and start planting my garden!

I ink-blended twisted citron Distress Ink and Oxide using my Beautiful Blender Brushes onto a green piece of patterned paper from the Gorgeous Gingham 6x6' Paper Pad. I die-cut this using the Platform Pop-Up die from Lawn Fawn to create the base and the grass areas. 


I used the Platform Pop-Up add-on die for the sky area. I die-cut white cardstock and ink-blended it with tumbled glass over a cloud stencil. I then added splatter using mermaid lagoon Distress Ink, water and a paintbrush.

I followed several instructional videos on YouTube from Lawn Fawn on assembling the interactive die. 


I stamped and coloured (with Copics) several images from the  I Really Dig You and cut them out with their coordinating dies. I added white gel pen accents with a Gelly Roll Pen.

I used liquid glue to stick the elements down to the platform pop-up to complete the scene. 


Thank you so much for reading my blog post, be sure to use my discount code T4TANNALISA10 when you visit the Time For Tea Designs shop to get 10% off your order.


Wednesday 15 May 2024

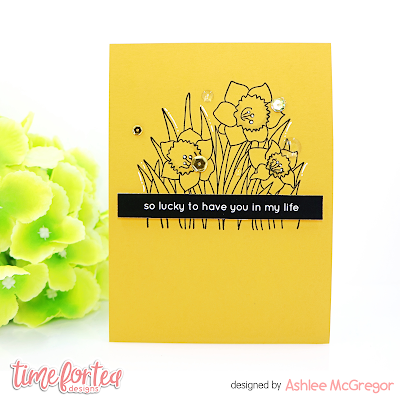
So lucky

Hey there tea-timer friends....

I have a new Time for Tea designs card to share with you today and this one uses some beautiful flowers from the Darling daffodils stamp set!


To create this card I started with a yellow card stock base which I directly stamped the large floral image on to using black ink. I then added some slight shading to the flowers and white pen highlights.

To add a sentiment I used one from the brighter days sentiment cards and adhered it to the card base using foam tape giving the card a little dimension. To complete the card I finished it off with some sequins and T4T enamel dots (clear)....


Thankyou for checking out my card today, I hope you enjoy this daffodil inspiration

Until next post, happy crafting. hugs Ashlee.


Tuesday 14 May 2024

Let's party!


Hello everyone! It's Ilona on the T4T blog, ready to party 🥳
For this card I used the Let's Party Clear Stamp Set. After stamping and coloring the critters and the cake, I used my Scan 'n cut machine to cut the images. Put those aside and created the background by using my Simple Nesting Dies - A6 and Distress oxides.
Tea dye and aged mahogany for the floor. Shaded lilac, cracked pistachio and evergreen bough for the top. 
Finished it by adding splatters with white acrylic paint.


For high contrast I chose white cardstock for the Let's Party Large Sentiment Die.
To make it stand out even more, I added shade by die cutting another piece in grey cardstock. Glued those two die cuts together and glued it onto my background.


I then added the critters and the cake, using 3D foam tape to create depth.
I added Stickles (sunburst) onto the yellow parts for some extra sparkle 🌟
Then I adhered the entire panel onto a blue panel which I cut using the Sweet Scalloped Dies.


Added the mint colored dots from the summer haze Time For Tea Designs Designer Enamel Dots set and that finished my card. Hope it gets you in the partying mood (partying = crafting, obviously 😉)


All the best,

Ilona

Monday 13 May 2024

Happy SNAIL Mail!

 Hi Tea Timers, welcome back to the blog. I wanted to send out some snail mail to a friend and thought I would make it Happy Snail Mail! I love this You Got Mail stamp set and thought it was perfect for what I wanted to send out.

Sets used:

(coordinating die set available here)

I first stamped out my images and fussycut them out. I then used Copic Markers to color the images and set them to the side.

For my background, I took an A2 panel and blended it with Salvaged Patina and Scattered Straw Distress Oxides and a cloud stencil.


I took another A2 panel and die cut out the grass piece. I then blended the piece with Twisted Citron, Mowed Lawn and Forest Moss Distress Oxides and set it to the side.

With the 'happy' word die, I die cut it out of pink cardstock. And with the 'mail' word die, I die cut it out of teal cardstock.

To assemble my card, I first adhered the grass piece using liquid adhesive. I then added the mailbox image behind it. 
 

I decided how I wanted the sentiment to go by adding the snails first using foam tape and then adding the words using liquid adhesive.

I wanted it to look like the happy mail was falling and raining on the loving snails so I used a mixture of foam tape and adhesive to add the envelopes above them, falling from the sky. I trimmed off any excess pieces.

I hope you enjoyed this tutorial and will send out some Happy Snail Mail too! All of the items I used are linked above and don't forget to use the code T4TRANDY10 at checkout for extra savings.


Saturday 11 May 2024

Colorful foxes with Kaja

Hi all,

It's Kaja from Kajcyika crafts and today I am back with a bright and adorable birthday card!

Take a look:

This time around, I wanted to make a bold card for my nephew that just loves anything colorful. I started off by stamping two cute little foxes from Birthday fox stamp set. 

Since I know I wanted to use bold colores, I decided to go with a gray color for foxes and use more color with other images and the background.

Next, I die cut two rectangles from the A2 Stitched hearts cover die from white cardstock that I will use as a cover for my card.


Then, I cut down a piece of yellow and red colorful paper from the Sweet summer paper pad. I trimmed it down to be the same size as my card base and positioned it behind the white panel, so it nicely peeks out the rectangles.

I stamped out the sentiment from Birthday fox in black ink and this time I decided to go with a simple 'Happy birthday'.

I glued everything on the square card base using double sided foam squares and liquid glue.

Hugs,
Kaja

Other Posts You Might Like