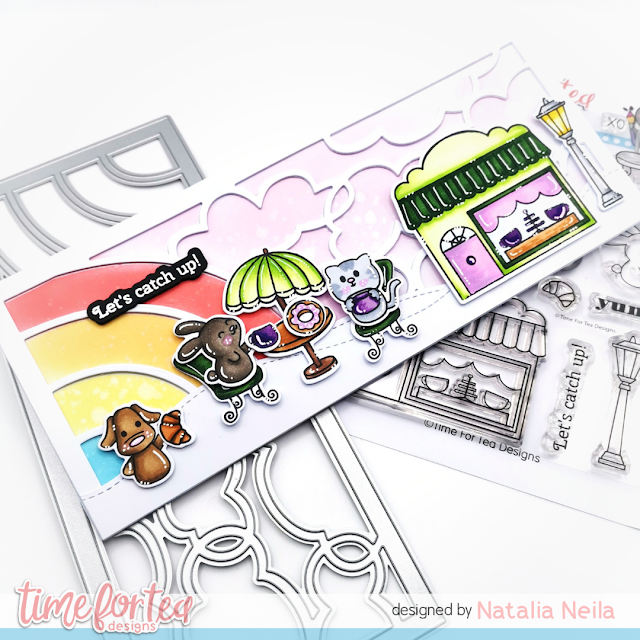
To make my background, I die cut the Skies the Limit slimeline die from white carstock and used it as a stencil. I ensured that the colours I chose stayed in the sections I wanted by using the negative piece from the die to mask the gaps. You can see the process in my reel here.
Don't they look like they are having the best time? I kind of fancy a croissant now, I must admit!
To get a 10% off your shop, including the new release, use the code T4TNEILA10
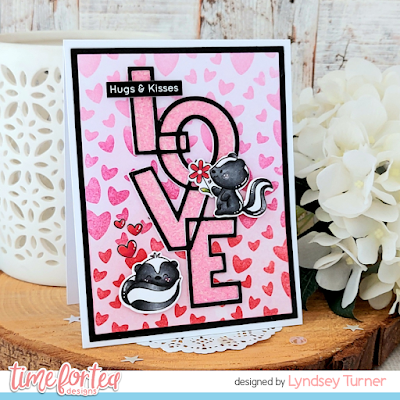
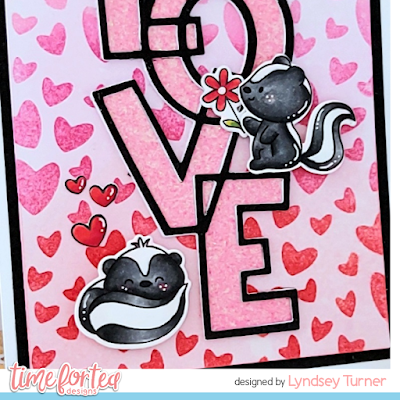
With the month of love just around the corner I couldn't resist using these adorable Skunks from the Stinkin Cute Stamp & Die Set to make a sweet Valentines Day cardto share with you today .
To start I stamped and coloured my cute critters using my Spectrum Noir Markers (colours listed below in order of lightest to darkest)
Skunks- IG6, IG7, IG9, CR6
Red - CR7, CR9, CR11
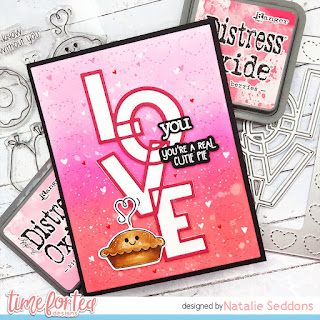
I created the heart background with the Scattered Hearts Stencil using distress inks in Kitsch Flamingo, Picked Raspberry and Candied Apple. I cut the panel out using the 2nd largest A2 Layering Dies, matting onto black card cut from the largest die. The LOVE Intertwined Die was cut twice from white card and once from black adhering together to create dimension and stuck this to the centre of my panel .
I cut the LOVE sentiment again from pink glitter card and paper pieced the inner parts of the sentiment back within the borders of the letters.
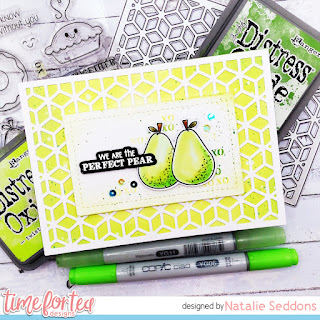
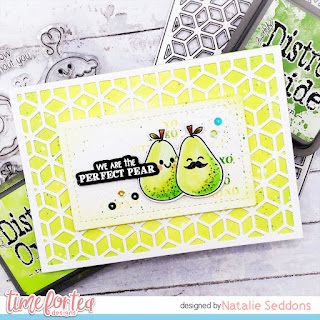
Happy Saturday Teatimer's hope your all well, how fast has this week rolled around! I have a fun Valentines/Anniversary card for you today. I decided to go for non traditional colours as I loved the citrus colours on the pears. I also did two versions to show you how it could be more traditional and then more cute with the addition of sweet faces and a bit of blush.
I just love how it gives a while different look to your card!
It was a really simple and quick card to create I started by cutting out the Geometric Snowflakes Cover Die and then using that as a template to cut out a back panel of the same size. I used white 360gsm card and coloured it up with Twisted Citron and adding some texture by splattering some water on and then dabbing it off. Then finishing it off with some splatters of mowed lawn distress oxide ink.
Setting this aside to dry I worked on the topper, the panel is cut out using the A2 Stitched Hearts Cover Dies. Again I splattered the panel with Twisted Citron and Mowed Lawn to add some interest.
The pears are from the We Go Together stamp set I stamped them out onto copic paper and used a range of green copics adding some dimension by adding the darker colours towards the bottom. Then adding some dots to give them a textured look.
The sentiment is white heat embossed on black card stock and then die cut using the coordinating dies. I added the sentiment and the pears before sticking and realised it looked a bit empty so added some xoxo's using the xo stamp in the same green inks. Then adhered them using some foam tape and adhered everything together and that was my card finished up. I hope you like it and if you want to purchase any of the items or anything else in the Time for Tea shop you can get 10% off using code T4TNATALIE10 . Have a great weekend and I will see you all next week.
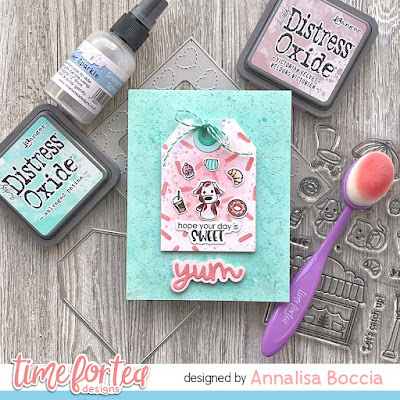
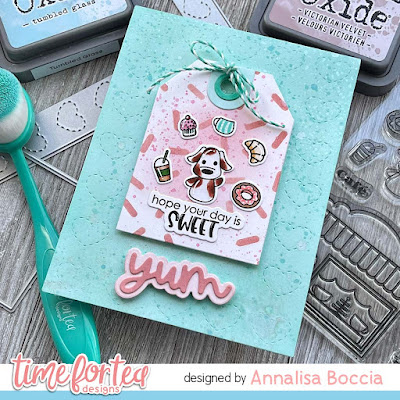
Happy Friday, DT Annalisa here sharing a sweet card that features two of the January release products from Time For Tea Designs - Café Critters and the A2 Stitched Hearts Cover Dies as well as some older goodies. I adore the mini croissant and coffee cup and absolutely love using them in my cards.
To start, I die cut a panel of white card stock using the large Stitched Hearts Cover Die and ink blended it with Salvaged Patina Distress Oxide using my Beautiful Rainbow Blender Brushes. I sprayed some T4T Shimmer Spray - Silver Sparkle onto the panel, I recently purchased this and just had to give it a try! The photos don't do it justice, it is so beautiful and shines and sparkles so much in person.
I then used the tag die and accessories in the Memory Keeping Essential Dies to cut a tag and added some Kitsch Flamingo Distress Oxide to the center with a light hand. Next, I used the Confetti 6 x6" Stencil with some Victorian Velvet and added some splatter in the same colour. I also used these two Distress Oxide colours on the Yum Sentiment Die.
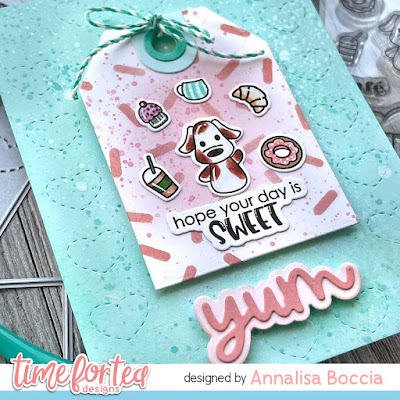
I stamped, coloured (with Copics) and die cut some images using the Café Critters and their coordinating dies. I also stamped and die cut a sentiment from the Cool Critters Clear Stamp Set and used liquid glue to attach everything to the tag. For the tag toppers, I coloured them with Salvaged Patina and Peacock Feathers Distress Oxide.
I stuck the teal panel to a card base and then added the tag (to which I added a teal bow using some twine) with some foam tape. To complete the card, I added the 'yum' sentiment and its' outline to the card with foam tape.
Thank you so much for visiting my blog, you can use my discount code T4TANNALISA10 when you visit the Time For Tea Designs shop to get 10% off your order.
Hello crafty friends, Kitty here! It's time for my usual Thursday DT spot for Time For Tea Designs.
As it's been so dark and cold I thought I would brighten things up and
make a spring themed card. So of course out came the bunnies and a cute
scene was made...
I hope that this new year is treating you and yours well. <3
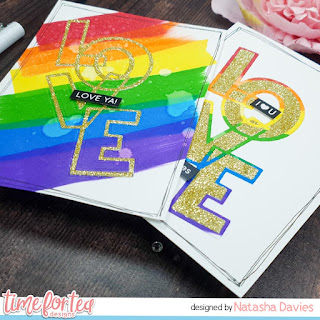
Today I'm sharing a video tutorial showing a die-cut inlay technique with the large Intertwined Love die that is part of the newest release. As soon as I saw this die, I knew that it would be perfect for this technique and I'm showing two ways that you can give it a go!
Whilst there may be two examples, I'm getting three finished cards by using the leftover pieces - so be sure not to throw those away!!!
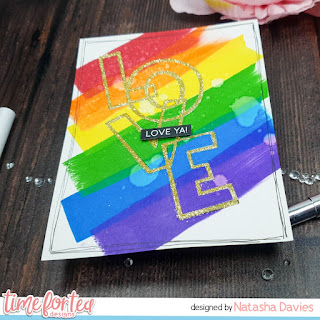
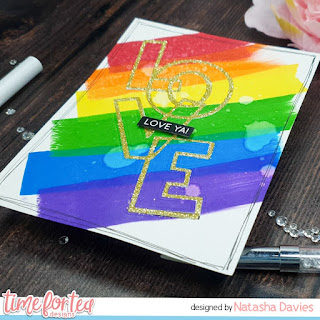
Rainbow Two-For-One Cards
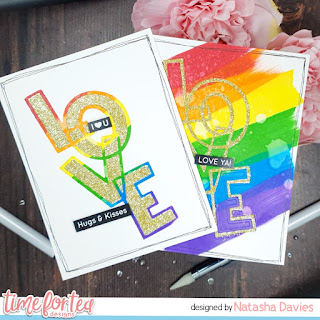
My plan for this card was the full rainbow background, but I actually think I love the 'leftover' card more!
I absolutely love having these pre-printed sentiments available to me, and I think they make perfect sub sentiments for a larger die cut sentiment/word like this one. (I used the Brighter Days, Black set for all of my cards today.)
The colours that I used for the Rainbow are all Catherine Pooler inks:
Rockin' Red
Orange Twist
Limoncello
Grass Skirt
Something Borrowed
Grape Crush
The gorgeous super fine glitter that I used is Gold Dust from WOW! Embossing Powder, and the double sided adhesive is Altenew.
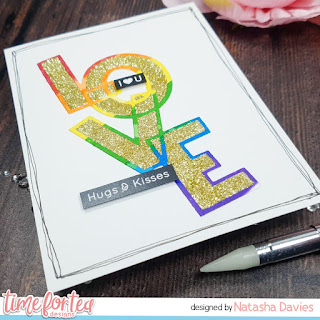
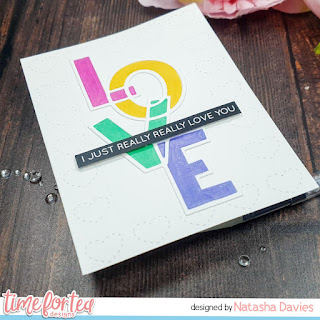
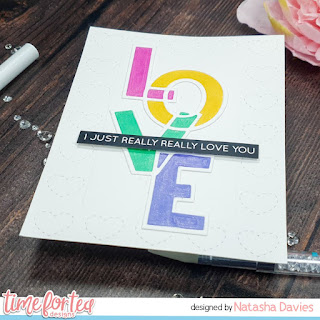
Pastel Colour Scheme
I cut my card panel using the new A2 Stitched Hearts Panel Die for a bit interest in the background of this card - I absolutely LOVE that this die is a2 sized as that is the go to size for me.
Rather than cutting the die two separate times to piece together; for this one I just inked up the inside pieces using some different colour inks. (I did use a second white die cut to stack up the outline so it was higher than the inside pieces - but this is totally optional and you don't have to do it to create this design. I'm just a bit extra like that.)
The inks colours that I used for this design are:
Pucker Up
Catching Rays
In The Park
Serenade
So those are my cards for today, lovelies! I hope you enjoyed the video and if you give these techniques a try don't forget to tag both myself (@handmadebytasha13) and Time For Tea Designs.
This way we won't miss your gorgeous creations!
As always, thank you for spending this time with me!
I hope that you have a lovely, happy, safe & wonderful week!
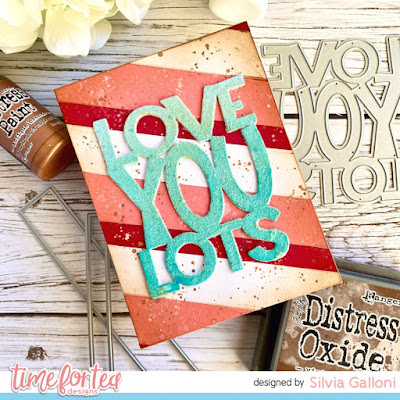
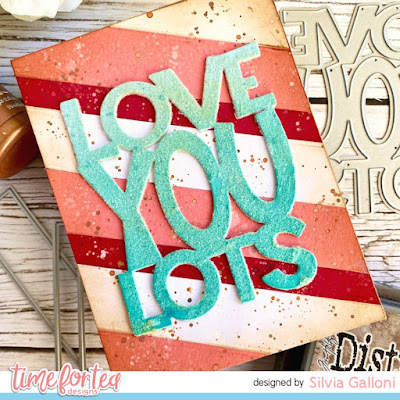
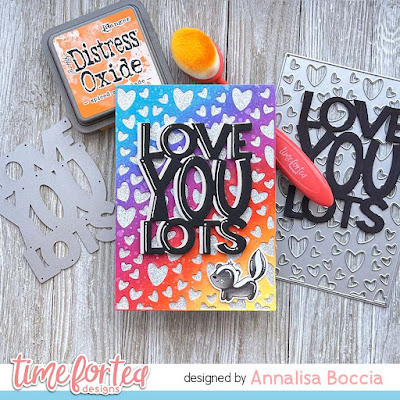
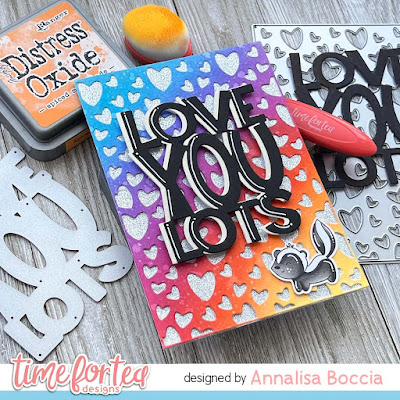
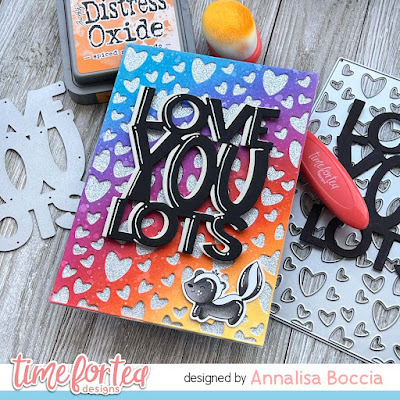
Hello crafty friends! Silvia's here today with an easy Valentine's card.
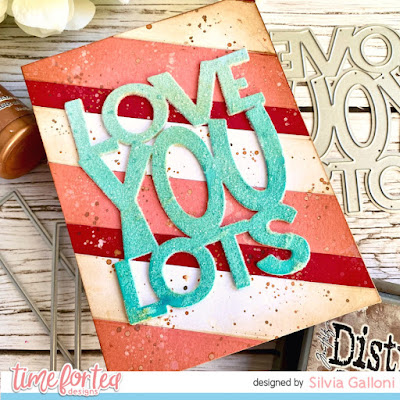
I started cutting some white, pink and red stripes with the two smallest die from the new "Simple Slimline Nesting" set and I glued on a 5"x3,75" panel.
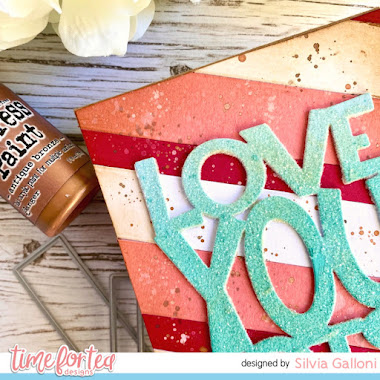
I cut out the excess and I darkened edges with vintage photo Distress Oxide ink and I splattered with brown ink and picket fence and antique bronze Distress Paints.
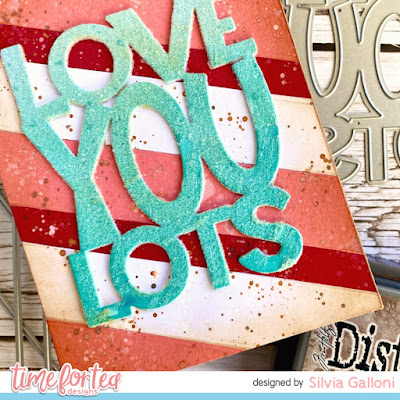
I then cut three times the sentiment with "Love You Lots Large Sentiment" die set, I glued one above the other and I covered with glitter.
I put everything together and that's my card!
I hope you enjoy it. I wish you an amazing day and don't forget that you can get a 10% off your Time for Tea order with the code T4TSILVIA10.
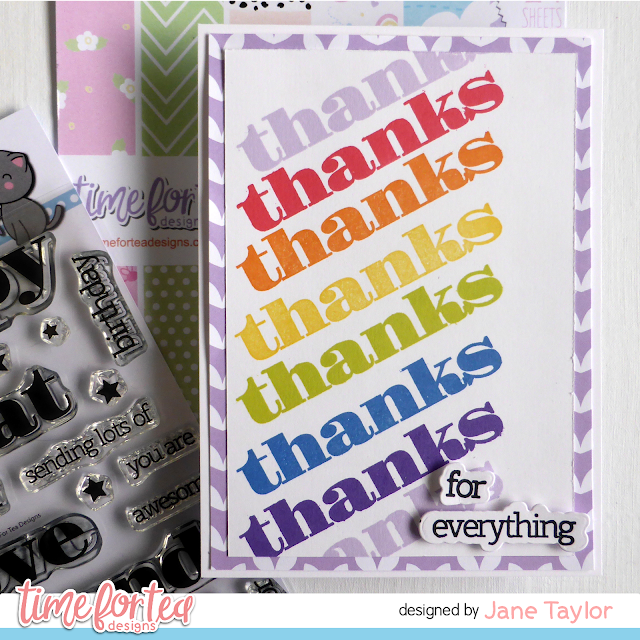
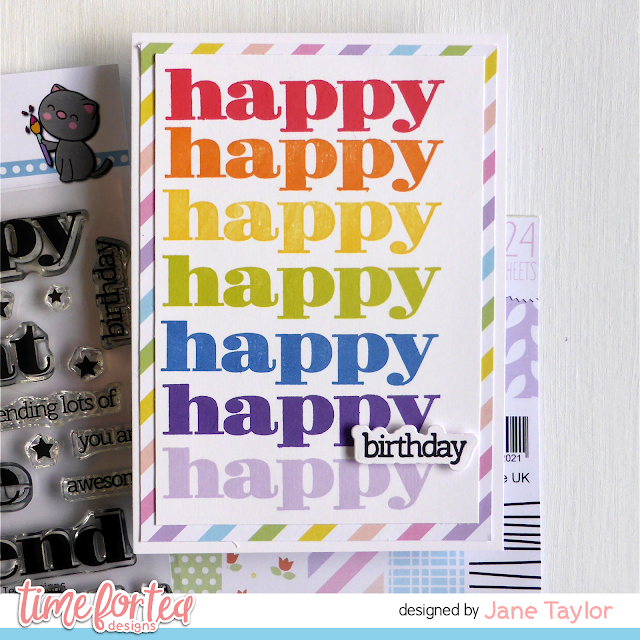
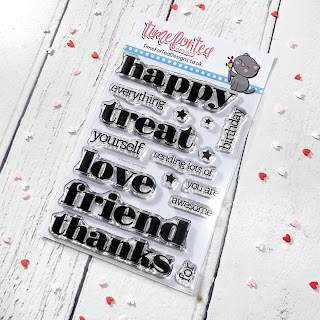
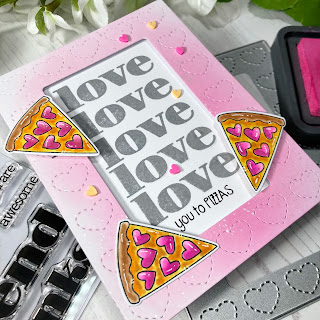
Today I'm sharing three cards I made using the awesome new Bold Sentiment stamps from the January release.
I started with the large thanks - who doesn't need thank you cards at this time of year? I lined up a rainbow of ink colours and used my stamp platform to space them equally starting with the red. I added in an extra lilac at the top and chose a matching paper from the Brighter Days pad to use as a mat.
Since I had all the rainbow inks out on my desk I created a second card, but this time using the large happy from Bold Sentiments. The paper mat is also from Brighter Days.
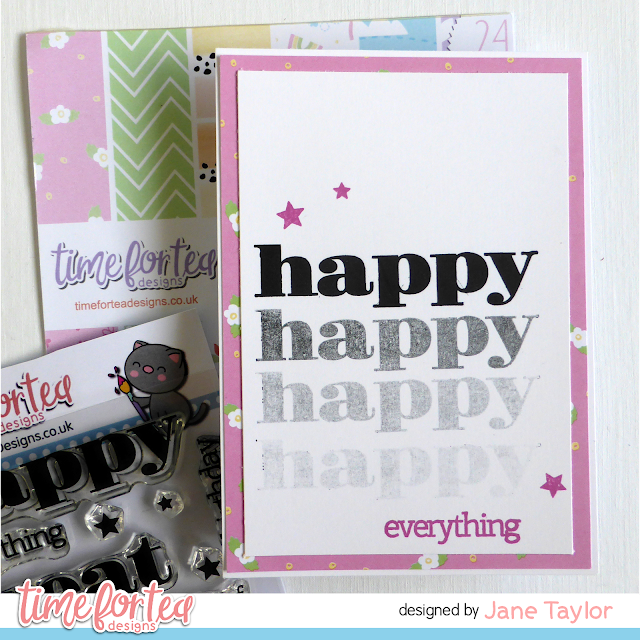
I couldn't resist making one final card using the happy from Bold Sentiments stamped out in varying strengths of black ink - a sort of ombre effect.
I stamped the 'everything' in pink and added some of the small stars from the same stamp set - always love the tiny extras in T4TD sets.
This was once again matted onto a paper from the Brighter Days pad.
I hope you like my cards using the awesome products from T4TD. If you'd like to purchase any items you can get 10% off by using my code - T4TJANE10.
Hello friends, today I show you this new card, created with my new goodies from the last release. Have you seen many wonders? Really beautiful stamps and dies, how can you resist?
For my card I used this die ....Geometric Snowflake for the background, I chose some Distress in shades of blue, then I used the Wow embossing powder to give colour and brightness to this important sentiment Love You Lots
I added these adorable squirrels from the set Jumping With Joy I really like the result, I hope you like it.
I wish you a wonderful week and remind you to use the code T4TCLAUDIA10 that will give you a 10% discount!!
Hi Friends! It's Miki here. I hope you enjoyed our little giveaway to celebrate the new release and I'm hoping you managed to get your hands on some goodies!
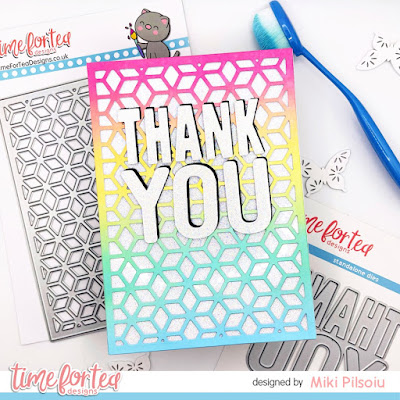
Today I'm sharing the card I made for the hop. I used the amazing Geometric Snowflakes die. I have to be honest, I see them as flowers but Jo rightly pointed out that they can be whatever you want them to be!
I started by ink blending a panel in the following distress colours:
Picked Raspberry
Squeezed Lemonade
Cracked Pistachio
Tumbled Glass
I then sprayed some perfect pearls water and let it dry. In the meantime, I cut a piece of glittery cardstock the same size as my cover die and glued it to a matching card base. Once my ink blended cardstock was dry I used the Geometric Snowflakes die and cut the panel. I cut it 3 more times from white cardstock and glued them together for added dimension. I then glued the panel on top of the glitter paper on my cardbase.
For the sentiment I used the Thank You Sentiment Die Set. I cut it 2 times from white cardstock and once more from the same glitter cardstock I used in the background and glued them together. To ensure it doesn't get lost in the background, I cut it one more time from black cardstock and off-set it a bit on the back of the letters. I then glued it to the front of my card and that's it.
I think you can never have enough thank you cards and this one is just so full of colour and sparkle, I love it!
Please remember you can use my code T4TMIKI10 to get 10% everything in the shop! (yes, that includes the new release!)
See you soon with more inspiration for the new release!
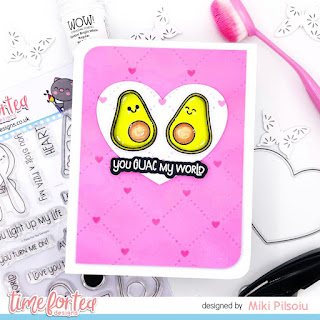
I hope you've enjoyed the new release? Jo certainly knocks it out of the park with each release doesn't she! This release is just perfect for Valentines Day or Anniversarys or even just show some love ❤
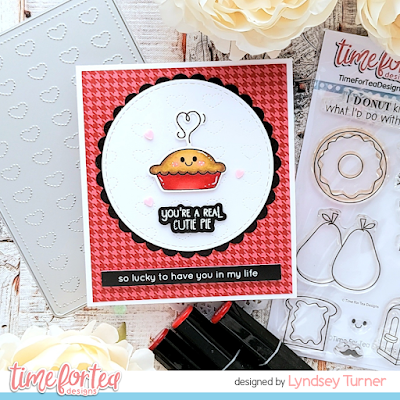
Today I'm sharing this sweet little cutie pie card with you. This adorable little image from the We go together stamp and die set is just the cutest!
To start as always I stamped and coloured my images using my Spectrum Noir markers (colours listed below in order of lightest to darkest)
Pie - EB2, GB8, GB11, GB10
Dish - CR7, DR5, DR6
To card was simple to make I trimed a 6x6 card blank to 12cm wide and added a piece of paper from the Joyful Winter 6x6 Paper Pad to front making sure to trimed down to leave a small border.
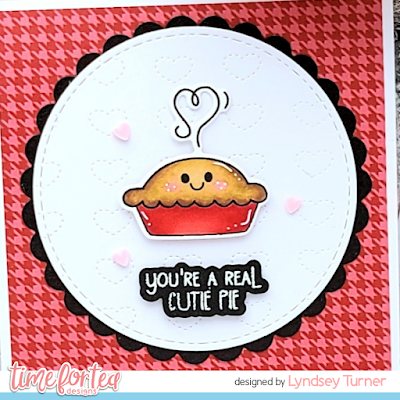
I die cut the Dotty Hearts Cover Plate from white card before cutting out using a Circle Nesting Die. This was matted onto to a piece of black card cut out using a Scalloped Circle Nesting Die. I stamped the sentiment on black card and embossed in white ink before using the matching die to cut out.
To finish I added a sentiment from the Brighter Days Sentiments and a few clay hearts around the image.
Thanks for joining me here on the blog today, don't forget to use my code T4TLYNDSEY10 for 10% off your order in store.
Happy Saturday Teatimer’s are you loving the new release? It’s another super cute one isn’t it! You may have peeked this card yesterday on the blog/insta hop so I thought I’d share with you how I made it.
All the products are from the new release I started by cutting out the A2 Hearts Stitched Cover Dies and did an ombré effect on it with Candied Apple, Picked Raspberry, Kitsch Flamingo and Spun Sugar Distress Oxide inks. Finishing it by spritzing water and then added splatters with the same colours and some gold watercolours. Setting this aside to dry I worked on the rest of the card.
I wanted some depth with the Love Intertwined Die so cut it out 3 times with white 360 gsm card stock and layered them on top of each other. Then for the last layer I used some hot pink paper. I adhered this to the card panel I set aside so I could then layer in some glittery white paper.
The sentiment and little cutie pie are from the new We Go Together Stamp Set. It’s filled with adorable images and I love how it has extra little faces you can add to the images that don’t have them so you can customise them yourself. Again with the coordinating dies they cut out the sentiments which is something I love about Time for Tea. It’s gives you a different option than the usual sentiment strip or just stamping straight onto the card. Once my pie was coloured and the sentiment heat embossed (the you I masked and stamped from the yourself sentiment in the Bold Sentiments Stamp Set) and cut out it adhered them to the card adding some depth with foam tape. I adhered my card to a black card base and that was it finished up. I hope you like it and if you would like to purchase any of the items in the shop you can get 10% off your order using code T4TNATALIE10 . Have a great weekend and happy crafting!
We'd like you to celebrate with us by joining our Blog Hop and Instagram Hop for a chance to win. There will be one randomly drawn winner from the blog hop and one randomly drawn winner from Instagram who will each receive a £25 gift card to the store!
All the products will be available in the store at 9.00am today, 21st January. But why not hop along with us now to get a preview and some amazing inspiration from the T4TD DT using the release?
To be in with a chance to win all you need to do is:
Comment on this post and each of the DT hop participants blogs before the hop closes at midnight on Sunday 23rd January UK time.
A random draw of all those who comment on instagram and/or the blogs of the DT taking part will take place on Monday 24th January and the winners announced shortly after on T4TD Instagram story and the T4TD blog.
Make sure you hop along with us for lots of inspiration as well as a chance to win one of the £25 gift cards to the Time for Tea shop! Remember you can increase your chance of winning by joining in with the Instagram Hop too! Find it @timeforteadesigns
Happy new release day! DT Annalisa here! For my card today, I started by ink blending on some white cardstock using my Beautiful Rainbow Blender Brushes and some Distress Oxides in the colours Mustard Seed, Spiced Marmalade, Candied Apple, Wilted Violet and Mermaid Lagoon. I added some splatter of water using a spray bottle and patted it dry with a piece of paper towel.
Once the panel was dry, I die-cut it using the Scattered Hearts Cover Plate. I cut a piece of glitter paper to the same dimensions as the die (4 1/8 by 5 7/8 inches), adhered this to a card base and then glued the rainbow hearts panel on top of it.
I then used the brand new Love You Lots Large Sentiment Die to cut out some black card stock as well as some shimmer cardstock. I used liquid glue and placed the black text on top of the off-white text offsetting them a bit. I used a White Gelly Roll Pen to add some highlights to the black letters and then adhered the two sentiments to the card with foam tape.
To finish the card, I glued on a cute skunk from the Stinkin' Cute Clear Stamp Set which I coloured with copics and used some gelly roll pen on for highlights.
Thank you so much for visiting my blog, you can use my discount code T4TANNALISA10 when you visit the Time For Tea Designs shop to get 10% off your order.
Be sure to check out all of the DT inspiration using the new
release and best of luck on the Instagram and blog giveaway!
Get ready to fill your carts with all the great stamps & dies from our January Release!
We are so excited to bring you the full reveal of the New Release in the final of our countdown videos.
Be sure to check it out and make note of all the treats you want to add into your T4TD collection.
The Design Team are also here to give you some awesome inspiration in our New Release Blog and Instagram Hop. Hop along with them today to be in with a chance of winning a T4TD Gift Certificate. Click the picture to go the first stage on the Blog Hop and find out more!
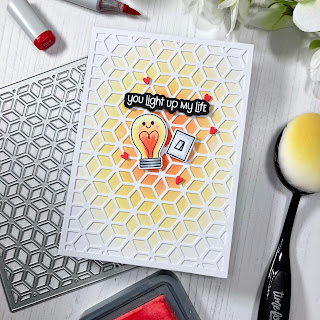
Hello & Happy Thursday! Kitty here and it's time for my usual afternoon DT spot for Time For Tea Designs. I went full on bright and busy for this slimline card. It was so much fun to make and I love adding lots of little detail...
I started out my creating my background panel. I gently blended Salvaged Patina & Twisted Citron Distress Inks three times on a slimline panel. I then blended Twisted Citron onto card and die cut it with the Grass Die from the Landcape Edge Dies. I added this onto each section. I created the front panel by blended Kitsch Flamingo & Picked Raspberry Distress Oxide Inks. I then used the Chic Chevron Stencil with Picked Raspberry Ink over the top. I used a Square Label Die
to create the three windows and added white dots around them with a
pen. I then added acetate behind the windows, added sequins to each
window and fixed it onto the back panel to create the shaker windows. I
used the Smitten Kitten Stamp Set
for each of the images. I coloured them with Copics, cut them out and
fixed them in place on the windows. I cut the sentiment from the Brighter Days Sentiment Cards into three pieces and added them along with some heart embellishments.
As
always, thank you ever so much for joining me today, don't forget to join us tomorrow for our Blog Hop. You can use my code T4TKITTY10 for 10% off your order at Time For Tea Designs.
Hi there and welcome back to the Time for Tea’s blog. Silvia’s here with you today.
For today’s card I decided to create a customize background with the “Tall Alpha” stamp set.
I started cutting a panel from white cardstock (I used one of my Christmas gift to do this, Tim Holtz’s Deckle Torn Edge Trimmer) and I stamped XOXO several time with worn lipstick Distress Oxide ink.
I darkened edges and I splattered with clean water, worn lipstick and vintage photo Distress Oxide inks loosened with water and white and bronze acrylic paint.
Next I stamped one of the cute mice from the “Baked With More Love" stamp set, I colored it with alcohol markers and I cut it with coordinating dies.
We are so excited to bring you the FINAL day of our Countdown Reveals of the upcoming New Release!
We would love for you to check it out with us to get a sneak peek of some of the fabulous new products that will be released 21st January 2022 @ 9am BST.
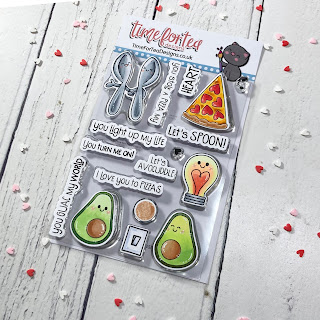
The Let’s Spoon Stamp and die set is full of fun, cheeky pun
sentiments and their coordinating characters. Create the unique cards for valentines
and birthdays that show how you care in a sassy & mischievous & way.
The fabulous font in the Bold Sentiment Stamp and dies will
really make a statement on all your projects. The set comes with larger words
in this stylish font and smaller complimentary phrases to allow you to build your
own special messages. Use the coordinating dies to add extra dimension and
impact. Mix and match with your other T4TD stamps and dies to make something
really special and unique.
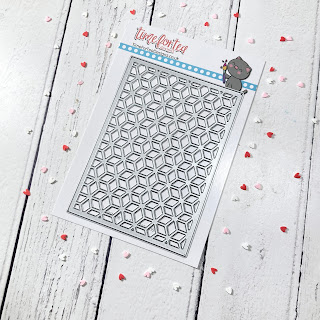
Our Geometric Snowflakes cover die really is something of a
chameleon when it comes to creating beautiful backdrops for your projects. Add
colour behind the die to allow it to really pop or ink blend an ombré finish
before cutting to highlight the pattern. Depending on how you style your die
you may see snowflakes, cubes, flowers or diamonds. Whichever you see this die
will always make a stunning feature.
Watch all of our countdown reveal videos daily on YouTube.
Tomorrow
is the FINAL day of the release so join me here where you can see all of the products
in full.
You can also see the full reveal Live on our Facebook Page at 8pm this
evening.
All of the products revealed today will be available from 9am BST 21st January 2022.
Join us tomorrow for the final day of our countdown.


