Pages

Showing posts with label Cosy Sentiment Die. Show all posts

Wednesday, 15 November 2023

Cosy....

Hello there Tea-timers...

It's your friend DT Ashlee here and I'm ready to inspire you with some more creativeness using T4T goodies!! 

I thought it was time to get these super cute little snowmen out and colour them up so today's card feature the Snow much fun set....


Time for Tea designs products used :


To create this card I started with a light grey card stock base. I then used a circle stencil to add a focal point to the card base using a blend of blue Distress oxide inks. Once I was happy with the blend I went on to add my sentiment. 

The focal sentiment was die cut using the Cosy sentiment die and then I added a stamped sub sentiment below from the Snow much fun set!

Now it was ready for two cute snowmen. These were coloured using Spectrum noir tri-blend markers with added white pen highlights. These were adhered in place using foam tape and then it was all completed with a touch of pretty sequins!


What do you think of this cosy friendship card?!


Thankyou so much for stopping by and checking it out, I hope you enjoyed it and it inspired you to get creative too. Happy crafting, hugs Ashlee. 

Tuesday, 21 December 2021

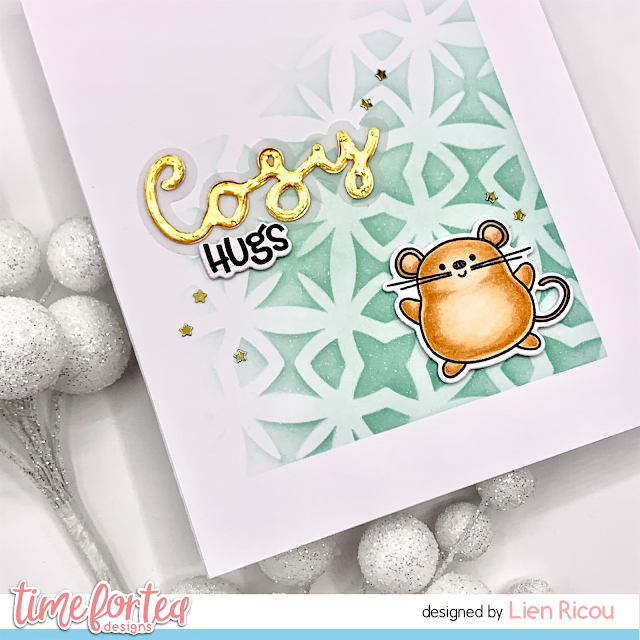
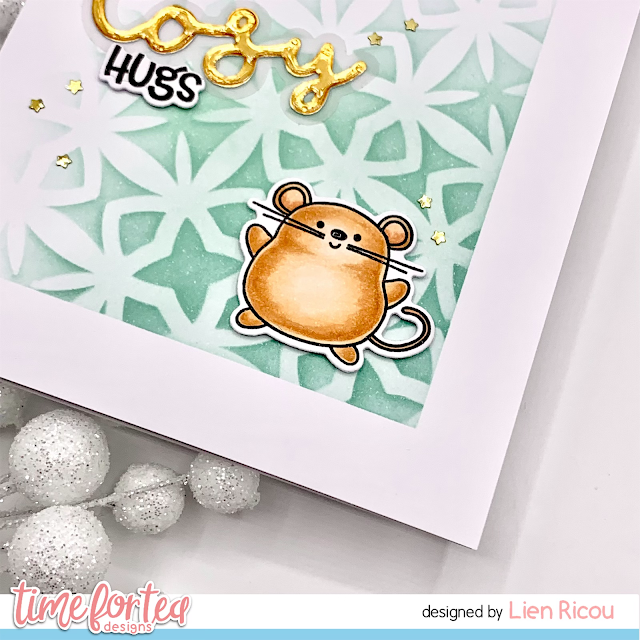
Clean and Simple: Cosy Christmas

Hey everyone, Lien here. Today I am sharing this card on the Time For Tea Designs Youtube Channel. I am featuring the Baked With More Love stamp set along with the Boho Tile Stencil from Time For Tea Designs. I hope you like this simple card idea. xxx


You can click HERE to watch on the Time for Tea Designs Youtube channel.


I started by coloring one of the images from the Baked With More Love stamp set from Time for Tea Designs using my copic markers (listed below). Afterwards, I used the matching dies to cut it out. 


For the background, I trimmed down an A2 sized panel. I used the Boho Tile Stencil from Time For Tea Designs and ink blended some distress inks on this panel. For the sentiment I used the Cosy Sentiment Die and Car Critters from Time for Tea Designs. 


As everything was prepped, I adhered it all together on a card base. I finished the card of using glossy accents on the 'Cosy'. I hope you like the card!


Thinking of buying some T4TD supplies? With T4TLIEN10 you will get 10% of your order at Time For Tea Designs! Happy shopping xxx 


Supplies:
  • Time For Tea Designs - Baked With More Love
  • Time For Tea Designs - Baked With More Love Dies
  • Time For Tea Designs - Car Critters
  • Time For Tea Designs - Car Critters Dies
  • Time For Tea Designs - Cosy Sentiment Die
  • Time For Tea Designs - Boho Tile Stencil
  • Transotype: Perfect Colouring Paper
  • Lawn Fawn Cardstock: Gold
  • Vellum
  • Gina K. Designs Amalgam Ink - Obsidian
  • Copic Markers: E33, E21, E00 / E13, E01, E00
  • Distress Inks: Evergreen Bough, Cracked Pistachio
  • Ranger: Glossy Accents 
  • Little Things from Lucy's Cards: Itty Bitty Stars - Gold
  • NUVO Deluxe Adhesive
  • Tombow MAXI Power Tape
  • Post-It Tape

Tuesday, 30 November 2021

Cosy Mini Village Card


Hello Tea Timers! 

It's Miki here today with some inspiration for the new release! To go with it, we've organised an Instagram Hop where you have a chance to win the whole release so make sure to check it out! Details on the T4TD Instagram

Ok, now let's talk about the card. I chose to use the Slimline Mini Village Die to create a cosy village scene. I picked 3 different color cardstock and cut them to 4.25" x 5.5" (my final card size). As you can see I went for some less conventional Christmas colors. I started by adhering down the pink one to my A2 cardbase as my card front. I then used the die to cut the darker green cardstock, leaving enough space at the top for my sentiment. This die won't cut the bottom so you can create different size layers. I then glued this down on my card front. Next, I picked the lighter green cardstock and die cut it, just below the houses from my previous layer and adhered that on top. Lastly, I picked a pink scrap and die cut it as the smallest layer on my card and adhered it.

Now that my layers were in place I moved on to the sentiment. I used the Cosy die and die cut the word from Silver mirror cardstock and the largest shadow from Vellum. I went ahead and die cut the word Cosy 3 more times from white cardstock and glued them all together for extra dimension. Once my word was assembled I glued it on the vellum shadow and then the whole sentiment at the top of my card.

To finish it off, I added stickles to all the house and tree tops to mimmic snow.

I hope you like today's card and I can't wait to share with you the rest of my creations using this release!

If you shop on the T4TD website, please remember to use my code T4TMIKI10 for 10% off your whole order.

Happy shopping!
Miki


Other Posts You Might Like