Pages

Showing posts with label CAS. Show all posts

Thursday, 20 July 2023

Pig Out! The Diet Starts Tomorrow


Hey there, Tea Timers!!  It's Amanda back today with a clean and simple, but OH SO ADORBS card using the Workout Pigs Stamp Set!  
BONUS!  This set is on sale now!!  Grab yours before the run out!

This card is SUPER simple to make and doesn't require any special dies!

First, I've cut 2 panels that measure 3 3/4" x 2 3/8".  I've blended a bit of Catherine Pooler Shea Butter ink on the background. 
Next, I stamped my sentiments directly onto the panels.
On a separate piece of alcohol marker friendly white cardstock, I stamped my images from the Workout Pigs Stamp Set.  I colored them with Copic markers and then die cut them out with the coordinating dies.  I attached them to the panel with 3D foam squares.


A super simple and easy card that is just too cute! 
Thanks for stopping by the Time for Tea Designs blog today!  I hope you enjoyed this card and feel inspired to make something fun today!

Xx, Amanda


Tuesday, 21 December 2021

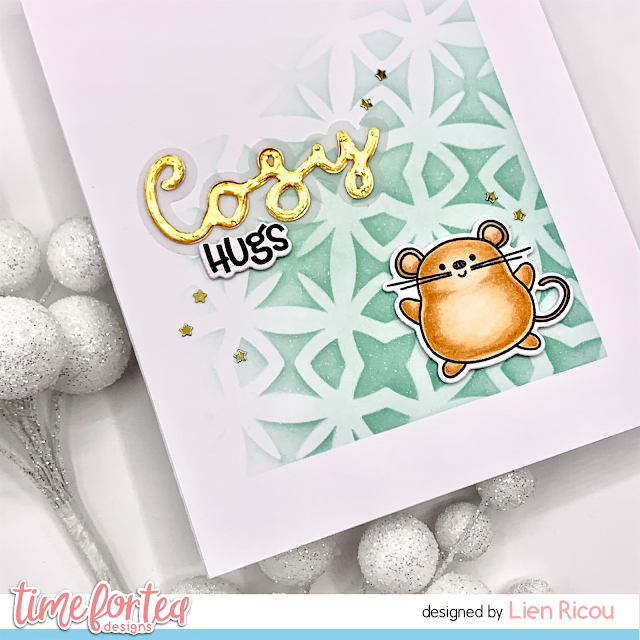
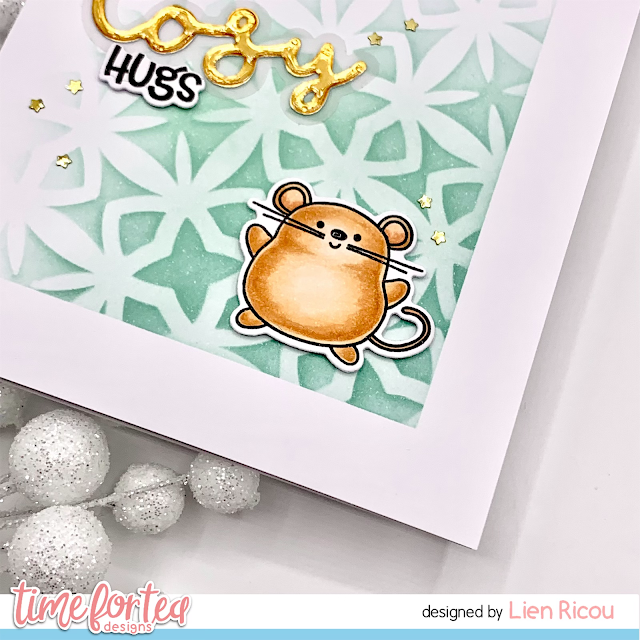
Clean and Simple: Cosy Christmas

Hey everyone, Lien here. Today I am sharing this card on the Time For Tea Designs Youtube Channel. I am featuring the Baked With More Love stamp set along with the Boho Tile Stencil from Time For Tea Designs. I hope you like this simple card idea. xxx


You can click HERE to watch on the Time for Tea Designs Youtube channel.


I started by coloring one of the images from the Baked With More Love stamp set from Time for Tea Designs using my copic markers (listed below). Afterwards, I used the matching dies to cut it out. 


For the background, I trimmed down an A2 sized panel. I used the Boho Tile Stencil from Time For Tea Designs and ink blended some distress inks on this panel. For the sentiment I used the Cosy Sentiment Die and Car Critters from Time for Tea Designs. 


As everything was prepped, I adhered it all together on a card base. I finished the card of using glossy accents on the 'Cosy'. I hope you like the card!


Thinking of buying some T4TD supplies? With T4TLIEN10 you will get 10% of your order at Time For Tea Designs! Happy shopping xxx 


Supplies:
  • Time For Tea Designs - Baked With More Love
  • Time For Tea Designs - Baked With More Love Dies
  • Time For Tea Designs - Car Critters
  • Time For Tea Designs - Car Critters Dies
  • Time For Tea Designs - Cosy Sentiment Die
  • Time For Tea Designs - Boho Tile Stencil
  • Transotype: Perfect Colouring Paper
  • Lawn Fawn Cardstock: Gold
  • Vellum
  • Gina K. Designs Amalgam Ink - Obsidian
  • Copic Markers: E33, E21, E00 / E13, E01, E00
  • Distress Inks: Evergreen Bough, Cracked Pistachio
  • Ranger: Glossy Accents 
  • Little Things from Lucy's Cards: Itty Bitty Stars - Gold
  • NUVO Deluxe Adhesive
  • Tombow MAXI Power Tape
  • Post-It Tape

Tuesday, 26 October 2021

Clean and Simple Fall Card: Hogs & Kisses

Hey everyone, Lien here. Today I am sharing this card on the Time For Tea Designs Youtube Channel. I am featuring the Hogs & Kisses stamp set from Time For Tea Designs. For this card, I tried to feature some fall/ autumn themed colors in a CAS card. I hope you like it xxx 


You can click HERE to watch on the Time for Tea Designs Youtube channel.


I started by coloring one of the pigs from the Hogs & Kisses stamp set from Time for Tea Designs using my copic markers (listed below). Afterwards, I used the matching dies to cut it out. 


For the background, I took an A2 sized panel, after masking off an area using purple tape, I used my distress inks to create a gradient background. Afterwards, I white heat embossed the sentiment on top of this gradient. 


As everything was prepped, I adhered it all together on a card base. I finished the card of using some Teardrops and glossy accents. I hope you like the card!


Thinking of buying some T4TD supplies? With T4TLIEN10 you will get 10% of your order at Time For Tea Designs! Happy shopping xxx 


Supplies:
  • Time For Tea Designs - Hogs & Kisses
  • Time For Tea Designs - Hogs & Kisses Die
  • Mama Elephant - Basic Rectangles
  • Transotype: Perfect Colouring Paper
  • Gina K. Designs Amalgam Ink Obsidian 
  • Versamark Clear Embossing Ink
  • Distress Inks: Wild Honey, Fired Brick, Aged Mahogany
  • Copic Markers: E13, E11, E01, E00 / G00, G000 / BG78, BG96, YG17, YG03, YG00 / E77
  • Ranger Embossing Powder: White (super fine detail) 
  • Ranger: Glossy Accents
  • Black Glaze Pen
  • Little Things from Lucy's Cards: Teardrops
  • Thin Foam Squares from Scrapbook Adhesives
  • NUVO Deluxe Adhesive
  • Pritt Adhesive Roller

Wednesday, 25 August 2021

Sweet black monochrome with a pop of red

Hey everyone, Lien here. Today I am sharing this card on the Time For Tea Designs Youtube Channel. I am featuring the Sundae Sweeties stamp set that was previously released. I decided to make a monochrome card with a pop of red, I hope you like it xxx 


You can click HERE to watch on the Time for Tea Designs Youtube channel.


I started with the cute image and sentiment from the Sundae Sweeties stamp set from Time for Tea Designs. I colored the image using copic markers (listed below). Afterwards, I used the matching dies to cut it out. 


For the background, I trimmed down a patterned paper from the Brighter Days Paper Pad from Time for Tea Designs and a piece of white card stock (for the grounding).

  • Cherry: R35, R24, R22 / W7
  • Cream: W3, W1, W0
  • Ice: W8, W6, W5, W3
  • Cone: W4, W3, W1
  • Cat: W7, W5, W4, W2 / W7 
 
With all the elements ready, I assembled the card on a mini slimline card base. I finished it of using some hearts sprinkles and glossy accents. I hope you like it xxx

Thinking of buying some T4TD supplies? With T4TLIEN10 you will get 10% of your order at Time For Tea Designs! Happy shopping xxx 

Supplies:

  • Time for Tea Designs - Sundae Sweeties 
  • Time for Tea Designs - Sundae Sweeties Dies
  • Time for Tea Designs Paper Pad: Brighter Days
  • Transotype: Perfect Colouring Paper
  • Gina K. Designs Amalgam Ink
  • Copic Markers: see above
  • Trinity Stamps: Heart Sprinkles Mix - Sweet-N-Tart
  • Ranger: Glossy Accents
  • Pritt Adhesive Roller
  • NUVO Deluxe Adhesive
  • Thin Foam Squares from Scrapbook Adhesives (black)

Tuesday, 20 April 2021

CAS card doing some noline coloring

Hey everyone, Lien here. Today I am sharing this card where I did some noline coloring using my Copic Makers. The stamp set I am featuring on this card is the All Occasion Critters by Time For Tea Designs.

You can watch the video below or click HERE to watch on the Time for Tea Designs Youtube channel.


I started by coloring in the cutie from the All Occasion Critters stamp set from Time For Tea Designs. I stamped it out using Fadeout Noline Coloring/Detail Ink from InkOn3. Next, I used my Copic Markers to color it in and I used the matching dies to cut the image out. 


For my slimline panel, I used the Slimline Scalloped Trio Circle Nesting Dies from Time For Tea Designs. I created a blue gradient using Distress Inks. Next, I could stamp out the sentiment on the bottom of this panel.


With all the items ready, I assembled the card. I finished it of using Teardrops embellishments. 


Thinking of buying some T4TD supplies? With T4TLIEN10 you will get 10% of your order at Time For Tea Designs! Happy shopping xxx 


Supplies:
  • Time For Tea Designs - All Occasion Critters
  • Time For Tea Designs - All Occasion Critters Die
  • Time For Tea Designs - Slimline Scalloped Trio Circle Nesting Dies
  • Transotype: Perfect Coloring Paper
  • Gina K. Designs Amalgam Ink
  • InkOn3: Fadeout Noline Coloring/Detail Ink
  • Distress Inks: Black Soot, Chipped Sapphire, Faded Jeans, Broken China, Tumbled Glass
  • Copic Markers: E47, E57, E13, E11, E18, E15, E33, E53, R59, R39, R37, R35
  • MICRON Fineliner 01
  • Little Things from Lucy's Cards: Teardrops
  • NUVO Deluxe Adhesive
  • Thin Foam Squares from Scrapbook Adhesives
  • Paradise Adhesive Roller


Friday, 26 March 2021

Sending Bear Hugs


Happy Friday, DT Annalisa here. Spring is in the air, and I am sharing a clean and simple card (CAS) featuring several dies and stamps. I don't create CAS cards often, as I really struggle with this type of card because I can't seem to stop myself from adding so many things!

Before I get into how I made the card, I wanted to let you know about the Spring Sale that is on now until Wednesday, March 31st at midnight. You will get 30% off on a selection of dies when you use the code HOPPYSPRING21 at check out. But wait, there is more, there is a free Easter Basket Digi Stamp Collection that is perfect for your Easter cards!

I stamped the bears from the Bearing Gifts stamp set, die-cut them with the coordinating dies, and then coloured them with my Copics. I also stamped and cut out the sentiment. Next, I die cut the Wavy Hello Sentiment Die (which is on sale!) several times from some white card stock and adhered them together with liquid glue to add some dimension. 


For the background panel, I applied some Distress Oxides (Spun Sugar, Shaded Lilac, Tumbled Glass, Cracked Pistachio) on some heavyweight card stock using my Beautiful Blender Brush. I then added some splatter using water, white paint and Shaded Lilac. Once dry, I used the Dotty Hearts Panel Die on the coloured background. I trimmed off the top and bottom and adhered it to a white card base. I just love the dotted hearts that this die creates!


I assembled the card by gluing down the bears, the hello, and finally the 'sending you bear hugs' sentiment using liquid glue. To complete the card, I added a little heart that was die-cut out of silver paper that I had in my stash. I often die-cut several small hearts out of different types of card stock so they are ready to use.

Don't forget, you can save 10% off your Time For Tea Designs order using the T4TANNALISA10 at the checkout.


Saturday, 20 March 2021

Quick Clean and Simple Card using your Stash


Do you have lots of coloured images that you just haven't used yet? Or backgrounds that you've created that you've not put on a project? I know I do. Today's card can be adapted to any of your images and backgrounds to make a quick, clean and simple card.

Please check out the video below to see how easily this card came together.


The images I used were coloured during a Facebook Live on Thursday evening. I also stamped and heat embossed my Plaid rug. I used a emboss resist technique to add my colour and then cut to size.


Why not try using a stamped or ink blended background you have in your stash, cut it down and add some of your cute critters?


I added a simple sentiment to the card base in Versafine Ink and some pretty sequins.


My bears had been water coloured using Arteza Water Brush Markers and I added Stickles to the donut glaze and Glossy Accents to the juice bottle.


If you would like to see the process of colouring my little bears and how I created the Plaid rug you can watch the Live replay of the Facebook Live on YouTube below,
or our Facebook page.

I hope you like todays' project. Be sure to follow the Blog and our Social Media for more projects in the future.

Hugs Jo
XOXO


Sunday, 6 December 2020

Rainbow Sympathy CAS Card


Hello everyone and happy Sunday. DT Annalisa here sharing an extra card this week featuring one new stamp set and some older but still awesome T4T goodies.

 I made this card for a friend who unfortunately had to say goodbye to her dog Maverick. This is always such a difficult thing to do as our furry friends are a huge part of our lives.

I don't typically make CAS or clean and simple cards but was inspired by Jo's Facebook Live this week to share this one. To start I used my Large Square Masking stencil to lie down some colour with Distress Oxides (Chipped Sapphire, Faded Jeans and Broken China) onto some 80 lb Neenah Desert Storm card stock. I used my white Gelly Roll Pen to add some white dots as well as lines around the outside of the square area. 


I die cut the Rainbow Mini Shaker Die from some white card stock and coloured in the rainbow with my copics. I stuck these down using liquid glue to the card base. Next, I stamped, coloured and die cut the cute dog from the Happy New Year Critters Clear Stamp Set from the November 2020 release. I stuck the dog on the card on top of the rainbow so that he was hopping over the rainbow which I thought was very fitting for this sympathy card.

I stamped the 'thinking of you' sentiment (Grateful For You Landscape Clear Stamp Set) with VersaMark ink and used some Alabaster ultra fine embossing powder by Brutus Monroe to heat emboss it. To finish the card I added some stars and hearts which I die cut from some Metal Prismatic Foil using the coordinating dies from Storms Don’t Last Forever as well as the coordinating dies from the Santa Paws Clear Stamp Set.

For all of you who have had to say goodbye to a loved furry friend this year, I send you my sympathies. It really is such a painful time and my thoughts are with you.

I have a 10% discount code for the T4T store which can be used If you are interested in purchasing any of the T4T products used in my project, use T4TANNALISA10 at checkout for a 10% discount which can be used on anything, anytime and has no time limit.


Saturday, 5 December 2020

Quick & Easy Christmas Cards for Batch Making

 Hi everyone!


Jo here to let you know that the edited version of our latest FB Live is now available on YouTube.


Please check out the video link below to see how I made this CAS cards.


If you've followed me for a while you'll know that CAS is REALLY hard for me. I always want to add more :) This project was so much of a challenge for me, but you know what?? I loved it! I will definitely be doing more. 


Because the papers are all from our Winter Wonderland Paper Pad, they all coordinate. So even though the images are different they still work together as a set.


Our cute cat is from the Catmas Crackers Stamp set. The sentiment is from the Skating By Penguins Stamp Set.


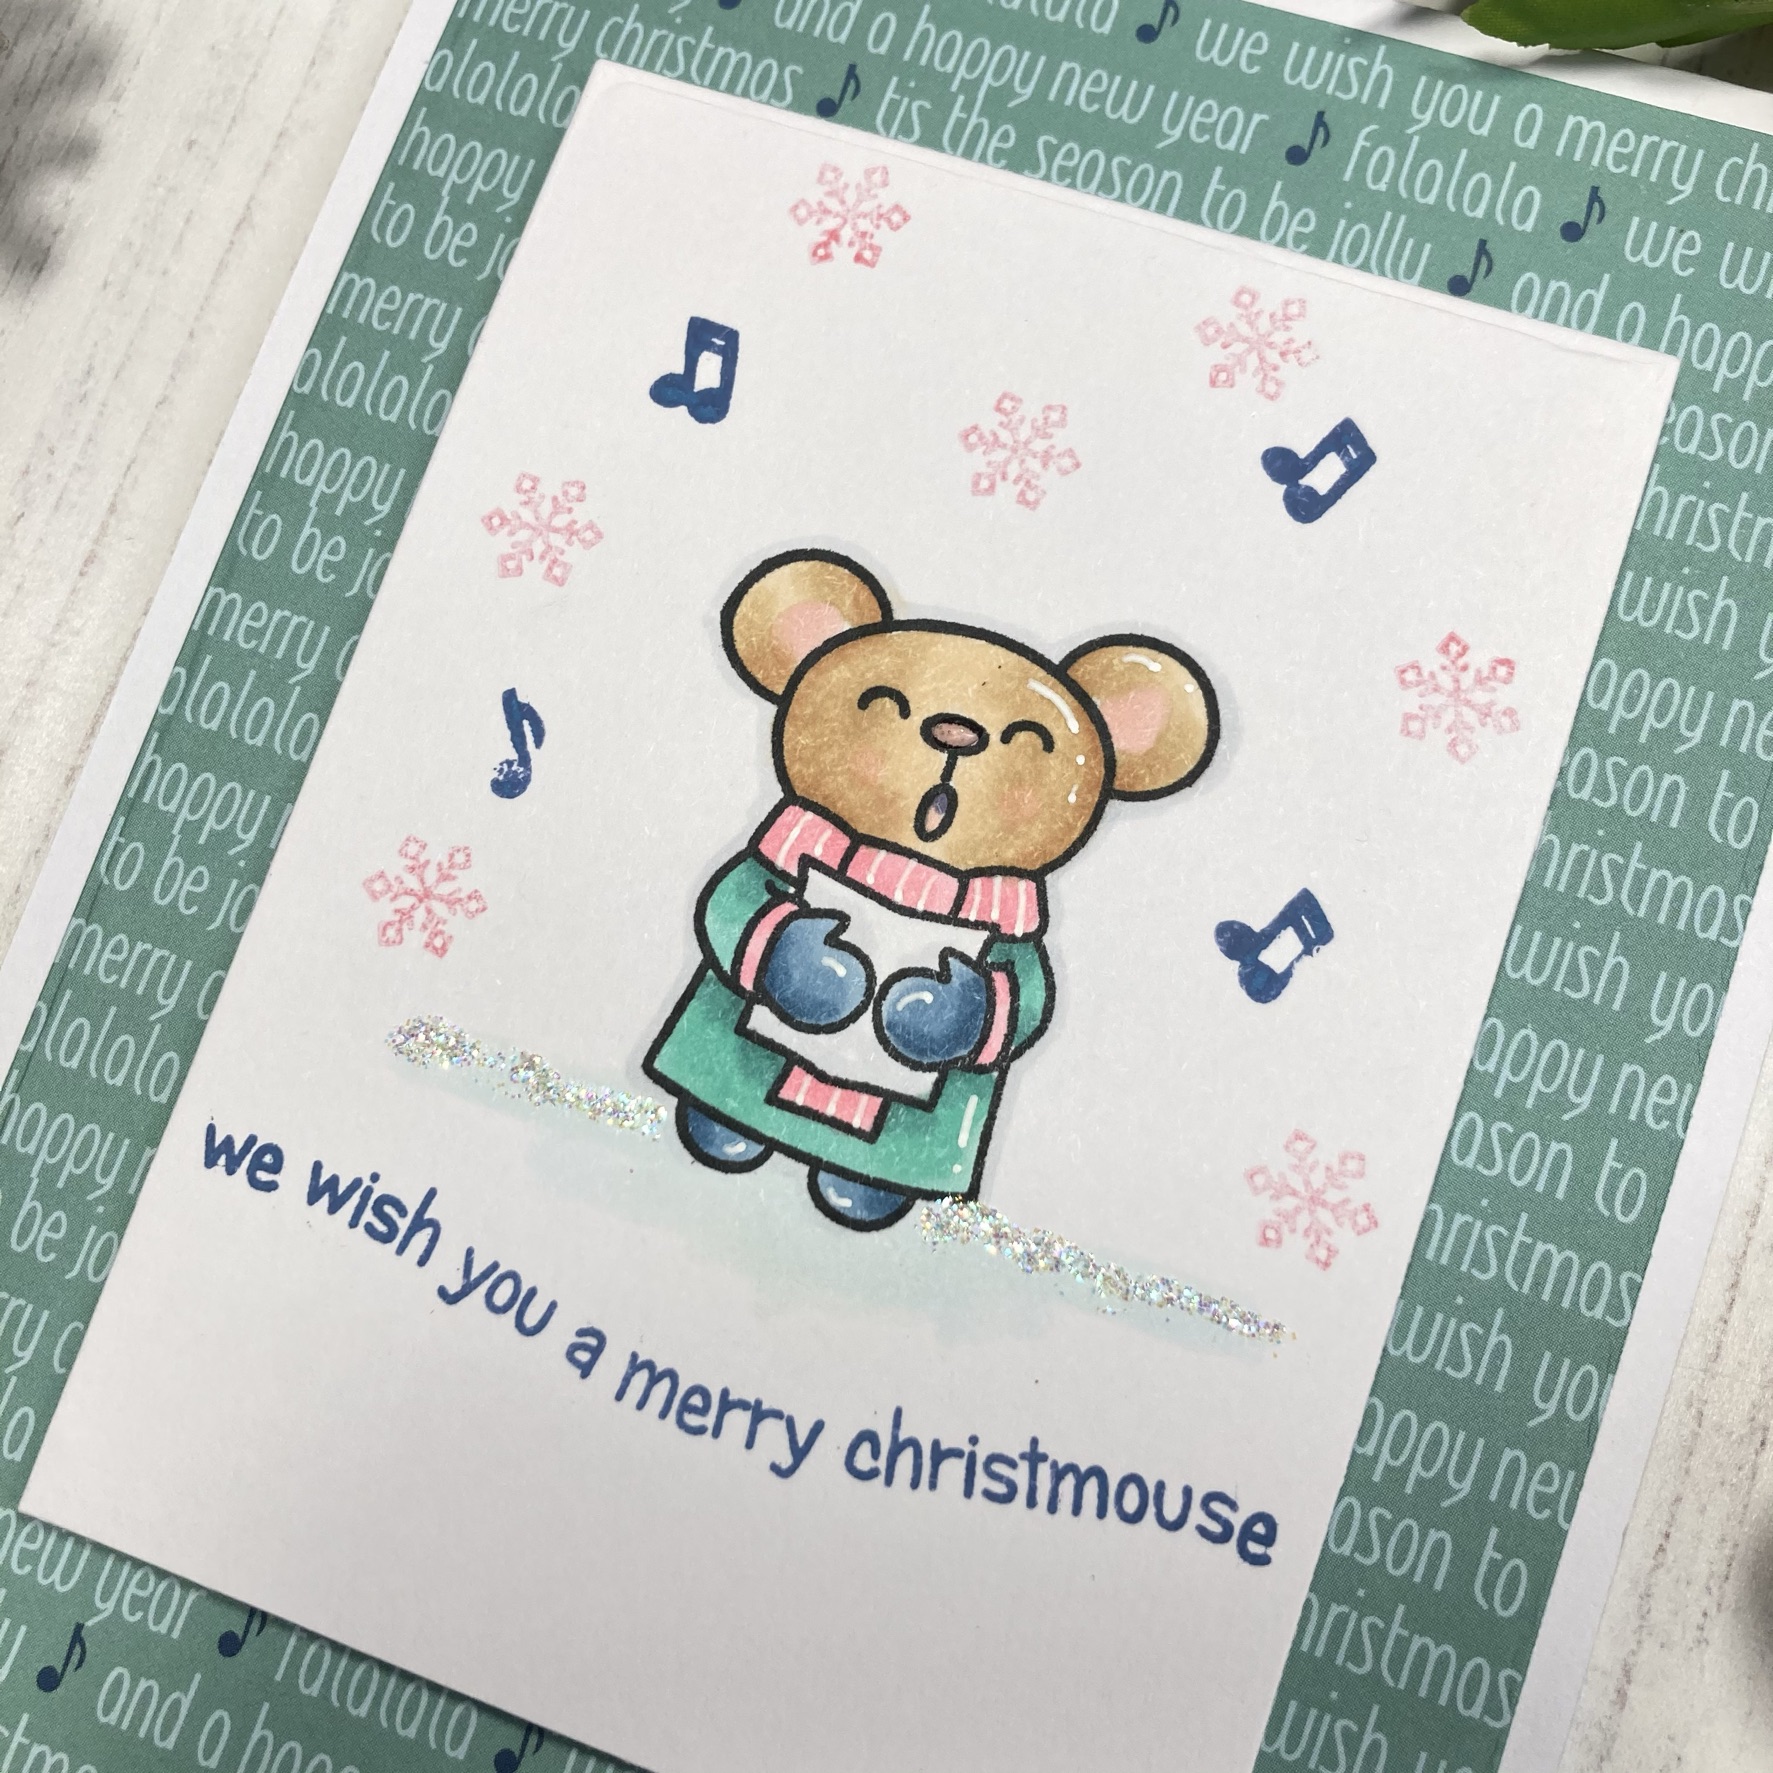
Each layer was cut with our A6 Layering Dies. This adorable mouse is from our Carolling Critters Stamp set.


Our happy Penguin is from the Skating By Penguins Stamp set. This character is probably the simplest to colour if you wanted to batch make with just one image.


I added some second generation stamping of snowflakes in each of my backgrounds.


Some Stardust Stickles added a final touch of sparkle to the snow.


These cards are an ideal formula for any quick card making - not just for Christmas. You can just chose one image and stamp it multiple times and recreate the same card several times, rather than different images like I did. That will make the process even faster. Perfect for this time of year when we all have so many cards to make.


Thank you for checking out our tutorial and video.

Don't forget to join us for our FB Live every Thursday at 8pm BST.

Details of some of the products I used are below.

Jo 
XOXO

Other Posts You Might Like