Pages

Friday, 12 September 2025

Just Married Kitties


Happy Friday, DT Annalisa here! Today’s card was a request from a friend whose niece is getting married in September. I combined the Just Married A4 Printed Cardstock and Just Married stamp set to create a personalized card in their wedding colours, navy and lavender.

I ink-blended Shaded Lilac Distress Ink on the edges of an A2 card base and set it aside.


I pressed Shaded Lilac Distress Ink onto the Cosy Sweater 6x6 Stencil, then sprayed it with water, and finally pressed Distress Watercolour Cardstock into it, letting it sit for a few minutes.

I spritzed the paper with more water, once I removed the stencil, so the colour could run. I heat set this with my Ranger Heat tool. Next, I pressed Uncharted Mariner Distress Ink onto my craft mat, spritzed it with water, and pressed the watercolour panel into it. I then added splatters of Watercolor Distress Pencils in the matching ink colours.

I ink-blended the edges of the panel with Uncharted Mariner and Shaded Lilac Distress Ink, die-cut it with a stitched rectangle die, and used double-sided tape to stick it to the card base.

I stamped the car and the balloons from the Just Married stamp set, and coloured them with Copic Markers. The rest of the images and the sentiment were from the Just Married A4 Printed Cardstock. I die-cut all of the images with the coordinating dies. I love being able to mix and match the printed images and stamped images to fit your needs!


I used liquid glue and double-sided foam tape to adhere the images to the card and added Summer Haze Designer Enamel Dots to complete the card.

Thank you so much for reading my blog post! Don’t forget to use my discount code T4TANNALISA10 when you shop at Time For Tea Designs to receive 10% off your order.


Tuesday, 9 September 2025

Big Birthday Wishes


Hey all! I'm here sharing an adorable card featuring Time for Tea Designs. 

I love using big word dies as a focal point for a card. For this card, I took the "Big Birthday Wishes" die and cut it out in white cardstock. I used "Seedless Preserves" Distress Oxide to do an ombre ink blend on the word dies.

I attached it on a card panel and I used the same ink to ink blend the edges of the card.

I added a few critters from the "Treat Cart" stampset to add touches of adorable-Ness to this card!

Thanks for stopping by!
Jill


Monday, 8 September 2025

Thanks for Listening

Hi. Design team member Koren Wiskman here. I hope that I can inspire you to create something fun with all of these awesome T4TD supplies. Today I am using the Let's Chat Stamp Set and Coordinating Dies as well as the Speech Bubble Dies to create this project. 

The card size is A2 (4.25in x5.5in.) The front panel is cut to 3.25in x 4.75in. This is my favorite size card to create. I have tried so many others but this size is the one that keeps my heart happy. My card bases are typically made using a neutral gray cardstock. These two details about my cards rarely change. 

Background

This scene was easy to create. I grabbed an old cloud edge stencil from my stash and several shades of ink to mimic a gorgeous sunset. I used these to create a card panel with ink blended clouds. I really wanted to work with pink. Not just any pink, hot pink. So, I grabbed some hot pink cardstock from my stash and cut a scalloped circle. On top of the scalloped circle is a circle of ink blended clouds. On top of that is some grass, cut using very bright green. 

Focal Images

My two critters are from the Time for Tea Designs Let's Chat Stamp Set. I stamped them on alcohol marker friendly paper using alcohol marker friendly ink, so that I could color them with my alcohol markers. I cut them out using the coordinating dies. 

Sentiment

I used the T4TD Speech Bubble Dies to create a little bit of a conversation between my two critters. I heat embossed "thanks for listening" from the Let's Chat Stamp Set using white embossing powder onto that same hot pink cardstock and cut it out using the coordinating dies. The "heart emoji" is a small glossy enamel heart from my stash. 

Everything is popped up using foam squares. 

I hope that I've inspired you to create something today. Check out the Let's Chat Stamp Set and Coordinating Dies as well as the Speech Bubble Dies in the T4TD shop. 

KOREN

Sunday, 7 September 2025

Ewe Are The Best!

Hello!


Michelle from the Design Team here and today I have card inspired by the oncoming change of season. I bring to you a cosy little fall scene that’s full of fluffy fun! These sweet sheep are making the most of autumn with big piles of crunchy leaves and lots of happy smiles.

Supplies used:

Ewe Are The Best

Jumping With Joy


To start with, I ink blended a soft sky background using Salvaged Patina Distress Oxides with my usual addition of splatters to give it interest.


Next, I die cut a hillside and ink blended with my favourite combination of Twisted Citron and Lucky Clover Distress Oxides. 


I shopped my stash for a large tree die, ran it over with a woodgrain texture die and then ink blended with Brushed Corduroy, Vintage Photo and Ground Expresso Distress Oxides. For the head/leaves of the tree, using Mustard Seed, Spiced Pumpkin and Festive Berries Distress Oxides, I ink blended bold orange colours and added speckled details to capture that perfect autumn glow. 


All the images were either printed or stamped out. Each sheep was coloured with warm tones to match the feel of the card. I tucked two of the sheep into the piles of leaves, looking very content and with the third one, I wanted to add my usual element of fun so I placed it like it couldn't want to jump in! The layered leaves add such great texture and movement to the scene.


For the sentiment, there was only perfect one choice for it - 'ewe are the best'. I die cut EWE from some alphabet dies in my stash from cardstock that I ink blended with the same colours of the tree head/leaves to tie it all together. I added further dimension to this by die cutting the letters again from white cardstock and offsetting it. 

I really love this card as it's not the usual animals that you expect to be playing in piles of leaves! 


If you’re feeling inspired to jump into some autumn crafting, this is your sign. Grab those oranges and greens and have some fun!


Michelle


Saturday, 6 September 2025

🫖 Fancy a Cuppa? 🫖

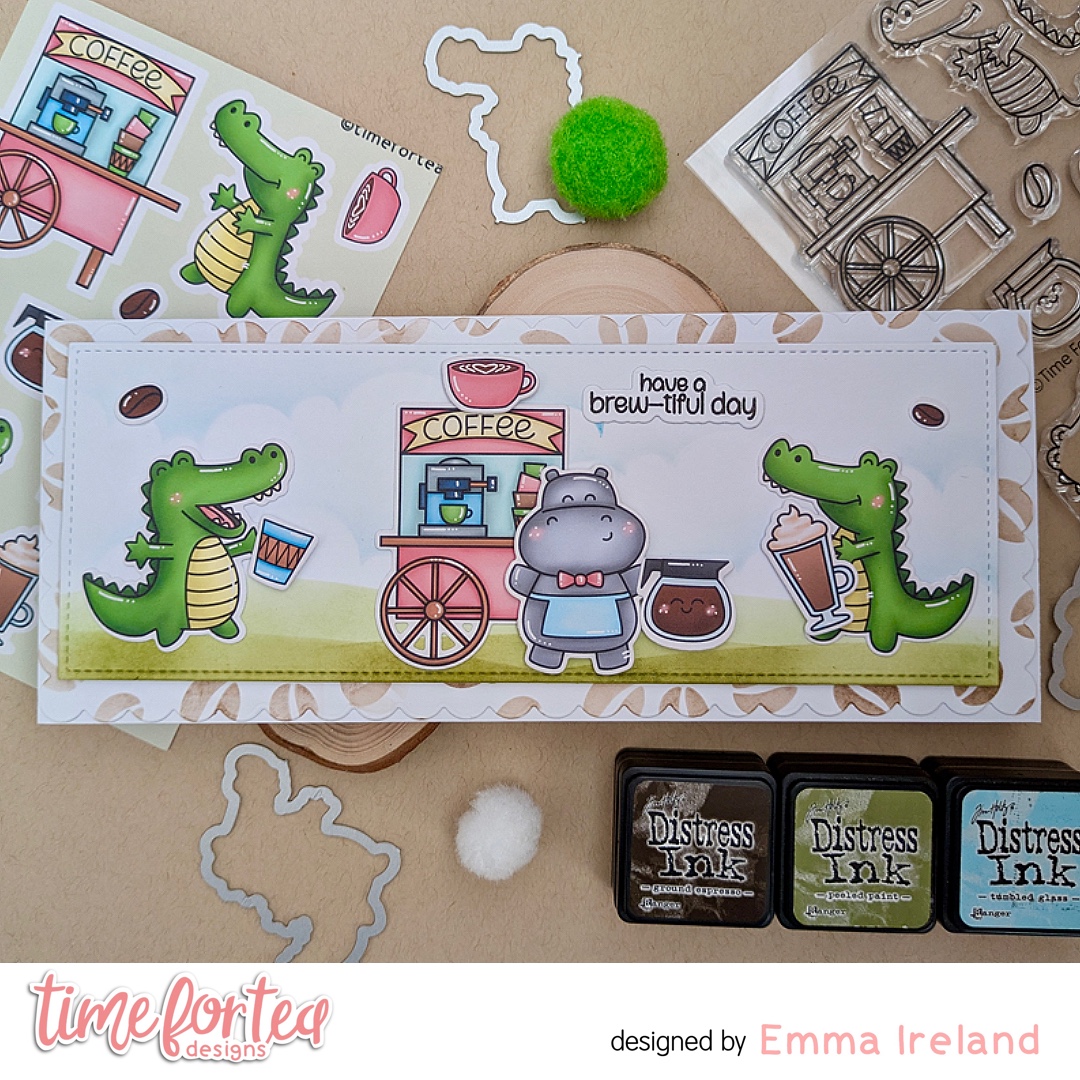
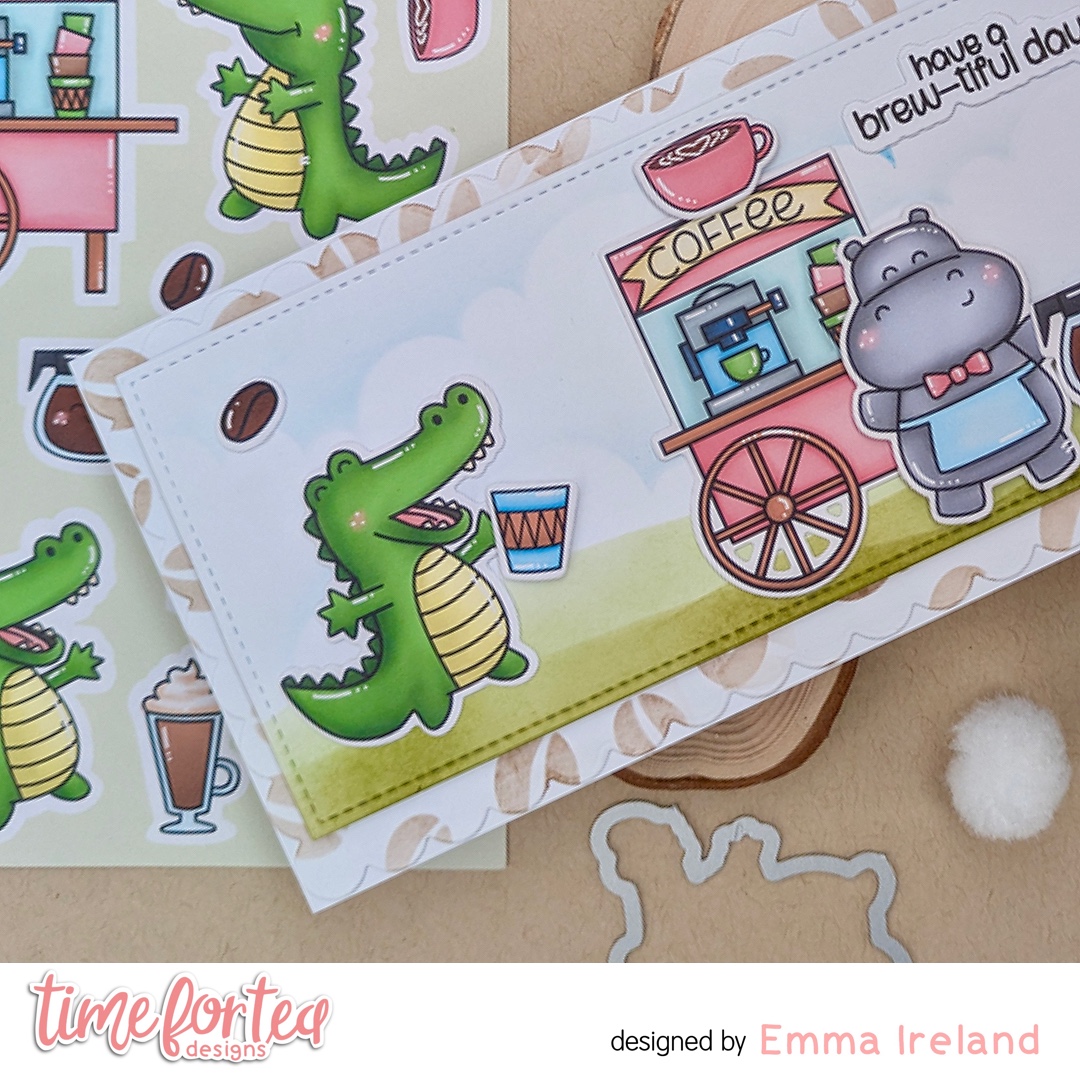
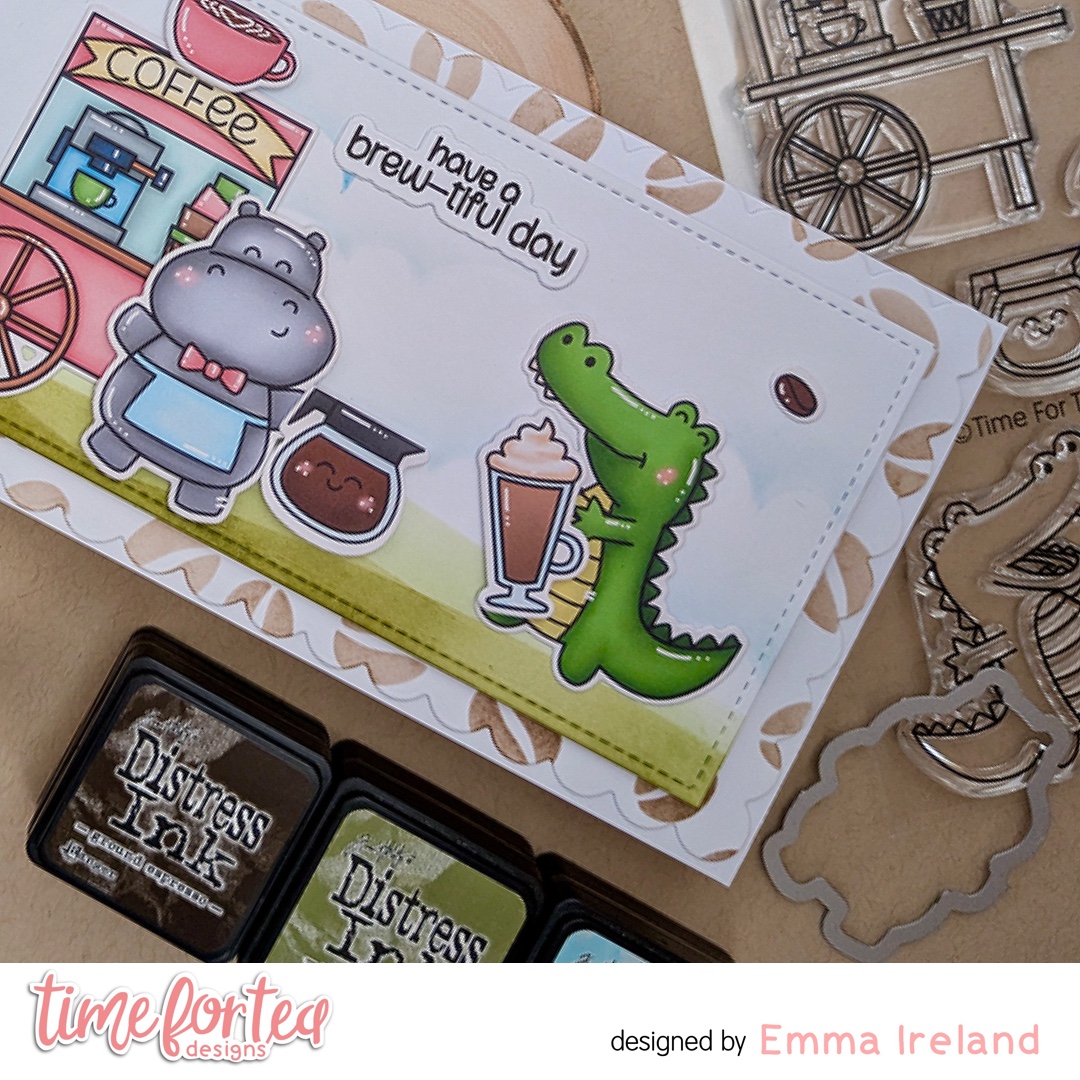
Hello Tea Timers. DT Emma here and I’m back today with a new card featuring the ‘Snappy Before Coffee’ A4 Printed Card-stock and coordinating die set, alongside the ‘Coffee Beans’ and the ‘Scene Builder’ 6 x6″ Stencil from Time for Tea Designs. I could not resist using these again, I just love them so much! 

If you haven’t much time during your day but still want to create a super fun card then these Pre-printed card stock sheets are the way to go. 

Time for Tea Designs Shop


Now with this set, ‘Snappy Before Coffee’ you will get these sweet little characters coloured and pre-printed on to 200gsm cardstock. There are 2 A4 sheets included along with free digital stamps so you can print and colour in your own medium as often as you like. With at least 8 different collections to choose from you can make a card to suit all your occasions.


Making the card:

To create this card I have used one piece of white card and cut it out to create a slim line panel. I have used some Tim Holtz Ground Espresso distress ink and the ‘Coffee Beans’ stencil and brushed the ink all over. I adhered it to my card base with double sided tape. For the top layer I have cut another piece of white card and used the ‘Scene Builder’ 6×6 stencil and created some clouds and hills using the Tumbled Glass, Salty Ocean, Peeled Paint and Mowed Lawn distress inks. I then arranged my cute little characters with foam tape and sentiments/coffee beans with some glue. I have popped the top layer up with more foam tape.


Thank you for visiting the T4TD blog today. For a 10% discount on your order, use my special code –  T4TIRELAND10

Hugs, Emma xxx

Friday, 5 September 2025

Simply The Zest


Happy Friday, DT Annalisa here! I am sharing a bright, fruit-themed card featuring Fruitful Friends and Squeeze the Day from Time For Tea Designs. Summer is the perfect time to enjoy delicious, fresh fruit! 🍓🍋🍉

I grabbed the Sweet Scalloped Dies to cut out some patterned paper from the Sweet Summer 6x6' Paper Pad, then used double-sided tape to attach it to my card base.


Next, I cut a panel from red and green patterned paper with the Rounded Corner Stitched Rectangle Dies. I ink-blended Abandoned Coral and Twisted Citron Distress Ink with my Beautiful Blender Brushes. I used a watercolour brush and some water to add Festive Berries and Mowed Lawn Distress Watercolour Pencil splatter. I added white splatter with a paintbrush and Picket Fence Distress Spray Stain. Once this was dry, I used double-sided tape to attach it to my card base.


I stamped several images from the Fruitful Friends and Squeeze the Day stamp sets, coloured them with Copics, and cut them out with their coordinating dies. I added white gel pen accents with a Gelly Roll Pen. The worm with glasses is from Book Buddies, the sun and clouds are from Rain Or Shine Mice, and the flowers are from Ewe Are The Best.


I stuck the images to the card base using liquid glue or double-sided foam tape for dimension and added several Sweet Summer Designer Enamel Dots to complete the card.

Thank you so much for reading my blog post! Don’t forget to use my discount code T4TANNALISA10 when you shop at Time For Tea Designs to receive 10% off your order.


Monday, 1 September 2025

Let's Party Card Set

Hi. Design team member Koren Wiskman here. I hope that I can inspire you to create something fun with all of these awesome T4TD supplies. Today I am using the Time for Tea Designs Let's Party Die to create these cards. There are two cards made with basically the same materials. 

The card size is A2 (4.25in x5.5in.) The front panel is cut to 3.25in x 4.75in. This is my favorite size card to create. I have tried so many others but this size is the one that keeps my heart happy. My card bases are typically made using a neutral gray cardstock. These two details about my cards rarely change. 

Card 1: Today, I flipped the script. Usually, the above statement would be correct but today, I changed it up. I'm using a natural card panel with visible fibers. The card base itself is also, not light gray but dark gray. I know, i'm wild! 

Background 

Card 1: On top of the natural fiber card panel, I created a rainbow stripe circle. I cut half inch strips of cardstock and glued them to a piece of white copy paper in a row. Once I had my own custom rainbow cardstock, I cut a circle out of it. It is popped up onto the natural cardstock panel using foam squares. 


Card 2: The dark gray panel was cut to my normal go to size of 3 1/2 by 4 3/4 inches. I then ran it through my die cutting machine inside an embossing folder that leaves a corrugated cardstock design. 

Both of these cardstock panels are popped up onto the card base using craft foam and tear tape adhesive. 

Sentiment:

Card 1: I used the Time for Tea Designs Let's Party Sentiment Die. I cut this one from that same dark gray cardstock I have been using. It too was embossed with the same corrugated design. It was layer on top of three additional cuts of the same die using the same dark gray cardstock. I absolutely had to put it wonky inside this circle. I tried to look at it perfectly straight and I just couldn't do it. I had to leave it wonky. I'm sorry to those that are disappointed but my chaotic heart won that battle. 


Card 2: I used the same rainbow stripe paper that I customized for the circle and used it to make the sentiment. I love how it turned out. 

I'm ready to party, how about you?

I hope that I've inspired you to create something today. Check out the Time for Tea Designs Let's Party Die in the T4TD shop. 


KOREN

Other Posts You Might Like