Pages

Showing posts with label Interactive card. Show all posts

Friday, 22 May 2026

Interactive Book Worm


Happy Friday! DT Annalisa here, and today I’m sharing a fun interactive shutter card featuring the Time For Tea Designs Book Buddies stamp set and coordinating dies. This adorable card would be great for a book lover in your life.


To create this card, I used the Shutter Card die and Shutter Card Add-On die along with some double-sided Lawn Fawn patterned paper. I also followed a few of their YouTube tutorials, which made putting the interactive element together much easier.


I stamped several images from the Book Buddies stamp set, coloured them with Copics, and die cut them using the coordinating dies. To add a little extra detail and interest, I finished the images with white gel pen accents. I then used liquid glue to attach all the stamped images and sentiment to the card.


For the band around the front of the card, I used patterned paper from the Pretty Pastels 6x6 Paper Pad. I used the same patterned paper from the card base for the circle element and ink-blended it with Peacock Feathers Distress Ink. The large heart was die-cut from white cardstock and ink-blended with Worn Lipstick and Picked Raspberry Distress Ink, while the smaller heart frame was also die-cut from white cardstock. Once everything was finished, I adhered all the elements together with liquid glue.


Thank you so much for stopping by and reading my blog post! If you’re shopping at Time For Tea Designs, don’t forget to use my discount code T4TANNALISA10 to save 10% off your order.


Friday, 8 May 2026

Interactive Spring Card


Happy Friday! DT Annalisa here, and I’m sharing a fun interactive spring card featuring the Rain or Shine Mice A4 Printed Cardstock and coordinating dies from Time For Tea Designs.


For the background, I used patterned paper from my stash. I’m not sure why, but I’m always hesitant to use patterned paper that I really love! I die-cut the patterned paper using the Peekaboo Pop-Up interactive die from Lawn Fawn.


For the foreground, I blended Hickory Smoke Distress Oxide onto white cardstock through a cobblestone stencil. I added a bit of splatter with water and white paint for extra texture and interest. I used the middle tab for the interactive element and adhered it inside the card in the appropriate position. If you’re new to this die, Lawn Fawn has several helpful video tutorials on YouTube that walk through the process.


The images are from the Rain or Shine Mice A4 Printed Cardstock, which I die-cut using the coordinating dies. I adhered them to the interactive panel with liquid glue to bring the scene to life. To finish the card, I added stamped flowers, grass, and a butterfly from Cacti Critters, coloured them with Copic markers and accented with a white gel pen.


Thank you so much for stopping by and reading my blog post! Don’t forget to use my discount code T4TANNALISA10 at Time For Tea Designs to save 10% on your order.

Friday, 1 May 2026

Interactive Birthday Card


Happy Friday! DT Annalisa here, sharing a fun interactive card featuring the I Really Dig You Printed Cardstock and coordinating dies from Time For Tea Designs. I love the way the mole pops out from his hole! 


For the background, I used papers from the Pretty Pastels 6x6 Paper Pad. I die-cut the patterned paper using the Peekaboo Pop-Up interactive die from Lawn Fawn, then ink-blended the edges with Salvaged Patina Distress Ink to add contrast and depth.


For the foreground, I blended Mowed Lawn Distress Ink onto light green cardstock and added a bit of splatter with the same ink for extra texture and interest. I used the outermost tab for the interactive element and adhered it inside the card in the appropriate position. If you’re new to this die, Lawn Fawn has several helpful video tutorials on YouTube that walk through the process.


The images are from the I Really Dig You Printed Cardstock, which I die-cut using the coordinating dies. I adhered them to the interactive panel with liquid glue to bring the scene to life. To finish the card, I added three purple die-cut hearts and accented them with a white gel pen for a sweet final touch.


Thank you so much for stopping by and reading my blog post! Don’t forget to use my discount code T4TANNALISA10 at Time For Tea Designs to save 10% on your order.

Friday, 17 May 2024

3D Birthday Wishes


Happy Friday, everyone! DT Annalisa here sharing a 3D birthday card with the adorable I Really Dig You stamp set and the coordinating dies.  I love this cute gardening scene; it makes me want to go outside and start planting my garden!

I ink-blended twisted citron Distress Ink and Oxide using my Beautiful Blender Brushes onto a green piece of patterned paper from the Gorgeous Gingham 6x6' Paper Pad. I die-cut this using the Platform Pop-Up die from Lawn Fawn to create the base and the grass areas. 


I used the Platform Pop-Up add-on die for the sky area. I die-cut white cardstock and ink-blended it with tumbled glass over a cloud stencil. I then added splatter using mermaid lagoon Distress Ink, water and a paintbrush.

I followed several instructional videos on YouTube from Lawn Fawn on assembling the interactive die. 


I stamped and coloured (with Copics) several images from the  I Really Dig You and cut them out with their coordinating dies. I added white gel pen accents with a Gelly Roll Pen.

I used liquid glue to stick the elements down to the platform pop-up to complete the scene. 


Thank you so much for reading my blog post, be sure to use my discount code T4TANNALISA10 when you visit the Time For Tea Designs shop to get 10% off your order.


Thursday, 8 June 2023

How to Create Laundry That Really Tumbles!


 Hey there, Tea Timers!!  It's Amanda back with a very fun interactive card using the Loads of Love stamp set!

First, I created an angled background with the Pretty Pastels paper pad.

Next, I stamped my images and colored them in with Copic markers.
I die cut them with the coordinating dies, which includes a circle to cut out the center of the washer/dryer stamp.
I added acetate and then 3D foam tape to create a "shaker".
I added some laundry to the shaker.
Then, I assembled the rest of the card!


That's how I created the cutest little laundry room!  Thanks so much for stopping by the Time for Tea Blog today!

Xx, Amanda


Saturday, 11 March 2023

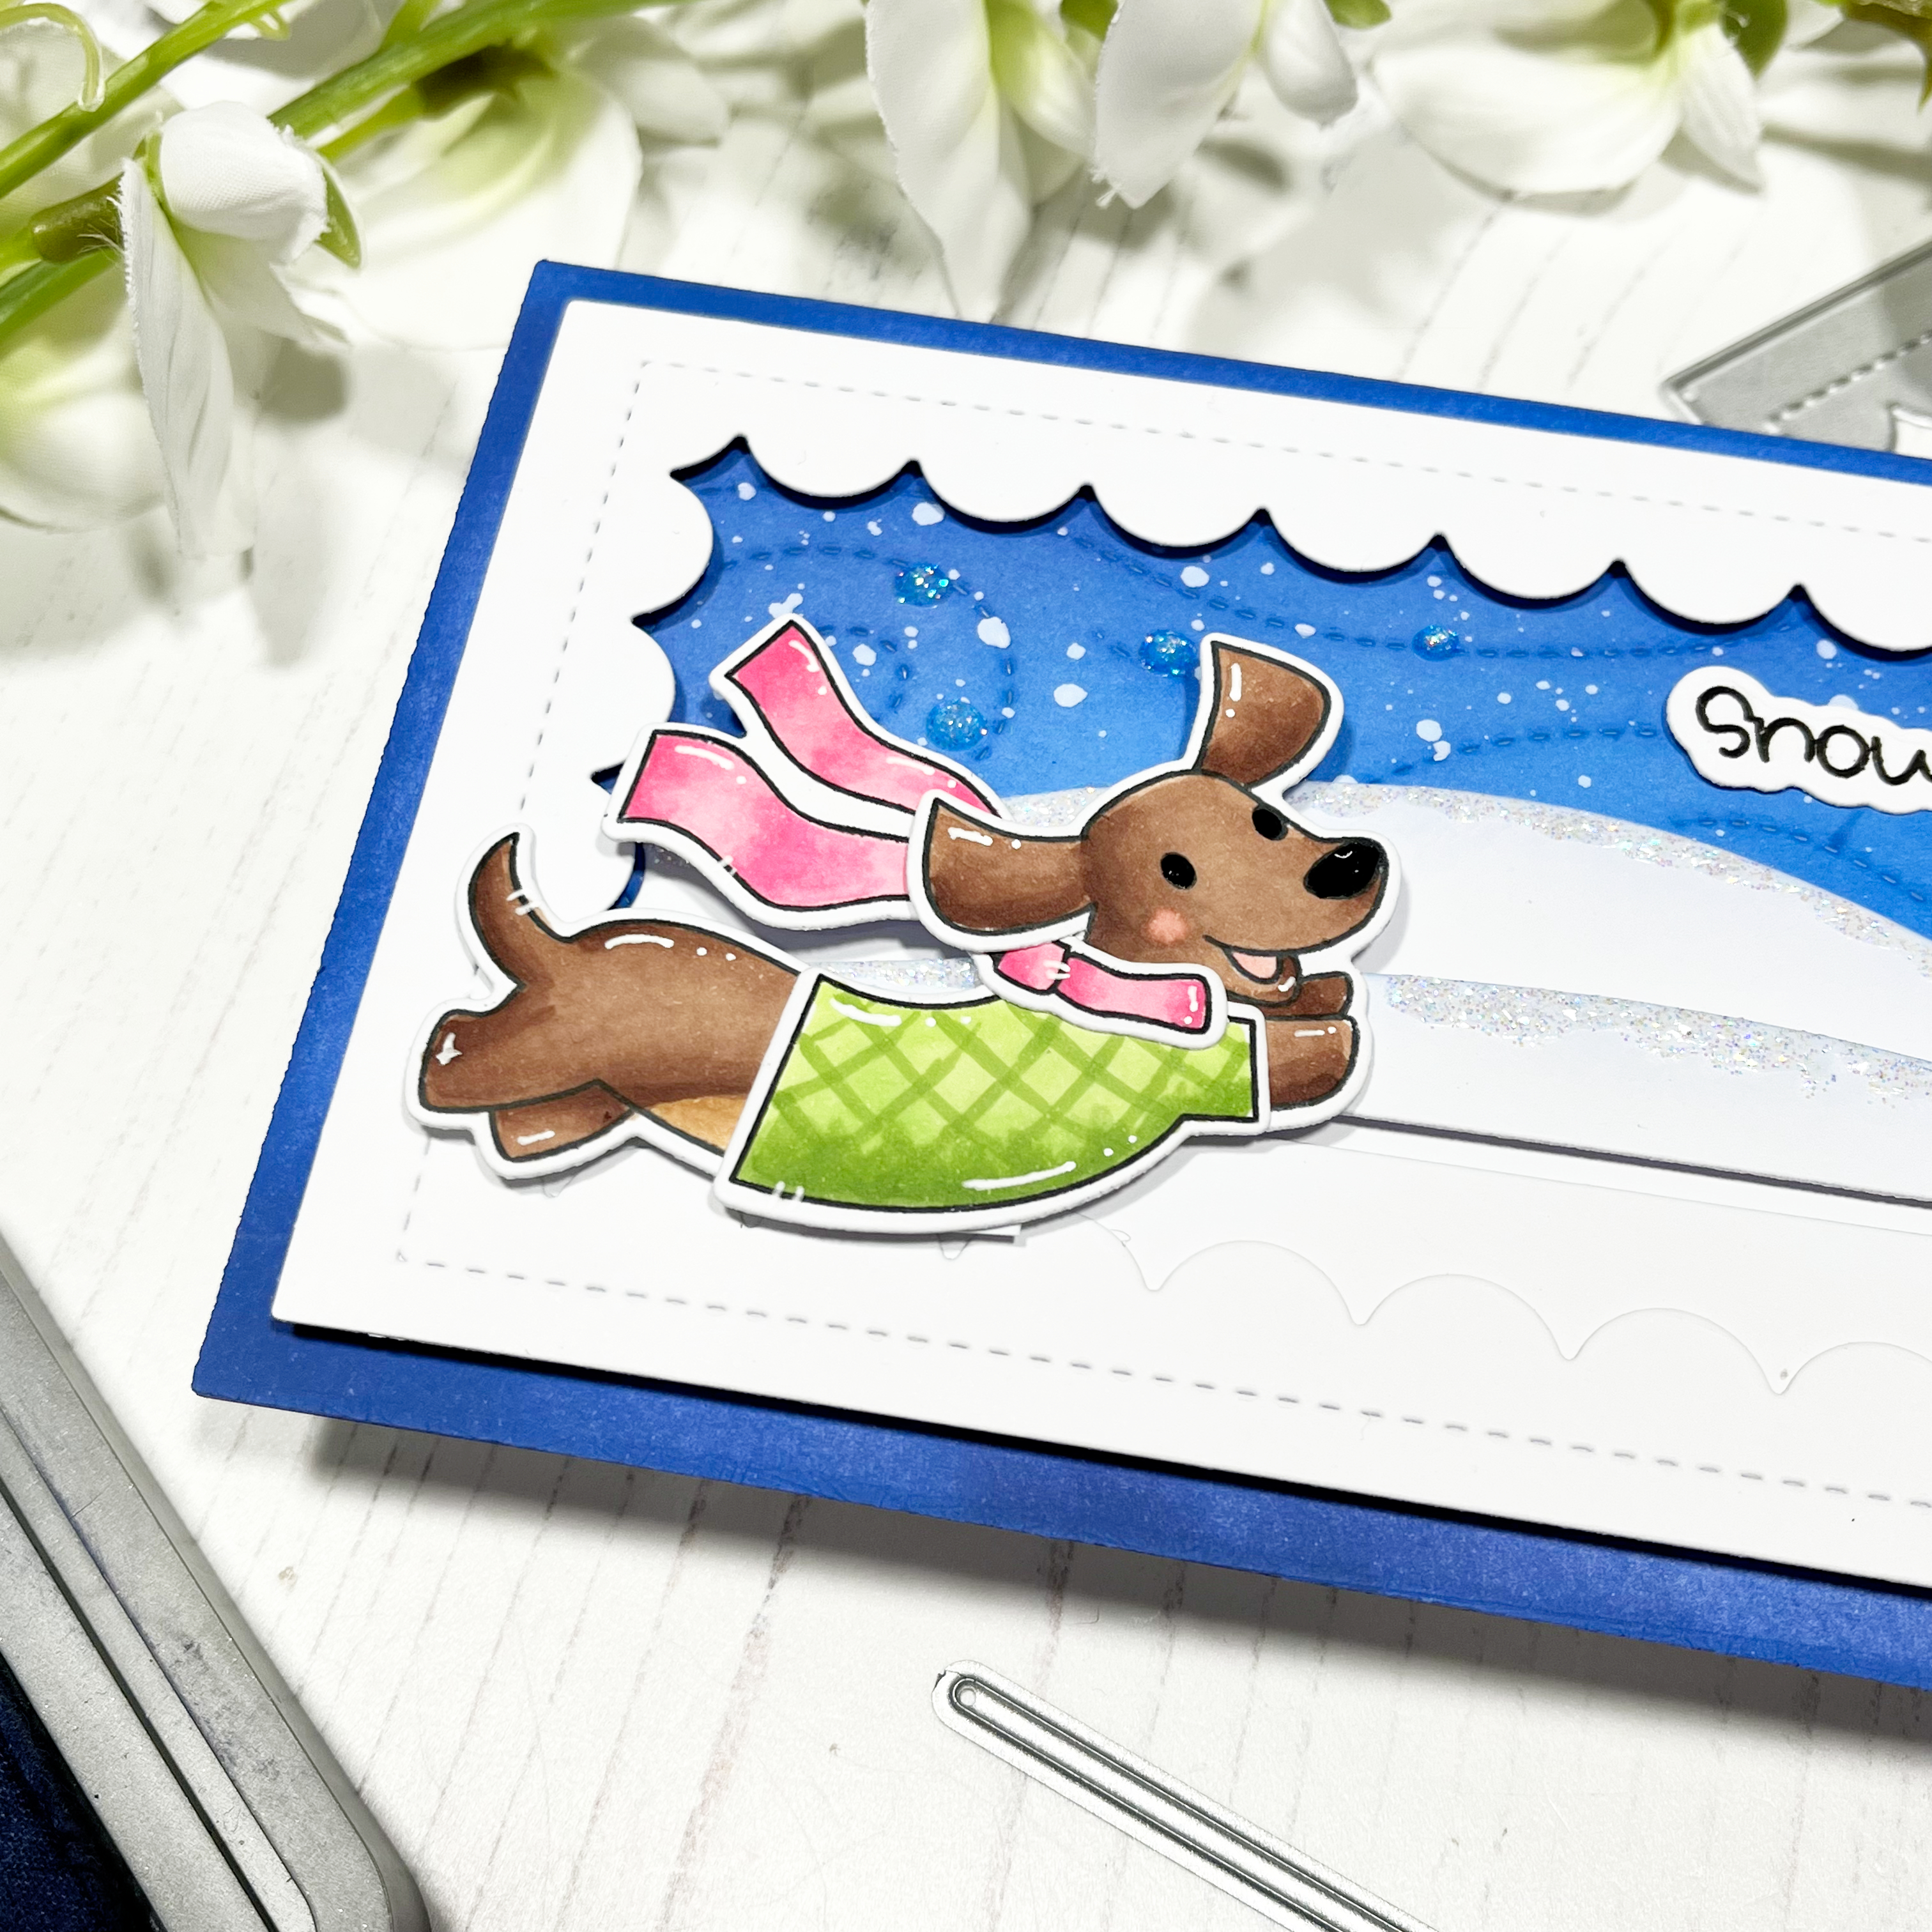
Making an Interactive Pull Tab Card with a Secret Message


In this week's Live crafting video I decided to make an interactive pull tab card.


I was very much inspired by all the snow we've had here in Sheffield, UK, over the last couple of days. It doesn't snow often really here anymore so when it does its a big deal and the world seems to come to a halt! :)


Personally, I like the look of snow but I'm not a fan of having to deal with it so having in fun in the snow is definitely up to this super cute Dachshund :)


Lynn, one of our Tea Timers came up with the idea of a secret message on the pull tab mechanism and I LOVE it!!


If you'd like to see how I put this fun interactive card together, head over to YouTube to watch the replay via the link below.


Stay warm!

Crafty Hugs

Jo XOXO


Thursday, 15 September 2022

How to Create a Peek-a-boo Porthole

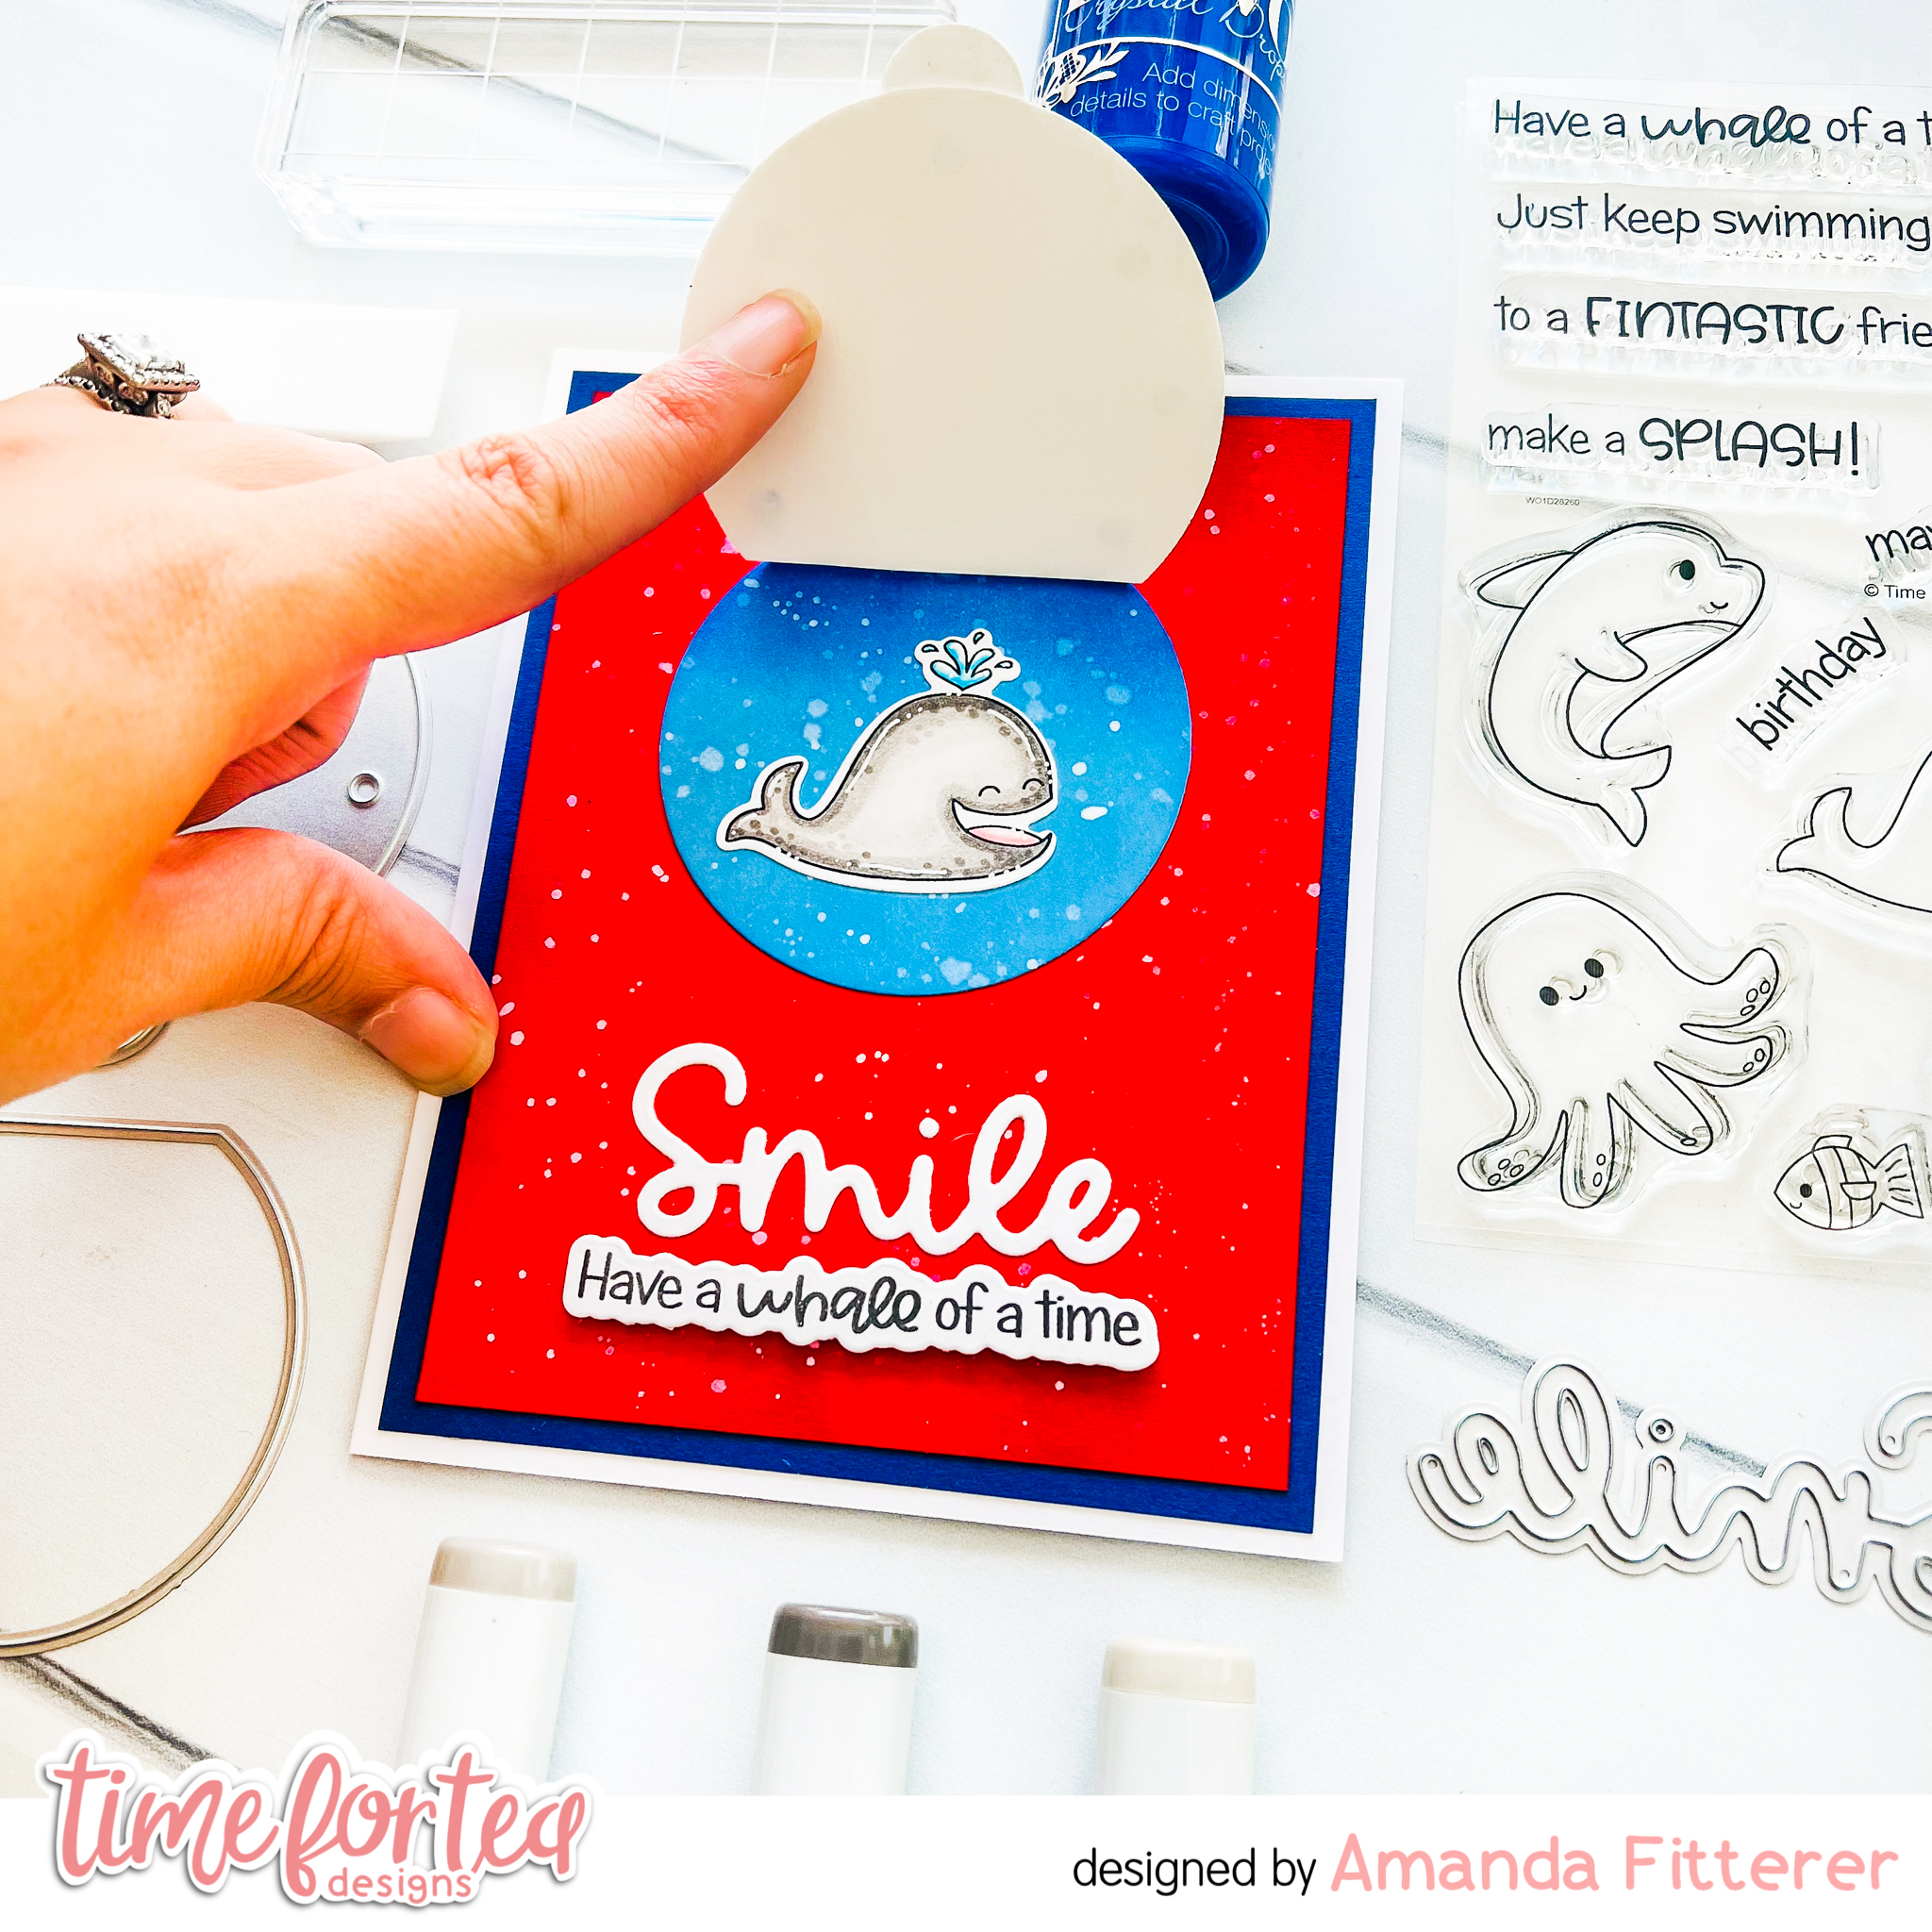
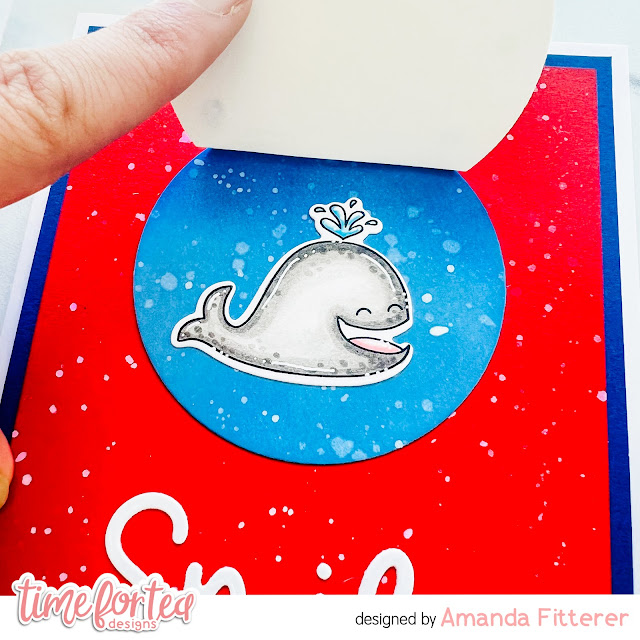
Happy Thursday, Tea Timers!  It's Amanda here!  Today, I get to share with you how to make a Porthole Lift the Flap Dies card!

To create this card, I'm starting with the dies and cutting the solid circle die (the one that is blue below), the porthole circle die (with the holes), and the trimmed circle die from the Porthole Lift the Flap Dies.  I've also trimmed a dark blue piece of cardstock and red piece of cardstock down.

I have glued the red cardstock to the blue cardstock.  Then, I'm gluing the blue circle to the red cardstock.  The trimmed circle goes behind the porthole.  Now, I'm adding Nuvo drops in the porthole circles.  Then I glue the porthole over top of the blue circle.

For my sentiment, I'm using the "smile" from the Smile Inverted Scallop Frame Dies.
I've also stamped the whale from the Fintastic Friends Stamp Set and colored it with Copic markers.


That's all I have to share with you today!  I can't wait to be here again next week and share another project with you!

Crafty hugs,
Amanda!

Friday, 9 September 2022

Wavin' Hello


Hello crafty people, Annalisa here with my latest DT card. This slimline ocean card uses the Beach Buds and Fintastic Friends stamp sets and features a wobbly octopus! I love the interactive element an action wobbler adds to a card.

I die-cut Distress White Heavy cardstock by Ranger with the Snow Flurry Cover Die. I ink-blended the negative pieces with Distress Ink using my Beautiful Rainbow Blender Brushes

The colours I used were as follows:
Sand bottom - Scattered Straw with Rusty Hinge splatter,
Ocean - Unchartered Mariner Ink, Salty Ocean & Salvaged Patina Oxide, 
Sky - Tumbled Glass. 


I adhered the stitched wavy die-cut to a slimline card base with liquid glue and added the ink-blended portions.

I stamped and coloured the sea creatures and other elements from Fintastic Friends and Beach Buds with Copic markers and added white Gelly Roll accents. I then used the coordinating dies to cut them out. I used liquid glue and double-sided foam tape to adhere the elements to the card. For the octopus, I added an action wobbler for added dimension and an interactive element.


I added the sentiment that I stamped with Versafine Onyx Black and cut out with its' coordinating die. I added Glossy Accents to the octopus and some fish to complete the card.


Thank you so much for reading my blog post, you can use my discount code T4TANNALISA10 when you visit the Time For Tea Designs shop to get 10% off your order.


Wednesday, 11 May 2022

Easy (E-Z!) light up cards

Happy May, Tea-timers! I have been meaning to try a light-up card forever, so when I got the Let's Spoon stamp set a couple of weeks ago in the Treat Yourself Tuesday sale, the little light bulb images just called out to be lit up, and I finally broke out my E-Z Lights from Pear Blossom Press.


To make your own, you'll need:

- Let's Spoon stamp set

- White and grey cardstock

- Vellum

- Copic markers (I used Y19, Y08, Y15, Y02 for the yellows and C5, C3, C0 for the greys)

- A tiny die (I used the heart from the Paper Plane Pals set)

- E-Z Lights

- Foam tape

- Clear tape


Instructions 

1. Stamp two of the light bulb images onto white cardstock, cut to 3.75" x 5". Stamp the sentiment below, and the light switch toward the bottom right.

2. Colour the light bulbs and light switch using Copics.

3. Use a tiny die to cut a small hole in the centre of each light bulb.

4. Separate one of the lights sets from the pack of three, and insert the battery. The three tiny lights on the end of the wires should light up when you press the small button. 

5. Place the stamped panel over the card base to work out where the light switch and bulbs will go. Mark their position with a pencil on the card base.

6. Attach the battery pack to the card base with double sided tape, underneath where the light switch will go. Place the lights over your pencil marks for the light bulbs and secure with tape. Tape down the rest of the wires so they won't poke out the side of the card front. Place your card front over the light set and press the light switch image to ensure everything is in the right place.

7. Colour a scrap of vellum with a yellow Copic marker and glue it in place behind the light bulb images.

8. Attach the card front to the card using double height foam tape, to ensure there is enough room for the battery pack. 

And here's the finished product:


Thanks again for tuning in and don't forget to use discount code T4TJAYNE10 to get 10% off your next purchase. Until next time, happy crafting!!

Other Posts You Might Like