Pages

Sunday, 13 February 2022

You're a Pig Deal

Good afternoon Teatimers,

I hope you've enjoyed joining in our Instagram and Blog Hop this weekend. If you haven't joined in yet what are waiting for? my teammates have some amazing creations to share with you. Don't forget to grab yourself some bargins while you at it from our Valentine’s sale. 

For my card today I'm sharing this super cute piggy from the Hogs and Kisses Stamp set, who's wizzing by to share some love ❤ 
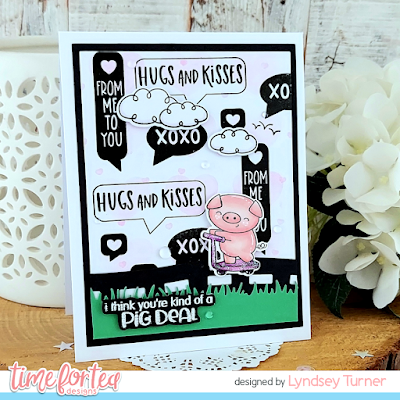

To create my card I took the Lots of Love Cover Plate Die and cut out from acetate to create a stencil, I used this along with some Kitsch Flamingo distress ink to create a subtle background. I then took the Speech Bubble Stamp Set and using black ink randomly stamped a selection of love themed sentiments across the background. 

I cut the panel out with the A2 Layering Dies. Across the bottom I uses the Slimline Hillside Scene Dies to cut out my road and grass border.

I added my cute little scooter piggy to the road, before adding an embossed sentiment to the card. Finally adding a few clear sequins across the card to finish off.

Thank you for joining me here on the blog today,  don't forget to use my code T4TLYNDSEY10 for 10% off your order in store.

Enjoy the rest of your weekend 

Lyndsey x

Saturday, 12 February 2022

Valentine’s Day Sale & Blog Hop

Hello Tea Timers!! 

We have some great news for you today! To celebrate Valentine’s day we are running a sale on a range of products in the T4TD store and we can tell you they’re all so adorable! 


To celebrate we’ve organised an Instagram and Blog Hop giving you a chance to win one of the two £20 vouchers to spend in the store. Here is how you can join in:


- Leave a comment on this post and every DT’s blog post


The hop will close at midnight February 14th UK time. The winners will be chosen at random from both Instagram and blogs and the winner will be announced on the T4TD Instagram & Blog on February 15th.


The next stop on the hop is: Natalia: http://cardsmadebynatalia.wordpress.com


Here is the full hop order:


T4TD: http://timeforteadesigns.blogspot.com/ 

Natalia: http://cardsmadebynatalia.wordpress.com/

Miki: http://cardsmadebymiki.wordpress.com/ 

Natalie: http://mommasedds.blogspot.com/ 

Claudia: https://claudiacubas.blogspot.com/

Jane: http://purplejetlovescrafts.blogspot.co.uk/ 

Silvia: https://piccolepolpettecrescono.blogspot.com/

Kitty: http://kittyskrafty.blogspot.com/

Jayne: http://carddaysnight.com/ 

Annalisa: http://albcards.home.blog/

Lyndsey: http://lyndseymariedesigns.blogspot.com/ 

Vicki: http://vicscrafts.wordpress.com/ 


Best of luck and remember to check out the DT’s Instagram pages for more chances to win!


Happy shopping!!

Friday, 11 February 2022

We Go Together


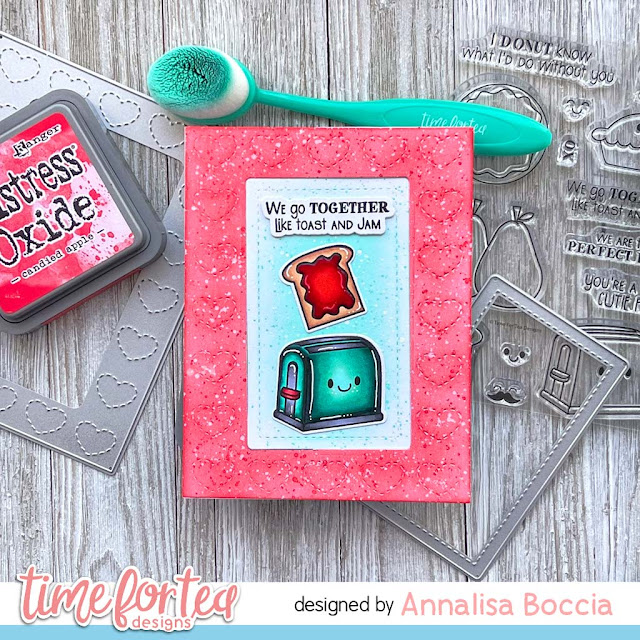
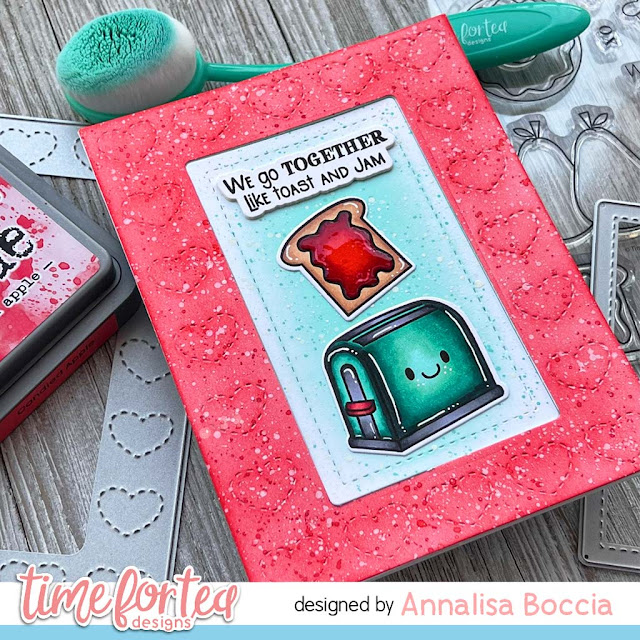
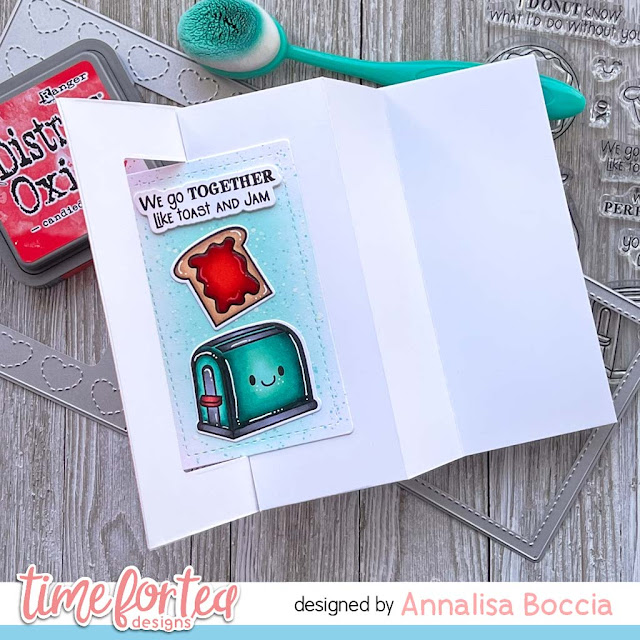
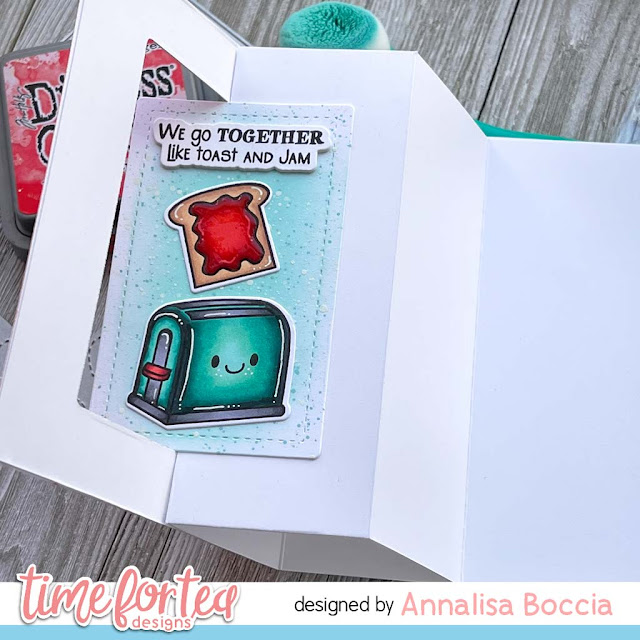
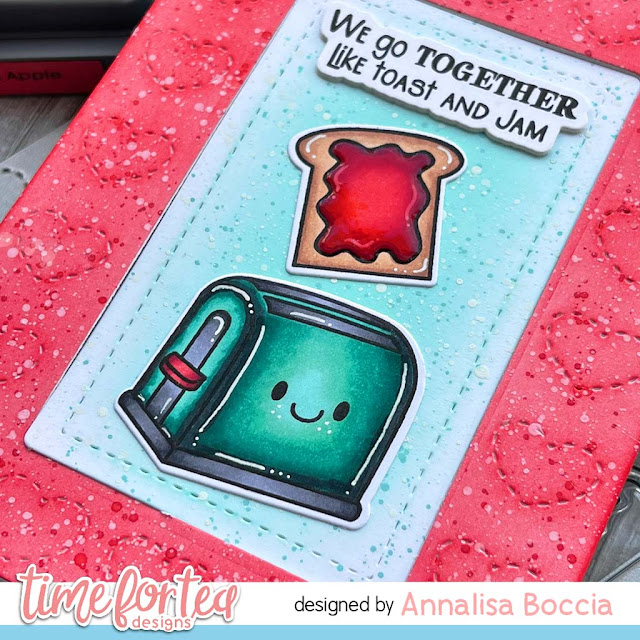
Hello, and happy Friday, DT Annalisa here today. I am sharing a fun interactive card featuring the We Go Together Clear Stamp Set and A2 Stitched Hearts Cover Dies from Time For Tea Designs. These two work so well together for a sweet Valentine's Day card.


I got the idea for this card directly from the one and only Jennifer McGuire and her Window Pop-Out Cards video.  This video came out right around the time that I got my T4T design team package, and I knew I just had to give it a try! I won't explain the 'how-to' for the interactive element as Jennifer is a pro, so it is best to learn directly from her.


For the hearts panel, I die cut some Distress White Heavy cardstock by Ranger and used my Beautiful Blender Brush to apply Candied Apple Distress Oxide. I also added white and Candied Apple splatter for some interest. I then die cut the stitched inside panel, applied some Salvaged Patina using a blender brush, and then added some teal and white splatter.


I stamped and coloured the toast and toaster with my Copics and then die-cut them, along with the sentiment, with the coordinating dies. I used the sentiment die to cut out several more pieces from white paper and glued them back to back to add some dimension.

I used liquid glue to adhere the sentiment and the toast and toaster to the stitched teal panel.


I assembled the card following Jennifer's directions so please check her video out if you are interested in doing something like this.

Thank you so much for reading my blog post, you can use my discount code T4TANNALISA10 when you visit the Time For Tea Designs shop to get 10% off your order.


Thursday, 10 February 2022

Sending lots of love

Hello crafty friends, Kitty here. As it's Thursday though it's time for my latest card. I used those kitties again as they are just perfect for Valentine's which is just around the corner...

For this card I used the Smitten Kitten Stamp Set. I coloured the images with Copics and cut them out. I created the background by firstly blending Kitsch Flamingo and Spun Sugar Distress Oxide Inks. I then placed the Boho Tiles Stencil over the top and used Kitsch Flamingo and Picked Raspberry Inks. I die cut white card using the photo frame from the Memory Keeping Essentials Dies and the glitter heart from the same die set. I made it into a shaker panel and added sequins and gems. I used the Black Polka Dot Washi Tape for the strip at the top. Next I used the Bold Sentiments Stamps & Dies for both the sentiments. I popped all the pieces onto foam pads and added a heart embellishment to finish.


Thank you so much for stopping by today.
Don't forget you can use my discount code T4TKITTY10 across the store for 10% off your order.

Kitty xx

Love you

 Hello there!!!! Silvia’s here with you!

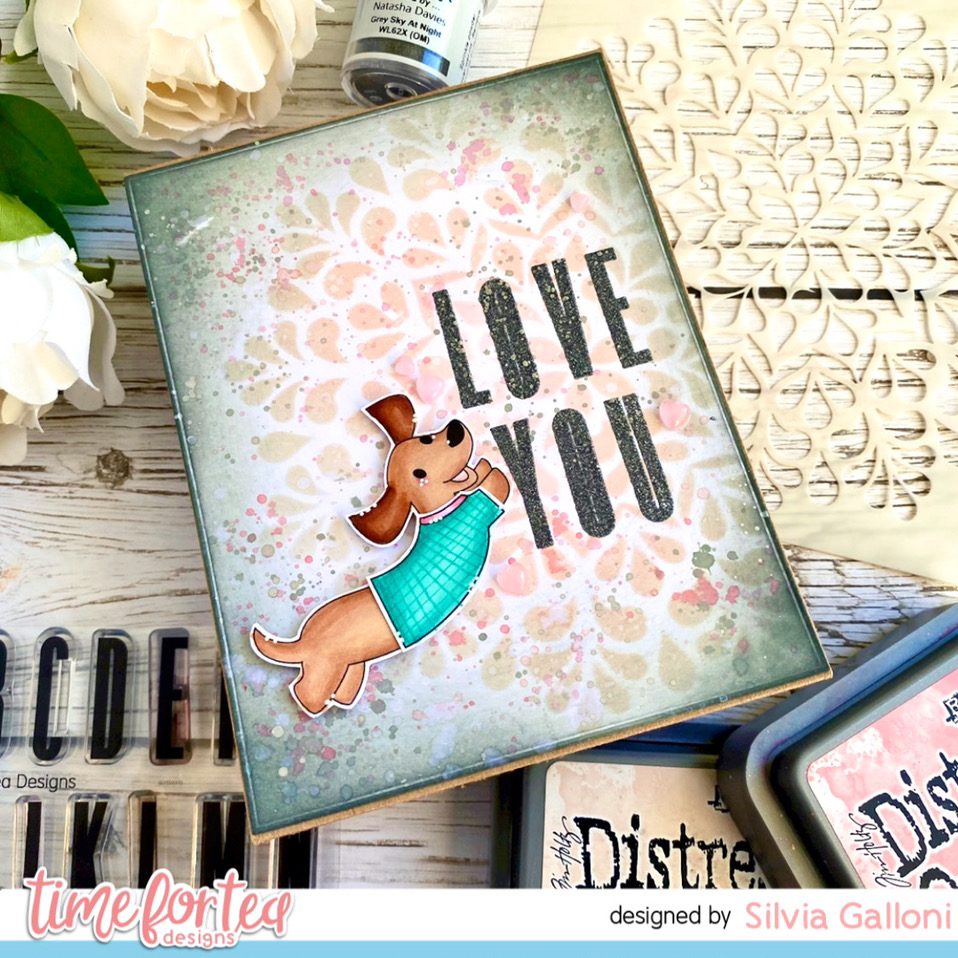
Today I'd like to share a second card I made with the beautiful "Spring Mandala" stencil.

I started cutting a 5,5"x4,25" rectangle from white cardstock, I placed the stencil over it and I started ink blending it from the centar with worn lipstick, tattered rose and pumice stone Distress Oxide inks. 

I darkened edges with black soot Distress Oxide ink, I splattered with clean water and the inks above (loosened with a drop of water) and I let it dry.

I then stamped with the Wow! Embossing ink "LOVE YOU", using the "Tall Alpha" stamp set and I heat embossed it with "Grey Sky at Night" Wos! Embossing powder.

I stamped images from the "Stop Duchshund Around" stamp set, I colored them with spectrum Noir alcohol markers and I cut them with coordinating dies.


I put everything together and that's all. I hope you enjoy it.


Thank you so much for stopping by today and don't forget you can get a 10% off your Time for Tea order with the code T4TSILVIA10.

 I wish you an amazing day. Hugs, Silvia.

Wednesday, 9 February 2022

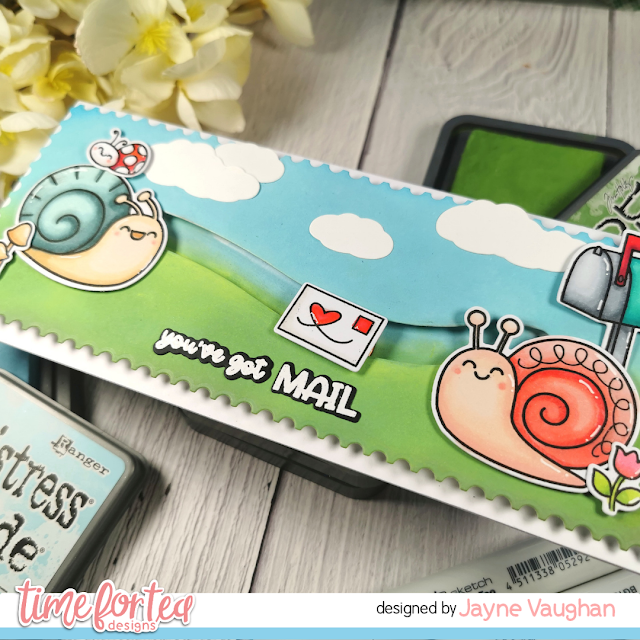
Penny slider card

Hey crafty friends, I'm back again today with another step-by-step tutorial, this time sharing a little trick to create an easy interactive card. 


Products/supplies used:

- Landscape Edge Standalone Die

- You Got Mail stamp set and co-ordinating die set

- Distress oxides in Mowed Lawn, Forest Moss, Tumbled Glass and Mermaid Lagoon

- Blender brushes

- A 2p piece

- Foam tape and circular foam dots

- Slimline Postage Stamp Frame Dies

- Paper Plane Pals die set

- White and black card stock

- White embossing powder, embossing ink and heat gun


Instructions:

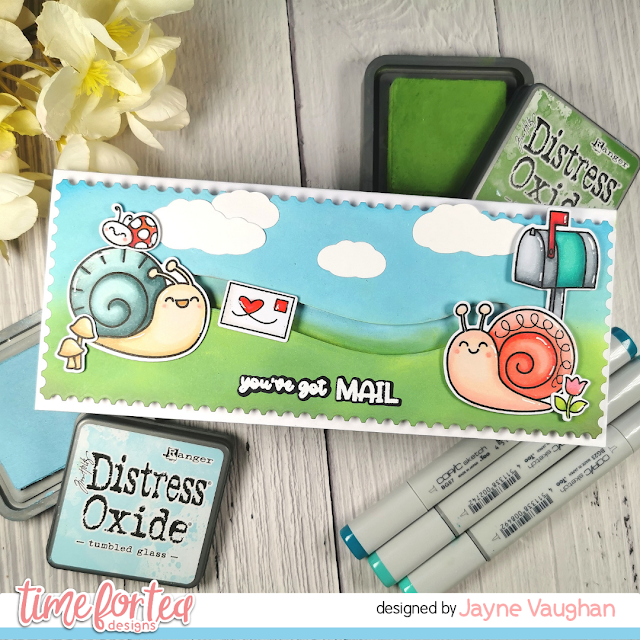
1. Stamp, colour and die cut the images from the You Got Mail stamp set.

2. Take a panel of white card stock (mine was about 8" x 4") and in the centre, die cut the slider channel from the Landscape Edge die set.

3. Ink blend the sky and grass for the scene using distress oxides.

4. Cut the panel down using the Slimline Postage Stamp Frame die set.

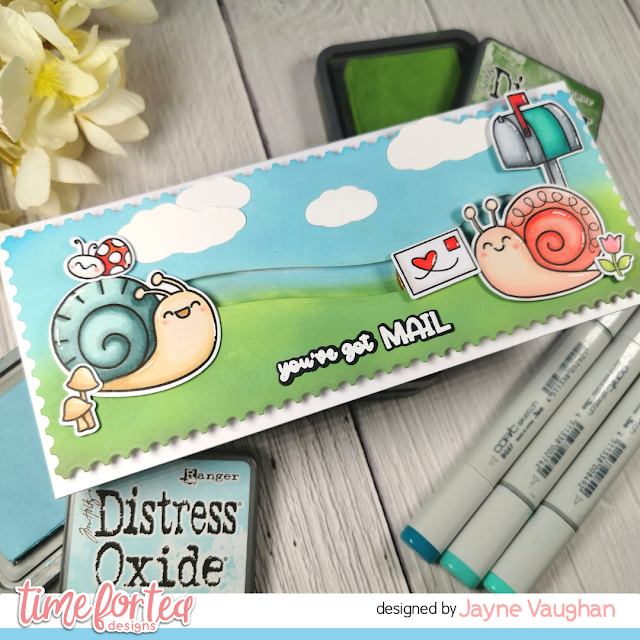
5. Attach a foam dot to the reverse of the envelope die cut. Place a 2p piece behind the panel, and attach it to the foam dot through the channel. The envelope will now slide along the channel. TIP - if you use just one foam dot in the centre of your image, it will tumble around and rotate 360 degrees (this is a super fun thing to do with cute critter cards!). However, if you want your image to stay upright, add two or more dots - which is what I ended up doing here.

6. Add some double-height foam tape to the reverse of the panel (so the coin has enough space to slide around freely). Attach to a slimline cardbase, just bigger than your panel.

7. Attach your critters to the front of the scene with foam tape. I placed my snails on either end of the track, so that the letter was travelling between them.

8. Die cut some cloud shapes using the Paper Plane Pals die set, and glue to the sky.

9. Heat emboss the sentiment in white on to some black cardstock, and glue to the card, underneath the slider channel.

10. Finally, add some Glossy Accents to the stamp and the heart on the letter.

And there you have a, fairly easy to make, interactive slider card!


Don't forget that Time for Tea is having a Valentines Day sale from 9am on 12th Feb, up to midnight on 14th Feb! And if you don't shop the sale, you can always use my discount code T4TJAYNE10 to get 10% off all of your other items!

Happy crafting and see you again for another tutorial in March!


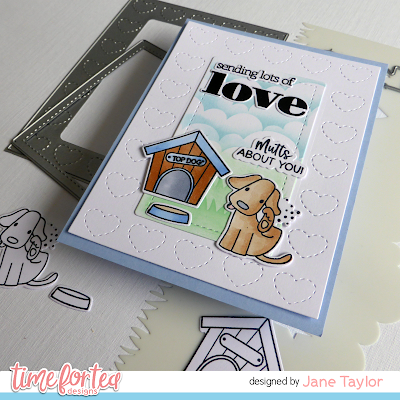
Sending Lots Of Love

 Hello!

Today I'm sharing a card I made using the A2 Stitched Hearts Cover Die and Bold Sentiments sets from the recent release combined with Dog Gone Mutts.


I started by cutting the stitched heart border and inner stitched rectangle from white card using the A2 Stitched Hearts Cover die. I then added some clouds and grass onto the stitched rectangle using the Slimline Scene Builder stencil.


Next I stamped coloured and die cut the images and a sentiment from Dog Gone Mutts and adhered them to the card.  I then decided to add a bit of interest to the top of the scene and stamped and die cut another sentiment using Bold Sentiments.

I hope you like my card using the awesome products from T4TD. If you'd like to purchase any items you can get 10% off by using my code - T4TJANE10.


Thanks for looking today. 
Stay safe and keep crafting!

Jane
x

Other Posts You Might Like