Hi Guys I hope you have had a good week looks like you have all loved the new release things sold out so fast! I have had so much fun creating with it and I know you will too!
Today's card is another framed one I just really love this look at the minute in fact I've run out of white fun foam I've done that many cards using this technique recently. It's such a simple design but frames your image and makes it pop.
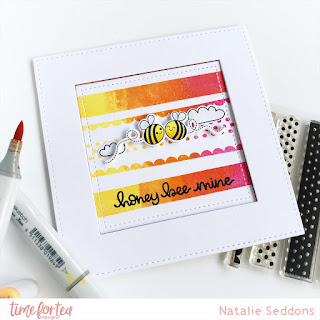
I started my card by cutting out the base with some 300gsm white card stock this just makes it really sturdy. I used one of the larger squares from the Quilted Square Nesting Dies and for the inner square die I used one of the smaller ones which fits the length of the washi tape perfectly. Once that's all cut I started on the washi tape background. I started out by stamping the middle one but I off set it to the top a little not so much but just enough to make the bees when we place them sit in the top third of the piece as its more pleasing to the eye than a central. I used a combination of Squeezed Lemonade, Picked Raspberry and Carved Pumpkin Distress Oxides for the ink I laid the colours all down at once on the stamp they blend easily so no worry about having harsh lines. Just be careful to lay your light colour first as the darker ones do tend to transfer onto your ink pad. You could probably do three stripes at once but I wasn't entirely sure what I was doing at this point so I started with one and worked from there.
Once the background was done I set it aside to dry for a while so I didn't smudge those lines and worked on my bees. These are another great stamp to use for quick and simple colouring. I also stamped and cut out two clouds for a little extra detail. Then making sure my ink was dry I could stamp my sentiment I actually used one from the older Bee set Bee Happy it just fit the strip nicely and looked really cute. The bees were popped up with foam tape and I just tucked the clouds underneath.
Then all was left to do was make the card base and cut out the fun foam. I made the card base myself by cutting out two of the larger rectangles then on one I scored a line across the top around 1cm's down then added some double sided tape and stuck them together. This is a great technique for unusual shaped or sized cards which mine mostly are. It is very rare you will find me make a standard sized card. To cut the fun foam I cut out the larger square first then used the card frame we made before as a guideline to where I needed to place my centre die then cut that out. I attached my frame to the card base first as its easier to line up this way and then popped in my centre piece and that's my card all finished up for today.
I hope you have a great weekend and happy crafting!


No comments:
Post a Comment
Thank you for leaving a comment, it really does brighten my day!