Tuesday, 29 October 2024
Let's toast
Monday, 28 October 2024
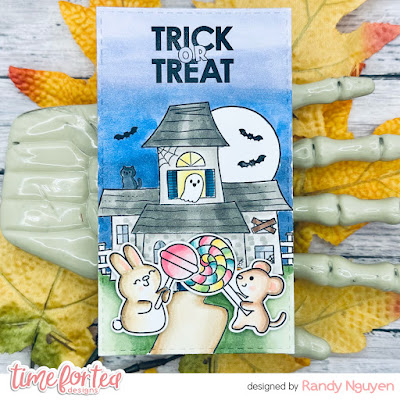
Trick or Treat
Hi Tea Timers, welcome back to the blog. We are just a few days away from Halloween and I wanted to share some last minute Halloween inspiration. Today I have mini slimline card featuring some adorable critters who are all about the treats.
Sets used:
I first stamped the image of the haunted house onto white cardstock. I then used a mini slimline die I had in my stash and die cut it out.
To extend the pathway, I took a pencil to draw in longer lines. When I was satisfied with how it looked, I took a fineliner pen and drew over the lines and erased any noticeable pencil marks.
I then used Copic Markers to color in the images. I stamped out my critters and used coordinating dies to die cut them out. I used Copic Markers to color these images as well.
Before I added on the images of the critters, I decided to stamp the 'Trick or Treat' sentiment directly onto my card base with black ink.
I then added my critters to the bottom of the card using foam tape, overlapping the candy they are holding just a bit.
This was a quick and easy tutorial in case you needed any last minute Halloween inspiration. If you are celebrating this year, I hope you have a fun and safe Halloween.
All the products I used are linked above. Don't forget to use the code T4TRANDY10 at checkout for extra savings. Happy Crafting!
Friday, 25 October 2024
Spooky Pumpkins
For the background, I ink-blended spun sugar, shaded lilac and villainous potion Distress Oxides with my Beautiful Blender Brushes. I added black and silver metallic watercolour splatter with water and a paintbrush. I used double-sided tape to adhere the panel to an A2 card base.
I die-cut Neenah Metalic Chalice Silver cardstock with the Zig Zag Frame & Tag Dies and used double-sided tape to stick it to the card.
I used Anthony's Alpha Dies to die-cut the letters 'BOO' from cardstock that I had coloured with twisted citron Distress Paint that I watered down. I love the bright green backgrounds you can create with Distress paint. I die-cut the same letters from black card stock and used liquid glue to stick them together with the black offset slightly to create a shadow effect.
I stamped "Trick Or Treat" from the Spooky Circle Tags clear stamp set (2021), along with leaves from Jumping With Joy and Stinkin’ Cute. I printed the pumpkins and kitty from the Trick or Treaters Digital Stamp Collection and cut out the images with my Brother Scan N Cut SDX125e.
I coloured the images with Copics and added white gel pen accents with a Gelly Roll Pen. I adhered the image, letters and sentiments to the card base using liquid glue or double-sided foam tape for dimension.
I added Designer Enamel Dots from the Summer Haze collection, to complete the card.
Thank you so much for visiting my blog. Remember to use my discount code T4TANNALISA10 when you visit the Time For Tea Designs shop to get 10% off your order.
Tuesday, 22 October 2024
It's beginning to ...
... smell a lot like christmas! 🌲 Don't you just love the smell of gingerbread cookies? And they look so cute as well! I know it's only October, but if this card won't get you into christmas spirit, nothing will 😉
I stamped the images from the Gingerbread family our house to yours set, colored them with my Copic markers and used the Brother scan 'n cut machine to cut them out.
For the blue frame, I used the Stitched window cover die and trimmed off one third so it would leave four squares. From soft pink design paper, I cut a square to fit exactly behind the frame. Using white glittery paper, I cut 2 strips to make a snowy floor.
I adhered everything onto a larger square from red design paper and this entire stack was adhered onto a white card base.
The sentiment comes from the Simple sentiments clear stamp set. I stamped it onto a strip of red cardstock using Versamark watermark ink, and used white embossing powder.The last step was adding the colored images, using 3D foam tape.
~Ilona~
Monday, 21 October 2024
"Hope your day is... Nap!"
Hi Tea Timers, welcome back to the blog. Today I am working with an older set and trying to create a new scene. I really love the images in the 'Loads of Love' stamp set and wanted to create fun scene with the critters.
Sets used:
I first stamped out my images and used the coordinating dies to die cut them out. I then used Copic Markers to color the images. I set the images to the side to start working on my background.
I took an A2 panel and blended the bottom portion with Antique Linen and Tea Dye Distress Oxides. I then took a fineliner pen and a ruler and drew lines to create a wood floor.
I then took a second A2 and blended it with Tattered Rose Distress Oxide. I then took the Tiled wall stencil and blended it onto the background with Saltwater Taffy and Worn Lipstick Distress Oxides.
I trimmed off the bottom piece so I could layer the tiled wall background onto the panel with the floor.
I then die cut out the shelf die twice and blended it with Milled Lavender and Seedless Preserves Distress Oxides.
For my sentiments, I heat embossed them onto teal cardstock using embossing ink and white embossing powder. I then die cut them out using the coordinating dies that are included in the set.
To assemble my card, I adhered the tiled wall piece onto the panel with the wood floor using liquid adhesive.
I then added my images using a mix of foam tape and liquid adhesive. To complete my card, I added my sentiments using foam tape.
I hope you enjoyed this blog today. All products I used are linked above. Don't forget to use the code T4TRANDY10 at checkout for extra savings. Happy crafting!
Friday, 18 October 2024
Halloween Kitties
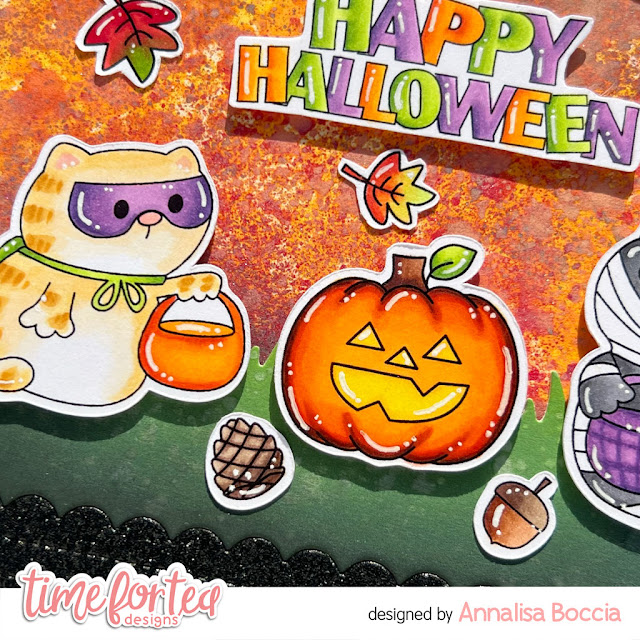
Happy Friday! DT Annalisa here with a cute kitty Halloween card to share using the Trick or Treaters Digital Stamp Collection and Haunted House (which is on sale right now!) Clear Stamp Set.
I created the background by spraying spiced marmalade and candied apple Distress Oxide spray onto watercolour cardstock and heat setting it. I used double-sided tape to stick it to a white card base.
Next, I used black glitter cardstock and die-cut the frame from Smile Inverted Scallop Frame Dies. I used double-sided tape to stick it to the card base.
For the grass area, I ink blended mowed lawn, rustic wilderness and black soot Distress Oxides using my Beautiful Blender Brushes. I added splatter with water, silvery green watercolour and a paintbrush.
I die-cut the grass with the Slimline Hillside Scene Dies and Smile Inverted Scallop Frame dies. This allowed me to use liquid and snap it into place along the base of the card.
I stamped the 'Happy Halloween' sentiment from the Haunted House clear stamp set, along with leaves, an acorn and a pine cone from Jumping With Joy and Stinkin' Cute. I printed the kitties and pumpkin from the Trick or Treaters Digital Stamp Collection and cut out the images with my Brother Scan N Cut SDX125e.
I coloured the images with Copic markers and added white gel pen accents. I stuck the images down to complete the card with either liquid glue or 1mm thick double-sided foam tape.
Thank you so much for reading my blog post. Remember to use my discount code T4TANNALISA10 when you visit the Time For Tea Designs shop to get 10% off your order.
Tuesday, 15 October 2024
When witches go riding...
When witches go riding, and black cats are seen, the moon laughs and whispers, 'tis near Halloween!
To emphasize the difference and depth between the background (sky) and foreground (bottom layer) I added a black spooky fence, but a row of houses would have been cute too! Using 3D foam tape, I adhered my witch, ghost and pumkins onto the card and that completed my spooky, but cute, scene!
Monday, 14 October 2024
"You are the sweetest friend"
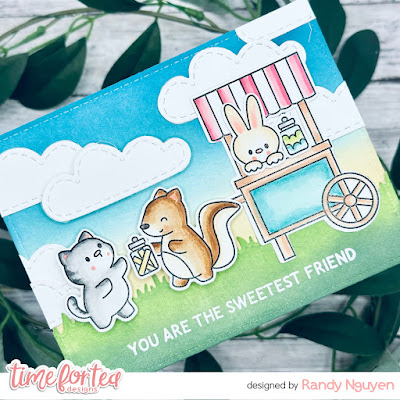
Hi Tea Timers, welcome back to the blog. I finally got my hands on the 'Sweet Cart Critters' stamp set and had to create it right away. I wanted to create a simple scene in which a friend was gifting another friend a jar of candy.
Sets used:
I first stamped out my images and used the coordinating dies to die cut them out. I then used Copic Markers to color the images.
To create my background, I took an A2 panel and blended it with Scattered Straw, Salvaged Patina and Peacock Feathers Distress Oxides.
I then die cut out the cloud die several times from white cardstock.
To create my grass piece, I took another A2 panel and die cut out a grass piece using one of the Landscape Edge standalone die pieces. I then blended it with Mowed Lawn and Forest Moss Distress Oxides.
On the grass piece, I heat embossed the sentiment using embossing ink and white embossing powder.
To assemble my card, I first adhered the clouds onto my background using liquid adhesive. I overlapped a few of the clouds and trimmed off any excess pieces and used them on the opposite side.
Then adhered the grass piece using liquid adhesive. I completed my card by adhering the cart, candy and critters onto the card using liquid adhesive as well.
I hope you enjoyed this quick and easy card today. All of the items I used are linked above. Don't forget to use the code T4TRANDY10 at checkout for extra savings, Happy Crafting!
Friday, 11 October 2024
Spooky In Pink
I adhered the images, sentiment and vellum outline to the card base using liquid glue or double-sided foam tape for dimension.
Thank you so much for reading my blog post. Remember to use my discount code T4TANNALISA10 when you visit the Time For Tea Designs shop to get 10% off your order.
Tuesday, 8 October 2024
Let it snow ☃️
Although I am not quite over the hoa hoa hoa season yet, I am moving on to christmas for this week's blogpost! I only just received these adorable little snowman from the Snow Much Fun Clear Stamp Set and I just had to make a card with them! So I stamped three images out of the set and coloured them up with Copic alcohol markers. After that, I cut out the images with my cutter bee scissors.
After that, I die cut a slimline panel out of white cardstock and blended the background with distress oxides bundled sage, speckled egg, blueprint sketch and seedless preserves. I splattered white acrylic paint thinned with water on top and let it dry. Meanwhile, I die cut a sentiment with the Let It Snow Sentiment Die out of white cardstock, and blended the same colours distress oxide, but just the other way round (top to bottom).

Monday, 7 October 2024
"Lots of time to relax..." -- Retirement Card
Hi Tea Timers, welcome back to the blog. Today I am creating a retirement card and I wanted to use the adorable cat images from the 'Queen for a Day' stamp set. I wanted it to look like just a bunch of friends, finally able to enjoy their time now that they get to live the retirement life.
I thought the set would pair well with the 'Baked with Love Kitchen Add-on' stamp set to help create the bathroom.
Sets used:
I first stamped out my images and used the coordinating dies to die cut them out. I then used Copic Markers to color the images.
Friday, 4 October 2024
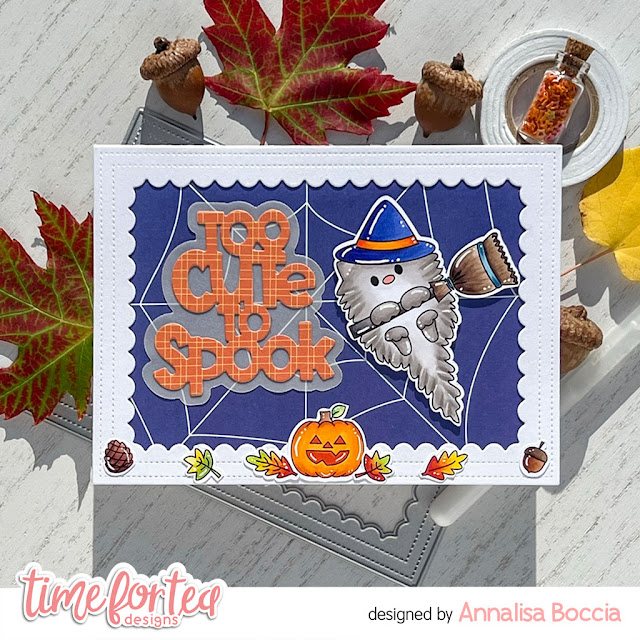
Too Cute to Spook Kitty
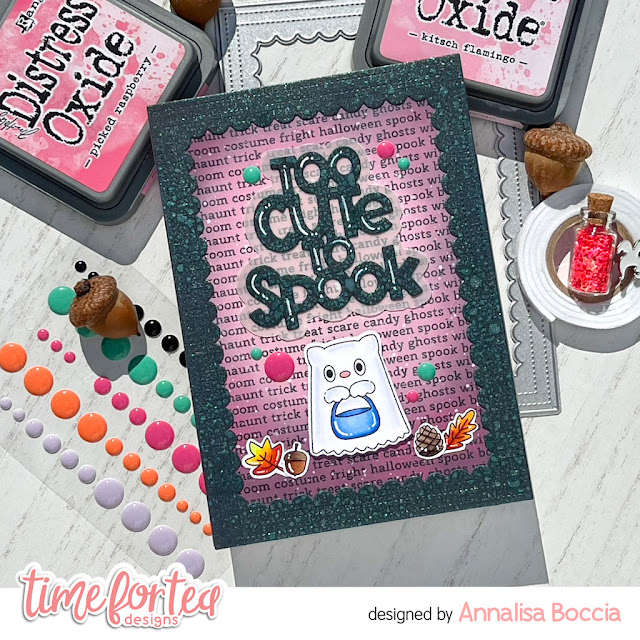
Happy Friday, DT Annalisa here sharing my first Halloween card of the season! It features the Trick or Treaters Digital Stamp Collection and the Too Cute To Spook sentiment dies.
I adhered the spider web patterned paper from the Halloween 2022 Digital Paper Collection to an A6 card base. I framed it with the largest die in the Smile Inverted Scallop Frame Dies that I stuck to the card base with liquid glue.
I die-cut the Too Cute To Spook sentiment from orange card stock in my stash and the outline from vellum. I used liquid glue to adhere both of these to the card.
Next, I stamped and coloured (with Copics) the kitty and pumpkin from the Trick or Treaters Digital Stamp Collection. I added white gel pen accents with a Gelly Roll Pen. The leaves, acorn and pine cone are from Jumping With Joy and Stinkin' Cute - these sets are great for all your fall cards. I used my Brother Scan N Cut SDX125e to cut the images out.
I adhered the images to the card base using liquid glue or double-sided foam tape for dimension.
Thank you so much for reading my blog post. Remember to use my discount code T4TANNALISA10 when you visit the Time For Tea Designs shop to get 10% off your order.
Other Posts You Might Like
-
A wonderful group of cardmakers, are celebrating this year's International Women's day by having an encouraging and uplifting I...
-
Hi everyone and welcome to the Heffy Doodle and Time for Tea Designs Collaboration Blog Hop! Our design teams have come together to share so...
-
Hi! Jo here with a SNEAK PEEK of the New Release Products plus this is the first stop on our GIVEAWAY Blog Hop!!! Yay!! ...


