Pages

Showing posts with label Haunted House. Show all posts

Friday, 31 October 2025

Halloween Trio


Happy Halloween! 🎃 DT Annalisa here, and today I’m sharing my fourth and final handmade Halloween card of the season! This project features a bright alcohol ink background and the adorable Spooky Circle Tags from Time For Tea Designs.


To create the background, I used Ranger alcohol inks, Yupo paper, Ranger blending solution, 99% isopropyl alcohol, and the Tim Holtz Ink Air Blower. The colours I went with are Ranger Indigo, Flamingo, and Amethyst.

Once the Yupo paper was dry, I die-cut it using the Sweet Scalloped Dies and attached it to a card base with liquid glue.


Next, I coloured the Spooky Circle Tags and candy images with Copic markers, then added a few white gel pen accents for extra pop. The stars are from Santa’s Nice List, and the sentiment comes from the Haunted House stamp set. I adhered all the elements with liquid glue.


For a touch of sparkle, I used a Quickie Glue Pen along the edges of a few images and sprinkled on some Lawn Fawn Prisma Glitter. ✨

Thank you so much for stopping by and checking out my post! Don’t forget to use my discount code T4TANNALISA10 when you shop at Time For Tea Designs to get 10% off your order.


Friday, 17 October 2025

Halloween Kitties


Happy Friday, DT Annalisa here, and I am sharing a fun Halloween card that features stamps, a stencil, and patterned paper from Time For Tea Designs.

Using the Movie Star 6 x6" Stencil, watercolour paper, and distress sprays, I created the stencilled background. First, I placed the stencil on the watercolour paper and sprayed Dusty Concord Distress Oxide Spray. After removing the stencil, I set the background with my Ranger Heat tool. Then, to fill in the white spaces, I sprayed Salvaged Patina Distress Spray Stain. Black watercolour splatter added extra interest as a finishing touch.


When the panel was dry, I used the Rounded Corner Stitched Rectangle Dies to trim it. I also cut a piece of patterned paper from the Halloween 2022 Digital Paper Collection using a stitched rectangle die. After preparing both layers, I glued the stencilled background on top of the patterned paper.

These two finished panels were placed on an A2 card base. Beforehand, I had covered the base with plaid paper from my stash.


I used stamps from Haunted House (sentiment), Jumping With Joy (leaves), and Trick or Treaters Digital Stamp Collection (cat and ghost cat). I used my Brother Scan N Cut SDX125e to cut out the digital images and cut the leaves out using the Jumping With Joy coordinating dies.

After colouring all of the images with Copics, I added white gel pen accents with a Gelly Roll Pen. I attached the images to the card base with liquid glue or foam tape for added dimension.


I added sparkles to the edges of some images with a Quickie Glue Pen and Lawn Fawn Prisma Glitter.

Thank you so much for reading my blog post! Don’t forget to use my discount code T4TANNALISA10 when you shop at Time For Tea Designs to receive 10% off your order.


Friday, 18 October 2024

Halloween Kitties


Happy Friday! DT Annalisa here with a cute kitty Halloween card to share using the Trick or Treaters Digital Stamp Collection and Haunted House (which is on sale right now!) Clear Stamp Set.

I created the background by spraying spiced marmalade and candied apple Distress Oxide spray onto watercolour cardstock and heat setting it. I used double-sided tape to stick it to a white card base.  

Next, I used black glitter cardstock and die-cut the frame from Smile Inverted Scallop Frame Dies. I used double-sided tape to stick it to the card base.  

For the grass area, I ink blended mowed lawn, rustic wilderness and black soot Distress Oxides using my Beautiful Blender Brushes. I added splatter with water, silvery green watercolour and a paintbrush.


I die-cut the grass with the Slimline Hillside Scene Dies and Smile Inverted Scallop Frame dies. This allowed me to use liquid and snap it into place along the base of the card.

I stamped the 'Happy Halloween' sentiment from the Haunted House clear stamp set, along with leaves, an acorn and a pine cone from Jumping With Joy and Stinkin' Cute. I printed the kitties and pumpkin from the Trick or Treaters Digital Stamp Collection and cut out the images with my Brother Scan N Cut SDX125e.

I coloured the images with Copic markers and added white gel pen accents. I stuck the images down to complete the card with either liquid glue or 1mm thick double-sided foam tape.

Thank you so much for reading my blog post. Remember to use my discount code T4TANNALISA10 when you visit the Time For Tea Designs shop to get 10% off your order.


Friday, 27 October 2023

Time to Trick-Or-Treat


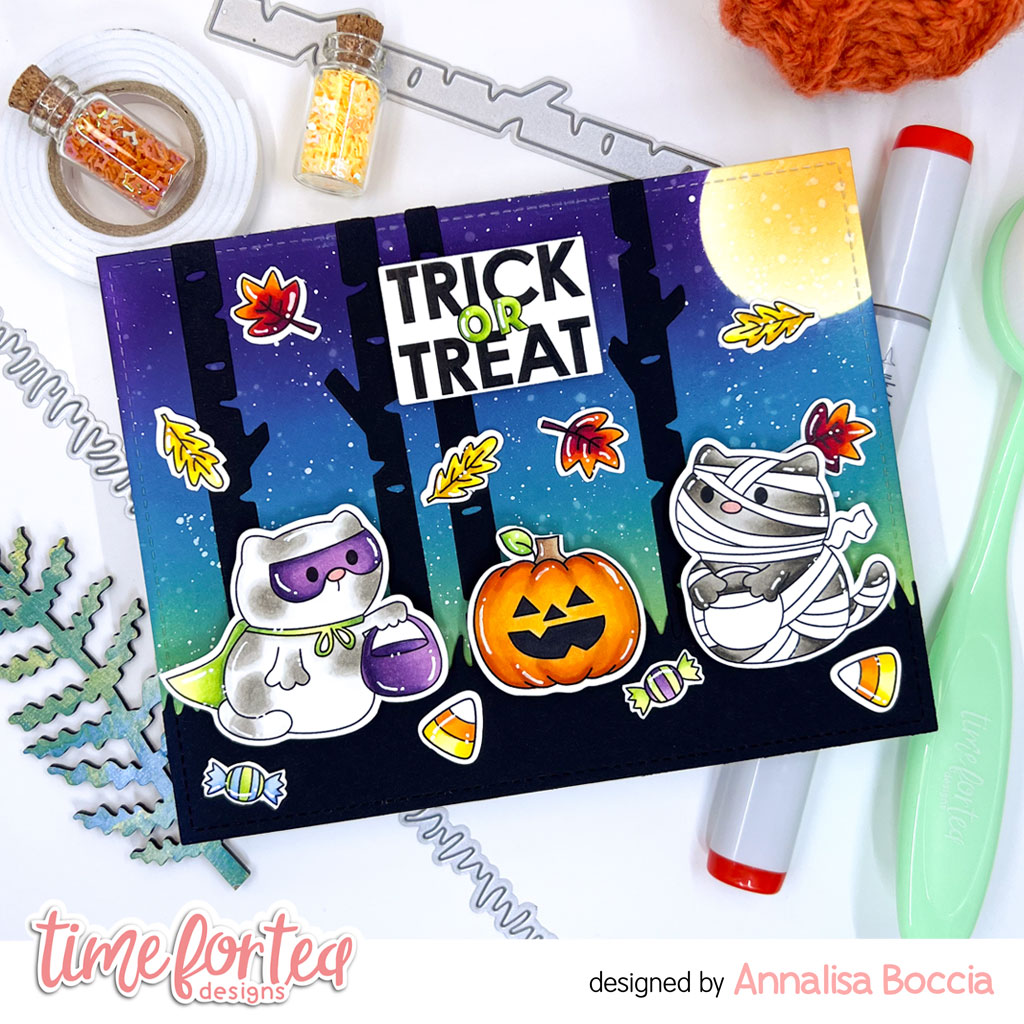
DT Annalisa here today! The kids will be trick-or-treating on Halloween in my area in just a few days! I created this nighttime trick-or-treat scene using the Trick or Treaters Digital Stamp Collection with the Haunted House clear stamp set. I love the ability to re-size digi stamps to what I need for my cards.

I ink-blended villainous potion, peacock feathers and twisted citron Distress Oxides onto Distress White Heavy cardstock by Ranger with my Beautiful Rainbow Blender Brushes. I splattered on water and Copic opaque white with a paintbrush. 


To mask the moon area for this scene, I added temporary adhesive to the back of the negative portion of one of the circles in the 
Circle Grid Masking Stencil. To colour the moon area, I used the outer section of the stencil for the mask and ink-blended squeezed lemonade and rusty hinge Distress Inks. 

I used the Winter Trees and Slimline Hillside Scene Dies to die-cut black cardstock. I used liquid glue to stick the trees and the grassy area to the ink-blended panel and glued this panel down to an A2 white card base.


I stamped and coloured (with Copics) several leaves from 
Jumping With Joy. I resized and printed several Trick or Treaters Digital Stamp Collection images and coloured them with my Copics. I added white gel pen accents with a Gelly Roll Pen to the coloured images. I cut out all the stamps with my Brother Scan N Cut SDX125e.

I stamped 'Trick or Treat' and die-cut it with one of the smaller A2 Layering dies. I adhered the images to the card base using liquid glue or double-sided foam tape for dimension. 


Thank you so much for reading my blog post, be sure to use my discount code 
T4TANNALISA10 when you visit the Time For Tea Designs shop to get 10% off your order.
Friday, 20 October 2023

Halloween Night Sky


Happy Friday, DT Annalisa here today. Halloween is quickly approaching, so I am sharing a spooky night scene card. This time of year it is always fun to create bold scenes with colours I rarely use for backgrounds like purple! I created this nighttime scene using the Trick or Treaters Digital Stamp Collection with the Haunted House clear stamp set. 

For the background, I used a circle mask in my stash and sprayed temporary adhesive to attach it to watercolour paper. I spritzed the paper with water and sprayed uncharted mariner Distress Spray Stain, I used my Ranger Heat It tool to dry the panel. Next, I added snow flurries Distress Mica Stain spray and once again dried this with my heat tool. I removed the moon mask and gently spritzed the side of the moon with water to create that 'spooky' moon look. I dried the panel with my heat tool, I find it is vital to dry the panel after spraying it with stains or water. I just love how mica stains really make things pop!


For the ground, I ink-blended villainous potion and black soot Distress Oxides. I then used a silver shimmer spray on top of this and dried it with my heat tool. I die-cut it using the Slimline Hillside Scene Dies. I created a 5-inch by 6 3/4-inch card base and used liquid glue to adhere the panels. I ink-blended squeezed lemonade and scattered straw Distress Ink onto the moon area. 

I resized the cat on the broom digi in Photoshop and printed it on Neenah Solar White 80 lb card stock. I stamped the sentiment and haunted house (I masked certain areas of the stamps to get the look I wanted). I used my Brother Scan N Cut SDX125e to cut out the images, coloured everything with my Copics and added white gel pen accents with a Gelly Roll Pen. I also used the Gelly Roll Pen to add stars to the sky.


I used liquid glue to stick everything down to the card base. I ink-blended black soot Distress Oxide to the edges of the card to complete it.  

Thank you so much for reading my blog post. Remember to use my discount code T4TANNALISA10 when you visit the Time For Tea Designs shop to get 10% off your order.


Saturday, 29 October 2022

Halloween Pumpkin Kitty


Happy Friday! DT Annalisa here, I have a cute slimline Halloween card featuring the Trick or Treaters Digital Stamp Collection and Haunted House Clear Stamp Set from Time For Tea Designs.

I used coloured paper from my stash and die-cut them with the Simple Slimline Nesting Dies. I added Shaded Lilac and Dusty Concord Distress Oxide to the edges of the purple paper using my Beautiful Rainbow Blender Brushesand Villainous Potion Distress Oxide splatter with a paintbrush.

 For the grass, I used the Slimline Hillside Scene Dies and added Cracked Pistachio to the edges and Mowed Lawn Distress Oxide splatter. I used liquid glue to adhere these to an 8.5 by 3.5-inch slimline card base.

I printed the digis and stamped the sentiment from the Haunted House Clear Stamp Set. The other stamps I used were  Kitty Capers (cat pointing) Life's Ups & Downs (hedgehog) Warm Winter Wishes (mouse). I coloured everything with my Copics and then added white gel pen accents. 

To cut out the images, I used the coordinating dies for the ones I had and my Brother Scan N Cut SDX125e for the others. To adhere the images to the card, I used liquid glue or double-sided foam tape.

Thank you so much for reading my blog post, you can use my discount code T4TANNALISA10 when you visit the Time For Tea Designs shop to get 10% off your order.


Friday, 21 October 2022

Hocus Pocus Tree


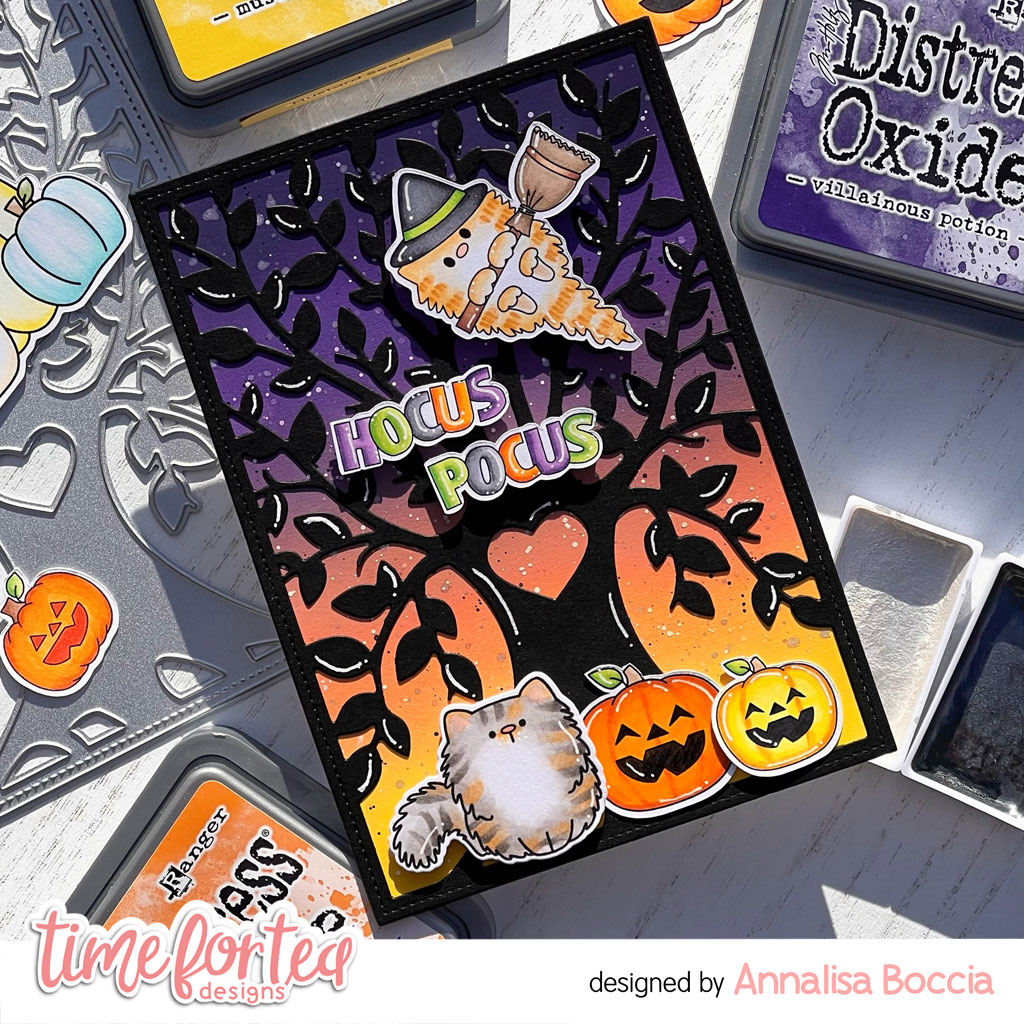
Happy Friday! DT Annalisa here with a Halloween card for you today that I made using the Tree of Love Cover Plate Die and the new Trick or Treaters Digital Stamp Collection.

I ink blended several Distress Oxide Inks (Villainous Potion, Wilted Violet, Seedless Preserves, Spiced Marmalade and Mustard Seed) onto Distress White Heavy cardstock by Ranger using my Beautiful Rainbow Blender Brushes. I added white, silver and black paint splatter with a paintbrush and set it aside to dry.


I used the Tree of Love die on black card stock and glued the cut-out onto the coloured background. I then added some white gel pen accents to the tree.

The kitty on a broom and pumpkins are from the Trick or Treaters Digital Stamp Collection; the sentiment is from Haunted House; the kitty on the ground is from Kitty Capers. I cut the images out and coloured them with my Copic markers. I added White Gelly Roll Pen accents before adhering them down to the card panel with liquid glue (pumpkins) and double-sided foam tape.


I added the panel to a white heavy stock card base to complete the card.

Thank you so much for reading my blog post, you can use my discount code T4TANNALISA10 when you visit the Time For Tea Designs shop to get 10% off your order.

Friday, 14 October 2022

Trick Or Treat Slimline


Happy Friday! DT Annalisa here today with a spooky slimline card featuring the Trick or Treaters Digital Stamp Collection from Time For Tea Designs.

I die-cut some white cardstock with the Mini Slimline Scallop Dies. I created a panel using Distress Oxides (Peacock Feathers, Wilted Violet, Villainous Potion, Black Soot) and my Beautiful Blender Brushes. I added white and black splatter to add interest. I used liquid glue to stick the scalloped frame to the panel.


I sized and printed the masked kitty and ghost kitty from the Trick or Treaters Digital Stamp Collection and stamped the sentiment from the Haunted House Clear Stamp Set. I coloured these with my Copics and cut them out with my Scan N Cut SDX125. I added white gel pen accents.

I then used double-sided foam tape to adhere them to the panel. For the bottom of the frame, I used smaller stamps in the following sets Stinkin' Cute (mushrooms), Jumping With Joy (leaves) and Life's Ups & Downs (hedgehog). It is so great to give these adorable smaller stamps some love!


I die-cut the striped black and white patterned paper from the Halloween 2022 Digital Paper Collection with the rectangle die in the Mini Slimline Scallop Dies. I adhered this to a mini slimline card base.

I added double-sided foam tape to the back of the scalloped frame panel and adhered it to the card base to complete the card. 

Thank you so much for reading my blog post. Don't forget to use my discount code T4TANNALISA10 when you visit the Time For Tea Designs shop to get 10% off your order.

Friday, 30 September 2022

Halloween Haunted House


Happy Friday! DT Annalisa is here today sharing a Halloween scene featuring the brand new Haunted House Clear Stamp Set.

I love the large size of this haunted house, it is so fun to colour and takes up most of the card! I stamped the house and coloured it with my Copics. I then used a circle die that I had in my collection but one of the T4T Simple Circle Dies fits this stamp perfectly! I added some accents with a white Gelly Roll Pen.

I used the Square Label Dies to cut out two pieces of patterned paper from the new Halloween 2022 Digital Paper Collection. I used a dot runner to adhere the two pieces together and then to a card base. I used double-sided foam tape to adhere the haunted house circle and the sentiment to the card. 


Thank you so much for reading my blog post, you can use my discount code T4TANNALISA10 when you visit the Time For Tea Designs shop to get 10% off your order.


Other Posts You Might Like