
Pages

Showing posts with label Retro phone builder die. Show all posts

Wednesday, 22 February 2023

Retro shaker

Hey there Tea-timers...

It's DT Ashlee here and I'm sharing a Retro shaker card featuring the awesome Retro phone builder die!!
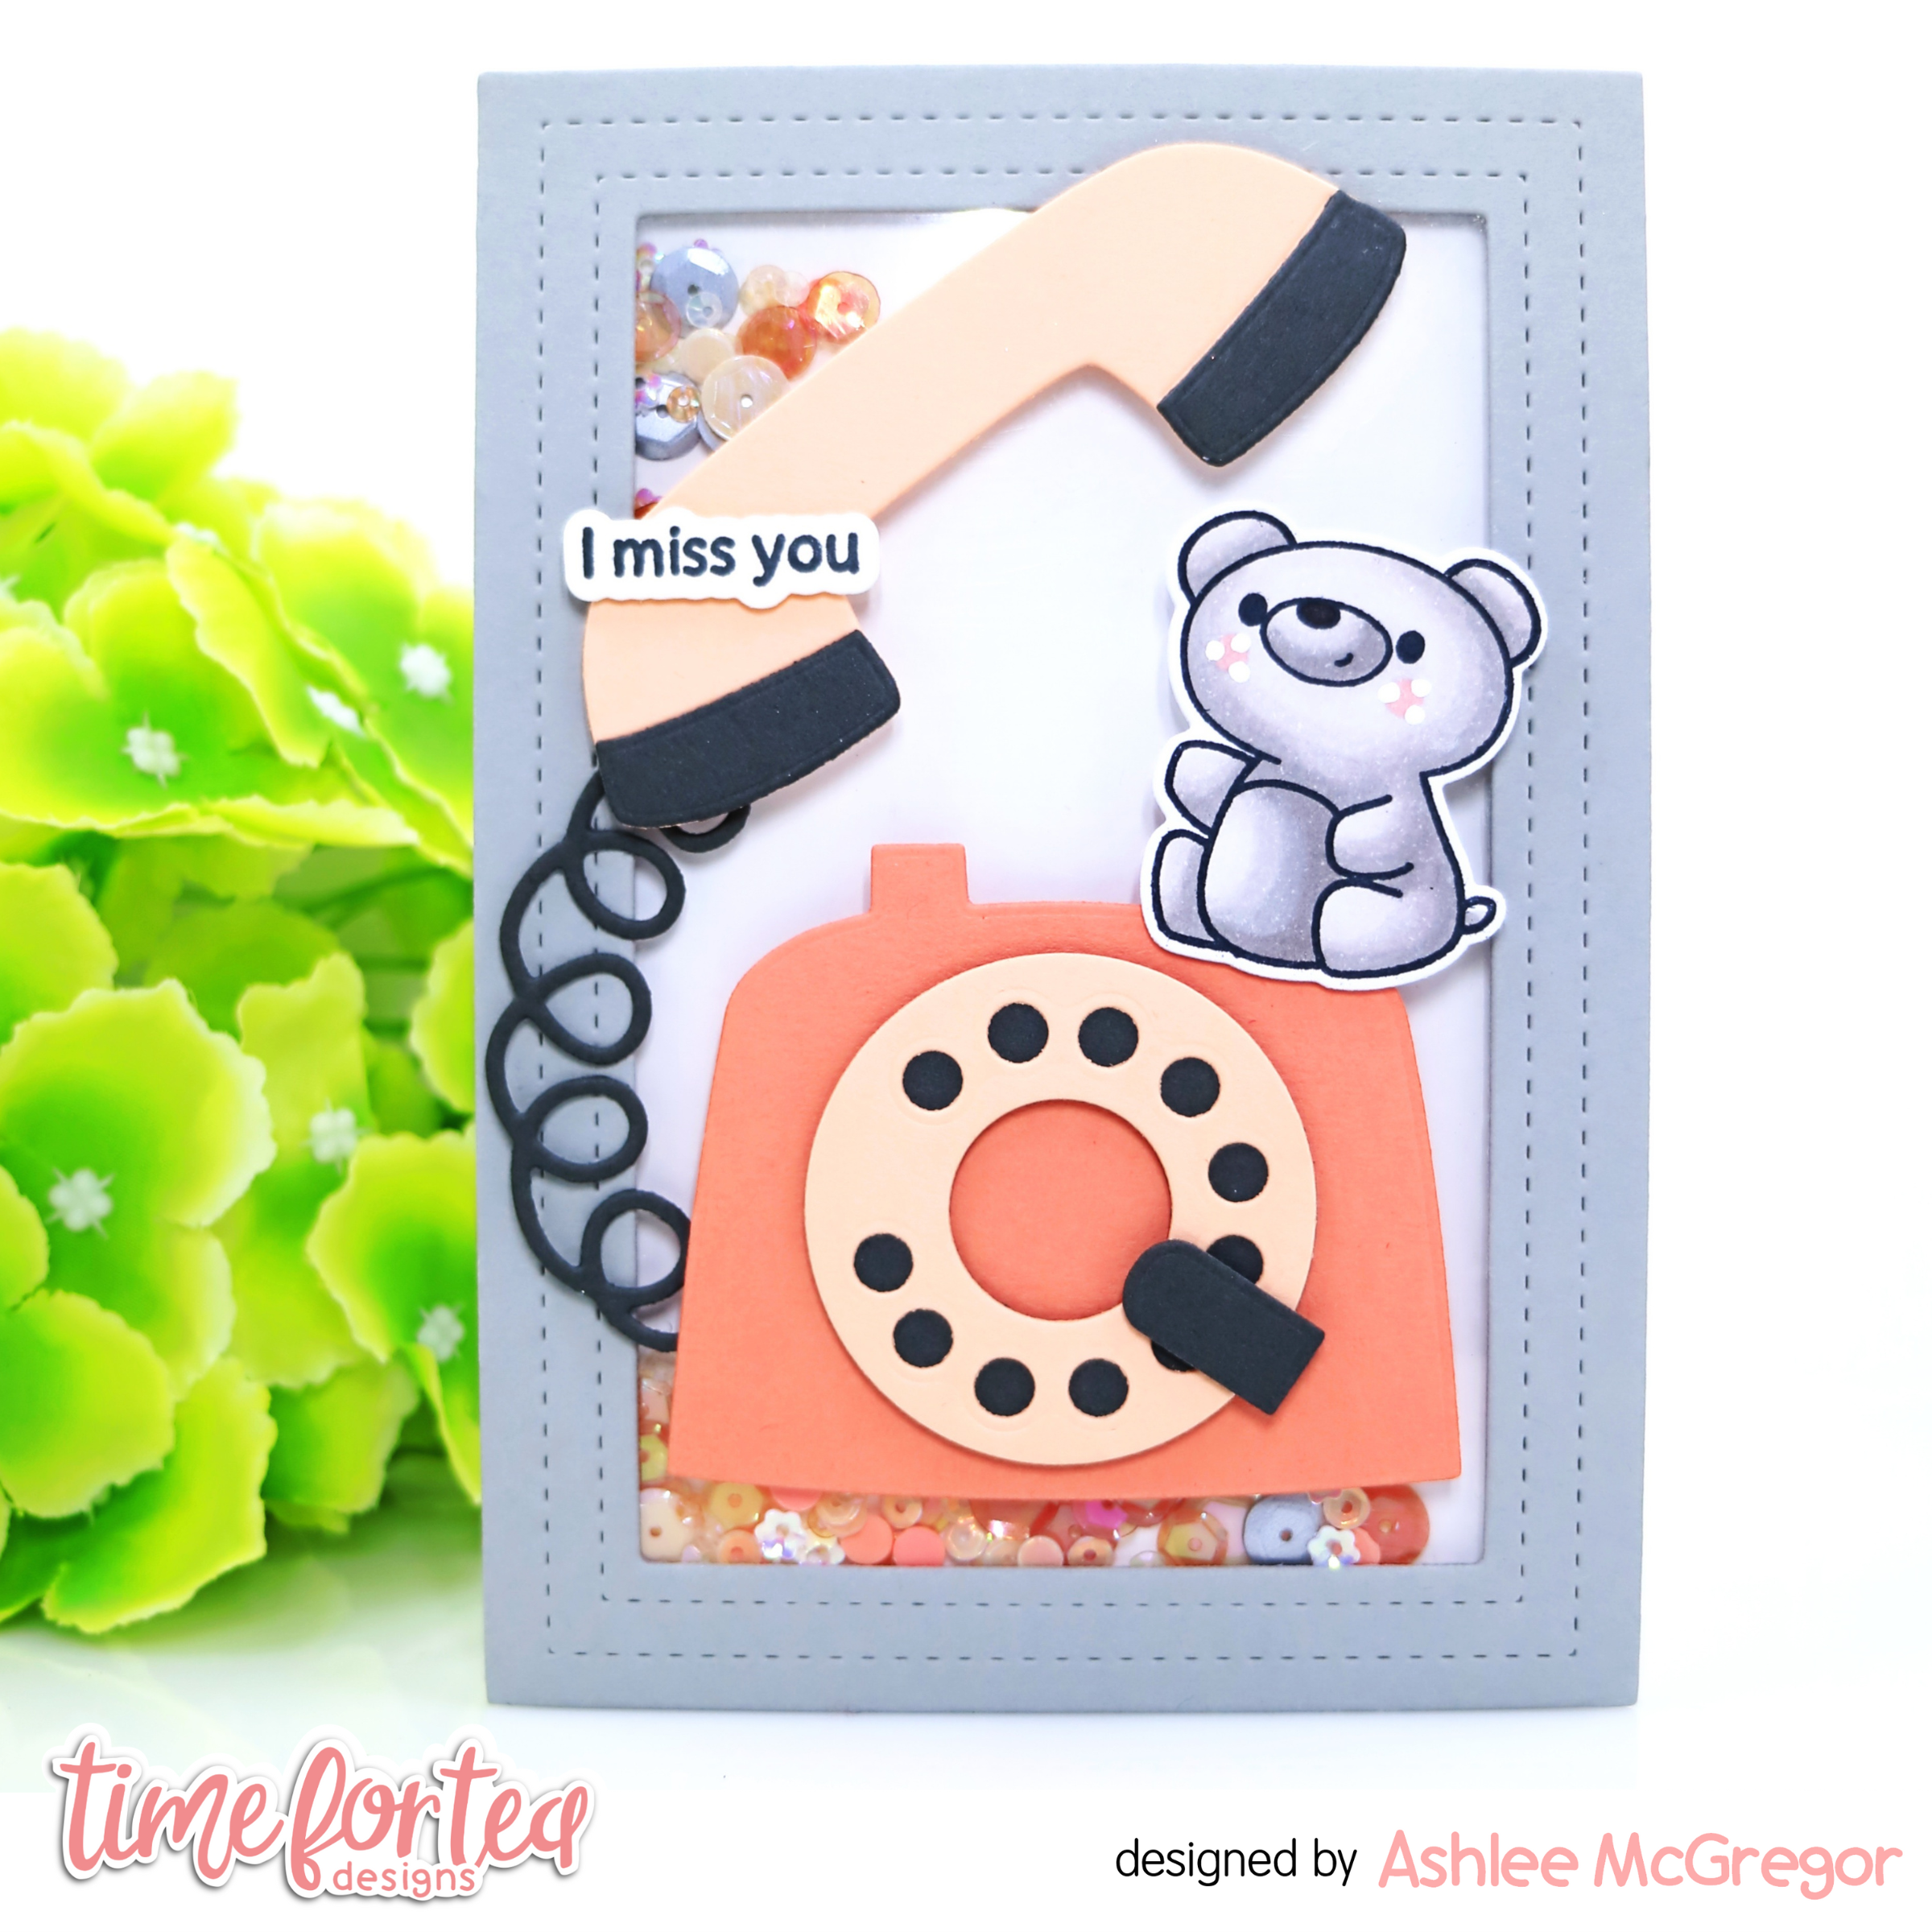

To create this card I started by making a shaker card base. I used the wide stitched frame dies to create the frame, adhered acetate to the open space and then added foam tape around the edges. I filled the shaker portion with a bunch of pretty sequins and then backed it with a piece of cardstock. 


I then went on to create the retro phone by die cutting all my pieces from cardstock and adhering together with foam tape and liquid glue....

I adhered it to the card base and then added a super cute little teddy from the Let's chat stamp set  (Coloured using Spectrum noir tri-blend markers and die cut using the co-ordinating dies)

To complete the card a little sentimen and now it's time to shake, shake, shake!!


That's all from me for today, I hope you enjoyed this shaker card inspiration...
Happy crafting, hugs Ashlee.

Thursday, 20 October 2022

Retro Phone Builder

Happy Thursday, Tea Timers!  It's Amanda here!  Today I'm sharing a "hello" card using the Retro Phone Builder Die Set!

To make this card, I cut my card base to 5.5"x8.5" and then folded it in half.  I trimmed a piece of Pawsome Rainbows Paper to 4"x5.25".  I glued the paper to my card base.  Next, I cut the pieces of my phone out using black and white cardstock. I also cut the "hello" out of the Hey, Hello, Hi Dies. For the white pieces that I wanted to be purple, I used Blueberry Cheesecake Color Hive Ink to ink blend those pieces.  I added some white highlights with a white gel pen.

I adhered my phone and sentiment together with liquid glue.  Then, I used 3D foam squares to pop them up and adhere them to my card front.


Wednesday, 14 September 2022

Hey, hello....!!

 Hey Tea-timers...

DT Ashlee here today with some new T4T inspiration for you to get you into that crafty mood!!

Todays card has lots of colour and an awesome retro phone, want to see?!....


This card base was made using some leftover pieces from one of my previous cards made using the Waves cover die. A rainbow distress oxide ink blended frame with differing levels of yellow waves done using foam tape creating lots of dimension!!

I had a panel of the rainbow blended card left so I used that to die cut my sentiments hey and hello...

I love when you can create multiple cards from pieces that you have made!!


Once the card base was all ready I die cut and assembled the Retro phone...
Ohhhh I love this die so much, its so fun and looks amazing!!

The phone was adhered to the base using foam tape before adding both my die cut sentiments and finishing it all off with a touch of sequin bling....

What do you think, would you like to receive this as a hey, hello card?


I hope its inspired you to get crafting and use lots of popping colour...
Happy crafting, hugs Ashlee. 

Sunday, 19 June 2022

Hello

Good afternoon Teatimers

Just calling to say a quick Hello! How cool is this retro phone die from the latest release? I absolutely remember my nan having one of these when I was younger and loved to play with the dial.

Taking a 6x6 card blank I die cut the largest of the Square Label Dies making sure the edge of my die when slightly past the fold of the card. I then took yellow patterned paper from the 6x6 Sweet Summer pad and cut out using the next die down.

I wanted a simple background design so that the funky yellow phone would stand out. Using the sentiments from the Hey There Critters stamp set and taking inspiration from a fellow DT colleague, I stamped a background of 'hellos' onto white card. I used the 3rd largest die from the set to cut out this layer.

I die cut the Retro Phone Builder Die from yellow card and added colour around the edges with Squeezed Lemonade and Spiced Marmalade. I cut the dial out twice from white card (including the holes) and once from black card (without holes) adding the black to the back of the white pieces to give some dimension.

I used the HELLO from the Hey, Hi, Hello dies cut 3 times from white card and the background from black and added underneath the phone.

I love the way the striking yellow phone stands our against the simple black and white background.

Thank you for joining me here on the blog today. You can use my code T4TLYNDSEY10 for 10% off your order in store.

Enjoy the rest of your weekend 

Lyndsey x

Friday, 10 June 2022

Just Called to Say Meow


Hello and happy Friday tea-timers! DT Annalisa here sharing a cute kitty card featuring the Retro Phone Builder Dies and the You Had Me At Meow Sentiment Dies. You could colour this giant retro phone in different Distress Oxide or Ink colours or even use patterned paper for a variety of cards.

For the background, I used my Aqua Beautiful Blender Brush to apply some Speckled Egg Distress Oxide to the Tiger Stripes 6 x6" Stencil to a 5 1/2 inch by 4 1/4 panel of Distress White Heavy cardstock by Ranger. I then sprayed Shimmer Spray in Silver Sparkle onto this panel and set it aside to dry. I also ink blended Hickory Smoke Distress Oxide onto a 1 1/4 inch by 5 1/2 inch piece of white card stock and then added some water splatter.

Once everything was dry, I glued the grey portion to the stencilled panel and then onto an A2 card base.

I stamped and coloured the kitty and mouse from the Hey There Critters Clear Stamp Set with Copic markers. I then die-cut them out with the coordinating die set.

I die-cut the phone elements and ink blended on Abandoned Coral and Saltwater Taffy for the phone receiver and dial area. I used Salvaged Patina and Peacock Feathers on the phone base. I used the same colours to ink-blend the 'meow' sentiment from the You Had Me At Meow Sentiment Dies. For the phone cord and behind the dial circle, I used Squeezed Lemonade. 

For the table, I used Weathered Wood for the table top and Saltwater Taffy for the table legs that I cut from the Purrfect Day Scene Builder Dies.

I added white gel pen accents to the die-cut elements and critters and added them to the card using a mixture of liquid glue and foam tape. 

I stamped and die-cut the sentiment from the Let's Chat Clear Stamp Set and its' coordinating die set and added this to the card with foam tape.

Thank you so much for reading my blog post, you can use my discount code T4TANNALISA10 when you visit the Time For Tea Designs shop to get 10% off your order.


Thursday, 2 June 2022

Hello - I'm only a phone call away A2 card


Hi Tea Timers! Welcome back to the blog! It’s Miki here and today I have an extra cute card to share with you. 


To start with, I used the A2 stitched hearts die and cut it from kraft cardstock. This adds some cute details to any background. I then glued it on a top folding A2 card base.


Next, I used the retro phone builder die. I cut the different elements in 3 colours: red, beige and black. I assembled it and glued it on top of the card panel. I don’t know the exact names of the cardstock that I used as I got it in a Mixed A4 Card Pack from Limetree Crafts.


Next, I stamped the two critters from the Let’s chat stamp set and coloured them in. I used the matching dies to cut them out and added some white highlights for extra details. I then used foam tape to position them on the card.


For the sentiments I used the Hello word die from the Hey, Hello, Hi Die set. I cut the sentiment in the same beige cardstock I used on the phone and the shadow in the same red. Using the same colours makes the design look more cohesive. I glued the layers together and positioned the sentiment at the top of the card. I then embossed one of the sentiments in the Let’s chat stamp set and used the matching die to cut it out. I added this with foam tape just underneath my die cut sentiment.


That finishes my card for today. I hope you like it! Remember, T4TMIKI10 gives you 10% off your order in store.


Hugs,

Miki

Other Posts You Might Like