Hey there, Tea Timers!! It's Amanda here! I'm excited to be here with you to share some birthday card inspiration!
To make this card, I started by creating a textured background on black cardstock. To create the textured background, I used a patterned stamp and stamped it with Clear Glue Embossing Ink. Next, I added clear embossing powder on top. Then, I melted the powder with my heat gun.
Then, on a piece of white cardstock, I ink blended Catherine Pooler's It's a Girl, Limoncello, and Something Borrowed inks to create a rainbow background. Then, I die cut my panel with the Big Birthday Wishes Large Sentiment Die. I also cut another white panel with the die to use as a shadow.
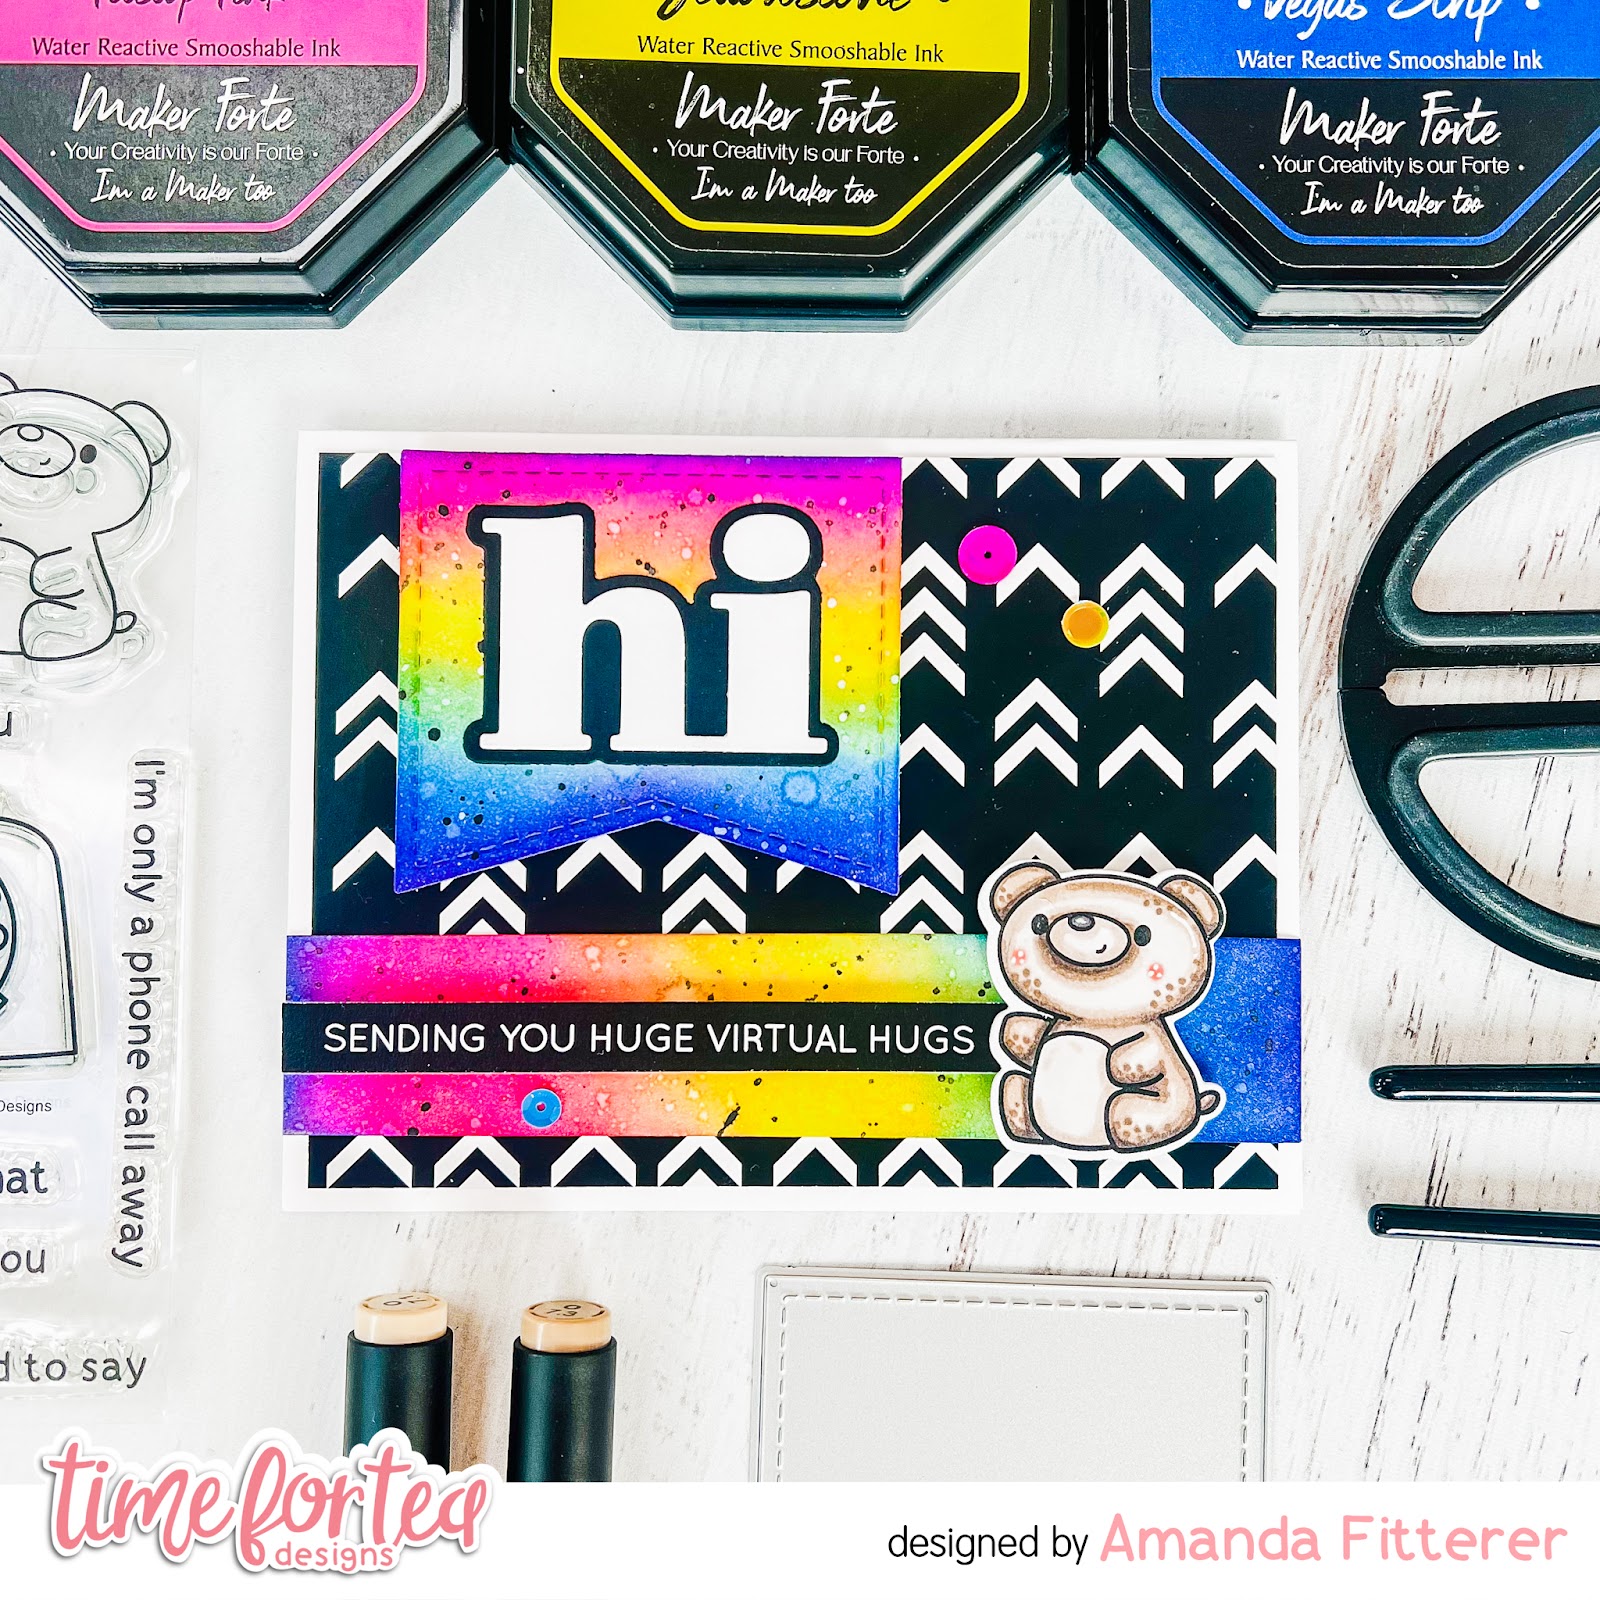
Happy Thursday, Tea Timers! It's Amanda here! I'm sharing this very happy card today! I love creating cards that have bright contrast and bright colors - especially when they're rainbow!
To create this card, I stamped my cutie from the Let's Chat Stamp Set and then colored him with OLO markers.
One of my favorite rainbow ink blends is the one I created on this card! It's a blend of Pitstop Pink, Yellowstone, and Vegas Strip Color Hive Inks. I also spritzed my ink blend with water and created some black splatters with black paint.
Thank you so much for stopping by the blog today! I hope you're feeling inspired by this post! Come back next week for another happy card!
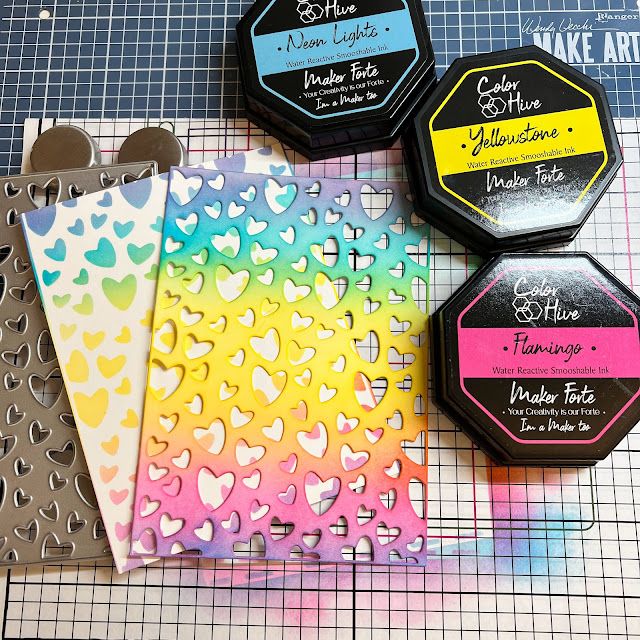
Well hey there, Tea Timer! It's Amanda back with the second card using the rainbow background I made in my last post.
To make this card, I die cut the Scattered Hearts Cover Plate on a piece of white cardstock. Once cut, I grabbed another piece of white cardstock and placed it underneath my die cut piece. Then, I blended a rainbow with Maker Forte Flamingo, Yellowstone, and Neon Lights inks. This gives me TWO backgrounds at once!
For my sweet pup, I used Enjoy the Little Things stamp set. I colored him with Copic markers and then die cut him with the coordinating dies. I propped him up with 3D foam squares and put him on a piece of round vellum.For my sentiment, I grabbed my Brighter Days Sentiment Cards and trimmed out the "just so ridiculously proud of you" sentiment.For the finishing touch, I added some rainbow colored gems!The next step is was to attach my background to a black card base using liquid glue.Don't forget, you can use code T4TAMANDA10 to get 10% off your purchase!
DT Natalia here today with a card I made using the Blooming Bunnies stamp set from the April Brighter Days New Release!
I used the slimline scalloped trio circle nesting dies set to make my background and shaker card. The distress oxide colours I used to create the rainbow blended background are: kitsch flamingo, squeezed lemonade, broken china and wilted violet. I also used Perfect Pearls water to give it a subtle shimmer, which I love!
I then stamped the solid little flowers stamps from the set randomly on my circles panel with Memento Dew drop - angel pink.
The Spectrum Noir alcohol markers colours I used for the bunnies are:
Browns: MB4, MB3, MB2, MB1 (I think this is my fav comb for browns lately!)
Greys: IG5, IG4, IG2, IG1
Brown greys: BG4, BG3, BG2, BG1
To assemble my shaker panel, I used the large foam roll, which since I discovered, I can't put away! The fact that it is so thin makes making shaker cards so much easier!
For the shaker sequins, I chose this happy mix called 'Cottage Garden' from Little Things from Lucy's cards - how adorable are those happy smiley faces? 😍
This new release is full of amazing products, including the cutest stamps, standalone dies and stencils! Make sure to check it out on the Time for Tea Designs shop! I can't wait to share more cards using these new products with you in the coming weeks, but for now, I hope you like this first one.
Hello Vic here today. I’m sharing a sweet card tutorial over on the Time For Tea Designs YouTube channel.
You can view the video here:
I used a standard square card for my video today, but feel free to use any card size that you like.
To start with I trimmed down a smaller panel of white card and used the Scene It Stencil and distress ink. I applied the ink to the card using the Beautiful blending brushes.
Once the sky background was completed I then used the grass stencil and applied this onto a separate piece of white card. I didn’t apply the ink onto the sky background as I will be fussy cut this grass piece out.
I am going to have the rainbow tucked behind the grass piece. Once I trimmed the grass piece out I reapplied the ink over the top.
I adhered the grass piece down but left the top of the grass with no adhesive so that the rainbow can be placed behind this. To make the rainbow I used the Circle Of Love Nesting Die and used different pieces of card to cut out each circle. You will need to use two circle dies to get a frame. Once all your colours are die cut I adhered them all onto a piece of card. You will be left with a big circle. I then trimmed the whole circle out then trimmed the circle in half. You will now be left with a rainbow.
I then stamped out my images using the gorgeous Crafty Cats Clear Stamps and I used my copic markers to colour them in. I then used the
Jo has designed lots of accessories with this stamp set so I highly recommend getting the dies if you can they are fantastic and take all the hard work out than using a pair of scissors.
I then used the sentiment that comes with the stamp set Craft Supplies Before Guys and I heat embossed this with white embossing powder onto a piece of black card. I then used my heat gun to heat set the sentiment.
I trimmed the sentiment down and applied some foam tape to the back of my ink blended panel. I also added some more clouds to my card blank with the Scene It Stencil.
Once this was complete I adhered all the images down and added some pearl drops and glitter.
Your card is now complete. Thanks so much for stopping by today and you can view all the beautiful