Pages

Showing posts with label Baked With Love Stamp Set. Show all posts

Thursday, 5 October 2023

Big Birthday Wishes


Hey there, Tea Timers!!  It's Amanda here! I'm excited to be here with you to share some birthday card inspiration!

To make this card, I started by creating a textured background on black cardstock.  To create the textured background, I used a patterned stamp and stamped it with Clear Glue Embossing Ink.  Next, I added clear embossing powder on top.  Then, I melted the powder with my heat gun.

Then, on a piece of white cardstock, I ink blended Catherine Pooler's It's a Girl, Limoncello, and Something Borrowed inks to create a rainbow background.  Then, I die cut my panel with the Big Birthday Wishes Large Sentiment Die.  I also cut another white panel with the die to use as a shadow.

Next, I stamped some images from the Baked with More Love Stamp Set and the Birthday Fox Stamp Set.  Once I got them colored in with my Copic markers, I die cut them out with their coordinating dies.

I adhered all my components onto the card with 3D foam squares.  I also added some different sequins all over the background using liquid glue.


Friday, 14 January 2022

Yum!


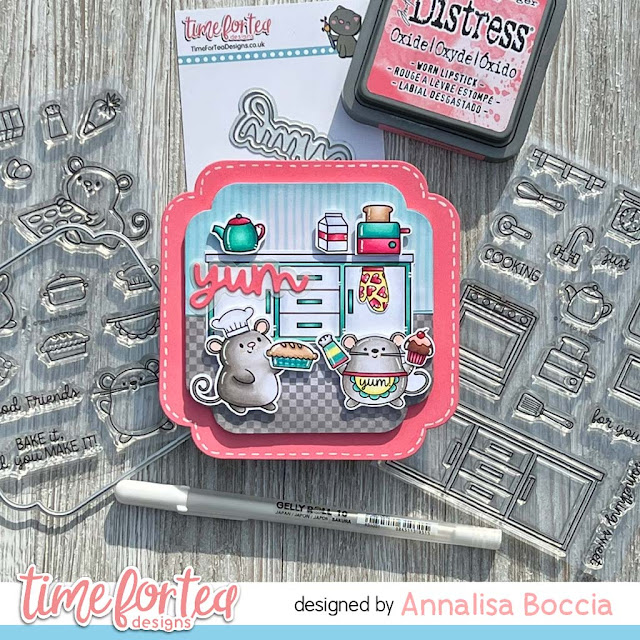
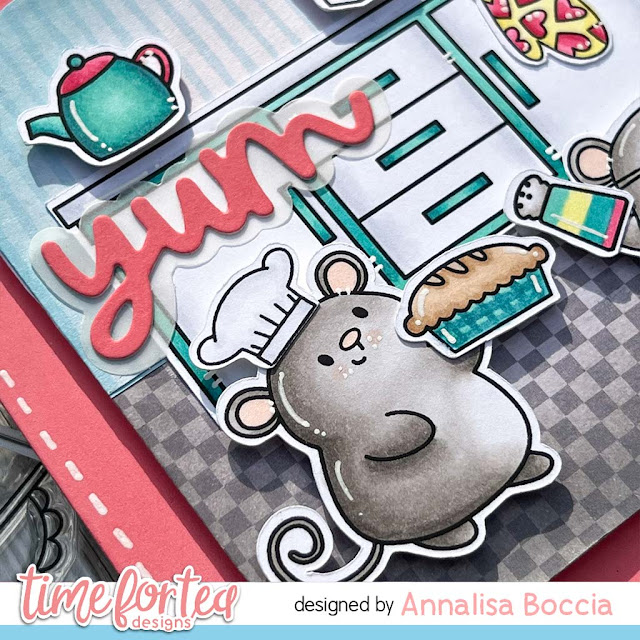
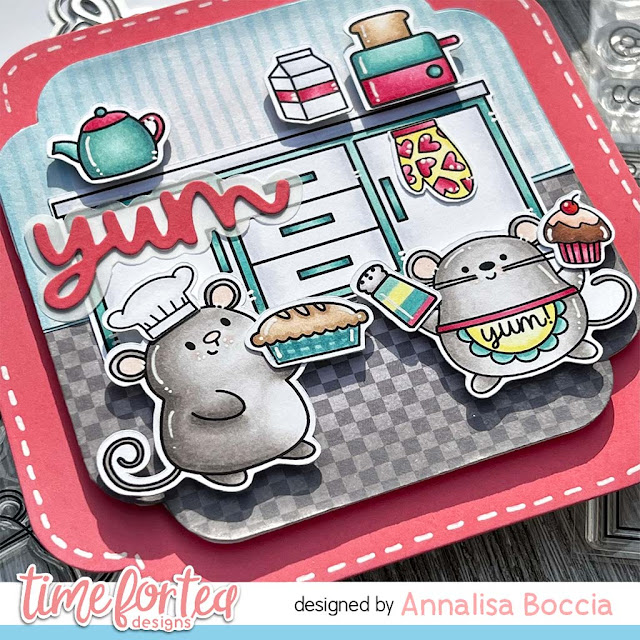
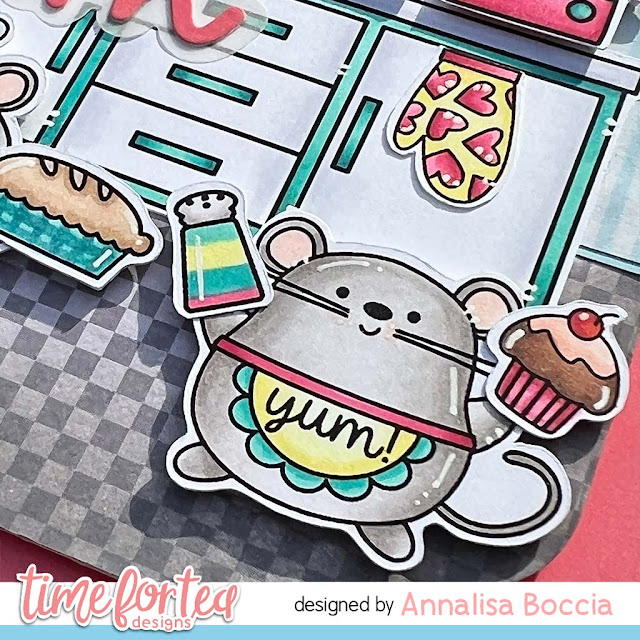
Hello and welcome! Annalisa here sharing a square kitchen scene card using two adorable stamp sets from the November release - Baked With More Love and Baked With Love Kitchen Add On stamp sets. I just love how well these two sets work together to make adorable kitchen scenes. 


I used some Worn Lipstick Distress Oxide ink and my Beautiful Rainbow Blender Brushes to colour some white card stock. I die cut this into a 4 1/2 by 4 1/2 square using the Square Label Dies and added some white stitched lines using a Gelly Roll Pen. I also used the pink-coloured card stock to die cut the 'Yum' sentiment die.

Next, I used the 4 3/4 die to cut a smaller square, I added two pieces of patterned paper that I had in my stash using liquid glue. I thought the checkerboard paper worked well for the kitchen floor and the stripes for wallpaper.


I stamped, coloured and die-cut all of the elements for the card and added some white gel pen accents. I added foam tape to the back of the smaller square frame and adhered it to the larger square. I then glued down the kitchen cupboards and oven mitt to the mini kitchen scene. I added foam tape and some liquid glue to all of the other elements and assembled the scene. 


I die cut out the Yum die outline from vellum and glued the word to it with liquid glue. I then adhered these both to the card.

This was such a fun card to create and I love the dimension and little elements.

Thank you so much for reading my blog post, you can use my discount code T4TANNALISA10 when you visit the Time For Tea Designs shop to get 10% off your order.


Saturday, 18 December 2021

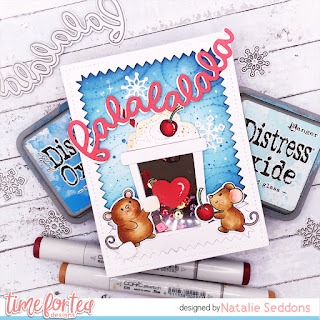
Falalalala Coffee Shaker Card


Happy Saturday everyone, I have been so excited to make a shaker card with the new Take Out Coffee Cup Dies. It was really easy to do too but you never know maybe one day Jo will do an add on set for us 😉
The rest of the card was pretty simple to do so to avoid a lengthy blog post I'll let you know how I made the shaker part. I began by cutting out the cup part out of 360 gsm white card twice, once out of brown paper and then again from white fun foam. I adhered the brown paper onto one and then on the second one I needed to cut out a window for the shaker. So using a ruler I measured 5 mm from the edge all around using dots to guide me then just joined them up using the ruler so it was all nice and straight. 
Then using the line as a guide I cut out the inside using my craft knife you want to make sure your blade is nice and sharp to get a clean cut, I used this then as a guide to cut out the middle of the fun foam and adhered them together with a piece of acetate sandwiched between them. 
I found it was easier to add the sequins into this part and adhering the brown paper onto the back. I used a mix of chocolate, gold and burgundy sequins as I was thinking about the Costa Coffee Black Forest Hot Chocolate when I was making this one. If i did it again though I feel like a pop of cream would have been great in there too!
Once this part was put together I added the rim of the cup in the same white card and cut out the cream for the top adding a little colour with some brown Distress Inks. I also cut the cream out of fun foam too so that it sat at the same height as the cup. I finished it up with a cherry and a heart die for a little extra detail. 
I just love how this one turned out and again I got to mix sets old and new which you know I love, Time for Tea stamps just work so well together which is what I love about them, it means you can still keep using your old favourites but adding a new twist with new designs!
For the rest of the card I used the Baked with more Love stamps, Hello Cupcake StampsZig Zag Frame and Tag DiesFalalala Scalloped Slimline DiesSlimline Hillside Scene Dies  and the new Snow Flurry Cover Plate Die. I told you I liked to mix and match my sets didn't I 😂
I hope you like my card for today if you want to purchase any of the items in the Time for Tea Shop you can get 10% off your orders using code T4TNATALIE10 . Happy crafting and have a great weekend!

 

Sunday, 14 March 2021

Guest Designer Franci shares some love for all the Mamas!

 Hi there! 

It's Franci here and I'm super happy to be guesting for Time For Tea Designs! 
I'm sharing a cute and fun Mother's Day card since all of you in the UK are celebrating today :)


Aww these little mice are so cute and that sentiment?! I love it! 
First of all I created my cardbase out of white cardstock and then I cut out a matching panel from some lilac cardstock. I inked it up with some pink Distress Ink on the Line Em Up stencil  and I put it aside to dry. I love this tone on tone effect: it reminds me about bakery curtains, the perfect match for my mice!


I stamped all my images from the Bake My Day set and the Baked With Love one, coloured them with copics and die cut them all with their coordinated dies.
Then I die cut my sentiment out of white cardstock and vellum and I glued it together. The shadow die in vellum gives it so much interest and it's even more amazing in real life!


I cut out a thin stripe out of white cardstock as the ground and I glued all my elements down into this cute scene with foam adhesive. I glued my sentiment at the top as well and then stamped all the little hearts. 

I love love loooove these images so much and I'm so happy how this happy card turned out! 

I hope you like it too and thanks a lot for stopping by! 
franci 

Saturday, 4 July 2020

You Bake My Day!


Hi guys, I have a super fun card for you today I literally hadn't planned to make this one it was all a happy accident. If you have been reading my blog post you will know that I like to batch stamp and colour things up so the Hamsters and accessories were left over from a few recent cards and they were lying around on my desk on top of the striped paper and I just loved how they looked together.
So I gathered up my accessories and added them to the critters I wanted the stripes but I didn't want it to be too much so I got my cheese die and cut that out of some crisp white cardstock to stick in front of it.
I popped the white up with some foam tape though to give it some added dimension and added my hamsters complete with their new look. I love how the holes just frame the Hamsters and peek those stripes contrasted again that crisp white cheese panel.
I stamped my sentiment and cut using the sentiment strip from the Mini Frame and Banner Die set then coloured with a blue copic marker and popped it on the card. I then added it to my card base and my card was finished a real quick and easy card today!


Wednesday, 24 June 2020

Fancy A Biscuit?

Happy Wednesday!

It's DT Shabneez here. As so many people are baking during lockdown I decided I'd bring the baking to my paper crafting and made biscuits - jammie dodgers to be precise!


I used the newly released mini frame and banner die set to create the jammie dodgers.  I coloured in my card stock then stenciled over the middle using the Splish Splash stencil.  The hearts in the middle are from the Toadally awesome die set and the sentiments from the Baked With Love set stamped on to the banners from the new set.


I added glossy accents to the hearts and I used the Diamonds Are Forever Stencil to make the background for my biscuits.

Hope I've not made you too hungry!

See you again soon!

Products Used:

Load image into Gallery viewer, Mini Frame & Banner Die Set

Load image into Gallery viewer, Baked With Love Clear Stamp Set

Load image into Gallery viewer, Splish Splash 6 x6" Stencil

Load image into Gallery viewer, Diamonds Are Forever 6 x6" Stencil


Other Posts You Might Like