Pages

Showing posts with label Santa Paws. Show all posts

Friday, 21 July 2023

New Home

Happy Friday, DT Annalisa here sharing a card for someone who has just purchased a new home! The Sweet Village stamp and coordinating die set were perfect for this card. I LOVE the tiny kitty and bushes in this set.

I glued the cloudy sky-patterned paper from the Brighter Days 6x6' Paper Pad to an A6 card base. I die-cut the frame using the Stitched Window Cover Die and used double-sided foam tape to stick this down to the card base.

I stamped and coloured (with Copics) several images from the Sweet Village stamp set and cut them out with their coordinating dies. I added white gel pen accents with a Gelly Roll Pen. The bow on one of the houses is from Santa Paws Clear Stamp Set (retired - but you could use any small bow here), I used the coordinating dies after I coloured it pink.

I die-cut the New Home Sentiment Dies into patterned paper in my stash and the frame from vellum. I glued the letters onto the vellum and used double-sided foam tape to stick this to the base of the card. 

I used liquid glue to adhere the remaining stamped elements to the card to complete it. 

Thank you so much for reading my blog post. Remember to use my discount code T4TANNALISA10 when you visit the Time For Tea Designs shop to get 10% off your order.

Friday, 31 December 2021

Yappy New Year


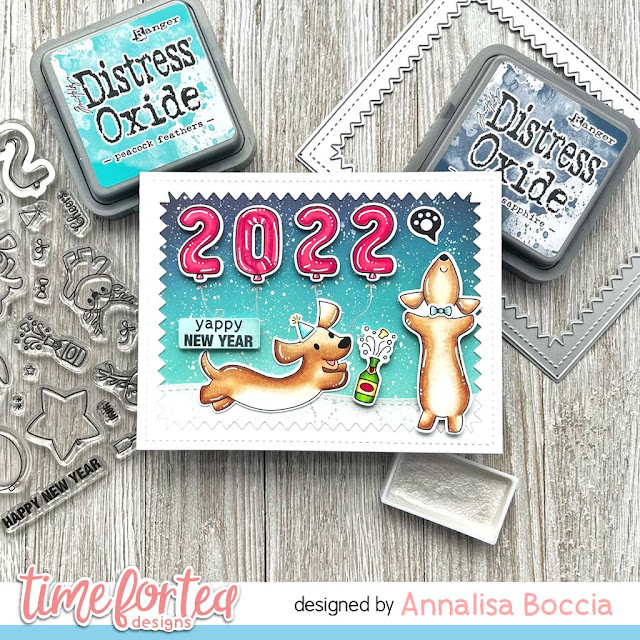
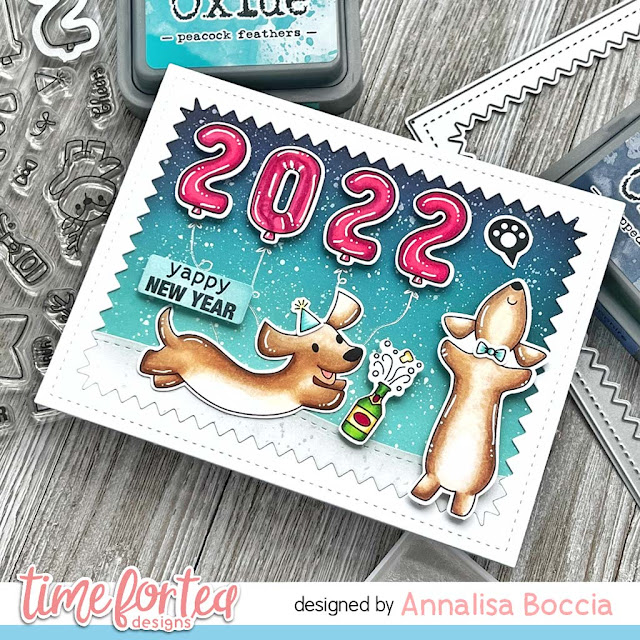
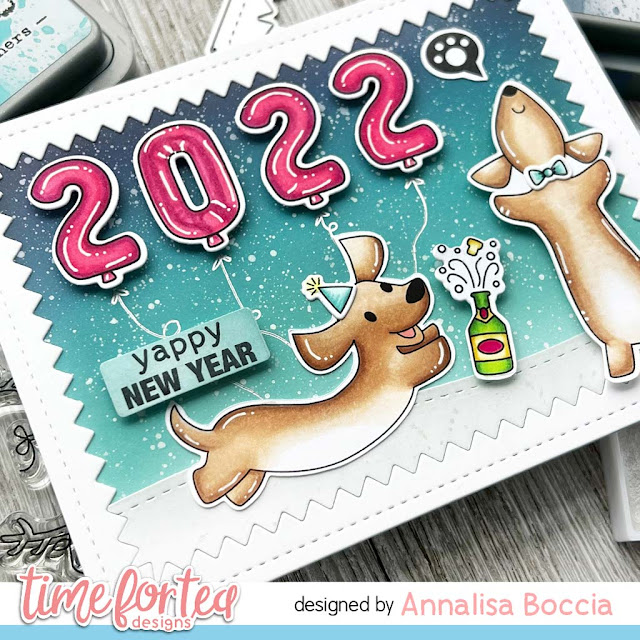
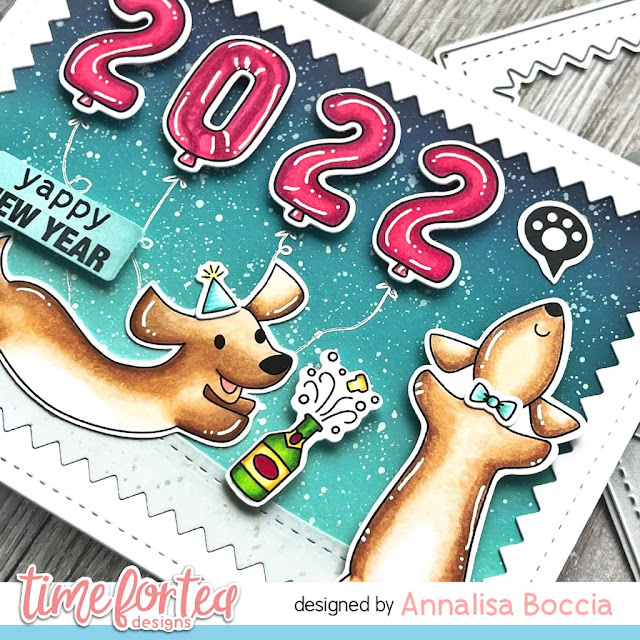
Hello everyone, DT Annalisa here. I am sharing a 'yappy' New Year card on this last Friday of 2021! I can't believe that we are headed into 2022 tomorrow, I hope that next year holds happiness and health for all of us as we have been through so much in the last few years.

I blended on Salvaged Patina, Peacock Feathers, Chipped Sapphire and Black Soot Distress Oxides to some white card stock using my Beautiful Rainbow Blender Brushes. I then added some white paint splatter with a paintbrush and set this aside to dry.


I die-cut out a frame using the Zig Zag Frame & Tag Dies and some white card stock. I used the Slimline Hillside Scene Dies to cut out a snowbank which I then die cut again with the Zig Zag frame. To this, I added splatter with some shimmery white watercolour and set it aside to dry.

I stamped all of the elements and coloured them with my Copics. I used the following stamps sets: Happy New Year Critters, Santa Paws and Stop Dachshund Around. I combined the sentiment 'yappy' from the Santa Paws stamp set with the 'New Year' from the New Year Critters stamp set as I thought it was quite punny!


To assemble the card, I glued down the zig-zag frame and the snowbank to the ink blended background. I popped up the numbers, sentiment, champaign bottle and doggie on the right with some foam tape, I then used liquid glue to adhere the rest of the elements. 


Thank you so much for reading my blog posts throughout the year, I so appreciate it, you can use my discount code T4TANNALISA10 when you visit the Time For Tea Designs shop to get 10% off your order.

Thursday, 4 November 2021

Embossing onto Vellum Christmas Tag Video Tutorial

 Hello DT Vic here today and I am sharing a fun Christmas video tutorial. I have made some Christmas tags that are really fun to make and will give your gifts an extra bit of sparkle. 


I made three Christmas tags today and I show you in the video how to emboss onto vellum. I really love how effective this is and it adds a touch of glam to your crafts. I used the Memory Keeping Essential Dies to make my tags. I love the size of these tags and I think they are great to use a gift tag. For my images I used the Skating By Penguins Clear Stamp Set. I also used the Santa Paws Clear Stamp Set for some of my greetings. Another stamp which was super fun to use was the Squiggly Giggly A7 clear Stamp Set. I loved how this turned out on my tag. For the snowflakes I used the dies from the Falalala Scalloped Slimline Die


The copic markers I used to colour the critters are: 

BV23, BV25, E40, R81, R83, BG11, BG32, YR21, R20

I added some ribbon to the top of my tags once my images were adhered down. To finish the tags off I then added the die cut snowflakes and some sequins. You will also see in the video that I chopped off the end of a stamp for my greeting. This is because I wanted the greeting Love From Santa, but if I wanted to use the whole greeting its easy to line the stamps up on my acrylic block. You can also mask off the end of the stamp if you didn't want to cut your stamp. 

I hope you enjoy the video today and give embossing onto vellum a try if you haven't already tried it. Don't forget to show us your crafts we love seeing them. 

You can also save 10% off your orders using the code: T4TVICKI10 at the checkout and this includes all the new release products too. 

Thank you so much for stopping by today,

Crafty Hugs

Vic 

Tuesday, 10 November 2020

Caroling Critters in the Snow


Hello everyone, DT Annalisa here! I am so happy for the new T4T release and excited to show you a sneak peek before Friday's release! Today's card features the new "Carolling Critters." Aren't they just adorable!! Who doesn't love a trio of cute carolling animals?

To start I created a snowy background scene with my Scan and Cut SDX125 using an SVG cut file from Lori Whitock called Christmas Card Layered Houses. To add some interest to the red sky, I added white heat embossed stars (from the Santa Paws and Fairy Garden clear stamp sets) and dots with my white gel pen.

Next, I stamped the images and coloured them in with my Copic markers. The little presents are from the Mew Are the Best Gift Clear Stamp Set and coordinating dies. The little bird is from another stamp set from the new release called "Skating By Penguins" - I just love the extra little critters in sets as they help to complete scenes.

I adhered the critters and other elements with liquid glue and stamped in some extra music notes with black ink. For the sentiment, I used part of the "we wish you a merry Christmouse" from the Caroling Critters stamp set as well as the "Christmas" from the Santa Paws which I die cut out using the coordinating dies.

To complete the card I added some snowflakes with blue gems on top which I have had in my stash for ages.

I am sure you will LOVE the new release as much as I do. Happy crafting!

Don't forget I have a 10% discount code for the T4T store which can be used on anything, anytime and has no time limit - T4TANNALISA10

Friday, 7 August 2020

Christmas Critters


DT Annalisa here. I hope are enjoying your Friday; it is finally cooler than 30 degrees Celsius here so I am a happy camper! Today I am sharing another Christmas card - you can never start making them too early! I used three stamp sets from the new July release - Christmas Surprise Clear Stamp Set, Santa Paws Clear Stamp Set and Mew Are the Best Gift Clear Stamp Set. The July release is so great to mix and match together!

To start I stamped the little mouse from Mew Are The Best Gift stamp set and masked it out. On top of this, I stamped the dog and presents from the Santa Paws stamp set and masked some of this out at the top end and stamped the tree from an older stamp set - Warm Winter Wishes - on top of this. I used my copics to colour the little scene, added some white gel pen accents and then cut it out. 

I stamped, coloured and die cut out the kitty from the Christmas Surprise stamp set and added him popping out from the side of the tree.

For the background, I used the Sparkle Cover Plate Die on top of some watercolour paper that I coloured with distress inks. I glued the die-cut piece to the coloured background with liquid glue.

Next, I added my cute scene to the background with some liquid glue. For the sentiment, I added 'merry' directly onto the background. I then stamped, coloured and die-cut 'Christmas' and popped it up on the card using some foam tape. 

If you are interested in purchasing any of the T4T products used in my project, I have a 10% discount code for the T4T store which can be used on anything, anytime and has no time limit - T4TANNALISA10


Other Posts You Might Like