Pages

Thursday, 30 September 2021

A Howling Good Day

Afternoon, DT Kitty here. It's time for my weeklycard. I decided to use the new Dog Gone Mutts Stamp Set as the doggies in it are just so cute! I went for a strong bright colour background...


I used the Dog Gone Mutts Stamps and coloured them in with my Copics. I then die cut the image with the coordinating Dog Gone Mutts Dies. I created the backrgound by blending Chipped Sapphire, Blueprint Sketch & Mermaid Lagoon Distress Oxide Inks. I then blended Mowed Lawn & Twisted Citron onto a strip of card and die cut it using the grass die from the Landscape Edge Dies. I die cut the panel using the Square Label Frame Dies and attached it onto kraft card. I used the fence, clouds and hedges from the Windmill Add On Dies. I blended some ink onto the hedges before adding them. I stamped the sentiment onto black card and heat embossed it in white then die cut it. I fixed everything onto the card with foam pads and added some gems to finish.


Dont' forget you can use my discount code T4TKITTY10 to get 10% off your order on the Time For Tea Designs website.

Kitty xx

“Because adulting is hard” coffee card

Hello crafty friends and welcome back to Time for Tea Designs blog. Silvia’s here today to share with you a coffee themed card!


I first die cut a panel with the largest die of the "Large Scallop Celebrate Frame" set from Distress Mixed Media Heavystock. I then used walnut stain Distress Oxide spray and tea dye and vintage photo Distress stain spray, water and heat gun to color it.


I then stamped 5 coffee cup from the “Coffee Lovers" stamp set, I colored them with alcohol markers, I cut them with coordinating dies and I heat embossed in white the cute “cream” heart from the same set.


I put everything together using a mix of liquid glue and foam tape and I matted it with one of the cute patterned paper from the "Sweet Summer" paper pad.
I ended my card adding a heat embossed sentiment on dark brown cardstock and that's all.


I hope you get some inspiration by this card and you like it.

Thanks so much for stopping by today and don't forget you can get a 10% off your Time for Tea order with the code T4TSILVIA10.

Have an amazing day!!! Hugs, Silvia.


Tuesday, 28 September 2021

Coffee?

 Hello all Tea Timers, Claudia here with some new inspiration. This time we are talking about one of my passions, coffee!!! Of course we in Italy drink a lot of it and I tell you it's the first thing my eyes see in the morning.... I love its wonderful aroma and when I saw this set Coffee Lover   I fell in love with it! 


To create this card, I used this adorable stencil    Coffee Beans Stencil  and blended with two Distress, first with Rusty Hinge and then with Vintage Photo.

I colored my mugs with very bright colors and sprinkled coffee beans here and there. I hope you like my card this week.... I'm off now, I have a great coffee waiting for me!!! 

Don't forget to use the code T4TCLAUDIA10 to get a FANTASTIC 10% discount!

HAPPY MAIL Noline coloring using distress inks

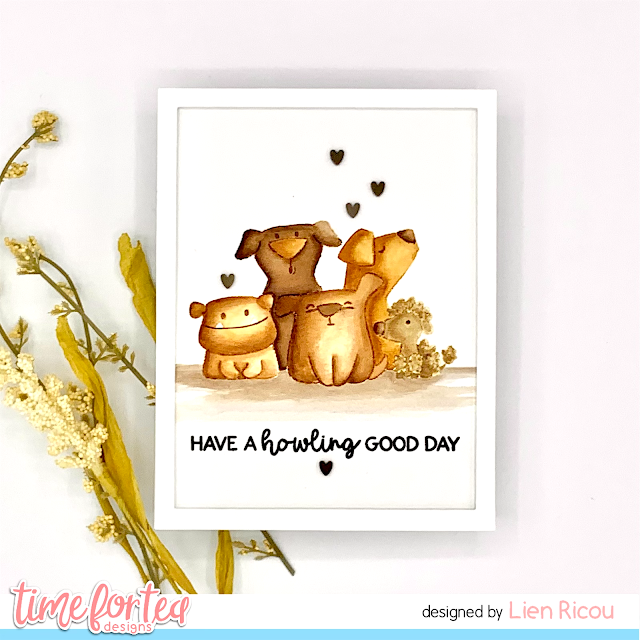
Hey everyone, Lien here. Today I am sharing this card on the Time For Tea Designs Youtube Channel. I am featuring the Dog Gone Mutts stamp set from Time For Tea Designs. For this card, I did some no-line coloring using distress inks. I hope you like it xxx 


You can click HERE to watch on the Time for Tea Designs Youtube channel.


I started by stamping out the dogs from the Dog Gone Mutts from Time for Tea Designs using antique linen distress ink onto water colour paper. I smooched several distress inks down onto a media mat and used them to do the water coloring of the critters. 


Once I had everything colored in, I cut the paper to an A2 sized panel. I also die cut a frame. After assembling the card onto a card base, I finished it using some heart sprinkles. I hope you like the card!


Thinking of buying some T4TD supplies? With T4TLIEN10 you will get 10% of your order at Time For Tea Designs! Happy shopping xxx 


Supplies:
  • Time For Tea Designs - Dog Gone Mutts
  • Waffle Flower - A2 Layers Die
  • WaterArt: Water Colour Paper 
  • Gina K. Designs Amalgam Ink Obsidian
  • Distress Inks: Antique Linen, Vintage Photo, Ground Espresso, Gathered Twigs, Brushed Corduroy, Frayed Burlap, Pumice Stone
  • White Gelly Roll Pen 
  • Trinity Stamps: Heart Sprinkles - Coffee Bean
  • Darice Thin Foam Strips
  • NUVO Deluxe Adhesive
  • Pritt Adhesive Roller

Lots of Hearts Rainbow 'Hello' cards (draft)

Hello everyone, Elaine here today sharing some simple but joyful 'hello' cards.  


For these cards I started with some ink blending.  Taking a piece of white, smooth, heavyweight card measuring 5 11/16" x 4 1/16", I used my Distress Inks and Time for Tea Designs Rainbow Blending Brushes to create a soft rainbow background. Starting in the top left hand corner I applied some Picked Raspberry Distress Ink.  Next, I applied some Festive Berries, Carved Pumpkin followed by Squeezed Lemonade, Cracked Pistachio, Blueprint Sketch, Wilted Violet and lastly, back to Picked Raspberry.  All colours were applied diagonally from top left down to bottom right.

Taking the Lots of Love Horizontal Cover Plate Die, I ran it through my die cutting machine with some white heavyweight card.  I like to save all the little hearts, they're great to use on another project.  I applied a small amount of liquid glue around the edge of my rainbow ink blended panel and carefully laid the lots of hearts panel over the top.

Setting the hearts aside to dry, I finished working on the sentiment.  I used the Large Script Hello Sentiment Die and cut the outline from grey cardstock and the word was cut from some more white cardstock and then ink blended.  To give a little more interest to the sentiment I created a gradient effect by applying more ink at the top of the word.  The two layers where adhered together and then adhered to the card front.  Finally the card panel was applied to a horizontal top folding card base.  

These cards were really simple to create and I love having cards like this in my stash to send for many occasions.

I'm delighted you stopped by today and hope you have a wonderful day!  Elaine xx


Monday, 27 September 2021

Cute coffee themed tags

Happy Monday, Tea Timers!

DT Natalia here today. I cannot believe how quickly the weeks go by!

For today's post, I have a couple of cute tags which are probably my favourite of the samples I made for this release... I have wanted to make a pink sky for a long time, and it is just stunning, isn't it? 

These cuties from the Snappy before Coffee are also just adorable.


I used one of the dies from the Square label dies set to create my tags, and layered them 3 times for some nice thickness and dimension. 

I also used the grass dies from the Landscape Edge Standalone die set to create my scene. 

To colour the stamps, I used my alcohol markers and added some highlights with a white gel pen. I cut them all out, including the sentiments, with the coordinating dies

I assembled it all together and then used my crop-a-dile punch to add the eyelets. I love the finish look those eyelets give the tags, right?

To finish them off, I added quite a few sequins from my Little things from Lucy's card - did I go overboard? Maybe... but I couldn't resist them - they look so cute!


I hope you like these today and they inspire you to use your nesting dies differently and create some tags that go well with any present or as a little message for someone! 

You can use the code T4TNEILA10 to get 10% off your shop! 

Sending crafty hugs,

Natalia

Sunday, 26 September 2021

You've got mail

 Happy Sunday Teatimers, 

Lyndsey here on the bright sunny Sunday afternoon and for my card today I'm taking a bit a couple of releases to share this cheery snail mail scene using the sweet You've Got Mail stamp set.


To start as always I stamped and coloured my images using my Spectrum Noir markers (colours listed below in order of lightest to darkest)
Post Box - IG1, IG3, IG5,IG7 
                 - GB10, EB3, EB5, EB8 
                 - TB3, TB4, TB5, TB7
                 - CR11, DR3, DR5, DR7 

Toadstool - CR11, DR5, DR7 
                   - EB1, EB2, GB10

Snail shell - CT1, CT3, CT4, GB5 
                    - TB1, TB3, TB4, TB5 

Snail Body - IG1, IG3, IG5 

To create the card I cut a rectangular piece white card and using mermaid lagoon distress ink and the Slimline Scene Builder Stencil covered the card with clouds.

The grass was cut using the Landscape Edge Dies and colour was added using twisted citron distress ink. These were added to the bottom half of the panel and then then cut out using the Slimline Postage Frame Dies.

I stamped the happy mail sentiment from the set in the top part of card and added my critters to create the scene. The whole panel was then added to a piece of blue card before going into a Slimline sized Card Blank.

Thank you for joining me here on the blog today, don't forget to use my code T4TLYNDSEY10 for 10% off your order in store.

Enjoy the rest of your weekend 

Lyndsey x

Saturday, 25 September 2021


 Happy Saturday Teatimers it’s Design Team member Natalie here with a fun coffee card for you today. I don’t know about you but this has definitely felt like my motto this week but maybe with a cup of tea 🤫😂
I love that the Coffee Lovers set enables you to make some pretty latte art or add a sweet smiley face whatever matches you mood. 
I teamed the new coffee lovers stamp set with the square label dies. I cut out a card base from Kraft card by folding my card in half and then placing the die on the fold but with the cutting edge hanging over the top so it doesn’t cut that bit. I also cut a smaller one from some rich red, then an even smaller one out of cream card stock. On the cream I stamped out lots of coffee cups with brown oxide ink and added the heart latte art in the middle. 
I like to use the same colours through out so used the same red and Kraft card to paper piece the mug and take away cup. Then I coloured in the latte art with a little COPIC marker after stamping it on some white Copic paper and fussy cutting it and adding it to the middle. 
I adhered everything and finished up by adding some coffee beans and heat embossing my sentiment in white onto the same red card. It was such a simple and quick card to make which is so handy when you need a last minute one. I can't wait to see your makes with this set, don't forget to share it with us on social media like Instagram and the Facebook group. Also if you want to pick anything up in the shop you can get 10% off your order using code T4TNATALIE10 Have a great weekend and I'll see you all next week!

Thursday, 23 September 2021

Coffee Duo

Hello Tea Timers, DT Kitty here with my latest card. For this card I decided to go with a coffee theme - a very popular one at the moment in crafting! I used lots of the new release products and had so much fun creating this one...


I started by creating my simple background first. I blended a little Gathered Twigs & Tea Die Distress Oxide in the centre of the card. I then used the Coffee Stains Stencil and more ink to create the rings. I also added some splats of water and brown ink. I used the Coffee Lover Stamp & Die Set to create the images and sentiments. I coloured all the images with Copic Pens and fixed them all onto the card with foam pads for some extra dimension.


Thank you ever so much for stopping by today. Don't forget you can use my code T4TKITTY10 to get 10% off your next order over on the Time For Tea Designs Shop.

Kitty xx
"Have a howling good day" window card

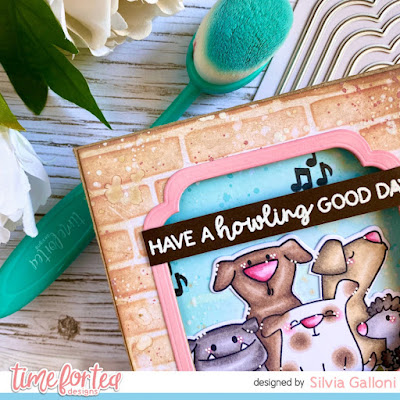
Hello crafty friends and welcome back to the Time for Tea blog! Silvia’s here today with you.

This week I decided to make a window card with some of the amazing products from the September release.

I started cutting two square panels from white card stock.

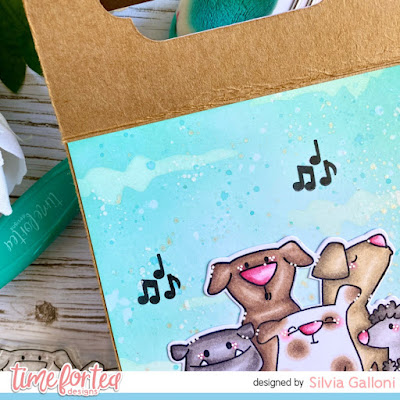
I ink blended one of them with tumbled glass and savaged patina Distress oxide inks for the sky and twisted citron and mowed lawn Distress Oxide inks for the grass. To ink blended it I used the new Beautiful Blender Brush in teal I added some soft white clouds with the “Sunrise Scene" stencil and I put it aside.


I then used the new "Square Label" dies to cut a window in the middle of the second square panel and I inked blended it with tea dye and fired brick Distress Oxide inks and the “Brick Wall" stencil. I also used this new amazing dies to cut a pink frame that I glued on my window.


I stamped images from the “Dog Gone Mutts" stamp set, I colored them with alcohol markers and I cut them with coordinating dies.

I put everything together and voila my window card, do you like it? I hope this.


Thank you so much for passing by today and don’t forget you can get a 10% off your Time for Tea order with my code, T4TSILVIA10.

Big hugs, Silvia.

Tuesday, 21 September 2021

Trick or Treat!


Hello to all Tea Timers, Claudia here with a scary but also very nice card. I used again this adorable set  Spooky Circle Tags with this so cute kitty, I love cats!!! 


I wanted to create a spooky scene, so I chose to use the die cut  Tree of Loveand the tree on black cardstock with a background made by shading distress  then I also created this moon in the background, what do you think? I think it doesn't make much sheer also because my little girl Gaia said it was very sweet and wanted it as a gift right away (and I can't say no to her). 


 Greetings to you all and I hope you enjoyed my inspiration!!! Don't forget to use the code  Greetings to you all and I hope you enjoyed my inspiration!!!

 Don't forget to use the code T4TCLAUDIA10 to get 10% off in the shop!!!    

Monday, 20 September 2021

CAS coffee card with a stencil

 Hello, tea timers! 

It is DT Natalia with you today. How are you? Was your weekend nice? I hope so! I got some crafting done but also managed to relax and do some house stuff, which always feels good! 

Today I have a Clean and Simple card to share with you, which I hope you like and encourages you to give it a go! 

I used the coffee stains stencil with pumice and ground espresso distress oxides. I love how the stencil makes a lovely background on its own, so quick and easy! 


For the sentiment, I used the pumice stone distress oxide on white cardstock then stamped the word Coffee from the Coffee Lover stamp and die collection, with walnut stain distress ink. 

I mounted it on a light brown textured cardstock (4.25x5.5") and added some sequins from My Little Things from Lucy's cards. 


I hope you like it as much as I do! 
Use the code T4TNEILA10 for a 10% your shop, including the new release!

Sending hugs, 
Natalia

Sunday, 19 September 2021

Coffee Lover

 Good afternoon Teatimers, 

Lyndsey here on the sunny Sunday afternoon and today I want share this fabulous coffee themed card with you using the new Coffee Lover stamp and die set. I absolutely love the sentiments in this set and its totally true that some of us need a coffee fix before taking on the world each day! ☕


To start I coloured the coffee cups very simply using CR11, DR5 and DR7 for the band and adding a little BG1 and BG3 for shading on the cup. Finishing with EB3, EB5 and EB8 for the little coffee beans. 

I used the A2 Layering Dies and cut a piece from coffee coloured card using the largest size and white card using the next size down.

To create my panel I masked of a section towards the left hand side and created an ombre effect using Antique Linen and Brushed Corduroy distress inks. Whilst the masking was still in place I used the Coffee Beans Stencil with the Brushed Corduroy applying a little more pressure to my brush to get the darker colour.

Finally after removing the masks I stamped the spilt coffee ring stamp up with the Brushed Corduroy ink and stamped across the blended section.


I added the coffee cups and beans onto the panel using foam pads before stamping the 'Coffee' in the top right hand corner. To finish off I stamped and cut out the adulting sentiment and added this towards the bottom right hand corner of the panel.

The whole panel was adhered to the coloured piece and added to a 6x6 card blank cut down to size leaving a small border around the edges.

Thank you for joining me here on the blog today, don't forget to use my code T4TLYNDSEY10 for 10% off your order in store 😀 

Enjoy the rest of your weekend 

Lyndsey x


Saturday, 18 September 2021

Snappy Before Coffee!

  Happy Saturday Teatimer’s this weekend has rolled around fast. Have you had a good week? Lots of crafting? That's hopefully my plan, it will be so nice to have a chilled out day. 

I know you all love coffee cards so I have a fun one to share with you today I just love a good pun don't you?!
The shape of my card didn't start out like it ended so I had originally cut out a stitched rectangle but I changed my mind after stencilling the sky and cutting out the grass. There was so much empty space so I used the new Square Label Dies to cut it out instead I like how the stitched detail stayed at the top and bottom though. Then I darkened up the sky edges with some chipped sapphire distress oxide to draw your eye in to the image. The sentiment is also stamped with the same ink. 
The crocodiles are from the new Snappy Before Coffee Stamp Set . They are super fun to colour I used the same yellow for their spikes and belly but darker greens on one and added some little spots and rosy cheeks. I coloured up the coffee cups and die cut everything out and adhered everything together. 
The it was time to make my card base I followed some kraft cardstock in half and took out one of the larger Square Label Dies. I popped the die onto the fold of the card making sure the part of the die that's on the fold is just hanging over the edge so it doesn't cut that part. Once it was made I added some splashes of coffee using the Coffee Stain 6x6 Stencil and adhered the rest if the card on top with some foam tape to give it some depth and that was my card finished up. I hope you like it it's a really quick one to make so great for any last minute needed cards. Hope you have a great weekend and don't forget you can get 10% off in the shop using code T4TNATALIE10 💖


Friday, 17 September 2021

Have a Howling Good Day


Hello and happy Friday! Annalisa here, I am following in the footsteps of Kitty's blog post and Jo's Facebook live yesterday and sharing an adorable dog card using the new Dog Gone Mutts stamp set. I am more of a cat person, but these dogs are beyond cute and I just LOVE the doghouse!

I stamped the dogs down (using Ink on 3 Blackout detail ink) onto some white cardstock. I then created a mask by using the leftover ink to stamp onto some masking paper. I trimmed the dogs out right along the line on the masking paper, removed the backing and stuck it down to the cardstock.


I stamped down the dog bowl and bone and created masks for these and added them on before stamping down the dog house. After creating a mask for the dog house, I stamped the trees, moon, birds and clouds from the Hillside Village stamp set.

To finish up the scene, I stamped the tennis ball and the 'have a howling good day' sentiment. I then coloured the whole scene in with my Copic markers and added some white gel pen accents.

I die cut out the scene with an older T4T stitched rectangle die. I then used some paper from the Brighter Days 6x6' Paper Pad to frame the scene. I adhered the patterned paper to a card base and then glued down the doggie scene on top.


Thank you so much for my blog post, you can use code T4TANNALISA10 when you visit the shop to get a 10% discount on your entire order.

Thursday, 16 September 2021

Howling Good Day

Hello, DT Kitty here! It's time for my usual Thursday DT spot. Today I am sharing another of my cards showcasing the new release products. There are some really cute stamp sets in this release so do check them out. I decided to create this one with some cute woofers...


For this card I used the Time For Tea Dog Gone Mutts Stamp Set. I coloured the images with Copic Pens and die cut them using the coordinating dies. I created a subtle slimline background using my Mermaid Lagoon & Twisted Citron Distress Oxide Ink. I layered my background onto white card. I die cut the scallop border from kraft card using the Slimline Scallop Nesting Dies. I stamped and die cut the sentiment and added all the pieces with foam pads. To finish I added some gems.


I hope you are all loving the new releases as much as the DT have been! Don't forget to use my DT code T4TKITTY10 for 10% off your order on the Time For Tea website.

Thank you for stopping by :)
Kitty xx

Coffee first then I do the things

Hello Tea Timers!!! Silvia's here with you today and  I'm so excited about our latest release....it's soooooo adorable, isn't it?!

I'm totally in love with the new amazing  coffee stencils and today I'd like to share with you a cute background I made with the "Coffee Stains" one.

I started cutting a 5,5"x 4,24" panel from kraft cardstock and I ink blended some tea dye, vintage photo and ground espresso Distress Oxide inks through the stencil in a random way.


I also added some heat embossed stains with vintage photo Distress embossing glaze because I love the translucent effect of this powder. I spalttered with water, brown inks and white and gold acrylic paints loosened with water.


Next I stamped two coffee cups from the "Coffee Lover" stamp set, I colored them with Spectrum Noir alcohol markers, I added a white embossed heart on them and I cut them with coordinating dies.


I put everything together, I added an embossed sentiment and that's all.


Thank you so much for stopping by today and don't forget that you can get a 10% off your Time 4 Tea order with the code T4TSILVIA10.

I wish you an amazing day. Hugs, Silvia.

Other Posts You Might Like