Pages

Showing posts with label coffee beans stencil. Show all posts

Friday, 1 November 2024

Caffeinated Hugs


DT Annalisa here, happy first day of November! The days are getting cooler and shorter, and many of us need caffeine to help keep us energized. For me, an afternoon cappuccino does the trick!

I created a card using the Stitched Quilted Cover Die to die-cut teal cardstock. I then inked it with Peacock Feathers Distress Oxide using my Beautiful Blender Brush and adhered it to a card base with double-sided tape.


Next, I ink-blended another piece of teal cardstock and used the Hey, Hello, Hi Dies to die-cut the word “hi.” I also die-cut “hi” from black cardstock and glued the two pieces together, slightly offset, to create a shadow effect.

After that, I die-cut some Distress White Heavy Cardstock by Ranger using the Sweet Scalloped Dies. I applied tea dye through the  Coffee Beans 6 x6" stencil, and after removing the stencil, I used the leftover ink on my brush to fill in the white areas of the cardstock. I then ink-blended the edges with Vintage Photo Distress Oxide and added a spritz of Tea Dye Distress Oxide spray.

I used double-sided tape to attach the coffee bean panel to the card base and applied liquid glue to secure the letters "hi" to the card.

Next, I stamped and coloured several images from the Warm Hugs set with Copics, then cut them out using their coordinating dies. I added white gel pen accents with a Gelly Roll Pen. Additionally, I stamped the sentiment "sending warm hugs in a mug" and die-cut it using its corresponding die. I adhered the images to the card base using either liquid glue or double-sided foam tape for added dimension.


I added three Designer Enamel Dots from the Summer Haze collection to complete the card.

Thank you so much for reading my blog post! Be sure to use my discount code T4TANNALISA10 when you shop at Time For Tea Designs to get 10% off your order.

Wednesday, 8 May 2024

Coffee

Hey there Tea-timers...

DT Ashlee here with some new T4T inspiration. This week I have a coffee themed card perfect to send someone to organise a coffee date! 


To create this card I started with a yellow card stock base. I then added coffee beans with distress oxide ink and the coffee beans stencil....


Using the Coffee sentiment die cut I die cut the pieces for this from two different shades of brown card stock before adhering to the base with foam tape. I then stamped the first part of the sentiment using black ink directly onto the card base at the top left hand corner.


I added three cups of coffee from the Pumpkin spice stamp set by stamping, colouring and die cutting them and adhering to the card base with foam tape. To finish off the card I added a tiny touch of sequins!

That's all for my card today, I hope you enjoyed this coffee themed card. Until next post happy crafting, hugs Ashlee. 

Friday, 26 April 2024

Warm Hugs in a Mug


Happy Friday, DT Annalisa here! I tried no line colouring in today's card, I love the look of it, but it is a technique that I find quite tricky, since you have no dark outlines, you must create contrast in the right places to get the right look. 

I ink blended Simon Says Stamp Khaki Ink for the background over the Coffee Beans 6 x6" Stencil using my Beautiful Blender Brush onto white cardstock. I removed the stencil and used a lighter hand and what was left on my brush to fill the white areas. I added brown splatter with a paintbrush, water and Khaki Ink.


I die-cut the ink-blended panel with a stitched rectangle die and then used double-sided tape to stick it to an 80 lb Neenah Desert Storm card base ink-blended with vintage photo Distress Oxide. 

I used salvaged patina Distress Spray Stain on the smooth side of Distress Watercolor Cardstock by Ranger. Once it was almost dry I sprayed water using a Distress Sprayer that filled in the white spaces with a pale teal colour. 


I die-cut the teal panel with the Warm Hugs Large Sentiment Die. I ink-blended another piece of Neenah Desert Storm with vintage photo Distress Oxide and die-cut it with the same die. I glued the two die-cuts together slightly offset to create a shadow.

I stamped elements from Let's ChatPumpkin SpiceWarm Hugs and Get Whale Soon with Ink on 3 fadout No Line Coloring ink. I coloured them with Copics, cut them out with their coordinating dies and added white gel pen accents with a Gelly Roll Pen


I adhered the images and the sentiment to the card base using double-sided foam tape for dimension.

I added teal and pink sequins from the Candy Christmas Squin Mix from Pawsome Stamps using liquid glue to complete the card.


Thank you so much for visiting my blog post, be sure to use my discount code T4TANNALISA10 when you visit the Time For Tea Designs shop to get 10% off your order.

Friday, 24 November 2023

You Had Me At Coffee

Happy Friday, DT Annalisa here with another coffee-themed card - I have been on a roll for the last few weeks! I created this card using the large You Had Me At Meow Sentiment Dies that I adjusted to read 'You had me at coffee' by adding the Coffee Sentiment Die. It is always fun to get more use out of dies like this!

I used the Large Scallop Celebrate Frame Dies to cut out watercolour paper on which I ink blended ground espresso Distress ink through the Coffee Beans 6 x 6" Stencil. Next, I applied tea-dye Distress Oxide Spray and heat set the panel. I then added ground espresso Distress Ink splatter using water and a paintbrush. 


I die-cut teal cardstock with the 'You had me at meow' and 'coffee' sentiment dies and then ink blended peacock feathers Distress Ink for a deeper colour. I ink smooshed ground espresso Distress Ink onto the coffee text for added texture. I die-cut vellum with the coffee shadow die and used liquid glue to adhere it to the 'coffee' text. 

For the images on this card, I used Snappy Before Coffee (coordinating die set) and It's Penguin-ing to Look A Lot Like Christmas (coordinating dies) that I coloured with Copics and added white gel pen accents. 


I die-cut the letters/text three times for dimension and glued them all together with liquid glue. I then used liquid glue to adhere all the elements to the card.

I added stickles for sparkle on the bottom of all the letters and some of the images.

Thank you so much for reading my blog post. Remember to use my discount code T4TANNALISA10 when you visit the Time For Tea Designs shop to get 10% off your order.

Saturday, 26 March 2022

Cute Coffee Card

 Hello DT Vic popping in today! I’m sharing a fun coffee theme card with you today.


I used the Coffee Lover Clear Stamp Set for my images. I stamped these out and coloured them in with my copics. I then used the Coordinating dies to die cut them out.


For my background I used the Coffee Beans 6x6 Stencil and the Coffee Stains 6x6 Stencil. I ink blended both of these onto some white card. I then die cut a piece of black card using the fun Square Label Dies.

I then heat embossed the sentiment using some white embossing and adhered this to my card. I stamped out a few more coffee beans and coloured them in before adding these onto my card.

You can also save 10% off your order using the code: T4TVICKI10 at checkout.

Have a lovely Saturday!

Vic


Thursday, 23 December 2021

Jolly Coffee Christmas


Happy Christmas Eve everyone! I hope you all have a wonderful day and a happy Christmas tomorrow. Thank you so much for your support throughout the year.

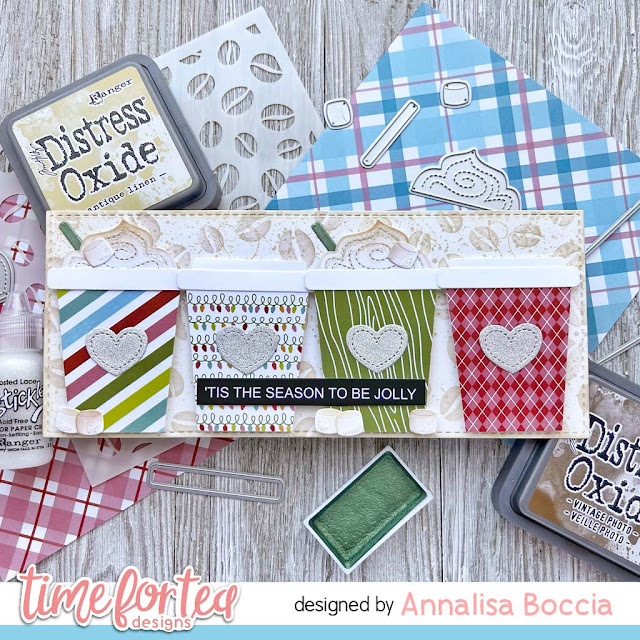
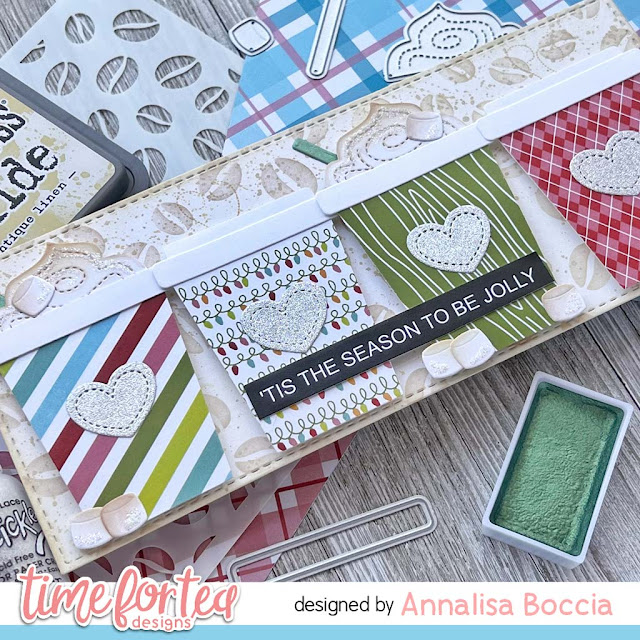
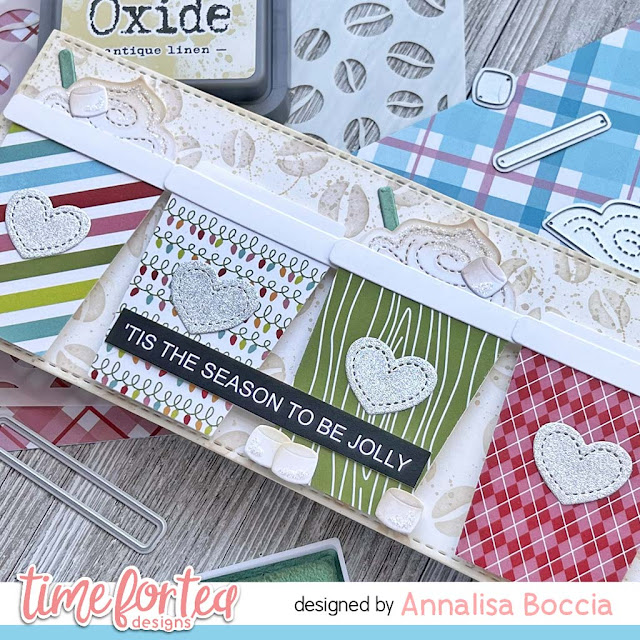
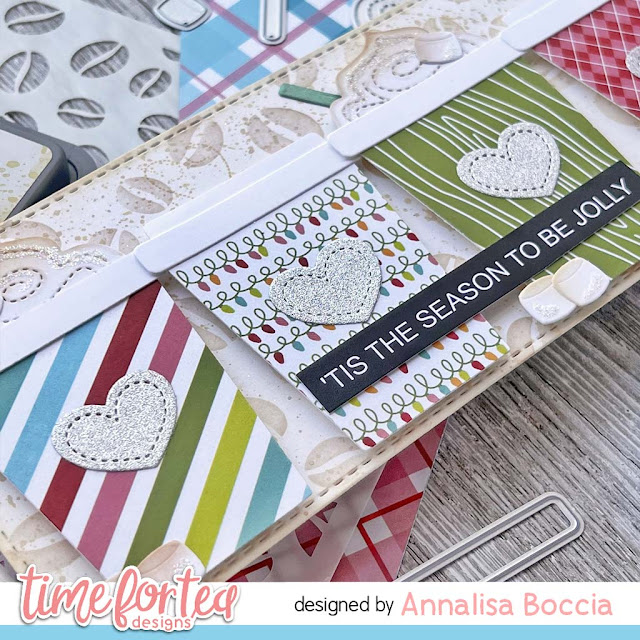
I am sharing a festive coffee card featuring the new Joyful Winter Paper Pad, when I saw these beautiful patterns I knew I needed to make them into coffee cups!

I started by creating the background, I die-cut a slimline base using the Slimline Scalloped Trio Circle Nesting Dies and then used the Coffee Beans 6 x6" Stencil to which I added Antique Linen, Vintage Photo and Ground Espresso Distress Oxides using my Beautiful Blender Brushes. I filled in the white areas by blending lightly with my blender brush and some of the leftover Antique Linen left on my blender brush. I added some splatter of Antique Linen Distress Oxide with a paintbrush. Once the panel was dry, I added it to an 8.5 x 3.5-inch card base.

I started creating the cups by cutting the patterned paper using the Takeout Coffee Cup Dies for the cup base. I then cut out the cup toppers. marshmallows and whip cream with white cardstock, I ink blended on a little Antique Linen onto the whipped cream and marshmallows to add some yummy colour! I die cut the hearts using the silver glitter card stock from my scraps.

I used some shimmery green watercolour to paint the straw once it had been die-cut. I glued the cup elements together using liquid glue and then added double-sided foam tape to the back of each of them.


I attached the cups side-by-side, to the coffee stencilled panel. I then used a combination of liquid glue and foam tape to adhere to the marshmallows and straws. To finish off the card, I added some Stickles to the marshmallows and whipped cream.  


Thank you so much for reading my blog post, you can use my discount code T4TANNALISA10 when you visit the Time For Tea Designs shop to get 10% off your order.

Thursday, 21 October 2021

Have a brew-tiful day

 Hello Tea Timers! Silvia’s back with a new coffee themed card!

I started die cutting one of the beautiful dies from the “Square Label" set from watercolor cardstock and I colored it with vintage photo Distress spray stain and walnut stain Distress oxide spray.

I then blended some ground espresso Distress oxide ink through the “Coffee Beans" stencil, I splattered with water and I covered droplets with vintage photo Distress embossing glaze and I heat embossed them. 

I also splattered with picket fence and antique bronze Distress paints.

I stamped images from “Coffee Lover" and “Snappy Before Coffee" stamp sets, I colored them with alcohol markers and I cut them with coordinating dies (here and here).

I next cut a rectangle from “Sweet Summer" patterned paper pad and I put everything together.

That’s all for today, I hope you’ll like the card.

Thank you so much for stopping by and don’t forget you can get a 10% off your Time for Tea order with the code T4TSILVIA10.

Hugs, Silvia.


Thursday, 7 October 2021

Coffee hugs

 Hi there! Silvia’s here today with a new coffee themed card.


I started die cutting a panel using one of the "Square Label" dies and I created my own pattern on it using the amazing "Coffee Beans" stencil. I used the stencil to create different layers: I started with tea dye Distress Oxide ink and then I go on with vintage photo and ground espresso Distress Oxide inks. For the latest layer I used vintage photo Distress embossing glaze....I really love its glossy effect! I also added some splatters with clean water and with the above brown inks to add some extra texture.


I stamped images from "Snappy Before Coffee" stamp set, I colored them with alcohol markers and I cut them with coordinating dies.


I die cut the "Hugs Sentiment" three times from brown cardstock, I glued one above the other and I added to my card with the super cute alligators.


I matted the square panel with one of the sheets from the "Sweet Summer" paper pad and that's all.


Thank you so much for passing by today, I hope you'll enjoy the card. And don't forget you can get a 10% off your Time for Tea order with the code T4TSILVIA10.

Have an amazing day! Hugs, Silvia.


Tuesday, 28 September 2021

Coffee?

 Hello all Tea Timers, Claudia here with some new inspiration. This time we are talking about one of my passions, coffee!!! Of course we in Italy drink a lot of it and I tell you it's the first thing my eyes see in the morning.... I love its wonderful aroma and when I saw this set Coffee Lover   I fell in love with it! 


To create this card, I used this adorable stencil    Coffee Beans Stencil  and blended with two Distress, first with Rusty Hinge and then with Vintage Photo.

I colored my mugs with very bright colors and sprinkled coffee beans here and there. I hope you like my card this week.... I'm off now, I have a great coffee waiting for me!!! 

Don't forget to use the code T4TCLAUDIA10 to get a FANTASTIC 10% discount!

Monday, 20 September 2021

CAS coffee card with a stencil

 Hello, tea timers! 

It is DT Natalia with you today. How are you? Was your weekend nice? I hope so! I got some crafting done but also managed to relax and do some house stuff, which always feels good! 

Today I have a Clean and Simple card to share with you, which I hope you like and encourages you to give it a go! 

I used the coffee stains stencil with pumice and ground espresso distress oxides. I love how the stencil makes a lovely background on its own, so quick and easy! 


For the sentiment, I used the pumice stone distress oxide on white cardstock then stamped the word Coffee from the Coffee Lover stamp and die collection, with walnut stain distress ink. 

I mounted it on a light brown textured cardstock (4.25x5.5") and added some sequins from My Little Things from Lucy's cards. 


I hope you like it as much as I do! 
Use the code T4TNEILA10 for a 10% your shop, including the new release!

Sending hugs, 
Natalia

Sunday, 19 September 2021

Coffee Lover

 Good afternoon Teatimers, 

Lyndsey here on the sunny Sunday afternoon and today I want share this fabulous coffee themed card with you using the new Coffee Lover stamp and die set. I absolutely love the sentiments in this set and its totally true that some of us need a coffee fix before taking on the world each day! ☕


To start I coloured the coffee cups very simply using CR11, DR5 and DR7 for the band and adding a little BG1 and BG3 for shading on the cup. Finishing with EB3, EB5 and EB8 for the little coffee beans. 

I used the A2 Layering Dies and cut a piece from coffee coloured card using the largest size and white card using the next size down.

To create my panel I masked of a section towards the left hand side and created an ombre effect using Antique Linen and Brushed Corduroy distress inks. Whilst the masking was still in place I used the Coffee Beans Stencil with the Brushed Corduroy applying a little more pressure to my brush to get the darker colour.

Finally after removing the masks I stamped the spilt coffee ring stamp up with the Brushed Corduroy ink and stamped across the blended section.


I added the coffee cups and beans onto the panel using foam pads before stamping the 'Coffee' in the top right hand corner. To finish off I stamped and cut out the adulting sentiment and added this towards the bottom right hand corner of the panel.

The whole panel was adhered to the coloured piece and added to a 6x6 card blank cut down to size leaving a small border around the edges.

Thank you for joining me here on the blog today, don't forget to use my code T4TLYNDSEY10 for 10% off your order in store 😀 

Enjoy the rest of your weekend 

Lyndsey x


Monday, 13 September 2021

COFFEE first and paper smooshing technique

Hello, tea timers! 

DT Natalia here. I hope your weekend was a lovely one!

Have you seen the NEW RELEASE yet? Too good & fabulous sentiments! I run on coffee, so this release was very, very relevant to me! I truly enjoyed making all the cards and I am excited to show them to you! 

For today, I have this card featuring the Coffee Lover Stamp and Die collection where I used a couple of my all time favourite techniques: using paste with stencils and paper smooshing. 

I have a video which I will post tomorrow on my IG account with how I made those cups, but it is so simple! I used the following distress oxides: 

  • barn door
  • dried marigold
  • kitsch flamingo
  • broken china
and then I used white WOW embossing powder for the cups. 


A trick: to make your cups stand up, use craft foam behind them! I used used the coordinating dies to cup 4 cups from foam and used liquid adhesive to glue them to my paper smooshed cups. I love dimension on a card! 

For the background, I used the new Coffee Beans 6x6" stencil with transparent matte texture paste from Ranger. I love the additional detail it gives to the card. 

And now, can we take a moment to admire the great sentiment? 'coffee first then I do the things' - yes! it should say 'at least TWO coffees first...' I love it!

I'm hoping this card inspires you! Use the code T4TNEILA10 for a 10% off your shop, including the new release items

Sending hugs,
Natalia

Other Posts You Might Like