Pages

Showing posts with label Square Label dies. Show all posts

Friday, 20 September 2024

Cherry On Top


Happy Friday, everyone, DT 
Annalisa here! Fall, my favourite season (Spring is a close second), begins in just a few days, so I am sharing a shaped card with autumnal colours. What is your favourite season?

I added several drops of dried marigold Distress Paint onto my glass matt and sprayed it with water. I pressed water-coloured cardstock into the paint several times to create a bright orange background.

I heat set the panel and sprayed on carved pumpin and tea dye Distress Oxide Spray. Once the panel was dry, I die-cut it with the Square Label Dies and added white gel pen accents to the corners. I created a card base using the Square Label Dies and used liquid glue to adhere to the orange panel.


I die-cut plaid patterned paper with the Scalloped Circle Dies and ink-blended the edges with spiced marmalade Distress Oxide ink and my Beautiful Blender Brush. I adhered it to the card base with double-sided foam tape.

I stamped and coloured (with Copics) images from Fruitful Friends (cherries and sentiment), Book Buddies (kitty), and I Really Dig You (butterfly) and cut them out with their coordinating dies. I added white gel pen accents with a Gelly Roll Pen.


I used liquid glue to adhere the images and sentiment to the card. I added glossy accents to the cat's glasses and the butterfly to add interest.

Thank you so much for reading my blog post. Remember to use my discount code T4TANNALISA10 when you visit the Time For Tea Designs shop to get 10% off your order.


Friday, 12 January 2024

Pink Birthday Party Bunny


Happy Friday. DT Annalisa here sharing a sparkly pink birthday card, because who doesn't love pink and sparkly! I used a stencil, dies and stamps from Time For Tea Designs

I used the Simple Square Nesting Dies to die-cut Neenah Metallic cardstock for the back panel. I glued this onto a white cardstock card base. 

Next, I sprayed Distress Mica Stain Cocktail Party onto watercolour cardstock through the Diamond Burst 6 x 6" stencil. I heat set the ink and then spritzed water mist to create the light pink background in the white areas left behind. I stuck this to the card base with double-sided tape.

I ink blended peacock feathers, salvaged patina and tumbled glass Distress Ink to white cardstock. I scooped some white Perfect Pearls into a mini mister and added water, spritzed this onto the inked panel and then heat set it. 

I used the Square Label Dies to die-cut the teal-inked panel and a piece of vellum. I used liquid glue to stick the teal panel to the vellum one. I then glued this to the card base.

I used the Let’s Party Large Sentiment Die to die-cut silver metallic paper and paper from a Christmas cracker; I love being able to repurpose paper! I created a text shadow using silver paper by offsetting the text slightly when I glued the sentiments on top of each other. I glued these to the centre of the blue panel on the card base and added three pink Summer Haze Enamel Dots around them. 


I stamped and coloured (with Copics) several images from the Let’s Party stamp set and the stars from Happy Trails and cut them out with their coordinating dies. I added white gel pen accents with a Gelly Roll Pen. I used double-sided foam tape to stick these to the card base to complete the card.

Thank you so much for reading my blog post. Remember to use my discount code T4TANNALISA10 when you visit the Time For Tea Designs shop to get 10% off your order.

Friday, 7 April 2023

Easter Wishes


Happy Friday, crafty friends! DT Annalisa here sharing a spring Easter scene I created using dies, stamps and stencils from the new release. I absolutely love the little bunny holding the little chick, so adorable!

I used the Square Label Dies to cut out a piece of patterned paper from the Pastel Basics Digital Printable Papers. I used another smaller die in the same set to die-cut white cardstock. I ink-blended Shaded Lilack, Kitsche Flamingo and Spun Sugar Distress Oxides over the Mini Egg Pattern Stencil using my Beautiful Rainbow Blender Brushes. I added white splatter with a paintbrush, water and Copic opaque white.


I die-cut a white fence using the Fenced In Dies and used liquid glue to adhere it to the inked panel. 

I stamped the bunny, chick and eggs from the Eggstra Special Birthday stamp set. The butterfly, flower and bee are from I Really Dig You. I stamped and Copic coloured all the images and cut them out with their coordinating dies. I added white gel pen accents with a Gelly Roll Pen

I used the large Easter Wishes Large sentiment die for the sentiment. I coloured it using Aqua Sky ink from Concord & 9th. I added white gel pen accents with a Gelly Roll Pen. I die-cut the sentiment two more times and adhered them all together with liquid glue.


I used liquid glue to adhere the sentiment and stamped images to the inked panel. I used double-sided foam tape to adhere this down to the card base that I covered with patterned paper.

Thank you so much for reading my blog post, you can use my discount code T4TANNALISA10 when you visit the Time For Tea Designs shop to get 10% off your order.


Friday, 11 November 2022

New Release: Brew Can Do It


DT Annalisa here today! Hello, and welcome to a brand new release! As a huge coffee fan, I had to share a coffee-themed card first! This release has EIGHT new stamp sets and coordinating designs, ranging in type from gingerbread characters to snowmen, penguins, seals and more. 

I stamped all the cups/mugs in the Pumpkin Spice stamp set and coloured them with my Copic markers. I added white gel pen accents and used the coordinating dies to cut them out.

I cut white cardstock with the 4 1/8 x 4 1/8 inch die from the Square Label Dies and ink blended on salvaged patina distress oxide using my teal Beautiful Blender Brush. I used the 5 x 5 inch die in the same set to cut patterned paper from the Brighter Days 6x6' Paper Pad. I also created a card base using the same-sized die.

I used liquid glue to adhere the patterned paper to the card base. I stamped the 'brew can do it' sentiment from The Perfect Blend stamp set to the teal panel and then stuck this panel to the card with double-sided foam tape.  


I added foam tape to the back of each mug and placed them on the card. I adhered three "Clear Bubbles enamel dots" to complete the card. These clear bubbles are absolutely beautiful and my photos don't do them justice!

Thank you so much for reading my blog post, you can use my discount code T4TANNALISA10 when you visit the Time For Tea Designs shop to get 10% off your order.

Friday, 30 September 2022

Halloween Haunted House


Happy Friday! DT Annalisa is here today sharing a Halloween scene featuring the brand new Haunted House Clear Stamp Set.

I love the large size of this haunted house, it is so fun to colour and takes up most of the card! I stamped the house and coloured it with my Copics. I then used a circle die that I had in my collection but one of the T4T Simple Circle Dies fits this stamp perfectly! I added some accents with a white Gelly Roll Pen.

I used the Square Label Dies to cut out two pieces of patterned paper from the new Halloween 2022 Digital Paper Collection. I used a dot runner to adhere the two pieces together and then to a card base. I used double-sided foam tape to adhere the haunted house circle and the sentiment to the card. 


Thank you so much for reading my blog post, you can use my discount code T4TANNALISA10 when you visit the Time For Tea Designs shop to get 10% off your order.


Thursday, 20 January 2022

So Lucky To Have You

Hello & Happy Thursday! Kitty here and it's time for my usual afternoon DT spot for Time For Tea Designs. I went full on bright and busy for this slimline card. It was so much fun to make and I love adding lots of little detail...


I started out my creating my background panel. I gently blended Salvaged Patina & Twisted Citron Distress Inks three times on a slimline panel. I then blended Twisted Citron onto card and die cut it with the Grass Die from the Landcape Edge Dies. I added this onto each section. I created the front panel by blended Kitsch Flamingo & Picked Raspberry Distress Oxide Inks. I then used the Chic Chevron Stencil with Picked Raspberry Ink over the top. I used a Square Label Die to create the three windows and added white dots around them with a pen. I then added acetate behind the windows, added sequins to each window and fixed it onto the back panel to create the shaker windows. I used the Smitten Kitten Stamp Set for each of the images. I coloured them with Copics, cut them out and fixed them in place on the windows. I cut the sentiment from the Brighter Days Sentiment Cards into three pieces and added them along with some heart embellishments.


As always, thank you ever so much for joining me today, don't forget to join us tomorrow for our Blog Hop. You can use my code T4TKITTY10 for 10% off your order at Time For Tea Designs.

Kitty xx

Friday, 14 January 2022

Yum!


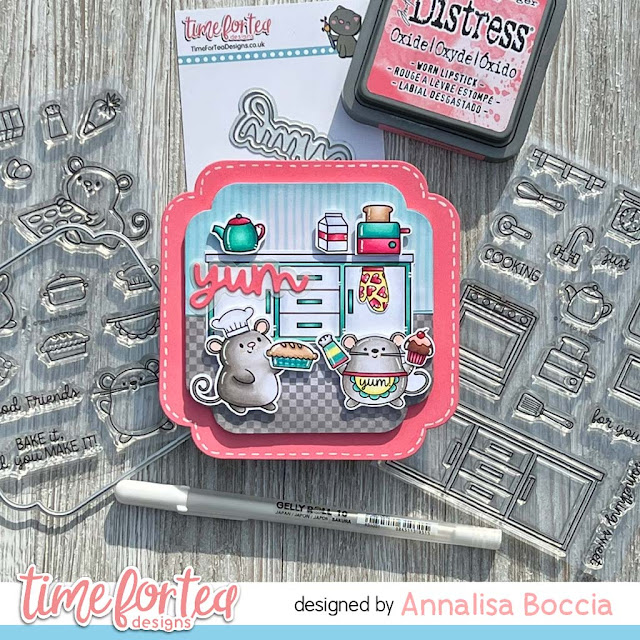
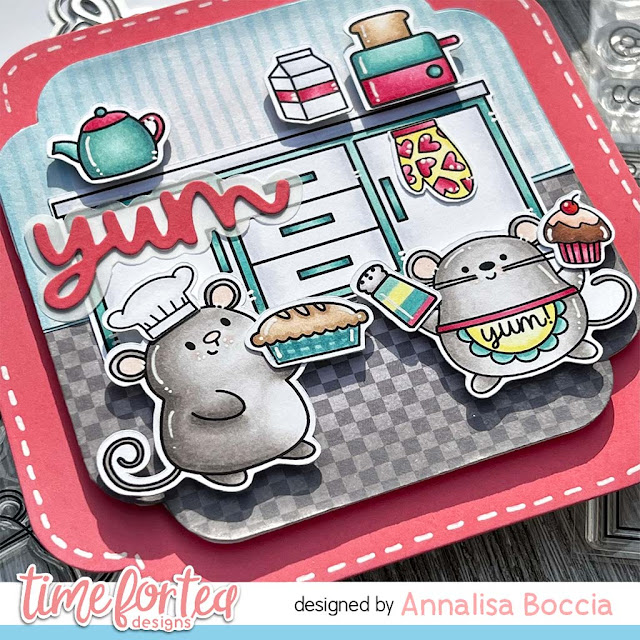
Hello and welcome! Annalisa here sharing a square kitchen scene card using two adorable stamp sets from the November release - Baked With More Love and Baked With Love Kitchen Add On stamp sets. I just love how well these two sets work together to make adorable kitchen scenes. 


I used some Worn Lipstick Distress Oxide ink and my Beautiful Rainbow Blender Brushes to colour some white card stock. I die cut this into a 4 1/2 by 4 1/2 square using the Square Label Dies and added some white stitched lines using a Gelly Roll Pen. I also used the pink-coloured card stock to die cut the 'Yum' sentiment die.

Next, I used the 4 3/4 die to cut a smaller square, I added two pieces of patterned paper that I had in my stash using liquid glue. I thought the checkerboard paper worked well for the kitchen floor and the stripes for wallpaper.


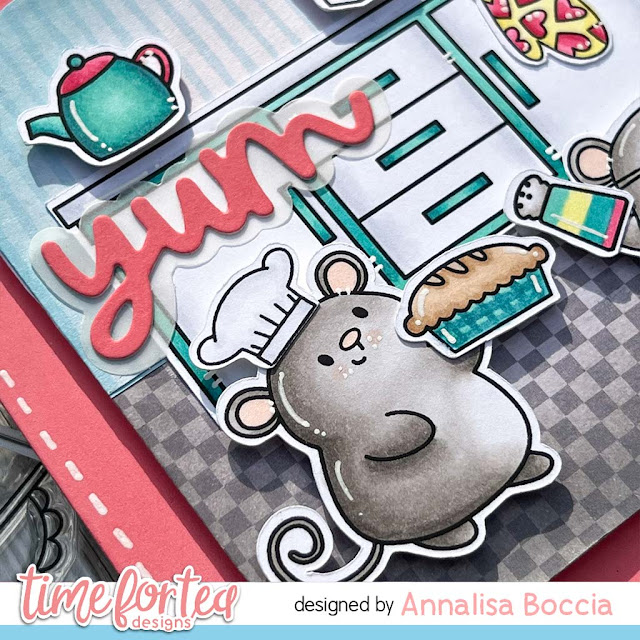
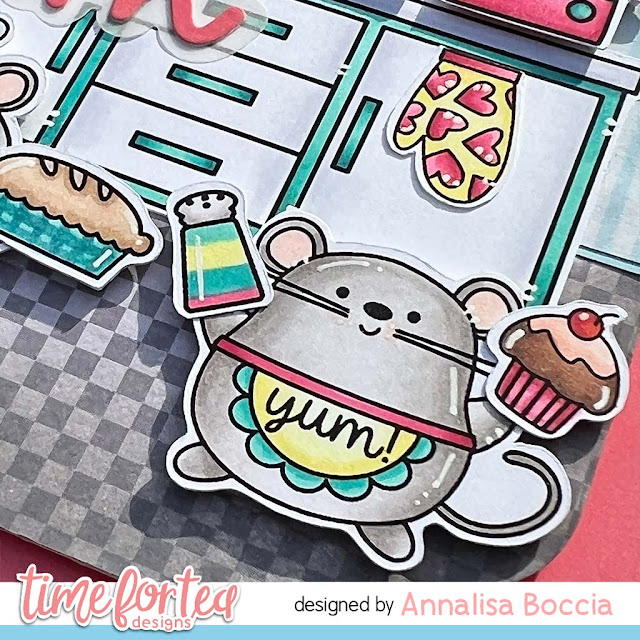
I stamped, coloured and die-cut all of the elements for the card and added some white gel pen accents. I added foam tape to the back of the smaller square frame and adhered it to the larger square. I then glued down the kitchen cupboards and oven mitt to the mini kitchen scene. I added foam tape and some liquid glue to all of the other elements and assembled the scene. 


I die cut out the Yum die outline from vellum and glued the word to it with liquid glue. I then adhered these both to the card.

This was such a fun card to create and I love the dimension and little elements.

Thank you so much for reading my blog post, you can use my discount code T4TANNALISA10 when you visit the Time For Tea Designs shop to get 10% off your order.


Thursday, 21 October 2021

Have a brew-tiful day

 Hello Tea Timers! Silvia’s back with a new coffee themed card!

I started die cutting one of the beautiful dies from the “Square Label" set from watercolor cardstock and I colored it with vintage photo Distress spray stain and walnut stain Distress oxide spray.

I then blended some ground espresso Distress oxide ink through the “Coffee Beans" stencil, I splattered with water and I covered droplets with vintage photo Distress embossing glaze and I heat embossed them. 

I also splattered with picket fence and antique bronze Distress paints.

I stamped images from “Coffee Lover" and “Snappy Before Coffee" stamp sets, I colored them with alcohol markers and I cut them with coordinating dies (here and here).

I next cut a rectangle from “Sweet Summer" patterned paper pad and I put everything together.

That’s all for today, I hope you’ll like the card.

Thank you so much for stopping by and don’t forget you can get a 10% off your Time for Tea order with the code T4TSILVIA10.

Hugs, Silvia.


Thursday, 7 October 2021

Coffee hugs

 Hi there! Silvia’s here today with a new coffee themed card.


I started die cutting a panel using one of the "Square Label" dies and I created my own pattern on it using the amazing "Coffee Beans" stencil. I used the stencil to create different layers: I started with tea dye Distress Oxide ink and then I go on with vintage photo and ground espresso Distress Oxide inks. For the latest layer I used vintage photo Distress embossing glaze....I really love its glossy effect! I also added some splatters with clean water and with the above brown inks to add some extra texture.


I stamped images from "Snappy Before Coffee" stamp set, I colored them with alcohol markers and I cut them with coordinating dies.


I die cut the "Hugs Sentiment" three times from brown cardstock, I glued one above the other and I added to my card with the super cute alligators.


I matted the square panel with one of the sheets from the "Sweet Summer" paper pad and that's all.


Thank you so much for passing by today, I hope you'll enjoy the card. And don't forget you can get a 10% off your Time for Tea order with the code T4TSILVIA10.

Have an amazing day! Hugs, Silvia.


Thursday, 30 September 2021

A Howling Good Day

Afternoon, DT Kitty here. It's time for my weeklycard. I decided to use the new Dog Gone Mutts Stamp Set as the doggies in it are just so cute! I went for a strong bright colour background...


I used the Dog Gone Mutts Stamps and coloured them in with my Copics. I then die cut the image with the coordinating Dog Gone Mutts Dies. I created the backrgound by blending Chipped Sapphire, Blueprint Sketch & Mermaid Lagoon Distress Oxide Inks. I then blended Mowed Lawn & Twisted Citron onto a strip of card and die cut it using the grass die from the Landscape Edge Dies. I die cut the panel using the Square Label Frame Dies and attached it onto kraft card. I used the fence, clouds and hedges from the Windmill Add On Dies. I blended some ink onto the hedges before adding them. I stamped the sentiment onto black card and heat embossed it in white then die cut it. I fixed everything onto the card with foam pads and added some gems to finish.


Dont' forget you can use my discount code T4TKITTY10 to get 10% off your order on the Time For Tea Designs website.

Kitty xx

Monday, 27 September 2021

Cute coffee themed tags

Happy Monday, Tea Timers!

DT Natalia here today. I cannot believe how quickly the weeks go by!

For today's post, I have a couple of cute tags which are probably my favourite of the samples I made for this release... I have wanted to make a pink sky for a long time, and it is just stunning, isn't it? 

These cuties from the Snappy before Coffee are also just adorable.


I used one of the dies from the Square label dies set to create my tags, and layered them 3 times for some nice thickness and dimension. 

I also used the grass dies from the Landscape Edge Standalone die set to create my scene. 

To colour the stamps, I used my alcohol markers and added some highlights with a white gel pen. I cut them all out, including the sentiments, with the coordinating dies

I assembled it all together and then used my crop-a-dile punch to add the eyelets. I love the finish look those eyelets give the tags, right?

To finish them off, I added quite a few sequins from my Little things from Lucy's card - did I go overboard? Maybe... but I couldn't resist them - they look so cute!


I hope you like these today and they inspire you to use your nesting dies differently and create some tags that go well with any present or as a little message for someone! 

You can use the code T4TNEILA10 to get 10% off your shop! 

Sending crafty hugs,

Natalia

Thursday, 23 September 2021

"Have a howling good day" window card

Hello crafty friends and welcome back to the Time for Tea blog! Silvia’s here today with you.

This week I decided to make a window card with some of the amazing products from the September release.

I started cutting two square panels from white card stock.

I ink blended one of them with tumbled glass and savaged patina Distress oxide inks for the sky and twisted citron and mowed lawn Distress Oxide inks for the grass. To ink blended it I used the new Beautiful Blender Brush in teal I added some soft white clouds with the “Sunrise Scene" stencil and I put it aside.


I then used the new "Square Label" dies to cut a window in the middle of the second square panel and I inked blended it with tea dye and fired brick Distress Oxide inks and the “Brick Wall" stencil. I also used this new amazing dies to cut a pink frame that I glued on my window.


I stamped images from the “Dog Gone Mutts" stamp set, I colored them with alcohol markers and I cut them with coordinating dies.

I put everything together and voila my window card, do you like it? I hope this.


Thank you so much for passing by today and don’t forget you can get a 10% off your Time for Tea order with my code, T4TSILVIA10.

Big hugs, Silvia.

Other Posts You Might Like