Pages

Showing posts with label distress ink. Show all posts

Friday, 20 March 2026

Birthday Herd


Happy Friday! DT Annalisa here sharing a spring birthday card I created using the Ewe are Moovellous A4 Printed Cardstock from Time For Tea Designs. These beautifully colored images, printed on high-quality cardstock, make it easy to create eye-catching cards.

I started by ink-blending Salvaged Patina Distress Ink over the Scene Builder 6x6 Stencil onto an A2 card base, then added blue ink splatter for extra interest.

Next, I die-cut white cardstock using the Wonky Window Cover Die and ink-blended it with Mowed Lawn, Peeled Paint, and Twisted Citron Distress Inks. To add texture, I splattered on Rustic Wilderness Distress Ink and Picket Fence Distress Spray Stain. I adhered this panel to the card base using liquid glue.

I then used the Ewe Are Moovellous coordinating dies dies to cut out images from the Ewe are Moovellous A4 Printed Cardstock. Using a combination of double-sided 1mm foam tape and liquid glue, I adhered the images and sentiments to the card.

To finish, I added clear Wink of Stella to the images for a subtle shimmer.


Thank you so much for reading my blog post! Don’t forget to use my discount code T4TANNALISA10 when you shop at Time For Tea Designs to receive 10% off your order.


Friday, 22 March 2024

I'm a Sucker For You


Happy Friday, everyone. DT Annalisa sharing a sweet pink card featuring the Sweet On You stamp set and the coordinating die set. I love the adorable critters holding all the sweets in this set.

I ink-blended kitsch flamingo, picked raspberry distress oxide onto white cardstock and added white watercolour splatter with a paintbrush. I die-cut this with the A2 Stitched Hearts Cover Die.


With my Beautiful Blender Brush, I ink-blended squeezed lemonade Distress Ink onto the upper half of an A2 card base. I used the small heart from You’re Engaged and the twirl and xo tiny stamps in Sweet On You and stamped them onto the top section with squeezed lemonade Distress Oxide. I ink-blended to the bottom section with lost shadow Distress Oxide. 

I die-cut a piece of Pretty Pastels 6x6 Paper Pad with the edge die in the Sweet Scalloped Dies collection. I ink-blended spun sugar Distress Oxide to the edges of the patterned paper and used liquid glue to adhere it to the inked A2 card base. 


I stamped and coloured (with Copics) several images from Sweet On You and Sweet Cart Critters and cut them out with their coordinating dies. I added white gel pen accents with a Gelly Roll Pen

I added double-sided tape to the back of the stitched hearts frame and pressed it onto the card base. Next, I used double-sided tape to adhere the mouse and sentiment to the card base. The remainder of the elements were adhered to the card using liquid glue.


Thank you so much for visiting my blog post, be sure to use my discount code T4TANNALISA10 when you visit the Time For Tea Designs shop to get 10% off your order.

Friday, 15 March 2024

Hoppy Easter Shaker


Happy Friday! DT Annalisa here to share an Easter shaker card I created using the Eggstra Special Birthday stamp set and their coordinating dies from Time For Tea Designs.  

I die-cut Distress Watercolor Cardstock by Ranger with the Slimline Scalloped Trio Circle Nesting Dies and the Eggstra Special Slimline Add-On Horizontal Die. I pressed peacock feathers, picked raspberry Distress Ink onto my glass matt, and sprayed water onto the inks. I pressed the die-cut watercolour panel into the ink several times and heat-set it.


I trimmed purple cardstock to go behind the watercoloured panel and glued it down to a slimline card base. I used liquid glue to adhere a trimmed piece of acetate over the egg panel holes.

Next, I added two layers of double-sided tape on the back of the egg panel and added pink, purple, blue and clear sequins. I then pressed the card base onto the double-sided tape to seal in the sequins.


I stamped and coloured (with Copics) several images from Eggstra Special Birthday and cut them out with their coordinating dies. I added white gel pen accents with a Gelly Roll Pen

I used liquid glue to adhere the stamped elements to the card. 


Thank you so much for reading my blog post. Remember to use my discount code T4TANNALISA10 when you visit the Time For Tea Designs shop to get 10% off your order.

Friday, 13 October 2023

Ocean Waves


Happy Friday! DT Annalisa here today sharing an ocean-themed card I created using several adorable stamps from Time For Tea Designs. I love how many ocean critters are available now in the T4T portfolio as making ocean-themed cards is one of my favourite things to do! 

I used the following supplies to create the card:


I created an inky ocean using ink smooshing with peacock feathers Distress Ink, water and some acetate. I die-cut the panel with the Ocean Waves Dies and set it aside to dry. For the sand, I ink-blended Kraft cardstock with Vintage Photo Distress Oxide. I also added brown splatter with a paintbrush. I die-cut the panel with the Landscape Edge Standalone Die.


I added white water colour splatter to the ocean and sand background sections. I used liquid glue to adhere the ocean and sand sections to an A2 card base.

I stamped and coloured (with Copics) several images from the stamp sets listed above and cut them out with their coordinating dies. I added white gel pen accents with a Gelly Roll Pen.


I added sparkles to sections of the images with a Quickie Glue Pen and Lawn Fawn Prisma Glitter. 

I adhered the images to the card base using liquid glue or double-sided foam tape for dimension.

I stamped the ‘wavin' hello!’ sentiment from Fintastic Friends and cut it out with the coordinating die. I added double-sided foam tape to the back and stuck it down to complete the card.


Thank you so much for reading my blog post. Remember to use my discount code T4TANNALISA10 when you visit the Time For Tea Designs shop to get 10% off your order.

Friday, 17 February 2023

Big Bunny Hello


Happy Friday! DT Annalisa here today sharing a no-line coloured card featuring several Time For Tea Designs products. I don't often use this technique with my Copics as it is out of my comfort zone, but I am glad I did.

For the background, I added Saltwater Taffy, Abandoned Coral and Picked Raspberry Distress Oxide ink to watercolour paper with a paintbrush. I added some splatter and spots with a paintbrush for added interest.

Once the panel was dry, I used the Dotty Hearts Panel Die to add the pretty stitched hearts. I adhered this to an A2 card base (8.5 by 4 1/4 inches) with double-sided tape. I die-cut the frame from the Zig Zag Frame & Tag Dies and glued it to the panel.


I stamped the bunny and phone from Let's Chat with pale Fadeout ink from Ink on 3, which works well for no-line colouring. I used my Copics, adding darker tones near the edges of the images; this helped to ensure that the lines were no longer visible once the image was coloured in. I added white gel pen accents before using double-sided foam tape to adhere the images to the card base.

I stamped the sentiments from Let's Chat with Versafine Onyx Black and cut them out with the coordinating die set.


I used the large heart die from the Slimline Postage Stamp Frame Dies to die-cut three hearts. I ink-blended them with Salvaged Patina, Stormy Sky and Faded Jeans Distress Ink using my Beautiful Blender Brushes. I added white splatter using a paintbrush and Copic opaque white.

I used liquid glue to adhere the three coloured hearts to the card. I then used double-sided foam tape to stick the sentiments to the card. I add three blue Festive Fun Designer Enamel Dots for the final touch.


Thank you so much for reading my blog post, you can use my discount code T4TANNALISA10 when you visit the Time For Tea Designs shop to get 10% off your order.

Friday, 2 September 2022

Just Keep Swimming Box Card


Hello everyone, happy Friday. DT Annalisa here today sharing a 3D box card I created using some new and older products from Time For Tea Designs. When I saw the ocean-themed July release, I knew I had to make an underwater box card featuring all the sea creatures.

I cut some Distress White Heavy cardstock by Ranger and used the 'ink smooshing' technique to add watered-down Distress Ink in Peacock Feathers. I pressed Peacock Feathers down onto my glass matt and sprayed it with water. I pressed the paper down into the watercolour to create a watery look. I then die-cut two pieces of this using the Box Clever Die Set. I also cut two wavy inserts using some dies I had in my stash and glued them on top of the inserts. Visit T4TD over on YouTube for a video on assembling the box. 


I will warn you that the Distress White Heavy cardstock no longer supports water the way it used to. My original Distress White Heavy cardstock could handle a lot of water. However, I purchased some new packages recently, and they 'bubbled up' whenever I added water. I will have to use the Distress Watercolor Cardstock by Ranger for watercolour techniques like this in the future.

I stamped the images from the Fintastic Friends and Beach Buds with Ink on 3 Blackout Ink and coloured them with my Copics. I cut them with their coordinating die sets; Fintastic Friends coordinating die and Beach Buds coordinating die. I added some white gel pen accents and Prisma Glitter. to some elements. I stamped the sentiment from Fintastic Friends using Versafine and die-cut it out with its' coordinating die. 

I assembled the box card using double-sided tape. I then used liquid glue to add all the critters and elements to finish the card.

Thank you so much for reading my blog post. Don't forget to use my discount code T4TANNALISA10 when you visit the Time For Tea Designs shop to get 10% off your order.

Be sure to follow me on Instagram and see all my latest projects.


Friday, 5 August 2022

Have a Whale of a Time


Hello and welcome! DT Annalisa with another card I created using the brand new release! For my card, I experimented with watercolour and used the Fintastic Friends and Beach Buds stamp and die sets for this underwater-themed card.

I used my A2 Layering dies to cut down a piece of Tim Holtz Distress Watercolor Cardstock 4 5/16 by 3 3/4 inch panel. I pressed some Peacock Feathers Distress Ink onto my glass mat and sprayed it with a bit of water. I added some clean water with a paintbrush to the water colour panel and added some Peacock Feathers Distress Ink with my paintbrush. This created the water background for the scene. I also added some water bubbles and splatter.

A big thanks to Jenn Shurkus and Lawn Fawn and their 'Create with Us' series for the inspiration and how-to for this watercolour technique. As a perfectionist, I struggle with water colouring, but Jenn shows you how in this terrific 'pool party' class which you can watch anytime on replay.

I stamped (with Ink on 3 Blackout detail ink) and coloured (with Copics) the images and then die-cut them with their coordinating dies. I heat embossed the sentiments onto black cardstock using white Alabaster ultra fine embossing powder by Brutus Monroe. I then die-cut the sentiments out with their coordinating dies. I really like the wavy dies in the Beach Buds coordinating dies set!

I added foam tape to the sentiments, whale and dolphin and adhered them to the panel. I used liquid glue for the remainder of the elements.


The A2 card base was created using light blue card stock. I added the sea panel to this with foam tape.

I added glossy accents to the whale, small fish and water bubbles to complete the card.

Thank you so much for checkout out my blog post. Don't forget to use my discount code T4TANNALISA10 when you visit the Time For Tea Designs shop to get 10% off your order.


Wednesday, 18 May 2022

Video: Movie Night & Popping Popcorn Card

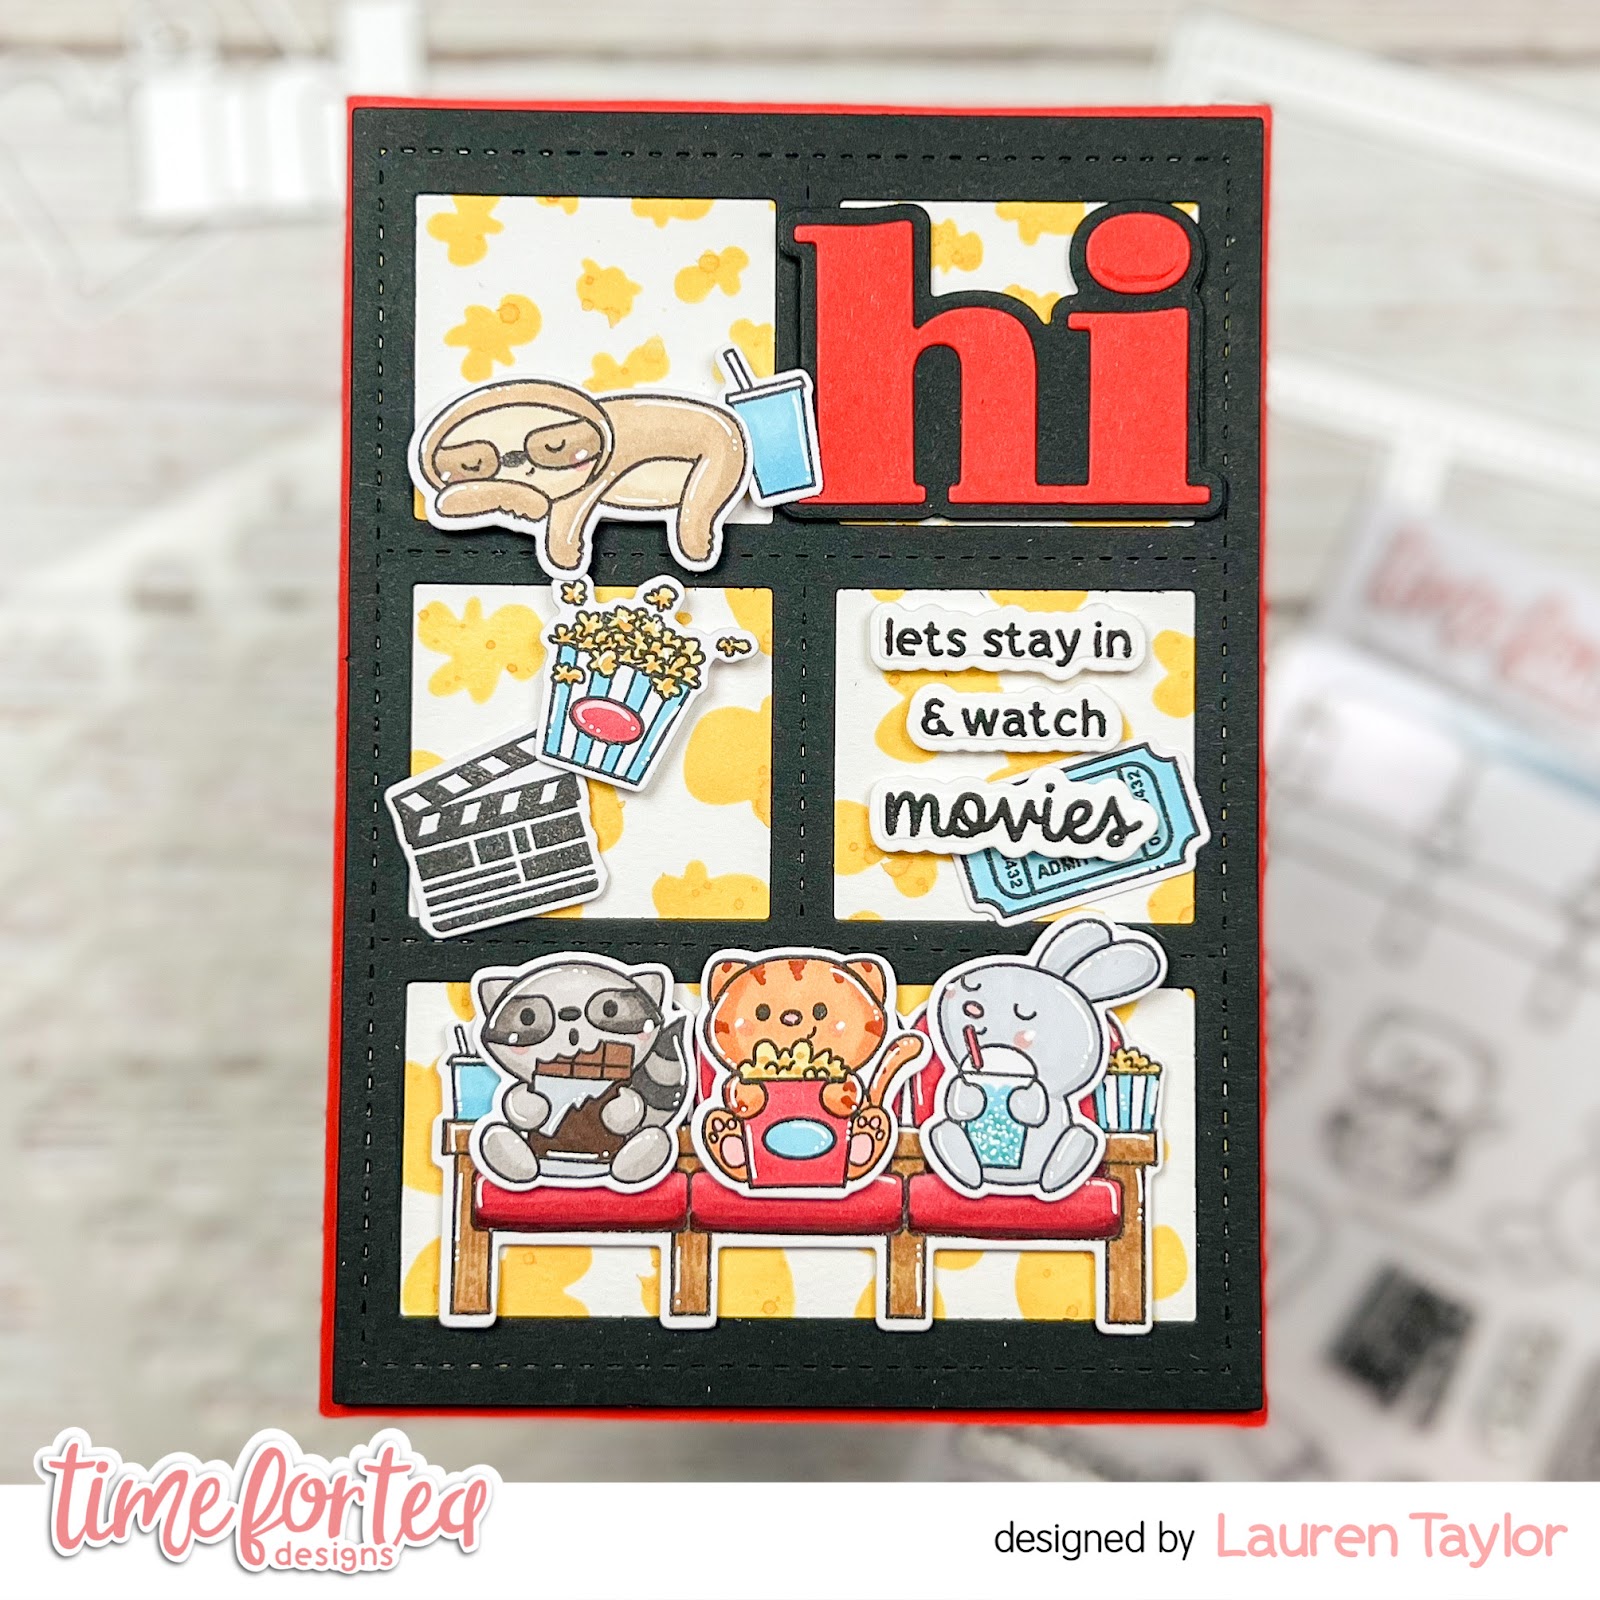
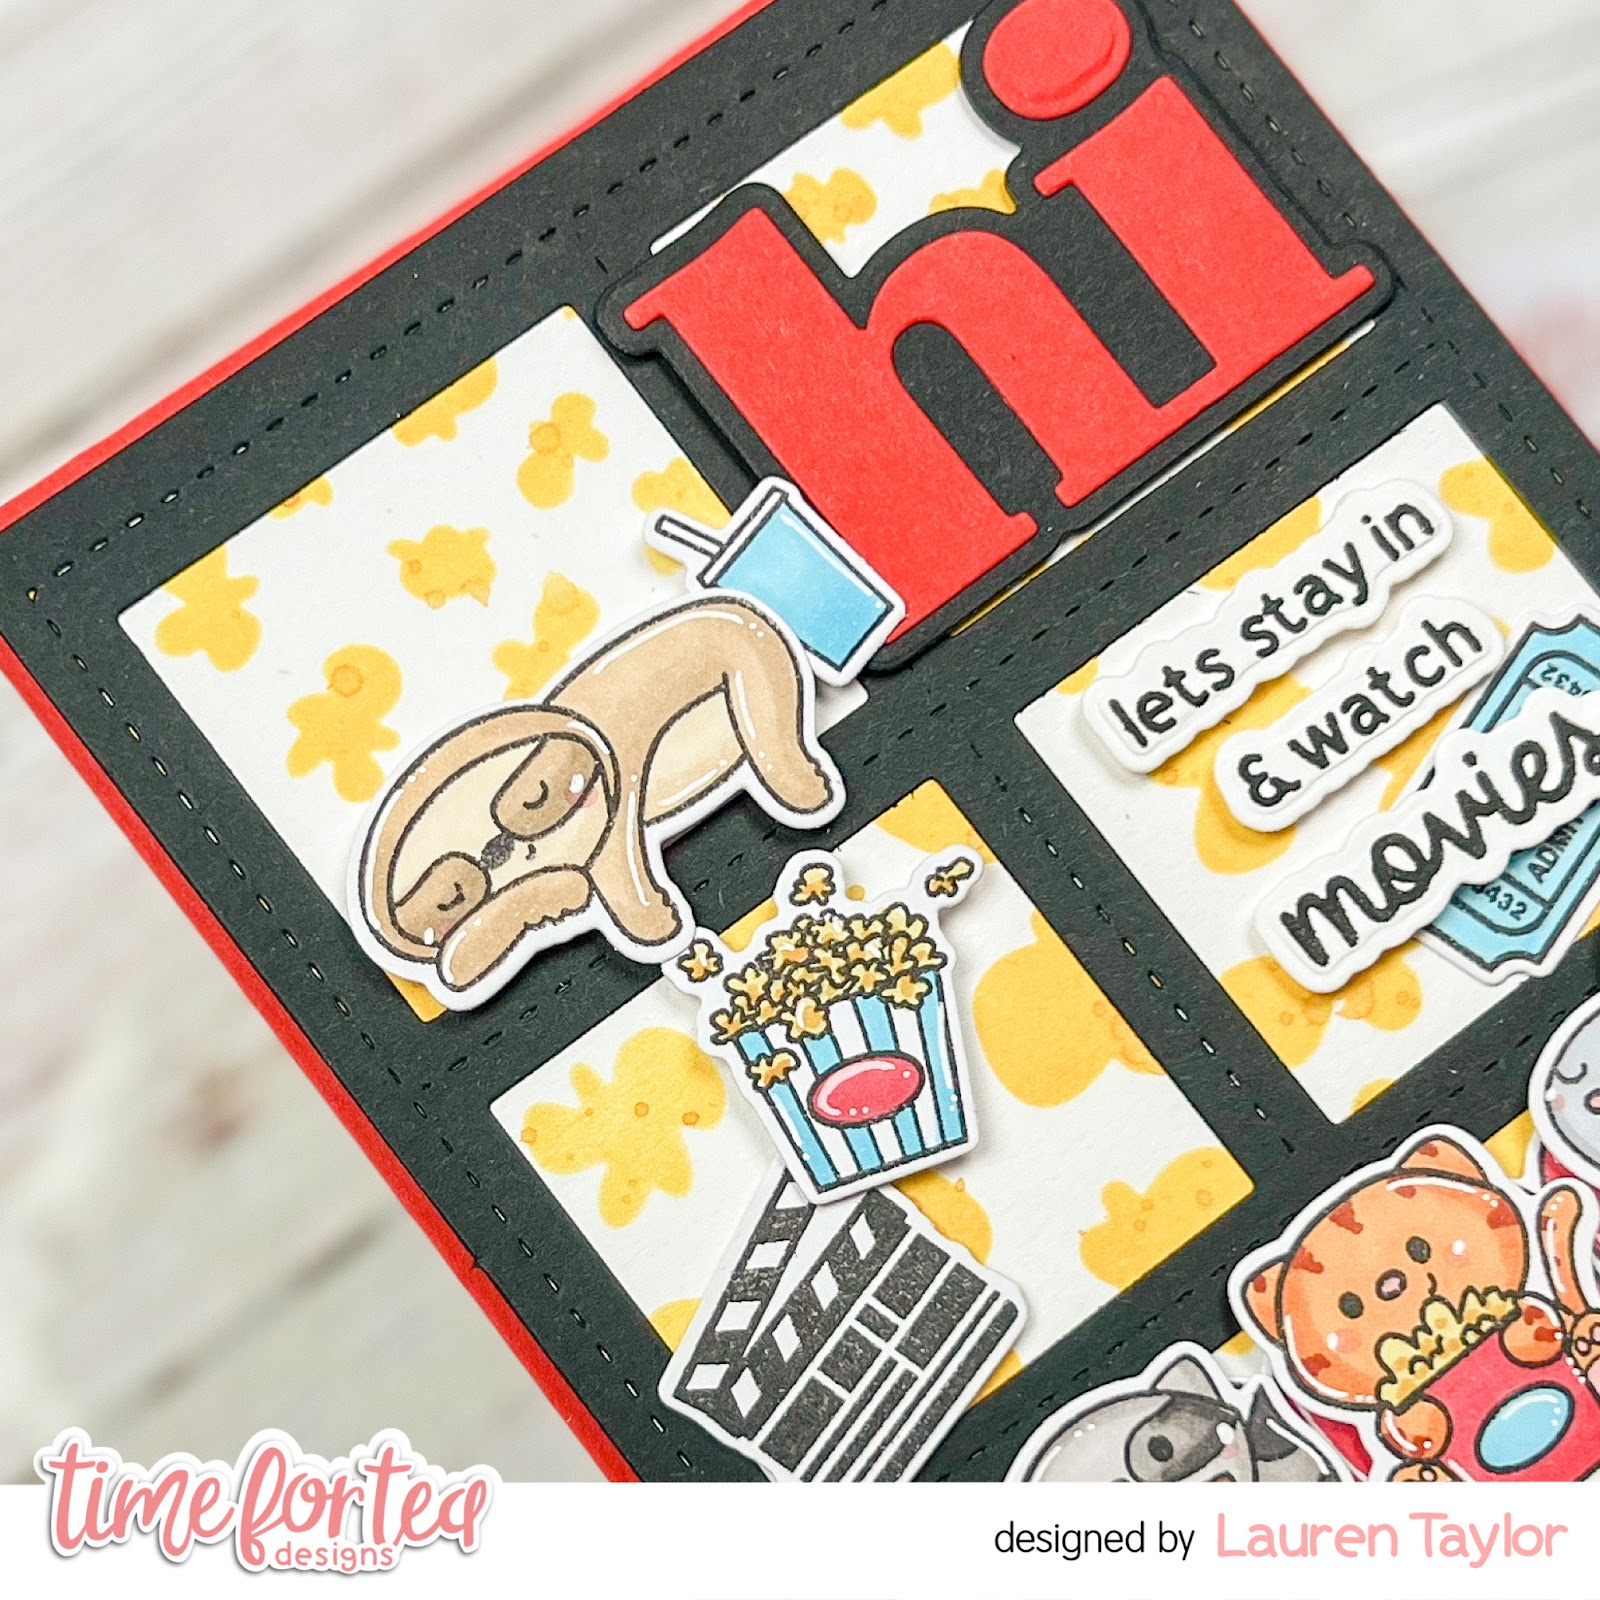
Hi, Friends! Lauren here and I'm back with a new video tutorial on YouTube! This month I using some of my favorite new products from the latest release. Can you spot the Popping Popcorn Stencil, Movie Night Stamps with Coordinating Dies, Stitched Window Cover Die and the Hey, Hello, Hi Dies?

In today's video I will share with you how I created my background and share how I laid out my design. There is a lot of layering in this card, but you can easily remove some layers by gluing elements of this card with glue rather than foam adhesive.

Click the image below to start the video and make sure to leave a comment if you have any questions!


Here is a quick list of the Time For Tea Designs supplies I used and make sure to enter my code T4TLAUREN10 at checkout for 10% off your order!

Movie Night Stamp and Die Collection

Movie Night Clear Stamp Set

Movie Night Coordinating Die Set

Stitched Window Cover Die

Hey, Hello, Hi Dies

Popping Popcorn 6 x6" Stencil

Thanks for joining me today and see you next month!

XO. Lauren

Find me on my social media here!

Tuesday, 26 October 2021

Clean and Simple Fall Card: Hogs & Kisses

Hey everyone, Lien here. Today I am sharing this card on the Time For Tea Designs Youtube Channel. I am featuring the Hogs & Kisses stamp set from Time For Tea Designs. For this card, I tried to feature some fall/ autumn themed colors in a CAS card. I hope you like it xxx 


You can click HERE to watch on the Time for Tea Designs Youtube channel.


I started by coloring one of the pigs from the Hogs & Kisses stamp set from Time for Tea Designs using my copic markers (listed below). Afterwards, I used the matching dies to cut it out. 


For the background, I took an A2 sized panel, after masking off an area using purple tape, I used my distress inks to create a gradient background. Afterwards, I white heat embossed the sentiment on top of this gradient. 


As everything was prepped, I adhered it all together on a card base. I finished the card of using some Teardrops and glossy accents. I hope you like the card!


Thinking of buying some T4TD supplies? With T4TLIEN10 you will get 10% of your order at Time For Tea Designs! Happy shopping xxx 


Supplies:
  • Time For Tea Designs - Hogs & Kisses
  • Time For Tea Designs - Hogs & Kisses Die
  • Mama Elephant - Basic Rectangles
  • Transotype: Perfect Colouring Paper
  • Gina K. Designs Amalgam Ink Obsidian 
  • Versamark Clear Embossing Ink
  • Distress Inks: Wild Honey, Fired Brick, Aged Mahogany
  • Copic Markers: E13, E11, E01, E00 / G00, G000 / BG78, BG96, YG17, YG03, YG00 / E77
  • Ranger Embossing Powder: White (super fine detail) 
  • Ranger: Glossy Accents
  • Black Glaze Pen
  • Little Things from Lucy's Cards: Teardrops
  • Thin Foam Squares from Scrapbook Adhesives
  • NUVO Deluxe Adhesive
  • Pritt Adhesive Roller

Tuesday, 5 October 2021

Follow Your Dreams with Unicorns in Training

 Hi crafty friends!  Its Elaine here today with my final Guest Designer card.  I absolutely adore anything and everything unicorns so I had to use this Unicorns in Training set.  

I stamped lots of images from the Unicorns in Training stamp set on to copic friendly cardstock.  I used some fun pink and purple copic markers to colour the mains and tails of the unicorns and for the body I used some light cool greys to give the image depth.  Here are the copic colours I used:

RV19, RV17, RV10, B66, B63, B60, V15, V12, V01, RV10, RV00, Y15, Y13, Y11, C3, C1, C00

I used the Unicorns in Training co-ordinating dies to cut out all the images and set them aside to work on the background.


Taking a piece of heavyweight white cardstock measuring 3.25" x 8.25" I began blending on Distress Ink in the shades Picked Raspberry, Blueprint Sketch and Dusty Concord in sections on the card.  I used the Time for Tea Designs Blending brushes to apply the ink and a very light hand to ensure a smooth blend.  To give the background a distressed look I splattered on some clean water with a smooth paint brush and dabbed the card with paper towel to leave some white spots.  I also added some ink splatters in the same Distress Ink colours over the co-ordinating areas to look like stars in a unicorn utopia!

I ran the distressed panel through my die cutting machine with the Slimline Scalloped Trio Circle Nesting Dies to created the three scalloped windows  I also second largest nesting rectangle to trim down the panel.  To create the panels behind the windows I blended on Distress Inks in Picked Raspberry, Blueprint Sketch and Dusty Concord on to small pieces of card slightly larger than the window openings.  I concentrated more colour at the top of the panel to give a gradient effect.

I used the largest rectangle die in the Slimline Scalloped Trio Circle Nesting Dies to cut a base from white card and adhered the two panels together.  I made my cardbase by cutting a piece of white heavyweight card to 7" x  by 8.5" and scored at 3.5 on the 7" edge.  Before applying the scalloped aperture panel to the card base I adhered the gradient panels behind the windows then secured the whole piece to the front of the cardbase.  I used liquid adhesive to adhere all my stamped images

For the sentiment I white heat embossed the word 'Dreams' and 'Follow your' on to white card stock.  I gently applied some Dusty Concord Distress Ink on the heat embossed sentiments to help everything co-ordinate.  The first part of the sentiment was cut into a thin strip and secured behind the die cut 'Dreams' to help it all blend together.

Finally, I went over (nearly all!) of the images with some Wink of Stella clear sparkle pen.  There can never be too much shimmer on a unicorn card!

That finishes up this card! Thank you so much for joining me today and I hope you have enjoyed all of my creations for Time for Tea Designs.  Take care everyone and have a great week! xxx Elaine xxx

.



Tuesday, 28 September 2021

HAPPY MAIL Noline coloring using distress inks

Hey everyone, Lien here. Today I am sharing this card on the Time For Tea Designs Youtube Channel. I am featuring the Dog Gone Mutts stamp set from Time For Tea Designs. For this card, I did some no-line coloring using distress inks. I hope you like it xxx 


You can click HERE to watch on the Time for Tea Designs Youtube channel.


I started by stamping out the dogs from the Dog Gone Mutts from Time for Tea Designs using antique linen distress ink onto water colour paper. I smooched several distress inks down onto a media mat and used them to do the water coloring of the critters. 


Once I had everything colored in, I cut the paper to an A2 sized panel. I also die cut a frame. After assembling the card onto a card base, I finished it using some heart sprinkles. I hope you like the card!


Thinking of buying some T4TD supplies? With T4TLIEN10 you will get 10% of your order at Time For Tea Designs! Happy shopping xxx 


Supplies:
  • Time For Tea Designs - Dog Gone Mutts
  • Waffle Flower - A2 Layers Die
  • WaterArt: Water Colour Paper 
  • Gina K. Designs Amalgam Ink Obsidian
  • Distress Inks: Antique Linen, Vintage Photo, Ground Espresso, Gathered Twigs, Brushed Corduroy, Frayed Burlap, Pumice Stone
  • White Gelly Roll Pen 
  • Trinity Stamps: Heart Sprinkles - Coffee Bean
  • Darice Thin Foam Strips
  • NUVO Deluxe Adhesive
  • Pritt Adhesive Roller

Wednesday, 4 August 2021

Big Birthday Wishes Video Tutorial

 Hello Vic here today and I have a fun video tutorial for you today. I wanted to make a bright birthday card with lots of ink blending on my background. 


Here are the products you need for the card:


My card size is an A6 top folding card. I trimmed down another piece of white card to A6 for my card front. This is the piece that I will be ink blending onto.


I added some distress ink colours to my card front. Using the  Bokeh Bubbles 6x6 Stencil I then applied a red ink over the stencil. I added some splatters of black ink to my card front once the background was dry.


I then stamped my images using the Birthday Bear Stamp and Die Collection  . I coloured in my images with copic markers then using the coordinating dies I run the images through my die cutting machine. Here is a list of the copic markers I used to colour in my images. 


I then used a piece of black foam and using the Big Birthday Wishes Sentiment Die I run this through my die cutting machine. I used foam instead of card to give the sentiment a bit more bulk but if you don’t want to add more bulk to your card just use a piece of black card. 


I then stamped some balloons to add to my card but I die cut the balloon first as I found this easier to stamp the balloons and string. I used the same red copic markers to colour the balloons in and I added these to my card once all my images were adhered down. 


Once your images are adhered into the card your card is now complete. I had so much fun making this card and using bright colours on my background I hope you will give this a go. Don’t forget to tag us in your creations so we can see your cards and crafty projects.
You can also save 10% off your order using the code: T4TVICKI10 at the checkout this includes the brand new release too!

Thank you so much for popping over today!
Vic


Tuesday, 6 July 2021

Life Would Suck Without You Video Tutorial

 Hello crafty friends Vic here today and I’m sharing a fun video tutorial.


I wanted to make a fun and colourful background and I also wanted to share a technique using emboss resist. I love using this technique especially with watercolour paints. 


For my background I used the A5 Woodgrain Clear Stamp. This is one of my favourite stamp sets I love the design and the texture it gives. I used a piece of A6 watercolour card and I stamped my ink with versamark ink. This will act like a glue to hold your embossing powder. I then sprinkled over some Opaque Bright White Embossing Powder onto my card and heat set the powder with my heat gun. I added some water and then added some distress inks onto my watercolour card. Using the heat gun I sped up the drying process. 


I stamped out my images using the Hillside Village Clear Stamp Set and I used the Coordinating Dies. I coloured the houses in with watercolour paint. I then stamped out my cute snails using the Snail Mail Stamp Set and Coordinating Dies. I coloured the snails and other accessories in with my copic markers. (Copic markers are listed on the screen of the video tutorial).


I also wanted to add a frame to my card and I used the Smile Inverted Scallop Frames Die. I used a pretty pink card to die cut my frame and I trimmed away the edges. I applied some foam tape to my frame and adhered this onto my card. I added all my images and then used a sentiment from the Brighter Days Sentiment Cards


I love how my card turned out I think it looks really bright and colourful. I hope you give the resist embossing technique a try it’s really fun to do and makes a watercolour background more fun. 

You can save 10% off your Time For Tea Designs purchases using the code: T4TVICKI10 at the checkout and this also includes new release products too. 

Thank you so much for stopping by today!

Hugs

Vic

Other Posts You Might Like