Pages

Showing posts with label Bearing Gifts. Show all posts

Tuesday, 22 February 2022

Love You Lots - alcohol inks on vellum


Hello Tea Timers!

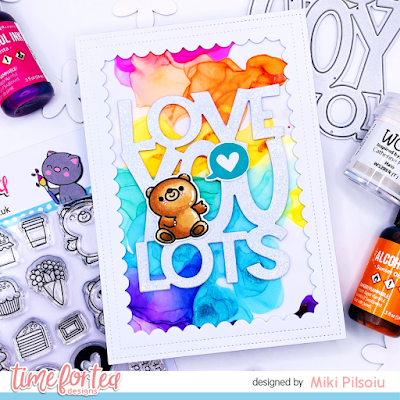
It's Miki here and today I'm back with new inspiration! I made this card while I was at Natalia's house and it was so much fun, we tried a lot of alcohol ink techniques.

Firstly, I used the Smile inverted scallop die for the frame. I cut it 3 times from white cardstock and glued them together. Next, for the background I used alcohol inks on vellum. The colours that I chose are:

  • Gumball
  • Sunset Orange
  • Dandellion
  • Clover
  • Glacier
  • Boysenberry
I glued the frame on top of the vellum and then added a piece of white cardstock at the back for extra support. 

Next, for the sentiment I used the Love You Lots Large Sentiment Die. I cut it 3 times from white cardstock. To add some interest I embossed one of the die cuts in WOW! Halo embossing powder and then glued all 3 layers together. I added the sentiment to the middle of my card panel.

For the images I used the Bearing Gifts Stamp Set. I stamped the little bear and coloured him in. I then used the matching dies to cut him out. For the speech bubble I used the Concord & 9th Oceanside ink to stamp and the matching die to cut it out. 

I added them to my card panel using foam tape. I then created a matching card base and glued the panel on top.

This card was so much fun to create. I'm no expert in alcohol inks so I don't play with mine often enough, but they're always fun to experiment with. Do you have any technique you'd like to use more?

Please remember to use my code T4TMIKI10 for 10% off your order in the shop.

Hugs,
Miki

Thursday, 18 February 2021

You Are Awesome Critter Card

 Hello DT Vic here today and I'm sharing a very sweet critter card with you. 


I love mixing up different Time For Tea Designs stamp sets and I thought it would be fun to add some colours to my card too. So for my card today I used the Be Slothy Stamp SetBeavering Away Stamp Set and the Bearing Gifts Stamp Set. I also used the You Are Awesome Sentiment Die for my greeting.


To start with I ink blended a plain piece of white card using purple, yellow and green distress inks and my Beautiful blending brushes. I then stamped some leaves and some dots.


Next I stamped and coloured my images using copic markers, using the coordinating dies I ran them through my die cutting machine. 


I then die cut my You Are Awesome Sentiment Die using green and pink card. I adhered these together using PVA glue and then applied them to the middle of my card using foam tape. I then added all the critters around the edge of my card. 


Once all the critters are adhered down your card is now complete. I loved how this turned out and it was so fun to use a sentiment die as my greeting.

Don't forget you can save 10% off your Time For Tea Designs Purchases using the code: T4TVICKI10 at the checkout. This includes the new release items too how amazing is that. 

Jo will also be crafting live on our Facebook page tonight at 8pm pop over and say hello.

Thank you so much for stopping by today!

Vic 

Saturday, 9 January 2021

Home Sweet Home


Happy Saturday everyone,  It's been a long week and I'm so ready for the weekend. I'll be staying home and catching up some missed crafting after a our first week of home school. What about you? Are you creating this weekend?
This week I was sad I didn't get to use the Spooktacular Stamp set as much as I wanted to at Halloween so I tried to think of ways to stretch it. I love to stretch my stamps as we know they aren't cheap so I like to get the most out of them.
I decided to combine it with the bear and accessories from the Home Sweet Home stamp set and another of the bears from the Bearing Gifts stamp set. I love that the bears all work so well together.
I started by cutting out three squares from the Quilted Square Nesting Dies two will form our card base and the other I used for the front of the card. I stamped out all my images and coloured them up with Copic Markers, the sky I just coloured up really simply with no shading other than with the little moons. 
The bears I chose some soft browns for so that they would stand out against that dark sky. Then for the books I like to not use too many colours so it doesn't distract the eye and keeps the card more uniform. I used the same yellow as the stars and used a darker shade of blue of the sky and mixed in some rich reds, and oranges. Then using the same red for the little cup. 
Once everything was coloured up I Die cut them out for the books though I removed the shelf that was under them afterwards as I wanted it to look like they were stacked up on the floor next to them.
I also needed to cut out the scallop circle die from the Spooktacular Coordinating Die set again out of white card this will just frame the sky like a window but still be quite subtle.
I popped everything on my card and then finished it up with the Home Sweet Home sentiment and that was my card finished up. I hope you like it and don't forget you can get 10% off in the shop using code T4TNATALIE10
Have a lovely weekend and I'll see you again next week!

Thursday, 5 November 2020

A Card Full Of Critters


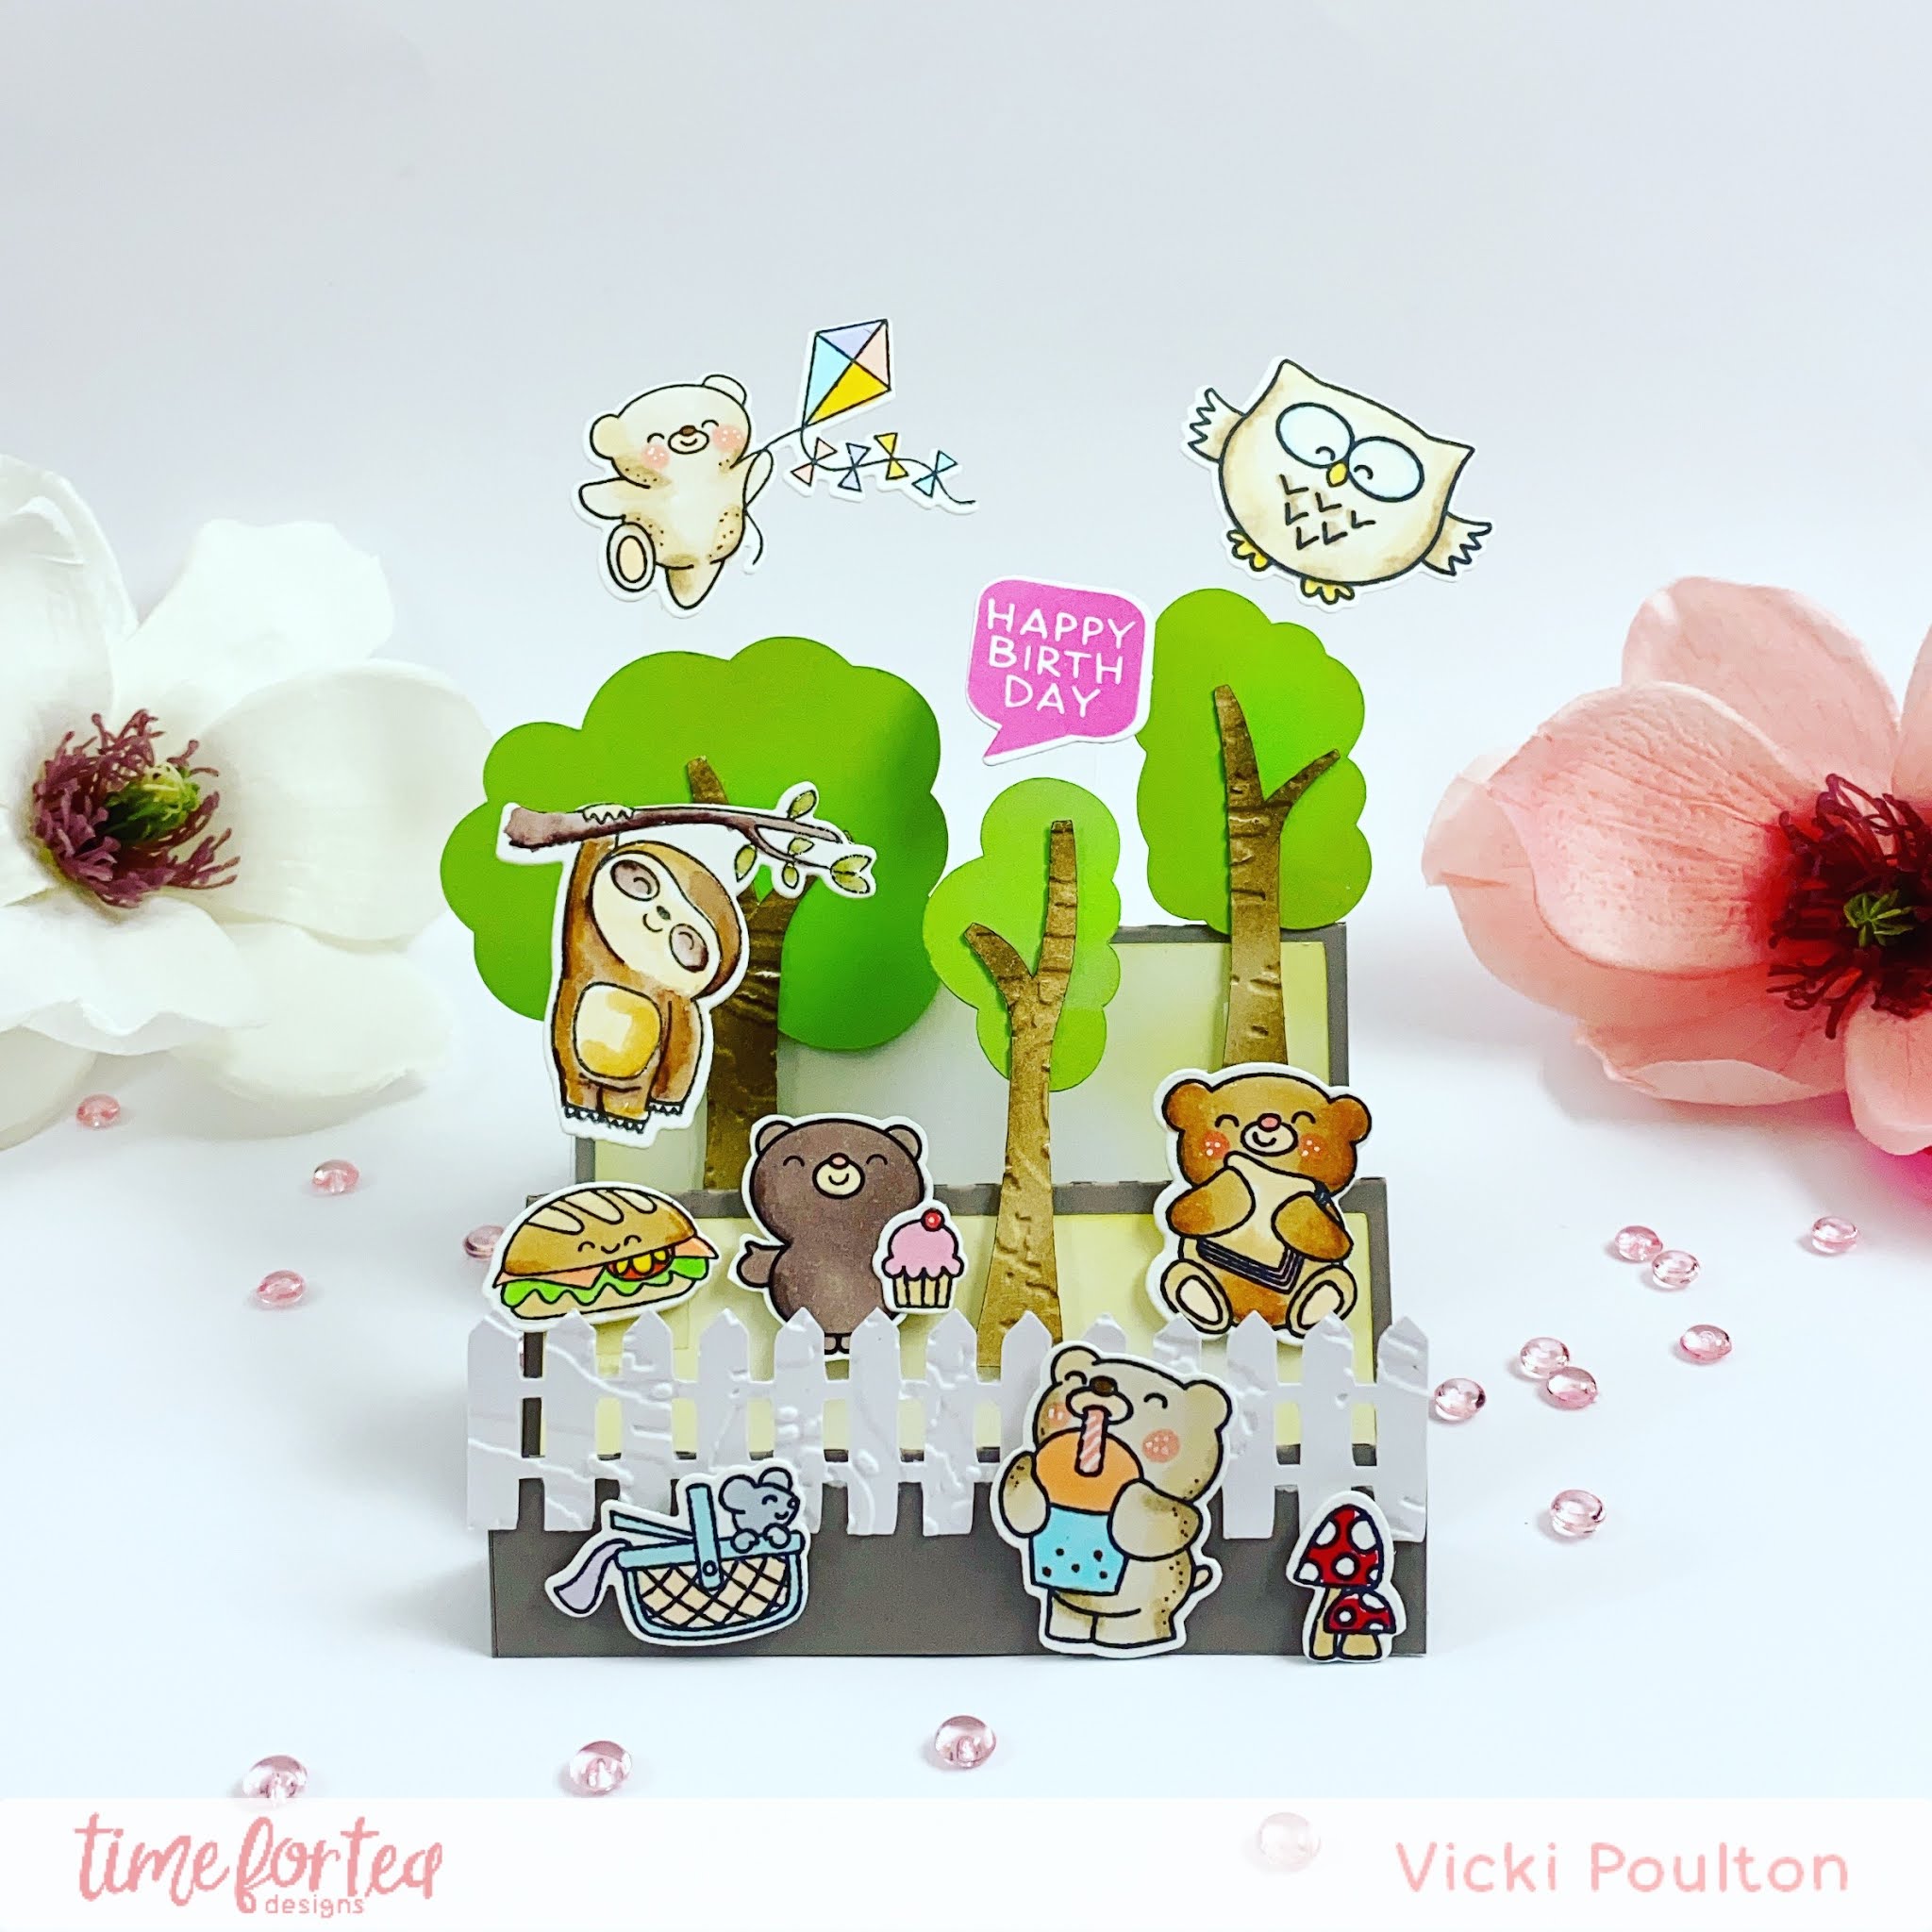
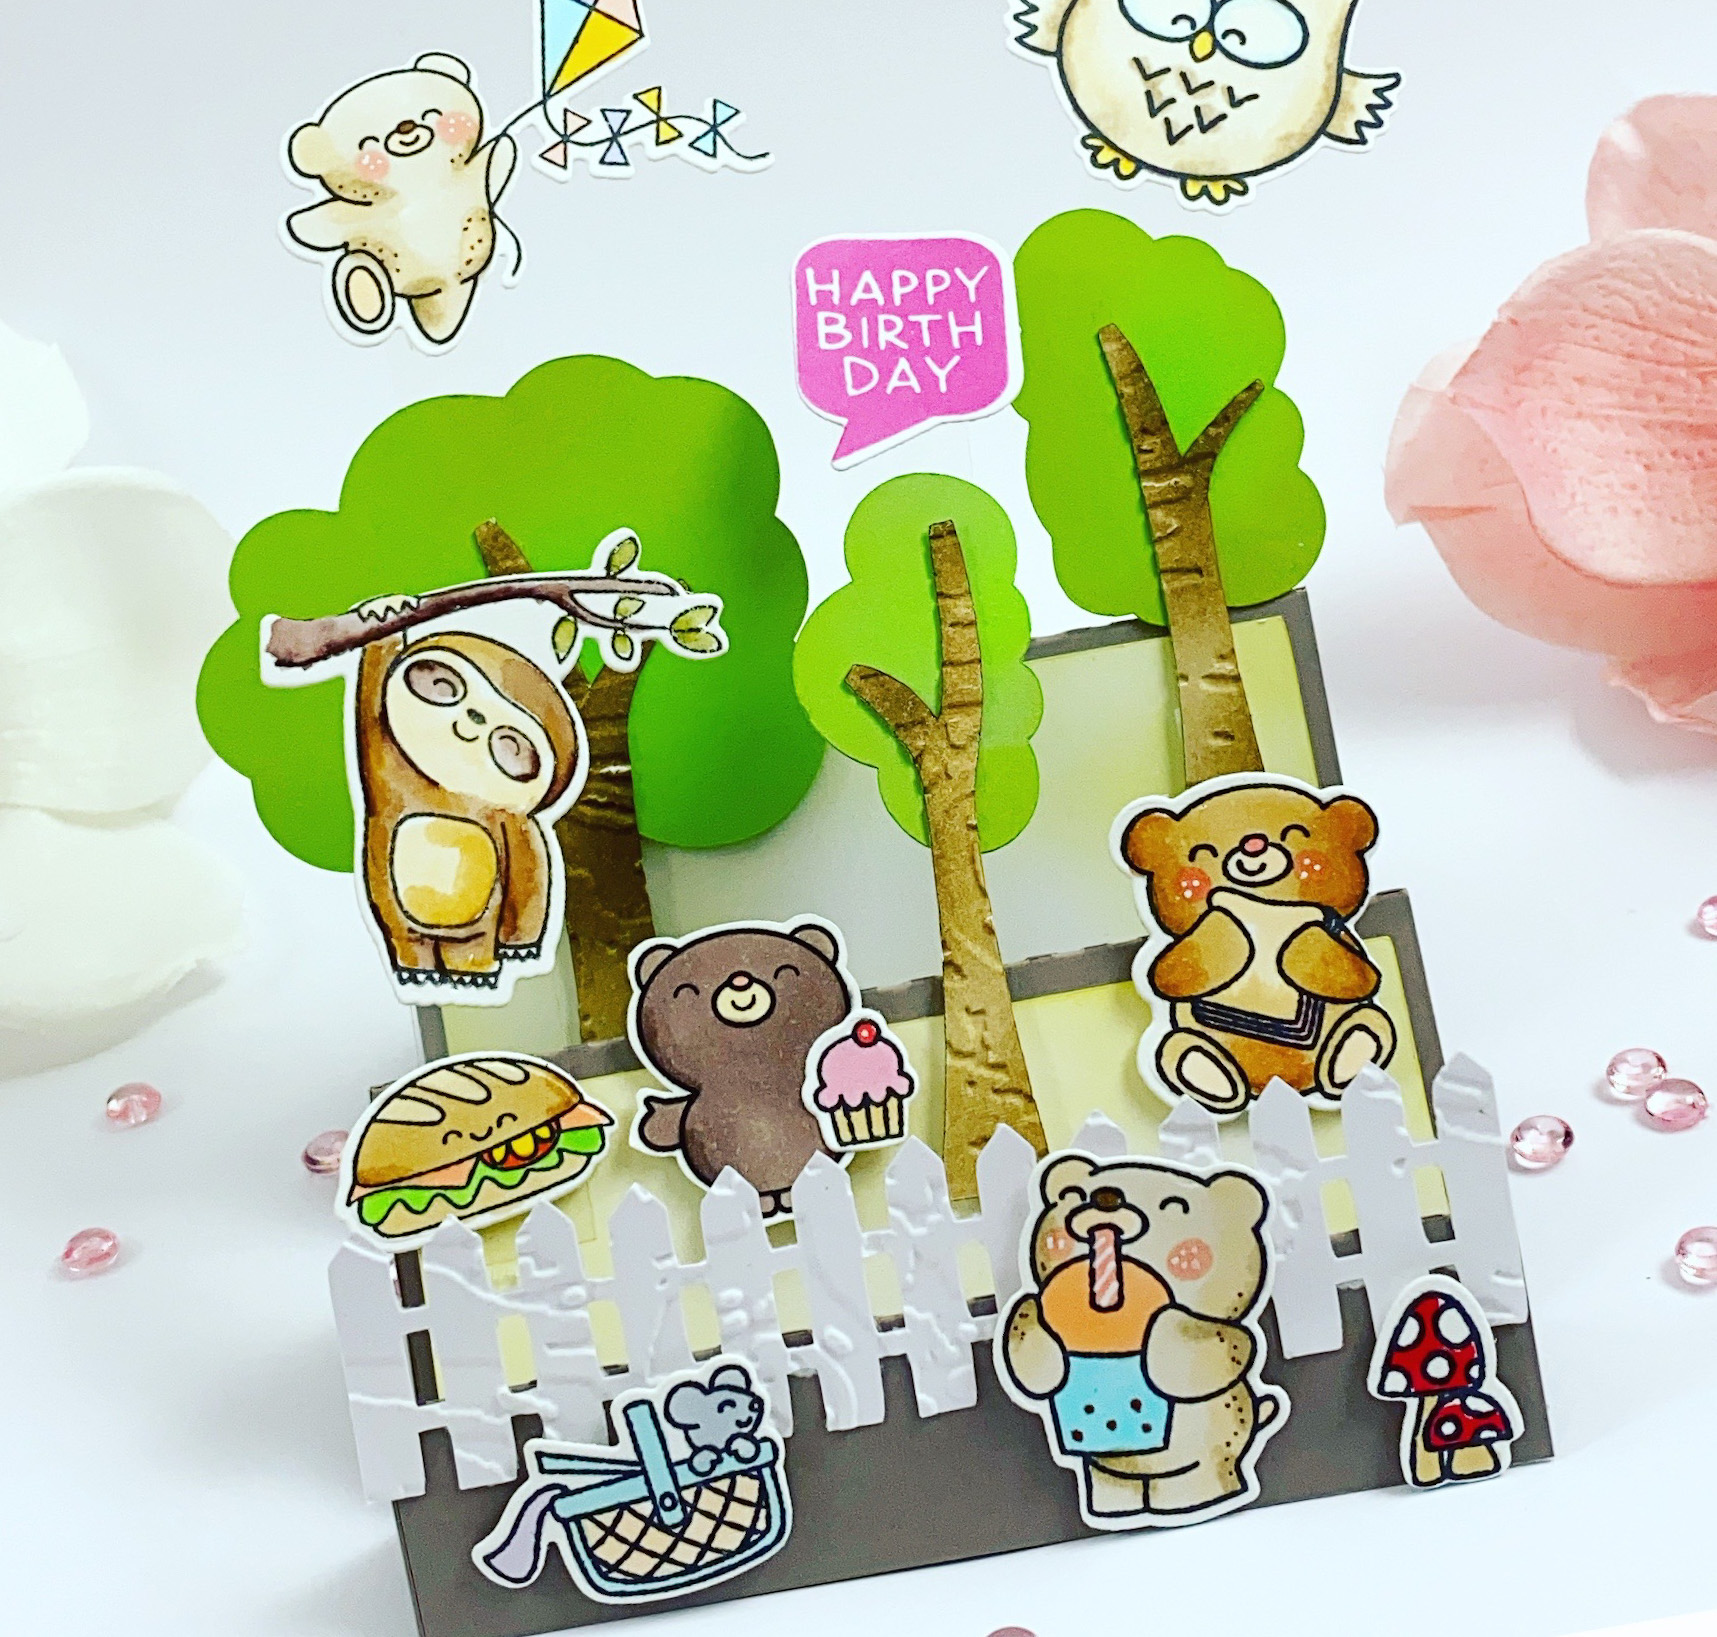
Hello Vic here today! I wanted to make a card that’s crammed with cute Time For Tea Designs images. The best way for me to do this was to use a stepper card. 


I cut my card using a silhouette machine along with the trees and started to put the card together. Once my stepper card was completed I started to stamp my images. I used Be Slothy Stamp SetSpeech Bubbles Stamp Set , Treat Yourself Stamp SetUp, Up & Away Stamp SetBearing Gifts Stamp Set ,Bears Picnic Stamp Set and the Be Owlsome Stamp Set. Once my images were all stamped I coloured the images in with my copic markers. Using the coordinating dies I then ran them through my die cutting machine. 

Next I used the Windmill Add On Die and using the fence die and some white card I ran this through my die cutting machine and adhered this onto the first fold of the stepper card. I then added some images to the card  using foam tape. For the owl, bear with a kite, sloth and greeting I added some acetate to the images and adhered them into my card to make it look like the images are floating. 


I loved how this card turned out and it’s fun to make too! You can use any stamps for this design I thought it would look really cute using the chosen images. 

Thank you so much for stopping by today! Don’t forget you can save 10% off your order using the code:T4TVICKI10 at the checkout. 

Have a wonderful day!

Vic


Saturday, 24 October 2020

Beary Sweet Fall Card - Using A Sketch for Inspiration


Hello everyone!!
I hope you're having a great crafty weekend.
Today I am sharing the card I made during our FB Live on Thursday. If you missed the live be sure to watch the edited version below to see how we made this sweet slimline card!


I think this card might be one of my most favourite cards in a while :)

I love all the super cute bears and their sweet treats sat in the patterned paper pumpkin patch.


The inspiration for the card came from a card sketch & colour inspiration from Pinterest.


I was really inspired by the colours, the fall theme and the sweet treats. Our Bearing Gifts Stamp set is perfect for this theme. I teamed it up with the Spooktacular stamp set which has the cool pumpkins and the Woodland Critters which has the piles of autumn leaves.


I could also have used the leaves in the Autumn Scene Cover Die or the Coordinating Dies for the leaves in the Woodland Critters set and just cut a series of leaves from colour cardstock or patterned paper.


I used the Slimline Scalloped Trios Circle Nesting Dies to cut several pieces of patterned paper. I then cut each piece with the Landscape Edge Dies to create a variety of  hills.


I used my Copic Alcohol Markers to colour my cute images and die cut the with the coordinating dies.


I added Glossy Accents to the donuts so they looked scrumptious & glazed.

In the video I talk through how we used the sketch to inspire our card but didn't follow it literally. I love using colour palettes and sketches as a starting point for my projects, especially when I'm struggling with my mojo!


The main elements we took from the sketch were the 3 circles - our 3 bears; the colour inspiration - fall colours; the sweet theme - cookie sweater textures, donuts and coffee; the sentiment at the bottom of our card.

I absolutely loved making this card and love how it turned out. I hope you do too!

Don't forget to join us every Thursday at 8pm BST on Facebook for our weekly Crafting Live with Jo.

A list of the products I used is below.

Happy Crafting 

Jo
XOXO


Saturday, 4 July 2020

You Bake My Day!


Hi guys, I have a super fun card for you today I literally hadn't planned to make this one it was all a happy accident. If you have been reading my blog post you will know that I like to batch stamp and colour things up so the Hamsters and accessories were left over from a few recent cards and they were lying around on my desk on top of the striped paper and I just loved how they looked together.
So I gathered up my accessories and added them to the critters I wanted the stripes but I didn't want it to be too much so I got my cheese die and cut that out of some crisp white cardstock to stick in front of it.
I popped the white up with some foam tape though to give it some added dimension and added my hamsters complete with their new look. I love how the holes just frame the Hamsters and peek those stripes contrasted again that crisp white cheese panel.
I stamped my sentiment and cut using the sentiment strip from the Mini Frame and Banner Die set then coloured with a blue copic marker and popped it on the card. I then added it to my card base and my card was finished a real quick and easy card today!


Saturday, 6 June 2020

Bearing Gifts


Hi Guys DT member Natalie here today and I'm sharing with you my cute mini gift box its great for making wedding favours, adding Easter eggs or just to pop a few sweets in. The Time for Tea paper pad is great for your base I used this gorgeous dotty teal paper alongside the pink stripes for the hearts.
I still had plenty of those bears left from my marathon colouring session to use. I've decided that this is my way forward by colouring lots of images at once so I can play around with layouts. It especially helps if you have lost your mojo. So that's what I did. I cut out my base and just played around with the layout. Top tip glue it together just at one side and lay it out flat so its easier to stick on your images and see it as a whole.


Once everything was stuck it was time to turn it into the box everything is scored when it goes through your die-cutting machine so its pretty easy to assemble. I used red tape to tape the edges so it was nice and strong and ran my bone folder over the score lines to make the folds more crisp. Its easier stick the bottom before the other side and you can use like the a pen lid to press it firmly down to make sure its completely stuck and then stick your other side. The top part you just gently press the middle bits in to close the top and I finished mine of with some twinkly twine. I hope you like my Gift Box I can't wait to see what designs you all come up with you are always so creative! 

Wednesday, 3 June 2020

Bear Hugs & Donuts!

Happy Wednesday!

It's Shabneez here with a cute donut shaped card to share made using various Time for Tea products to include the Splish Splash stencil in a different way!

I made the donut base using 2 of the Circle of Love nesting dies from kraft card.  I then took the Splish Splash stencil and inked through parts of it with Worn Lipstick Distress Oxide Ink using my blender brush.  Oxide inks work particularly well with coloured cardstock as the ink sits on the cardstock as oppose to getting absorbed into it.  I added Nuvo drops in small strips to resemble sweets.


I stamped my bear and donut then coloured in using my Chameleon pens.  I added some Glossy Accents on the doughnut to give it a glaze.


I hope you enjoyed seeing my fun creation.  Don't forget you can get 10% off the entire store using my discount code T4TSHABNEEZ10!

Happy Crafting!


Products Used:

Load image into Gallery viewer, Circle Of Love Nesting Dies


Load image into Gallery viewer, Bearing Gifts Clear Stamp Set


Load image into Gallery viewer, Beautiful Blender Brush - Medium


Saturday, 30 May 2020

XOXO


Hi Guys DT member Natalie here and I have another card to share with you all using that adorable Bearing Gifts stamp set. If you read my post last I mentioned that I had done a massive stamping, colouring and Die-Cutting session with these cuties. Once finished I laid them all out on my desk and just played around with layouts. I had placed these two bears together and thought they looked like they were having a leisurely stroll in the park and that's where I came up with my idea. 
To make my scene for my bears I used the Circle of Love Nesting Dies to cut my circle and used the
6x6 Scene It stencil to create the background. 
To get the sentiment to curve around the edge of the frame I added it to my stamping block then manipulated it so it was curved and held it over the circle to see whether I needed to move one side higher or lower until I had the shape I wanted and then stamped it on my card. Then I finished off by adding the bears and my topper was finished. 
For the base of the card I cut the new XOXO cover plate die out of  white cardstock and  made sure to keep some of the holes from inside the O. I cut another piece of Bristol Smooth cardstock the same size as the coverplate we cut and blended squeezed lemonade and spiced marmalade distress oxides on it then spritzed with water. This was then layered under the XOXO die cut piece and I popped the topper I made on the top and added it to my card base.
I hope you liked my card for today!


Other Posts You Might Like