Pages

Showing posts with label Snow Flurry Cover Die. Show all posts

Friday, 3 October 2025

Congratulations You're Engaged

Happy Friday, DT Annalisa here! I’m sharing an engagement card using dies and high-quality printed cardstock from Time For Tea Designs, along with Ranger Distress Watercolour Pencils. This card is in celebration of the engagement of Jo (owner of T4T) and Ant. Congratulations to you both!


For the background, I used a Distress Watercolour cardstock panel. I selected Watercolour pencils in Chipped Sapphire and Evergreen Bough to colour the cardstock. To prepare the pencils, I soaked the tips in water and scribbled them onto a piece of acetate. I spritzed the acetate with additional water, then pressed it onto the watercolour paper to transfer the colour. After allowing the panel to dry fully, I die-cut it using the Snow Flurry Cover Die. Finally, I used liquid glue to attach the panel securely to a card base.


I cut several elements from the Just Married A4 Printed Cardstock, using coordinating dies. The sentiment, from You’re Engaged A4 Printed Cardstock, is also die-cut. The bouquet is from Bearing Gifts. The stamp set isn't available, but the coordinating dies are on sale.

I used liquid glue to stick all of the elements to the card and added Glossy Accents for extra shine.


To complete the card, I added three Designer Enamel Dots from the Sweet Summer Dots collection.

When the postal strike ends here in Canada, I will pop this in the mail for you, Jo!


Thank you so much for visiting my blog! Don’t forget to use my discount code T4TANNALISA10 when you shop at Time For Tea Designs to receive 10% off your order.

Friday, 1 August 2025

All Aboard the FriendSHIP Art Journal


Happy Friday, DT Annalisa here! I'm excited to share another page from my mixed media art journal, featuring the new Boat Buddies stamp set, along with some older sea-themed stamps from Time For Tea Designs. I’m really pleased with how it turned out!

I started by applying a base layer of white gesso to my page, followed by a pastel blue paint from Hero Arts for the sky. For the ocean, I used the Making Waves stencil along with Distress Paints in Peacock Feathers, Salty Ocean, and Prize Ribbon, topped with white acrylic paint. I layered on several coats of paint, and for the top layer, I used a baby wipe on the bubbles area of the stencil to reveal the lighter Salty Ocean color underneath.


In the sky area, I applied white acrylic paint over a cloud stencil using a sponge. I created the sandy area using brown acrylic paint and a textured sponge, then added white paint splatters over the background.

For the shape and texture of the island, I used the Takeout Coffee Cup Dies, the Snow Flurry Cover Die, and scissors. I added color with Mowed Lawn and Twisted Citron Distress Paint.


I stamped several images from the Boat Buddies stamp set, colored them with Copics, and cut them out using the coordinating dies. I added white gel pen accents with a Gelly Roll Pen. Additionally, I incorporated images from the Seasons Tweetings (seaweed), Sealed With A Kiss (fish), and Beach Buds (crab, shells, turtle, palm tree), and Get Whale Soon (whale) stamp sets.

To adhere all the stamped elements, I used liquid glue. Lastly, I completed the card by adding white dots with a 0.7mm Posca Pen, which I had never used before, but I highly recommend it!

Thank you so much for visiting my blog! Don’t forget to use my discount code T4TANNALISA10 when you shop at Time For Tea Designs to receive 10% off your order.


Friday, 13 December 2024

Have A Sweet Christmas


Happy Friday, DT Annalisa here today
! I used the new Sweet Christmas stamp set from Time For Tea Designs to create a pastel pink Christmas card. I really enjoyed incorporating non-traditional Christmas colours into this project.

To begin, I die-cut Distress White Heavy cardstock by Ranger using the Wonky Window Cover Die. I then ran it through my Big Shot a second time with the Snow Flurry Cover Die, which creates a lovely stitched pattern that I love!

Next, I ink-blended the panel with Saltwater Taffy Distress Oxide and my Beautiful Blender Brushes. After that, I sprayed Sugary Gumdrop Distress Mica Stain onto the panel to add a beautiful shimmer.

I trimmed paper from the Joyful Winter Paper Pad to fit a card base measuring 5 3/4 inches by 4 1/8 inches and adhered it using double-sided tape.

For the pink panel, I applied 1 mm double-sided foam tape to the back before attaching it to the card base.

I stamped and coloured several images from the Sweet Christmas set using Copics and cut them out with the Brother Scan N Cut SDX125e. To add some detail, I used a white gel pen for accents with a Gelly Roll Pen.


I placed the stamped images in the openings of the card using 1 mm double-sided foam tape. I also added sparkles to some images using a Quickie Glue Pen and Lawn Fawn Prisma Glitter.

Finally, I stamped the sentiments, cut them out with the A6 Simple Nesting Dies, and adhered them to the card with liquid glue.


Thank you so much for reading my blog post. Remember to use my discount code T4TANNALISA10 when you visit the Time For Tea Designs shop to get 10% off your order.
Friday, 8 November 2024

Dies Only Coffee Card


Happy Friday, everyone! DT Annalisa here and I’m excited to share a card I created using only dies from Time For Tea Designs. While I typically prefer using stamps, I think these four die sets are terrific, and I wanted to make a card featuring them.

I added several drops of Dried Marigold Distress Paint onto my glass mat and sprayed it with water. I then pressed watercolour cardstock into the paint multiple times to create a vibrant orange background. After heat-setting the panel, I added Carved Pumpkin and Lumberjack Plaid Distress Oxide Spray.


Once the panel was dry, I die-cut it using the Snow Flurry Cover Die and adhered it to a panel of black cardstock that I had die-cut with the Sweet Scalloped Dies using liquid glue.

For the sentiment, I applied Salvaged Patina Distress Spray Stain to watercolour cardstock, heat-set it, and then die-cut it with the Warm Hugs Large Sentiment Die. I also die-cut the sentiment from White Silver metallic cardstock by Neenah. I used liquid glue to adhere the two die-cut sentiments with a slight offset before attaching them to the card base.

Next, I used the Takeout Coffee Cup Dies to cut the elements from watercolour cardstock and coloured them with Distress Oxides, inks, and sprays. Below are the colours I used for each part of the coffee cup:

- Milk Foam: Tea Dye Oxide Spray and Ink
- Coffee Cup Base: Lost Shadow Distress Oxide Spray and Hickory
Smoke Distress Ink
- Sleeve: Tea Dye Oxide Spray
- Heart: Salvaged Patina Distress Spray Stain
- Cup Lid: Lost Shadow Distress Oxide

I assembled the coffee cups with liquid glue and attached them to the card beneath the 'Warm Hugs' sentiment.

I added three Designer Enamel Dots from the Sweet Summer collection, to complete the card.

Thank you so much for reading my blog post. Remember to use my discount code T4TANNALISA10 when you visit the Time For Tea Designs shop to get 10% off your order.

Friday, 12 April 2024

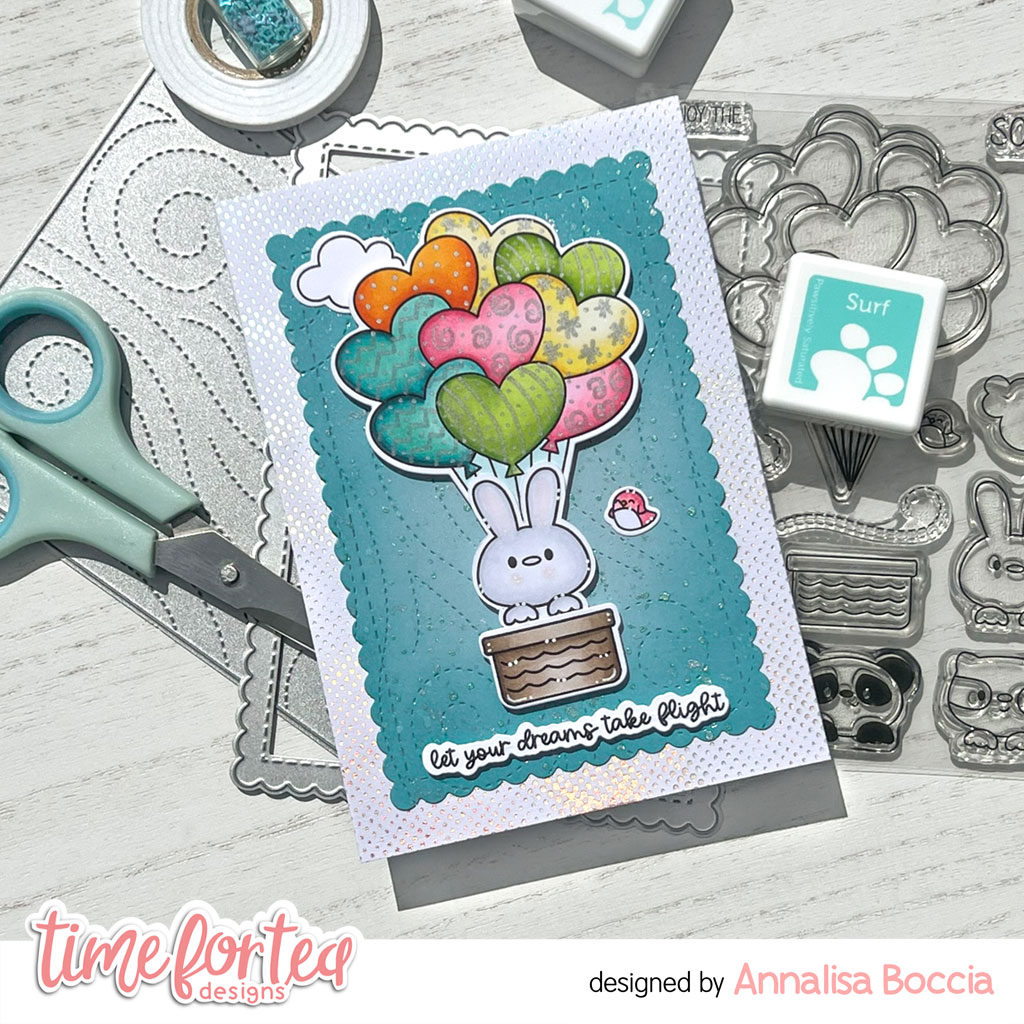
Let Your Dreams Take Flight


Happy Friday! DT Annalisa here with a new card to share that features the Love Is In the Air stamp and its' coordinating dies. I enjoyed colouring in all the cute balloons with my Copic markers.

To create this card, I started with a light blue card stock base that I die-cut with the Sweet Scalloped Dies and then Snow Flurry Cover Die to add texture. Next, I ink-blended the edges using my Beautiful Blender Brush, Surf, and Seafoam Pawsitively Saturated ink. I added silver splatter with a paintbrush, water and silver watercolour. 


Once the blue panel was dry, I adhered it to some silver dotted patterned paper that I glued to a 5 3/4-inch by 4-inch card base.

I stamped and coloured (with Copics) several images from Love Is In the Air and cut them out with their coordinating dies. I added white gel pen accents with a Gelly Roll PenI used a metallic silver marker to different patterns to the balloons. The sentiment is from Paper Plane Pals that I stamped and then cut out with the coordinating dies


I stuck the images to the card base using a combination of liquid glue and double-sided foam tape for dimension.

Thank you so much for reading my blog post, be sure to use my discount code T4TANNALISA10 when you visit the Time For Tea Designs shop to get 10% off your order.


Thursday, 15 December 2022

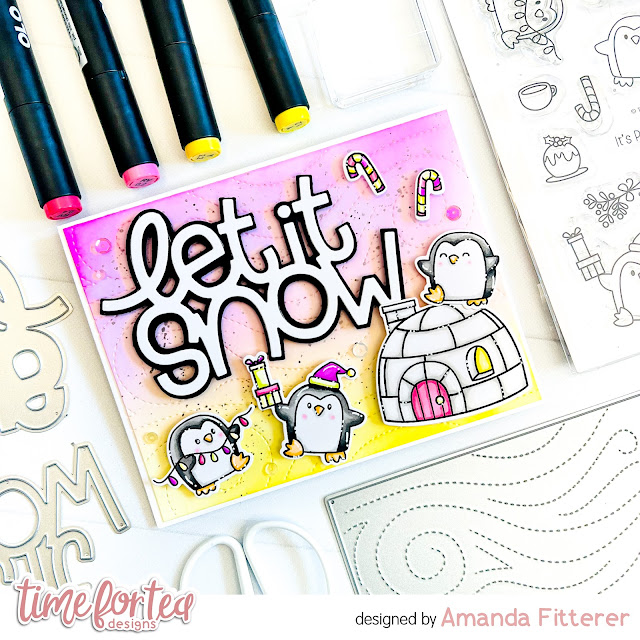
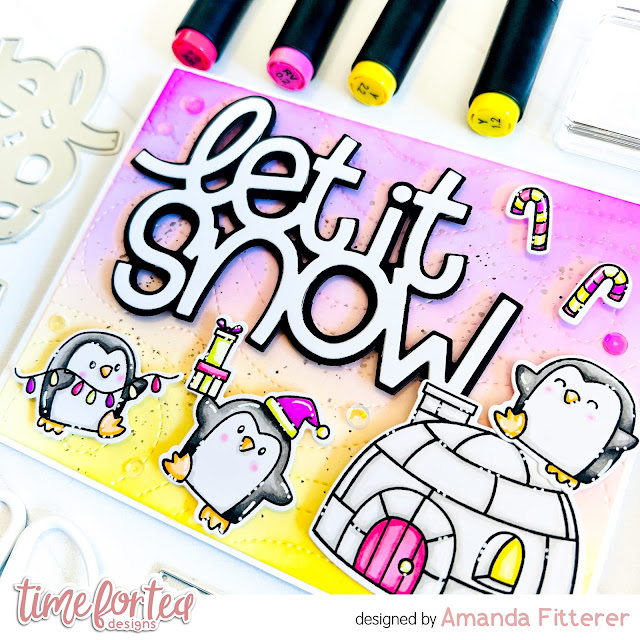
Let it Snow Penguins


Happy Thursday, Tea Timers!  It's Amanda here!  Today, I get to share with you the cutest little penguins from the It's Penguin-ing to Look A Lot Like Christmas stamp set!

To create this card, I created a beautiful background blend using Catherine Pooler's Pucker Up and Chiffon ink pads.  I used the Snow Flurry Cover Die to create a fun texture in the background!  Although it may look subtle, it really helps pull the card together, doesn't it?!


I used the NEW Let it Snow Sentiment Die Set to create my sentiment.
I stamped and then colored my cuties from the It's Penguin-ing to Look A Lot Like Christmas stamp set.  I used OLO markers to color my images and then used a White Gelly Roll pen to add some highlights and dots.


I had SO much fun making this bright and cheery card and I hope you enjoyed it too!


Thank you so much for stopping by the blog today!  I hope you're feeling inspired by this post!  Come back next week for another happy card!
Xx, Amanda

Friday, 25 November 2022

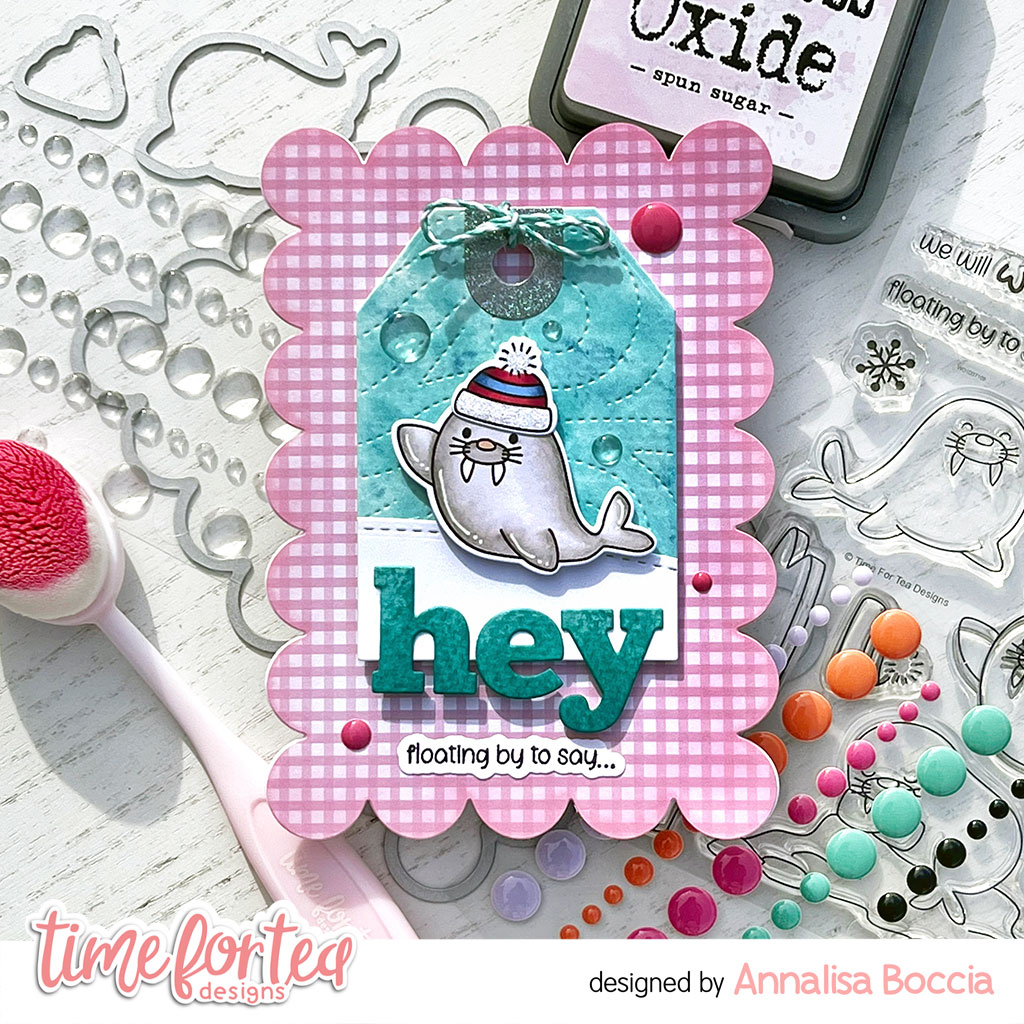
Floating By to say Hey


Hello and happy Friday. DT Annalisa here sharing a fun scalloped card featuring the new Walrus Be Friends stamp set by Time For Tea Designs. I love how the Walrus is waving hello.

To start, I die-cut a piece of Gorgeous Gingham 6x6' Paper Pad with the Large Scallop Celebrate Frame Dies. I ink-blended Spun Sugar Distress Oxide ink to the sides of the paper with my Beautiful Blender Brush. I then adhered this to a card base that I created using the same die. 


I sprayed Distress Mica Stain in Shiny Bauble onto watercolour paper. I love the shine mica stain has. Once it was dry, I die-cut it first with the Snow Flurry Cover Die and then with the tag die found in the Memory Keeping Essential Dies. I also used some of this paper to die-cut the hey sentiment from the Hey, Hello, Hi Dies. I ink blended on Peacock Feathers Distress Ink to the letters to darken them up. 

I cut some white card stock with the Slimline Hillside Scene Dies to create a snowy hill for the Walrus to sit on. I cut it again with the tag die and then glued it on top of the tag. I glued the 'hey' to the base of the tag with liquid glue. I tied a bow onto the tag with some Lawn Fawn teal Lawn Trimmings. 


I stamped the seal and hat from the Walrus Be Friends and coloured them with my Copic markers. I die-cut them with the coordinating dies and added some white gel pen accents. I used liquid glue to adhere the hat to the Walrus and then used double-sided foam tape to stick them to the tag. I then added double-sided foam tape to the back of the tag and placed it on the scalloped card base. 

I stamped and die-cut the sentiment and glued it to the bottom of the card base below the tag. To complete the card, I added "Summer Haze" and "Clear Bubbles" Designer Enamel Dots.


Thank you so much for reading my blog post, you can use my discount code T4TANNALISA10 when you visit the Time For Tea Designs shop to get 10% off your order.


Friday, 4 November 2022

Sending Big Birthday Wishes


Happy Friday, everyone! DT Annalisa here sharing a slim line card today featuring several stamps and dies from Time For Tea Designs. I created a bright watercolour background using distress ink reinkers and distress oxides. 

I used Arches cold pressed watercolour paper and painted on a mixture of Distress Ink Reinkers (squeezed lemonade, picked raspberry, peacock feathers) and Distress Oxide Ink (squeezed lemonade, twisted citron) with a paintbrush. I added some white splatter once the inks were dry.

I die-cut the panel using the Snow Flurry Cover Die. I then used the same die to cut some white card stock to get the outline. I used liquid glue to adhere everything to a slimline card base.

I used the Big Birthday Wishes Sentiment Die to cut out the sentiment three times and used liquid glue to adhere them together and then to the top of the card. 


I stamped, coloured (with Copics) and die-cut elements from five different stamp sets Lucky DucksPaper Plane PalsBirthday Bear and Fairy Garden. I used a mixture of liquid glue and foam tape to adhere everything to the card. I added Glossy Accents to the bunny's goggles, balloon, ladybug and the word 'Big.'
 

Thank you so much for reading my blog post. Don't forget to use my discount code T4TANNALISA10 when you visit the Time For Tea Designs shop to get 10% off your order.
Friday, 9 September 2022

Wavin' Hello


Hello crafty people, Annalisa here with my latest DT card. This slimline ocean card uses the Beach Buds and Fintastic Friends stamp sets and features a wobbly octopus! I love the interactive element an action wobbler adds to a card.

I die-cut Distress White Heavy cardstock by Ranger with the Snow Flurry Cover Die. I ink-blended the negative pieces with Distress Ink using my Beautiful Rainbow Blender Brushes

The colours I used were as follows:
Sand bottom - Scattered Straw with Rusty Hinge splatter,
Ocean - Unchartered Mariner Ink, Salty Ocean & Salvaged Patina Oxide, 
Sky - Tumbled Glass. 


I adhered the stitched wavy die-cut to a slimline card base with liquid glue and added the ink-blended portions.

I stamped and coloured the sea creatures and other elements from Fintastic Friends and Beach Buds with Copic markers and added white Gelly Roll accents. I then used the coordinating dies to cut them out. I used liquid glue and double-sided foam tape to adhere the elements to the card. For the octopus, I added an action wobbler for added dimension and an interactive element.


I added the sentiment that I stamped with Versafine Onyx Black and cut out with its' coordinating die. I added Glossy Accents to the octopus and some fish to complete the card.


Thank you so much for reading my blog post, you can use my discount code T4TANNALISA10 when you visit the Time For Tea Designs shop to get 10% off your order.


Friday, 29 April 2022

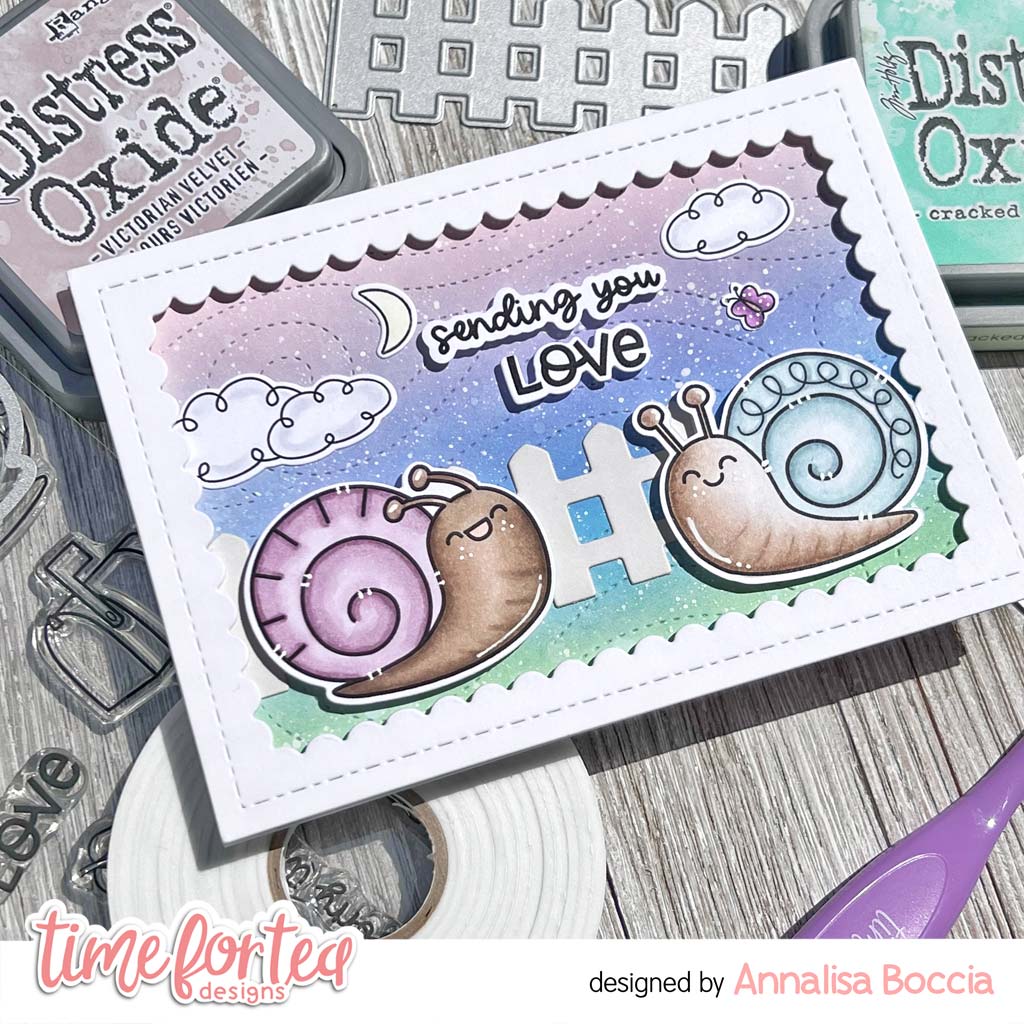
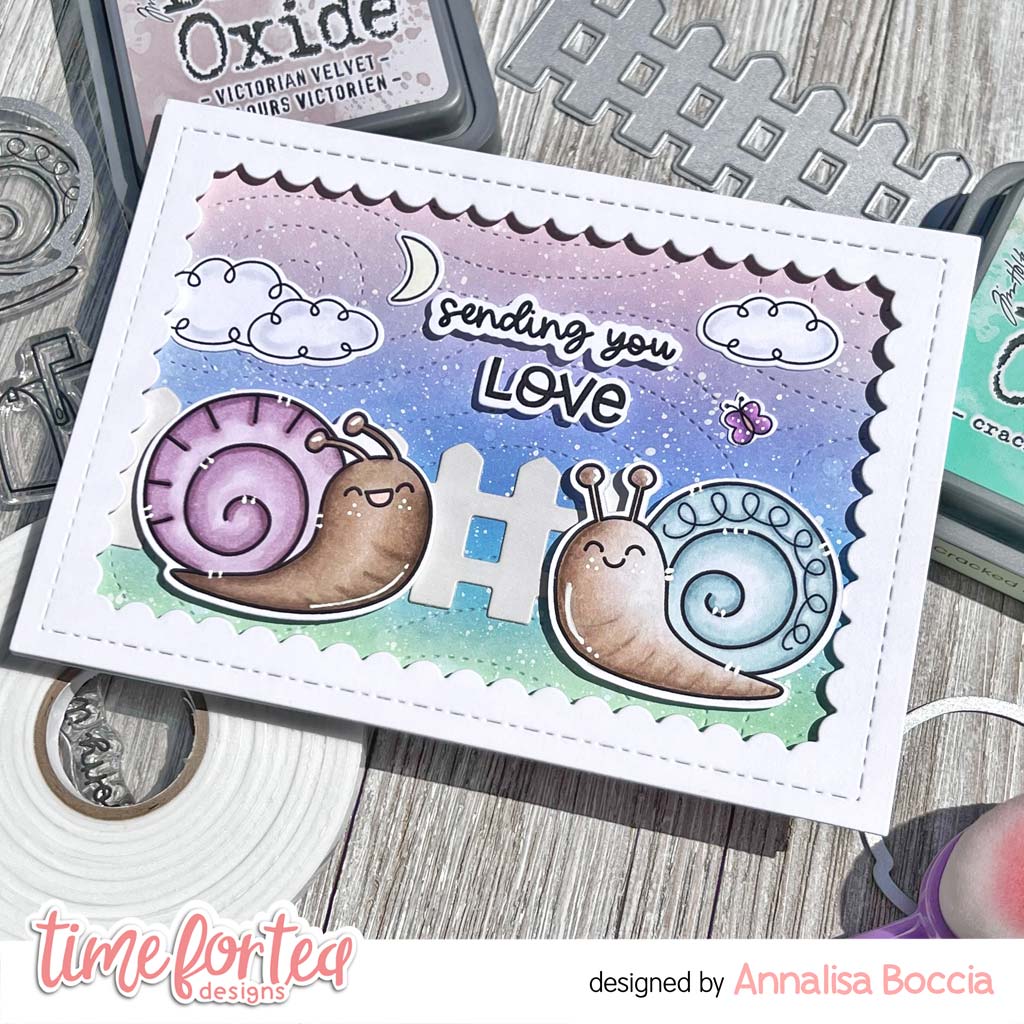
Sending You Love Snails


Happy Friday! DT Annalisa here sharing a card featuring the You’ve Got Mail clear stamp set and the coordinating dies. These snails are so fun to colour!

To start, I ink blended Distress Oxides (Victorian Velvet, Shaded Lilac, Salty Ocean and Cracked Pistachio) onto Distress White Heavy cardstock by Ranger with the Beautiful Rainbow Blender Brushes. I die-cut this panel with the Snow Flurry Cover Die and added white splatter to add inter


I die cut the fence from the Windmill Add On and lightly ink blended on some Weathered Wood Distress Oxide. I used liquid glue to stick this down to the ink-blended panel. I placed this onto a card base using liquid glue.

I stamped, coloured and die cut the snails from 'You've Got Mail.' I did the same with the clouds (Paper Plane Pals), butterfly (Be Slothy) and moon (Hillside Village). I used liquid glue to adhere the moon, clouds and butterfly to the panel. 


I used the larger frame in the Smile Inverted Scallop Frame Dies to die-cut some heavy white cardstock added foam tape to the back and stuck it to the panel. 

To complete the card, I added foam tape to the back of the snails and the sentiments and stuck them down.


Thank you so much for reading my blog post, you can use my discount code T4TANNALISA10 when you visit the Time For Tea Designs shop to get 10% off your order.

I hope you get some time to get inky and creative this weekend and that it makes you as happy as it does me!


Friday, 4 February 2022

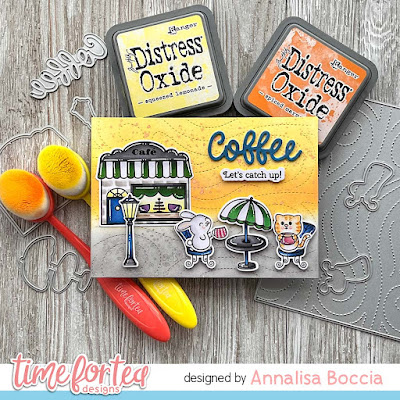
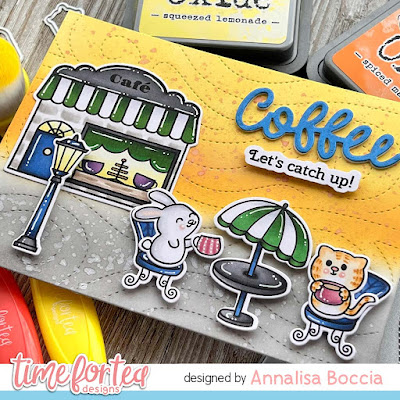
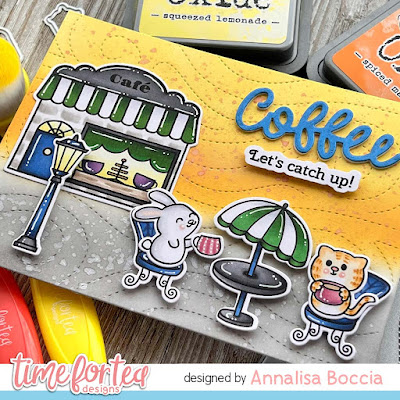
Coffee Catch Up


Happy Friday, DT Annalisa here, today is my mum's birthday, so please allow me to send out big birthday wishes to her!

I adore the Café Critters from Time For Tea Designs, it is probably one of my favourite sets of all time - I mean coffee and critters, what could be better?! We have just been hit with yet another winter storm, so looking at this scene has me wishing for warmer times so my husband and I can sit outside at a local cafe and sip cappuccinos!


To start, I created the background by ink blending Wild Honey, Spiced Marmalade, Squeezed Lemonaid (sky) and Hickory Smoke (ground) Distress Oxides onto a piece of Distress White Heavy cardstock using my Beautiful Rainbow Blender Brushes. I added some Spiced Marmalade splatter to the sky and Shimmer Spray - Silver Sparkle splatter to the ground. Once the panel was dry, I die cut with the Snow Flurry Cover Die and then added it to a white card base.

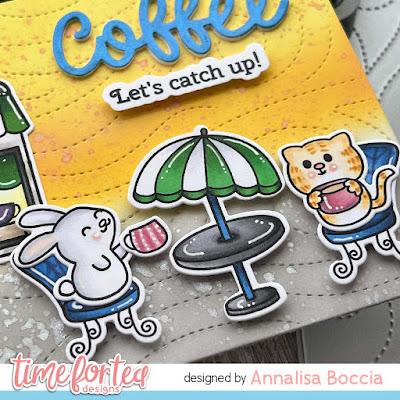
I stamped and Copic coloured the images from Cafe Critters and cut them out with the coordinating dies. I used liquid glue to stick the cafe to the panel and then used foam tape to adhere the rest of the images and the sentiment to the card. I also used liquid glue to stick the critters to their seats.

I used shimmery blue watercolour paint on heavy cardstock and die-cut it, once it was dry, with the Coffee Sentiment Die. I die-cut it two other times with white cardstock and glued them all together for some dimension. I then added the coffee sentiment to the panel with liquid glue. 


Thank you so much for reading my blog post, you can use my discount code T4TANNALISA10 when you visit the Time For Tea Designs shop to get 10% off your order.

Wednesday, 19 January 2022

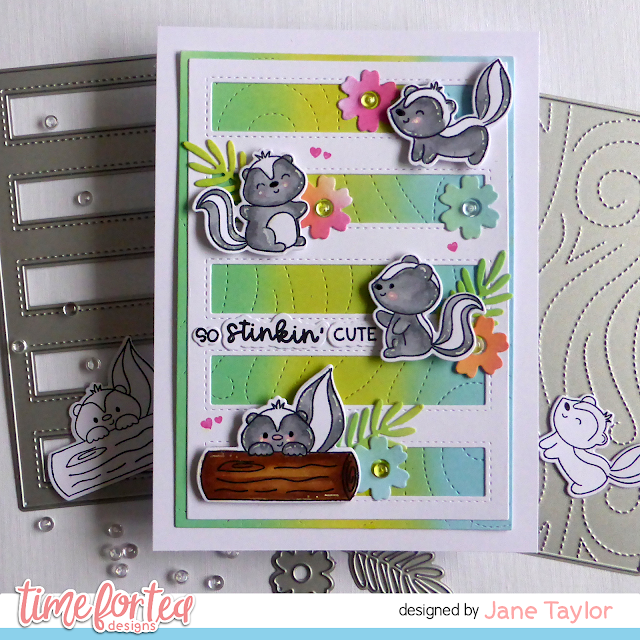
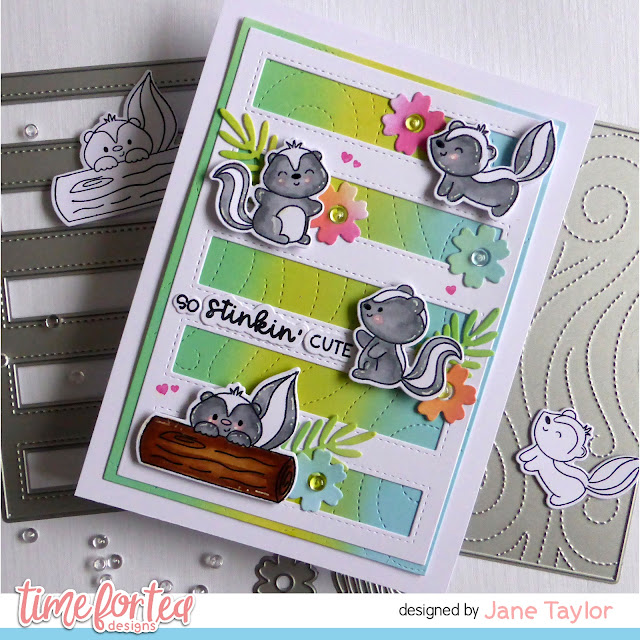
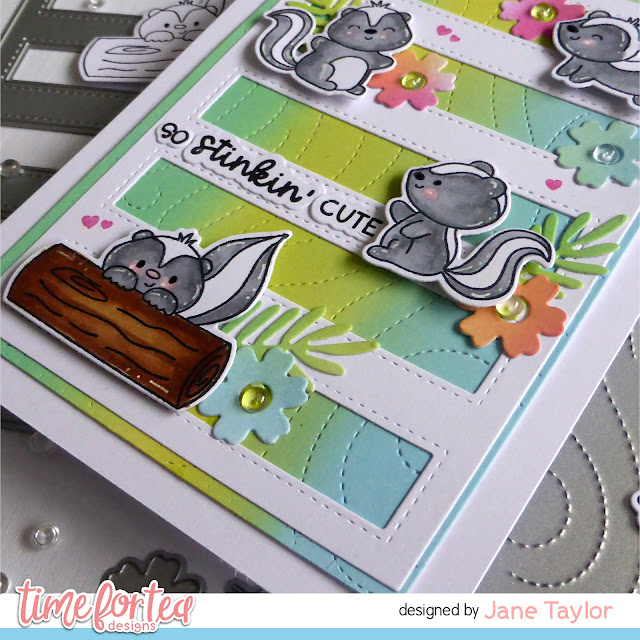
Stinkin' Cute

  Hello!

Today I'm sharing another card I made using the adorable Stinkin' Cute stamps and dies partnered up with some older products too.

I created a background in three colours of distress ink and the used the Snow Flurry Cover die to create more interest - can't begin to tell you how much I love this look!


Next I used the Stripes Cover Plate die and placed it on top of the background. I really love how this die gives such a brilliant frame for placing stamps.


Finally I added in the adorable Stinkin' Cute images and Spring Blooms die cut flowers and leaves. The final finishing touch was adding the clear gem stones and tiny heart stamps.

I hope you like my card using the awesome products from T4TD. If you'd like to purchase any items you can get 10% off by using my code - T4TJANE10.
Stay safe and keep crafting!
Jane
x

Other Posts You Might Like