Pages

Saturday, 11 June 2022

Sending Love!


My card this week really did not turn out as planned but I love how it now, looks like a night sky full of stars. I wanted to create a card for Jo and Ant after the sudden loss of their beautiful kitty Rosie. It's so hard loosing a fur baby and I wanted them to know we were thinking of them. 
My plan originally was to have a plain white background with the paw prints but I really struggle with CAS cards and wast loving the look. So I created the base by cutting out the largest rectangle from the Layering Dies Metric Sized  and layered on the paw prints cut out with the Pawsome Dies
For the rainbow I used the Rainbow Mini Shaker Die and cut it out of coloured card and added clouds using the coordinating die from the Storm's Don't Last Forever Clear Stamp set. The cute kitty is from the Puurfect Day Stamp set and coloured up with Copic Markers. 
It was at this point I realised I really didn't like the plain white background so tried water colouring in blue around the paw prints but that wasn't working either. So i grabbed my trusty Distress Oxides and began blending with a range of blues and adding black soot around the edges to darken them up. 
I added some splatters of gold paint and stars using white gelly pen and adhered my rainbow and kitty finishing it up with some clear sequins and a black frame using the A2 Nesting Dies
That was my card finished up for today, I hope you like it. You can find all the products I used in the Time for Tea Shop and get 10% off orders using code T4TNATALIE10 . 
Have a great weekend!


Friday, 10 June 2022

Just Called to Say Meow


Hello and happy Friday tea-timers! DT Annalisa here sharing a cute kitty card featuring the Retro Phone Builder Dies and the You Had Me At Meow Sentiment Dies. You could colour this giant retro phone in different Distress Oxide or Ink colours or even use patterned paper for a variety of cards.

For the background, I used my Aqua Beautiful Blender Brush to apply some Speckled Egg Distress Oxide to the Tiger Stripes 6 x6" Stencil to a 5 1/2 inch by 4 1/4 panel of Distress White Heavy cardstock by Ranger. I then sprayed Shimmer Spray in Silver Sparkle onto this panel and set it aside to dry. I also ink blended Hickory Smoke Distress Oxide onto a 1 1/4 inch by 5 1/2 inch piece of white card stock and then added some water splatter.

Once everything was dry, I glued the grey portion to the stencilled panel and then onto an A2 card base.

I stamped and coloured the kitty and mouse from the Hey There Critters Clear Stamp Set with Copic markers. I then die-cut them out with the coordinating die set.

I die-cut the phone elements and ink blended on Abandoned Coral and Saltwater Taffy for the phone receiver and dial area. I used Salvaged Patina and Peacock Feathers on the phone base. I used the same colours to ink-blend the 'meow' sentiment from the You Had Me At Meow Sentiment Dies. For the phone cord and behind the dial circle, I used Squeezed Lemonade. 

For the table, I used Weathered Wood for the table top and Saltwater Taffy for the table legs that I cut from the Purrfect Day Scene Builder Dies.

I added white gel pen accents to the die-cut elements and critters and added them to the card using a mixture of liquid glue and foam tape. 

I stamped and die-cut the sentiment from the Let's Chat Clear Stamp Set and its' coordinating die set and added this to the card with foam tape.

Thank you so much for reading my blog post, you can use my discount code T4TANNALISA10 when you visit the Time For Tea Designs shop to get 10% off your order.


Thursday, 9 June 2022

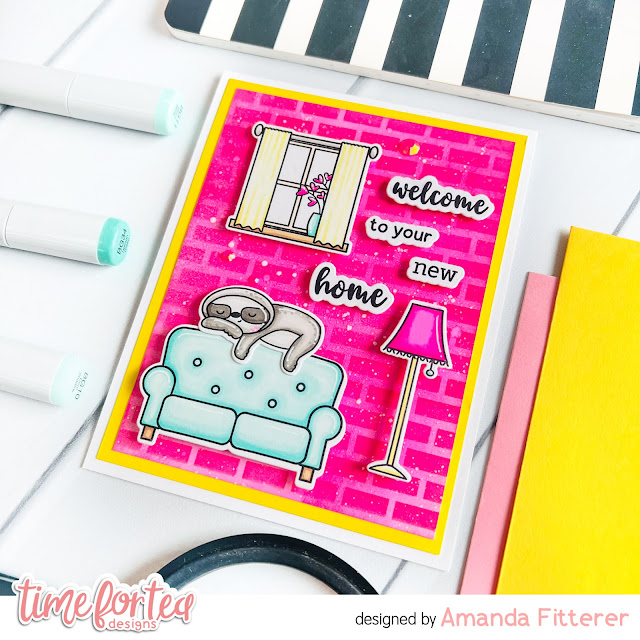
Welcome to Your New Home!


Happy Thursday, Tea Timers!  It's Amanda back with another fun project showcasing the NEW RELEASE!  Plus, today I'm sharing TWO easy tricks for elevating your cards!

Tip 1:  Create Layers
1. Start with a card base that is 5.5"x8.5" and fold it in half.
2. Trim a piece of colored cardstock to 4" x 5.25" and adhere it to your card base.
3.  For your card front, trim a piece of cardstock to 3.75"x5"

Tip 2: Use Vibrant Colors
When creating your layers, keep your card base white.
Use a bright cardstock for your next layer.
Use a complementary vibrant color for your card front.
This will help your focal images stand out and give you a polished look!

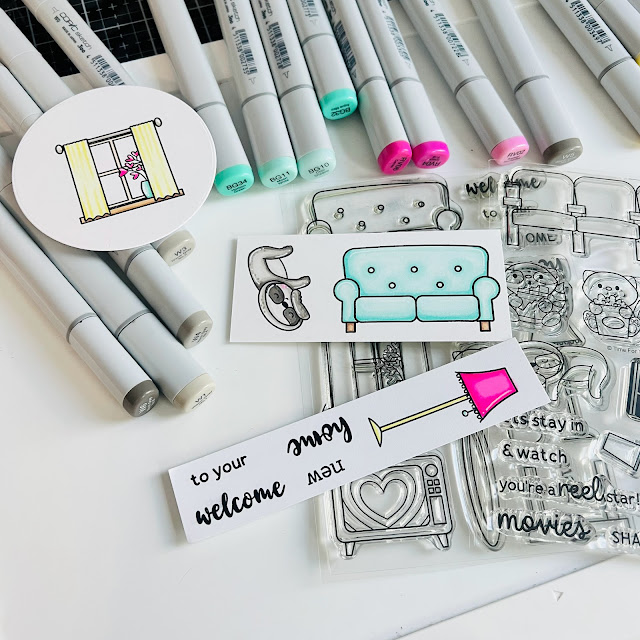
For this card, I've combined some stamps from the Home is Where the Heart Is Stamp Set and the Movie Night Stamp Set.


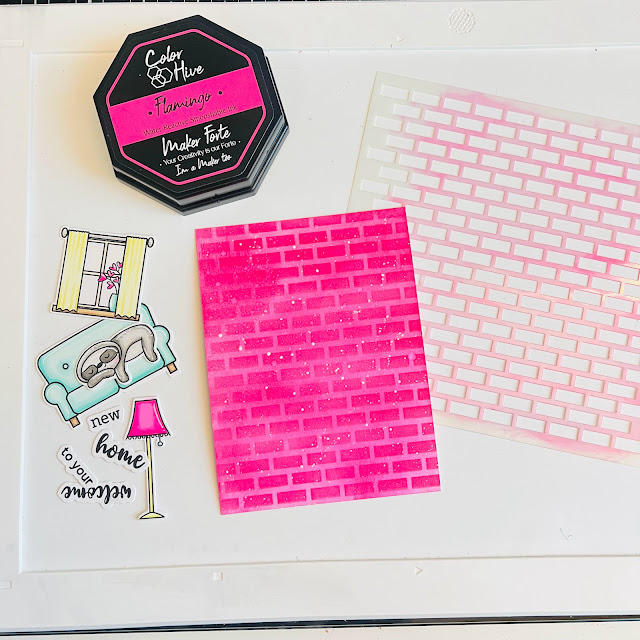
I've also grabbed my favorite Tiled Wall Stencil to create my background using Flamingo Color Hive Ink.


I've layered some yellow cardstock behind my cardfront and then adhered that to my card base.  I've attached my stamped and die cut images to my card front using 3D foam squares.


That's it for me today!
Don't forget, you can use code T4TAMANDA10 to get 10% off your purchase!
Until next week.... Xx, Amanda 


Wednesday, 8 June 2022

 In honour of Pride month, June’s tutorial blog is all about rainbows! Today, I’m sharing two clean and simple (“CAS”) cards that are perfect for when you need a card in a hurry.


Supplies needed:

         White cardstock
          Rainbow Mini Shaker die
          Acetate
          Shaker filling (rainbow colours)
          Liquid glue
          Foam tape
          Paper trimmer
          Ink cubes in rainbow colours (I used Poppy, Buttercup, Parsley, Oceanside and Eggplant by Concord and 9th)
          Blender brushes
          Copics or other colouring medium
         MISTI or other stamping tool

Instructions – Shaker card


1. Cut a panel of white card to 5”x3.75”. From just above the centre of the panel, die cut the Rainbow mini shaker die.
2. Glue some acetate to the reverse of the panel. On the front of the panel, use liquid glue to glue the rainbow die cut on to the acetate, inside the window.
3. On the reverse of the panel, attach some double-height foam tape around the outside of the panel.
4. Take a white card blank of 5.5”x4.25” and add some rainbow coloured sequins to the centre (I used the Fabulous mix by Lucy’s Cards).
5. Attach the front panel over the top of the shaker filling, sealing it in.
6. Trim down one of the sentiments from the Brighter Days sentiment cards and attach it to the front of the card with a thin foam strip.

Instructions – Ink blended rainbow card


     1. Place the largest of the rainbow arch stamps from the Storms Don’t Last Forever stamp set into your stamp positioner.
     2. Use a small ink cube to add red colour to one end of the stamp. Using a blender brush, softly brush the edge of the ink so that it doesn’t stamp a harsh line. Stamp your card stock. Without cleaning the stamp, add some yellow ink further up the arch, but overlapping with the red. Again, brush the edges of the yellow with a blender brush, and stamp the card. Repeat with the green, blue and purple colours, spread across the arch, and you will be left with an ink-blended rainbow arch on your card.
     3. Repeat with the medium and the smaller arches.
     4. Use your stamp positioner to stamp the sentiment below the rainbow.
     5. Stamp, die cut and colour the cat from the Hey There Critters stamp and die set, and add to the card with foam tape.


So, that completes two super simple, super easy but super colourful rainbow cards! Plus, you can adapt them by changing the sentiment to make them suitable for any recipient and any occasion.

Look out for two Reels to go with these cards, which I’ll be sharing on the T4TD and my own Instagram pages over the next couple of days.

Thanks for joining me again this month! Don’t forget that you can use discount code T4TJAYNE10 to get 10% off your purchases at the T4T store!


You're a REEL star....!!

 Hey Tea-timers...

DT Ashlee here today. Who here loves going to the movies?...

I do, I do and I especially LOVE popcorn (and lollies) when I go!! I have a serious sweet tooth hehe.

Movies and popcorn is the theme for todays card, here is a list of the products I used...

- Movie night stamp and die collection

- Purrfect day scene builder

- Popping popcorn 6x6 stencil

- Mini slimline scallop


I just adore this movie night stamp set, I can tell its going to be a regular used set in my stash!!

To create this card I started with a light yellow cardstock that I die cut the base from the mini slimline scallop die set. I then used the popping popcorn stencil to add lots of popping popcorn to the background. The inks I used to do that are : Simon Hurley Shooting star and Slippery when wet.

The frame I die cut from a red cardtsock (mini slimline scallop die) and then added some curtains by die cutting them out of black cardstock (purrfect day scene builder) and adhering to the frame to make it look like a little theatre...

I added foam tape behind the frame and adhered to the popcorn base!!


I thought it would be fun to make a couple wooden tables full of treats and add them to the scene...

To do this I die cut them from the purrfect day scene builder set and inked them with Simon Hurley ink grrr!. I then stamped, coloured and die cut popcorn and drinks from the movie night set and popped them on the tables!!

The reel stars of the show are the adorable animals all ready for the movie, all coloured up using a mix of alcohol markers. (Copic, Spectrum noir tri-blend and Altenew).

To finish off the card I added a heat embossed sentiment and pretty gold sequins!!


I hope this card has inspired you to get creative and make a fun scene, I  had lots of fun making it...
Happy crafting, hugs Ashlee. 


Use code "T4TASHLEE10" for discount at the Time for tea designs store.

Tuesday, 7 June 2022

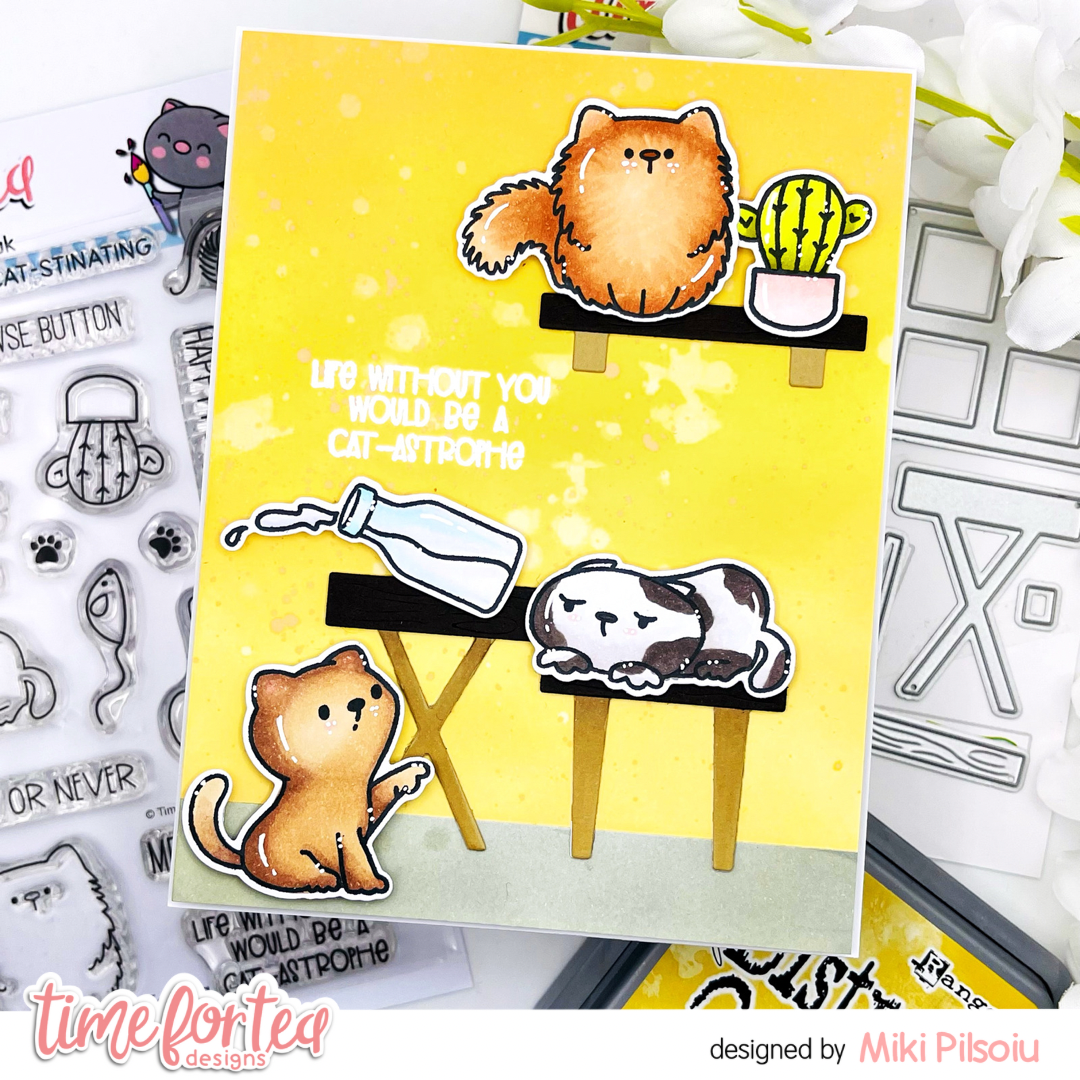
Life without you would be a cat-astrophe


Hi Tea Timers! 

Welcome back to the blog! It's DT Miki here and I'm back with a funny card for you today. 

To start with, I used distress oxides to create my background. I took an A2 card panel and masked off a portion at the bottom. I then ink blended the top in Dried Marigold, Fossilized Amber and Scattered Straw. I used some water to add splatters to it for extra interest. I then ink blended the masked portion at the bottom in Pumice Stone and glued the panel on an A2 card base.

When my background was fully dry I took a sentiment from the Kitty Capers stamp set and embossed it in white. 

Next, I used the Purrfect Day Scene Builder dies and cut some of the elements. I used a dark brown cardstock for the wooden pieces and kraft cardstock for the legs and used a marker to add a bit of shading. I glued them on my background.

I then stamped the kitties, cactus and milk bottle from the Kitty Capers stamp set and coloured them in. I used the matching dies to cut them out and added some white highlights for more detail. I arranged them on my card to make it into a funny scene and glued them down with foam tape. 

I love this stamp set, there's so many possibilities for creating scenes or even CAS cards! I hope you like it too and if you order something from the website remember to use my code T4TMIKI10 for 10% off your order.

Hugs,

Miki

How To Create A Cute Scene For Cards

Hi DT Vic here today and I’m sharing a video Tutorial. I often get asked how I create my scenes for my cards and I thought it would be fun to show you.


Products Used: 

I knew I wanted to create a sweet scene using the Purrfect Day Stamp & Dies the cats in this set are so sweet. I also really love the little plants so I popped them at the bottom of my card to make it look like the cats are laying in a big window. 

I used my copics to colour in the images and using the coordinating dies I die cut them out. 


I then used some black card and white embossing powder for my sentiment. I show you in my video how this was all out together.


I hope you find the video tutorial helpful and it will hopefully help you out if your stuck creating a scene for your card. Don’t forget you can also save 10% off your order using the code: T4TVICKI10 at the checkout this includes the brand new release!

Thank you so much for popping by!
Vic x


Other Posts You Might Like