Pages

Showing posts with label Simple Stripes stencil. Show all posts

Friday, 8 September 2023

Sweet Birthday Wishes

Hello, and happy Friday! DT Annalisa here sharing a sweet slimline card featuring the Birthday Cake stamp set. This stamp set features sweet treats with bold lines that are great for birthday cards.

I used the Simple Slimline Nesting Dies to die-cut three panels for this card: Neenah Solar White 80 lb card stock, black card stock and purple patterned paper. I glued the black cardstock and purple paper to a slimline card base.

I stamped and coloured (with Copics) several images from the Birthday Cake stamp set and one from the Birthday Fox clear stamp set. I added white gel pen accents with a Gelly Roll Pen. I used a 0.3 Copic Multiliner to draw a line for the table.

I masked off every image (yup, even the tiny cherry!) by stamping them on masking paper, cutting them out and placing them down on the paper over their respective stamped image. It enabled me to layer stamp sets and use a stencil on the background. 

I ink-blended lost shadow distress oxide using my Beautiful Blender Brush through the Simple Stripes 6 x 6" Stencil. I used low tack tape to mask off the table during this process. I moved the tape and ink-blended antique linen distress oxide on the table area.

I stamped 'sweet birthday wishes' once the ink was dry. I glued this panel to the card base and added Glossy Accents by Ranger to complete the card. 


Thank you so much for reading my blog post. Remember to use my discount code T4TANNALISA10 when you visit the Time For Tea Designs shop to get 10% off your order.


Friday, 12 May 2023

Queen For The Day on Mothers Day


Happy Friday, DT Annalisa here. It is Mother's Day this Sunday here in Canada, so I am sharing a card I made for my mum I created using the Queen For the Day stamp set from Time For Tea DesignsI just had to add the glass of champagne to the kitty in the tub with bubbles as it made me smile 🛁🐈🥂

I ink-blended Squeezed Lemonade Distress Oxide onto an A2 card base through the Simple Stripes 6 x6" Stencil. I used what remained on my blender brush to fill in the white spaces left. I moved the low tack tape I used to mask off the floor and masked the bottom of the wallpaper. For the bathroom floor, I blended on Lost Shadow Distress Oxide. 

In addition to the Queen For the Day stamp set, I used several T4TD stamp sets: Baked With Love Kitchen Add OnPurrfect Day, and You’re Engaged. I stamped, and coloured (with Copics) all the images and cut them out with their coordinating dies. I added white gel pen accents with a Gelly Roll Pen

I adhered some of the images to the card base using liquid glue, for the others I used double-sided foam tape for dimension.

Thank you so much for reading my blog post. Remember to use my discount code T4TANNALISA10 when you visit the Time For Tea Designs shop to get 10% off your order.


Friday, 19 August 2022

Seas The Day


Happy Friday, DT Annalisa  here sharing a sea-themed shaker card I created using stamps, dies and a stencil from Time For Tea Designs. I love how you can use the alpha dies to spell out part of a stamped sentiment to draw attention to it.

To start, I used a panel of watercolour paper and the Simple Stripes 6 x6" Stencil. I sprayed Dusty Concord Oxide Spray and Salvaged Patina Distress Spray Stain over top of it. I gently removed the stencil and set the panel aside to dry. I used a stitched rectangle die to trim it down once it was dry.

I cut out the letters 'SEAS' three times, using Anthony's Alpha Dies. Once from metallic card paper (top layer) and twice from white card stock, I then glued these all together with liquid glue.

I stamped the fish (from Fintastic Friends), gull and shell (from Beach Buds), coloured them with my copics and die-cut them out with the coordinating dies. I then stamped 'Seas the day!' onto white cardstock die-cut it out, and trimmed off the word 'Seas'. 


I used the Slimline Porthole Dies to die-cut some silver metallic paper (the same as the one I used for the letters 'SEAS') porthole. I die-cut the frame for the porthole die from white cardstock and glued them together. I used tape on the back to connect the striped panel to the porthole cover.

I created an A2 card base from white card stock and ink blended the edges with Prize Ribbon. In the centre portion where the porthole opening is, I ink blended Salvaged Patina Ink using my teal Beautiful Blender Brush. I used the bubbles section of the Making Waves stencil and ink blended on some white pigment ink. I glued down the two fish to this area and then added some sequins on top of them (for the shaker element). I added double-sided foam tape (doubled up) to the back of the striped panel and stuck this down to the card base.

I used liquid glue to stick down the sentiment, letters, shell and foam tape for the gull. I then added clear gems. to complete the card.

Thank you so much for reading my blog post, you can use my discount code T4TANNALISA10 when you visit the Time For Tea Designs shop to get 10% off your order.


Tuesday, 8 February 2022

Love you lots!


Hello everyone friends!!! Today I had fun playing with this awesome stencil Simple Stripes to create my Valentine's Day card. I wanted a special background to highlight the sentiment I used Love You Lots Large Sentiment 
To create the background I placed the stencil first vertically and then horizontally, after that I drew lines with black fine point pen, in the end with white gel pen. I really like the result. 

I added the sentiment from Brighter Days Sentiment Card and for a final touch with Enamel Dots  
I hope you like my card, I find it simple and pretty 
I wish you a wonderful week and I remind you to use the code T4TCLAUDIA10 to get a 10% discount in the shop!

Friday, 7 January 2022

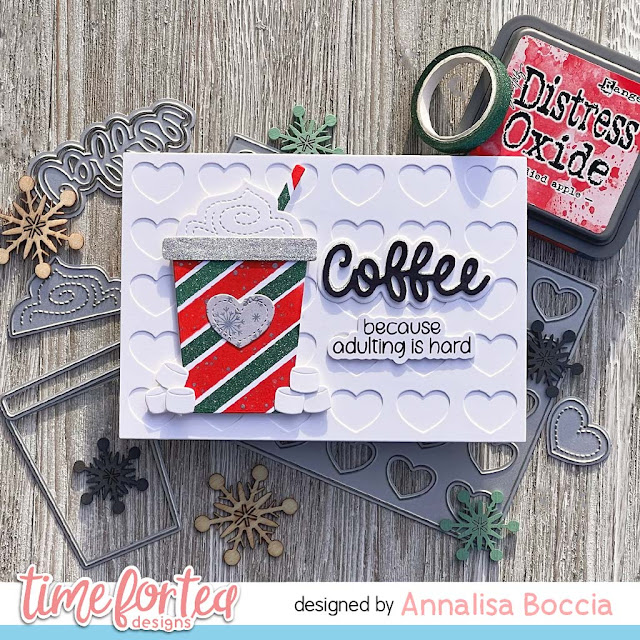
Coffee Because Adulting is Hard


Hello crafty peeps, DT Annalisa here, I trust that you have survived the first week of 2022. I don't know about you, but I definitely need my daily coffee fix to keep me going! My drink of choice is an iced latte, how about you? I have said it before, and I will say it again, I just LOVE the Takeout Coffee Cup Dies. I can't get enough of them! 

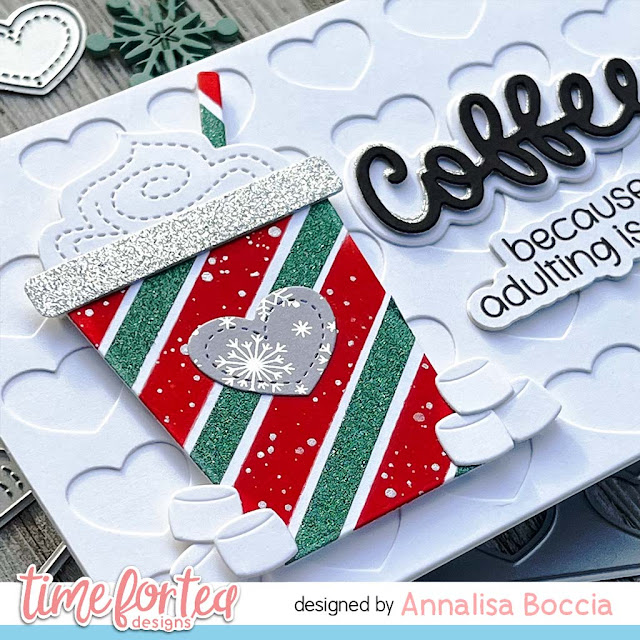
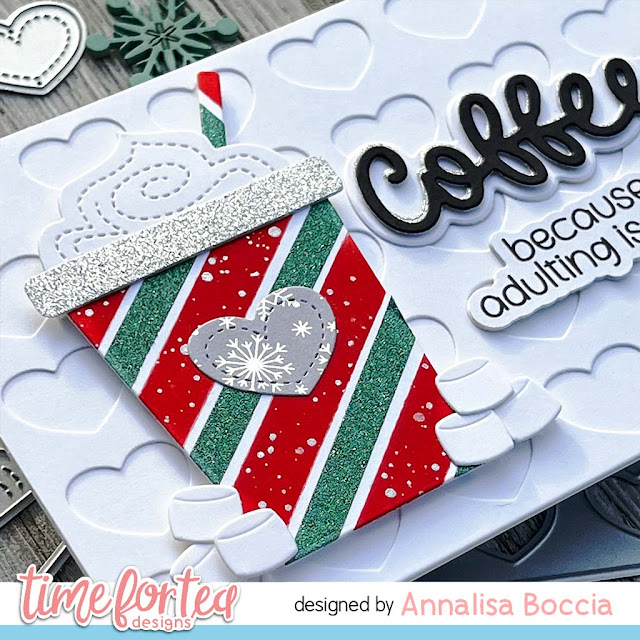
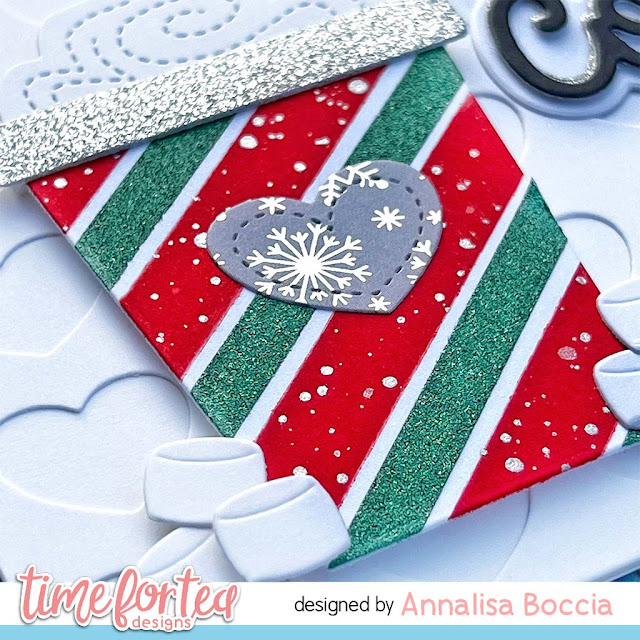
I began by using the Simple Stripes 6 x6" Stencil and applying Candied Apple Distress Oxide on white card stock using my Beautiful Blender Brush. I used some green glitter washi tape and added it in between the red stripes that I had created by the stencil. I then used the cup and straw dies to cut out this patterned paper that I had created. I am a little obsessed with Starbucks, and this pattern looks like it could be one of their cups! 


I cut the cup lid from some glitter cardstock and the heart from some foiled patterned paper. I assembled the cup using liquid glue and then set it aside.

I used the Coffee Lover Clear Stamp Set for the 'because adulting is hard' sentiment, which I stamped and then die cut out using the coordinating dies. I cut out another two pieces of cardstock with the coordinating die and glued the sentiment on top of them for a bit of dimension. I then used the Coffee Sentiment Die to die cut out black and silver glitter cardstock. I glued the black sentiment on top of the silver one and overlapped them a bit so you can see a little of the silver peeking through. I die cut out the shadow of the word coffee and adhered the sentiment to it. 


Next, I took an A2 base and adhered a panel to it that I created by die-cutting some white cardstock with the Lots of Love Horizontal Cover Plate Die

I assembled the card by adding some foam tape to the back of the coffee cup and placing it down. I then glued the sentiments down with liquid glue. For the marshmallows, I used a combination of foam tape and liquid glue to adhere them to the card and cup. The marshmallows just make me smile every time I use them! 


Thank you so much for visiting my blog, you can use my discount code T4TANNALISA10 when you visit the Time For Tea Designs shop to get 10% off your order.

Tuesday, 4 January 2022

Hello 2022!!!

Hello everyone dear Tea Timers and best wishes for a Happy New Year!!!  Today my card is dedicated to sweetness and a fun and creative new year 2022. 


    To create the background, I used the Simple Stripes Stencil   and only shaded half of it with Distress. I created the sentiment with the stamp  Solid Month Numbers
The sweet characters of my card come from the set  Hello Cupcake     with this gorgeous cup cake that I love, I decorated the cream with the Enamel Dots 

I hope you enjoyed my first inspiration of the year, and remember to use the code T4TCLAUDIA10  on your purchases to get 10% off!!! 

Wednesday, 15 December 2021

Take Out Coffee Cup

 Hello!

Today I'm sharing a card I created using the Take Out Coffee Cup dies, the Coffee Sentiment die and the Simple Stripes stencil.


I chose some favourite colour inks - not your usual coffee colours but I love them - and inked up a plaid pattern using the Simple Stripes stencil.


I then used the Take Out Coffee Cup die placed in the middle of the stencilled card to cut the coffee cup and used the rest as a border mat. I inked up pieces of card in the lighter pink and orange to complete the top of the coffee cup and the frosting.


I finished off my card by inking up a piece of card in the darkest colour and die cutting the heart from the Take Out Coffee Cup set and the sentiment from the Coffee Sentiment die.

I hope you like my card using the awesome products from the November release. If you'd like to purchase any items from T4TD you can get 10% off by using my code - T4TJANE10.

Thanks for looking today. 
Stay safe and keep crafting!

Jane
x

Other Posts You Might Like