Pages

Showing posts with label Enamel Dots. Show all posts

Sunday, 22 December 2024

Holly Jolly Christmas

 Hi Friends!
I’m Patricia and today I share you a new Christmas card with new release Santa's Nice list stamp set
For the background I've used Distress Oxide ink (Wilted Violet & Worn Lipstick colors)

I've cutting two circles from Stitched Circle dies for use under the two santas and highlight them from the background
And I've given both of them a few touches with Distress ink so that they were not completely white.

For the sentiment I used one of sentiment of the set and White Velvet Alpha Stickers. To finish I used a few Festive Fun & Clear enamel dots.
Thank you so much for reading my blog post. Remember to use my discount code T4TPATRICIA10 when you visit the Time For Tea Designs shop to get 10% off your order. Happy Crafting!  

Sunday, 1 December 2024

Have a mice & gouda Cheesemas!!

 Hi Friends!
I’m Patricia and today I share you a new Christmas card with new release Merry Cheesemas stamp set.


I've used the Stitched Circle dies to background and center of my card and put all elements of the set over creating a christmas scene with the mouses.


The background circle I've used Distress oxide inks (Fossilized Amber, Wild Honey & Vintage Photo colors) and ink splashes. Also I've decorated with enamel dots and sequins. All stamps are colored with Copic Markers.


Thank you so much for reading my blog post. Remember to use my discount code T4TPATRICIA10 when you visit the Time For Tea Designs shop to get 10% off your order. Happy Crafting! 

Thursday, 27 April 2023

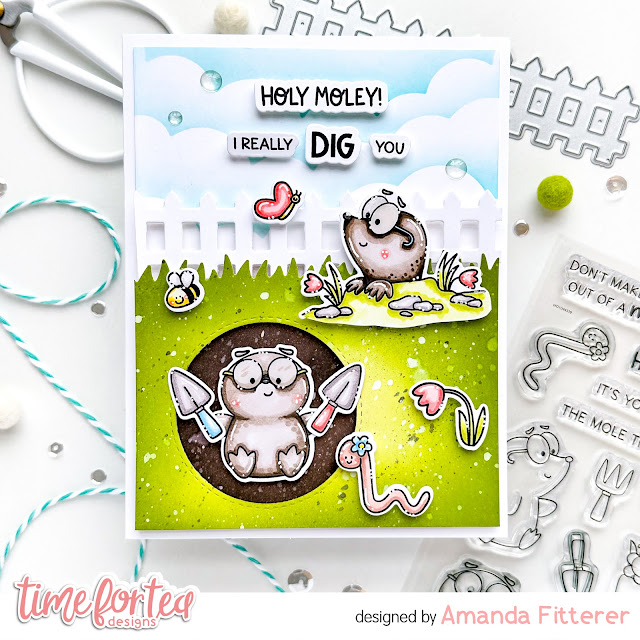
How to Create a Scene Card with Amanda Fitterer

 Hi crafty friends!!  It's Amanda here sharing a really fun scene card with you today!  Today, I'm going to share my tips and tricks on how I create an entire scene in one A2 card!

When I create a scene card, I like to leave a white 1/8" border around the entire edge of my card.  This helps frame the scene in.  So, I plan my scene on a piece of white cardstock that is 4" x 5.25". 

First, I am going to work on my foreground.  My foreground will appear closer to the viewer.  To do that, I'm going to prop it up with foam tape.  

I am trimming a piece of white cardstock to 4"x 3".  Then, I am ink blending it with Catherine Pooler's Melon Ice and Martini inks, concentrating the lighter color in the center and the darker color on the edges.

Next, I'm using a circle die to cut out my hole and the Landscape Edge Standalone Dies for the grass. I've also cut a fence using the Fenced In Dies


Now, I'm planning my background!  This will appear farthest away from the viewer.

I'm taking a piece of white cardstock trimmed to 4.25"x5.5.  I'm creating some clouds using Cummerbund ink and a cloud stencil.  The Scene Builder Stencil has some clouds you can use!

On the bottom of the card, I'm blending the "inside" of my hole with Sand Castle and S'mores.  Once I'm done ink blending, I'm trimming the panel down to 4"x5.25".


Now, we're going to add our focal images!  I've stamped my images from the I Really Dig You stamp set and then colored them with alcohol markers.  I've die cut the little guys out and used scissors to trim the grass down.  To make their glasses look more realistic, I'm adding Glossy Accents to them and then will allow them to dry!


Now, I can stamp my sentiments and die cut them out with the coordinating dies!  


Now, that we have all the elements ready to go, we can assemble the scene!
First, I'm going to adhere my background panel onto the A2 card base by using liquid glue.  This gives me some wiggle room in case I don't place it perfectly.

Next, I'm going to place foam tape all along the back of my grass and my fence.  Then, I will adhere my grass first, then the fence (behind the grass).

Then, we'll put foam squares behind all our stamped images.  This gives another layer of dimension!


Lastly, I've added a few Clear Bubbles Enamel Dots for just a bit more excitement!


That's it!  Such a fun and dimensional scene card! I hope you enjoyed this post and I hope you find some time to get crafty today!!  

Xx, Amanda


Friday, 17 March 2023

Get Whale Soon


Happy Friday! DT Annalisa here sharing a get well soon card featuring the Get Whale Soon stamp set and the Wonky Background Masking Stencil. I have been under the weather for the past week, so I thought it would be fitting to share this. Thankfully I am on the mend, as it is hard to be crafty when your head is congested! 

I ink-blended Tumbled Glass, Salvaged Patina and Peacock Feathers Distress Oxide Ink over the Wonky Background Masking Stencil onto some white cardstock using my Beautiful Rainbow Blender Brushes. I added splatter with a paintbrush, water and Salty Ocean Distress Oxide Ink. I also added metallic silver watercolour splatter with a paintbrush.

Once dry, I die-cut the panel with the A2 Layering dies. I used the same die set to cut grey card stock that I glued to an A2 card base. I love how these dies make it so easy to create a layered card like this without having to measure!

I stamped the images from Get Whale Soon with Lawn Fawn Jet Blank Ink and coloured them with my Copics. I added white gel pen accents and then used the coordinating dies to cut them out.    

I stamped the 'sending you hugs' to the bottom of the ink-blended panel using Versafine Onyx Black. Next, I added double-sided foam tape to the back of the panel and stuck it down to the card base.


I used liquid glue to stick down the pills and heart to the card base for the rest, I used double-sided foam tape. I added Glossy Accents for shine and added dimension, to some of the elements. I added blue Designer Enamel Dots from the Sweet Summer Enamel Dots, to complete the card.

Thank you so much for reading my blog post, you can use my discount code T4TANNALISA10 when you visit the Time For Tea Designs shop to get 10% off your order.

 

Friday, 3 February 2023

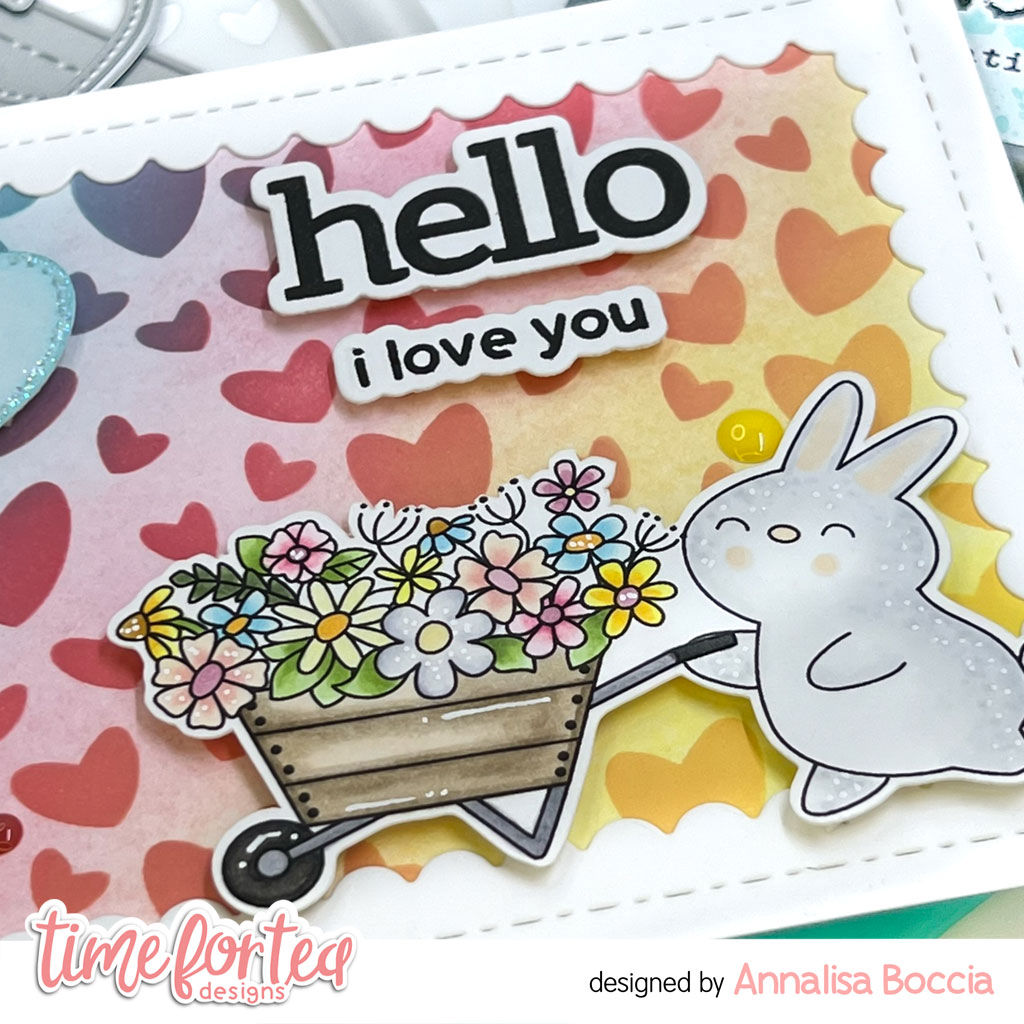
Bunny Valentine


DT Annalisa here wishing everyone a happy Friday! It is bitterly cold (-35 Celcius with windchill) where I am in Canada, so I wanted to share a bright spring Valentine's day card. It features the adorable Blooming Bunnies stamp set and the Scattered Hearts Stencil, perfect for Valentine's Day cards.  


For the background, I ink-blended Salvaged Patina, Worn Lipstick, Dried Marigold and Mustard Seed Distress Oxide onto the Scattered Hearts Stencil with my Beautiful Rainbow Blender Brushes onto some white cardstock. After removing the stencil, I ink-blended lightly with only the ink on my brushes. I die-cut white cardstock with the large frame in the Smile Inverted Scallop Frame Dies and used liquid glue to adhere it to the ink-blended panel. I used double-sided tape to stick this panel to an A2 card base. 

I stamped the bunch of flowers, masked them out and stamped down the wheelbarrow, and finished by stamping the bunny. I used my Brother Scan N Cut SDX125e to cut around the bunny and the cart. I then used my Copics to colour them in and added accents with a white Gelly Roll Pen.

I stamped the sentiments from Let's Chat and cut them out with the coordinating die set. I used the heart from the Slimline Postage Stamp Frame Dies to die-cut white cardstock. I ink-blended this with Salvaged Patina Distress Oxide ink and added sparkles to the edge with a Quickie Glue Pen and Lawn Fawn Prisma Glitter.

I used double-sided foam tape to stick all of the elements to the card. To complete the card, I added Sweet Summer Designer Enamel Dots.


Thank you so much for reading my blog post, you can use my discount code T4TANNALISA10 when you visit the Time For Tea Designs shop to get 10% off your order.


Thursday, 29 December 2022

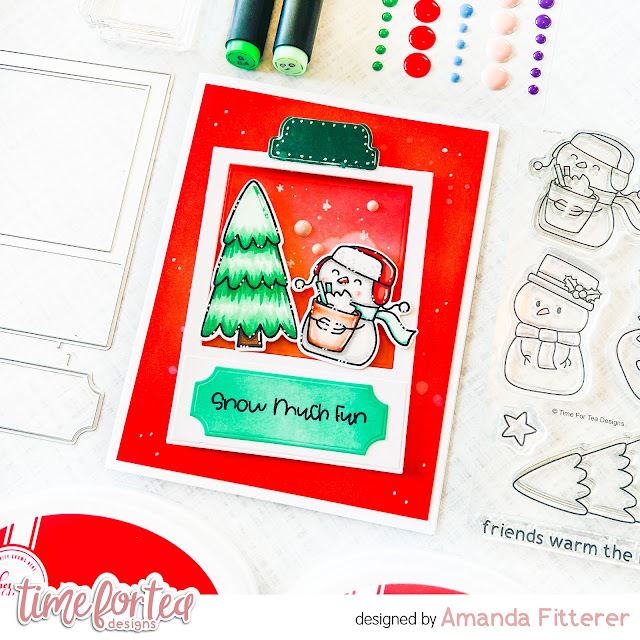
Snow Much Fun Polaroid Card


Happy Thursday, Tea Timers!  It's Amanda here! Do you love using the polaroid and tab dies from the Memory Keeping Essential Die Set?  If you don't have this die set, you HAVE to get it!  It's not just for memory keeping; that's for sure!  I love using all the elements for cards!

For this card, I grabbed my new Snow Much Fun stamp set and stamped out a few images.  I colored them with OLO markers, added some white highlights with a Gelly Roll pen, and then cut them out with the coordinating dies.

For my background, I blended Bellini and Rockin' Red Catherine Pooler inks and spritzed with water and white paint flecks.

Wondering where my "snow much fun" sentiment frame came from?  It also came from the Memory Keepers Die Set!  Yup!!  How perfect is it?  I used Minted and Aquatini to color the frame before stamping my sentiment.

For my final touches, I added some Festive Fun Enamel Dots!
I hope you have enjoyed this blog post and it makes you feel inspired to make something!  Sending you SNOW MUCH FUN!  Xx, Amanda


Thursday, 22 December 2022

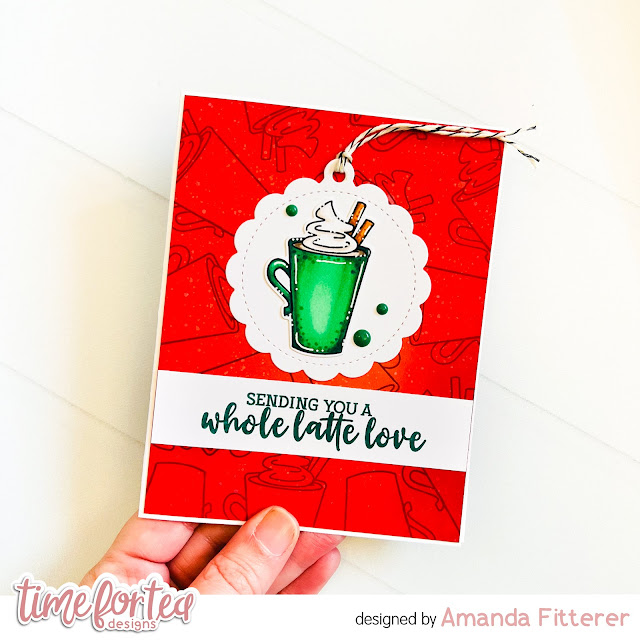
How to Make the Pumpkin Spice Stamp Set Work for a Holiday Card!


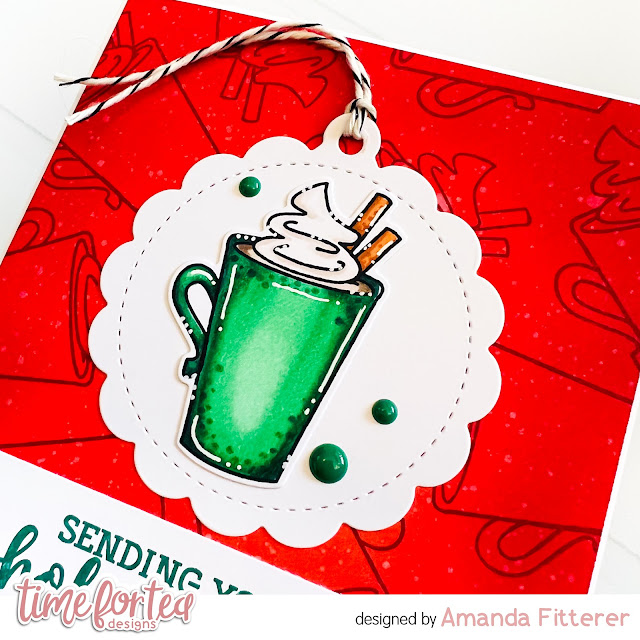
Happy Thursday, Tea Timers!  It's Amanda here!  I'm sharing this card I made for a family friend!  I wanted to use the Pumpkin Spice Stamp Set, but I needed it to work for Holiday card!

The first thing I did was create a vibrant red background using red cardstock and then ink blending only the edges with a dark red ink.  I stamped some mugs around the entire background with dark red ink as well.

Next, I stamped my mug image on white cardstock and then colored it in with OLO markers.  I die cut it out, as well as a little tag die.  I placed some Festive Fun Enamel Dots on the tag as well.  I stamped my sentiment on a white strip and added that to the front of my card.

This was such an easy and quick card to make!  I love that the Pumpkin Spice stamp set can be used for a winter card, don't you?!

Thank you so much for stopping by the blog today!  I hope you find time to get crafty today!!  Xx, Amanda


Wednesday, 21 December 2022

Brew-tiful....!!

 Hey there Tea-timer friends....

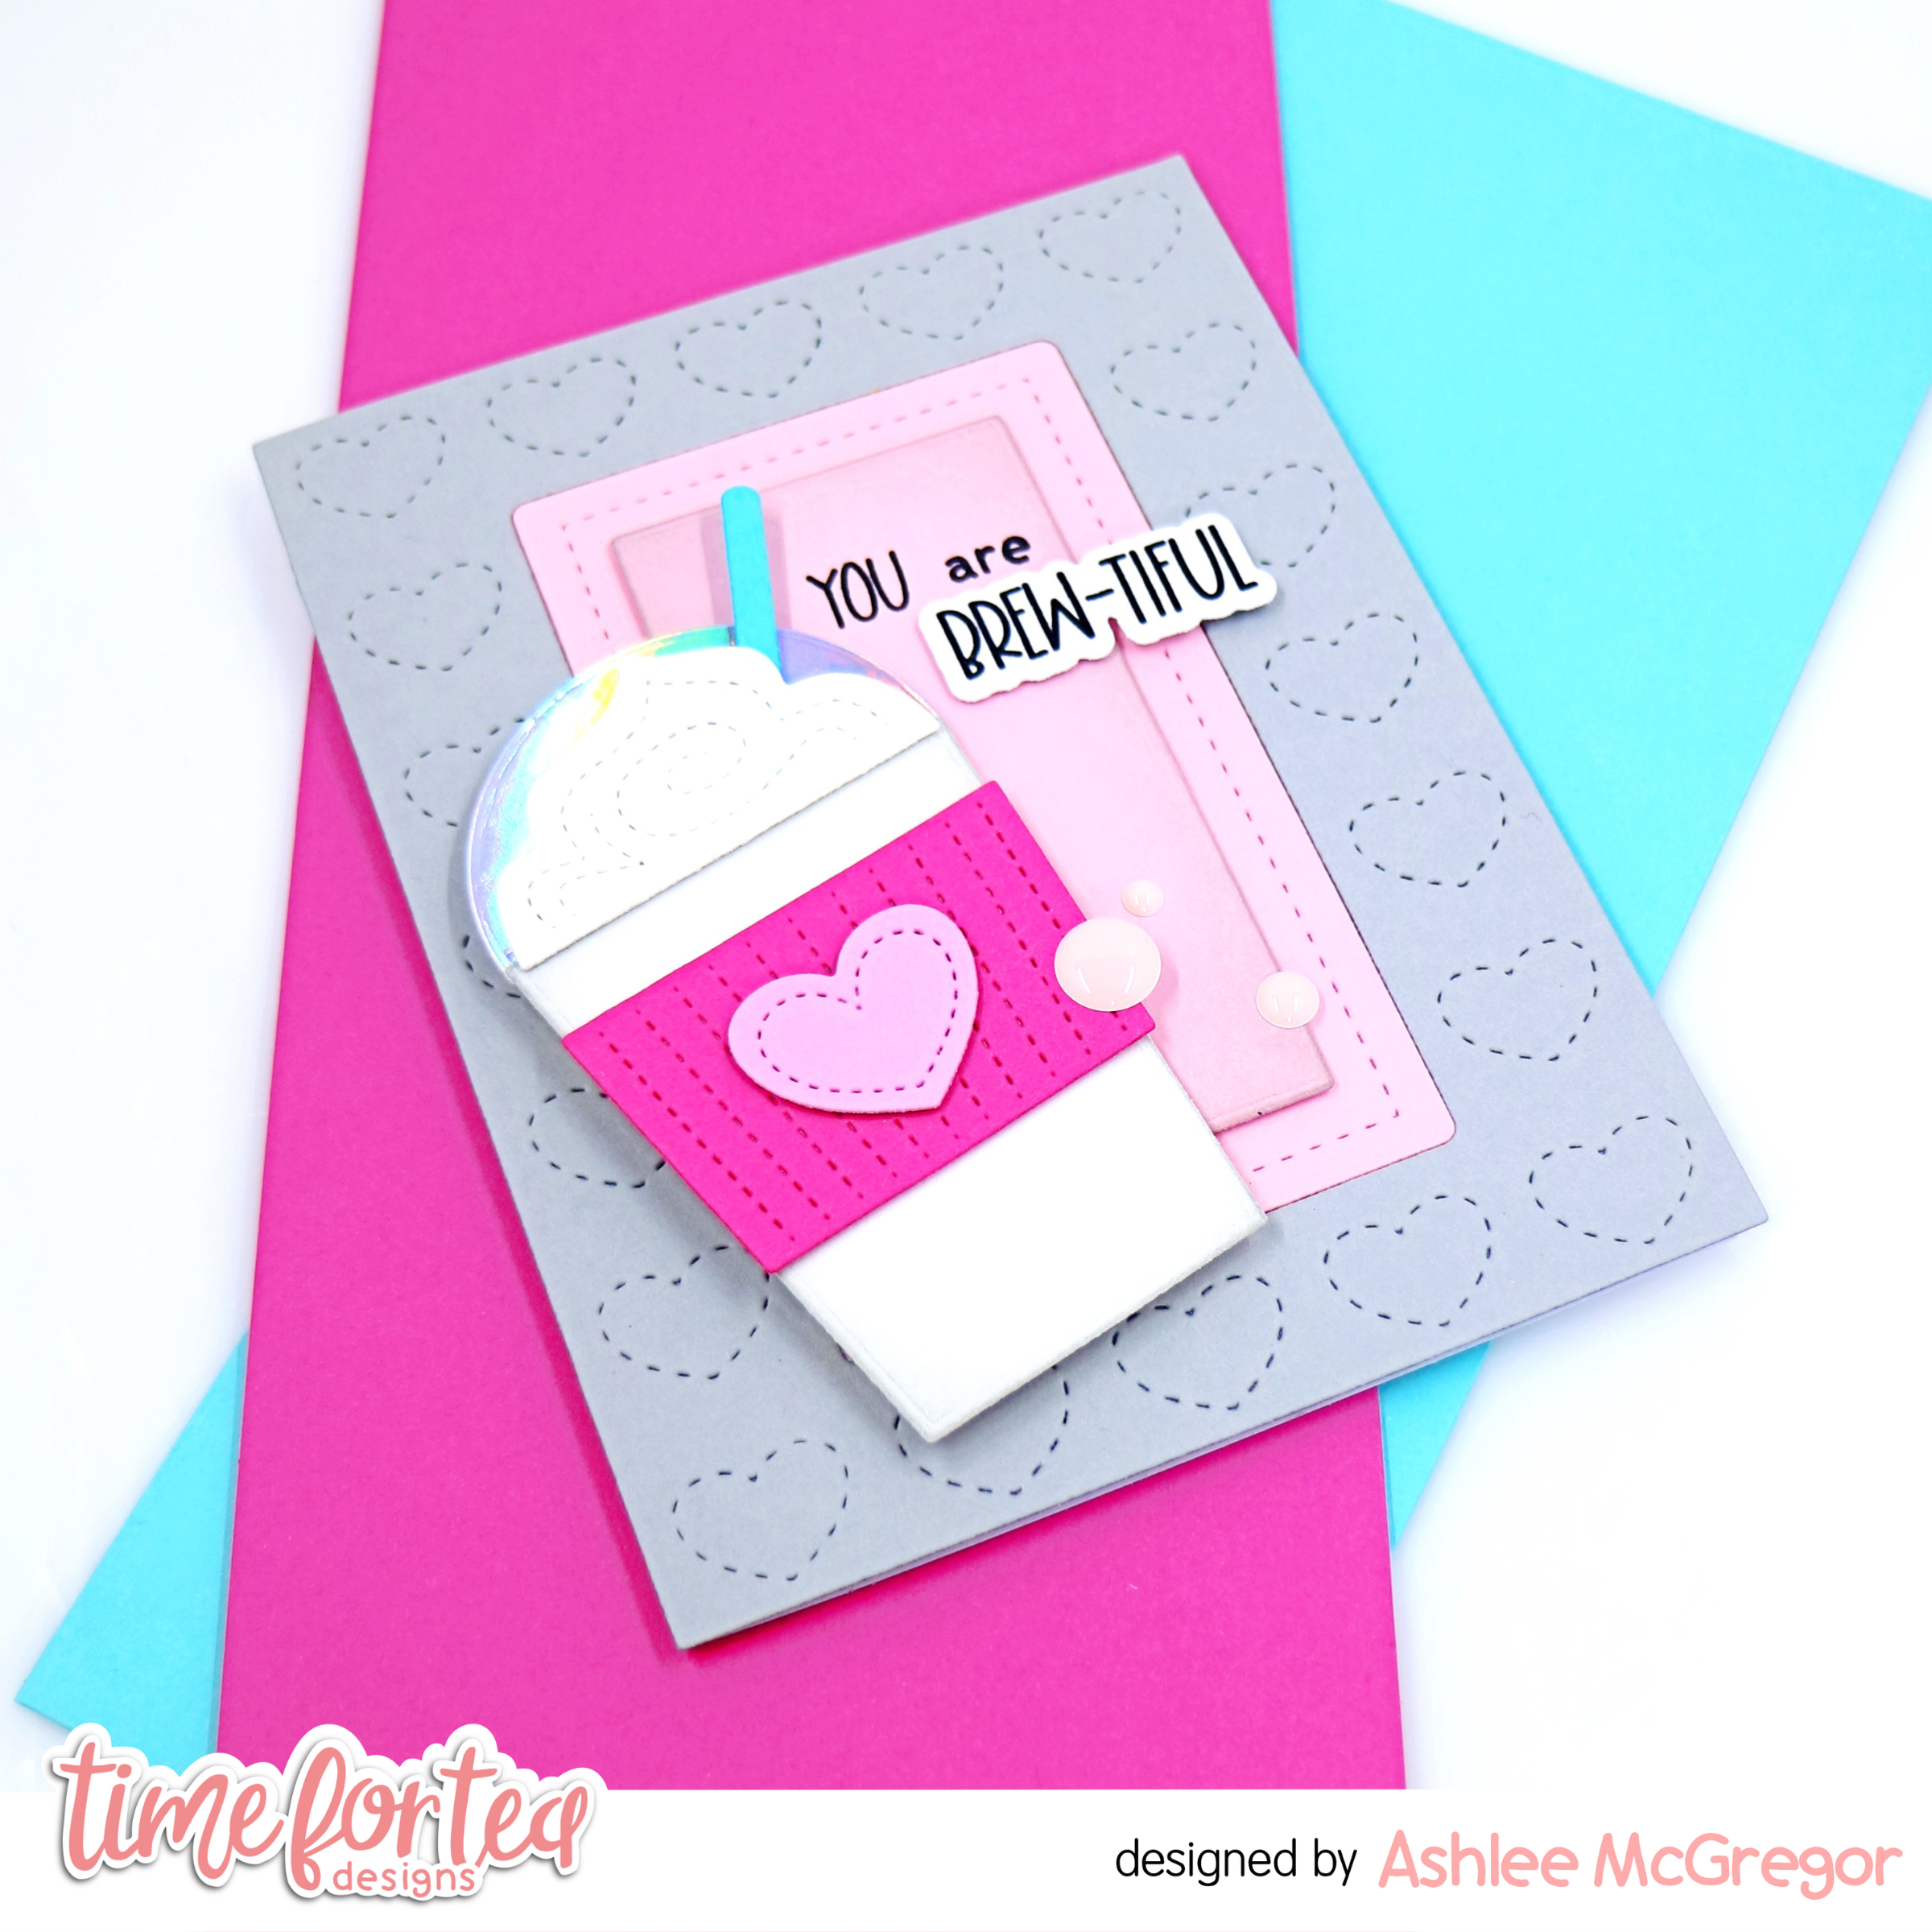
Who loves a nice brew of iced coffee topped with cream?! I know I do and this card is totally inspired by delicious coffee....


I used the fabulous T4T Takeout coffee cup die to die cut all the pieces for the takeout coffee cup and adhered them together with liquid glue and foam tape ready for my card base. 


To create the base of my card I used the A2 Stitched hearts cover die and die cut it from grey cardstock I then used the centre dies from that same piece to die cut the pink frames for the centre. 

I added a stamped and die cut sentiment from the Pumpkin spice collection!

To complete the card a touch of Time for Tea designs Festive fun enamel dots...
A brew-tiful card perfect for the coffee lover!


This is the last card for me for 2022 on the T4T blog, I hope you have enjoyed my creations this year. I look forward to sharing more T4T inspiration with you all in 2023. Happy crafting, hugs DT Ashlee. 

Wednesday, 30 November 2022

Let it snow, let it snow....!!

Hey there tea-timer friends... 

DT Ashlee here today to share a new card with you and this one uses more of the new release goodies!!

I am totally loving all the new sets, they are so fun and super adorable too...


This card uses the Snow much fun Stamos and co-ordinating die set along with these previously release T4T products...


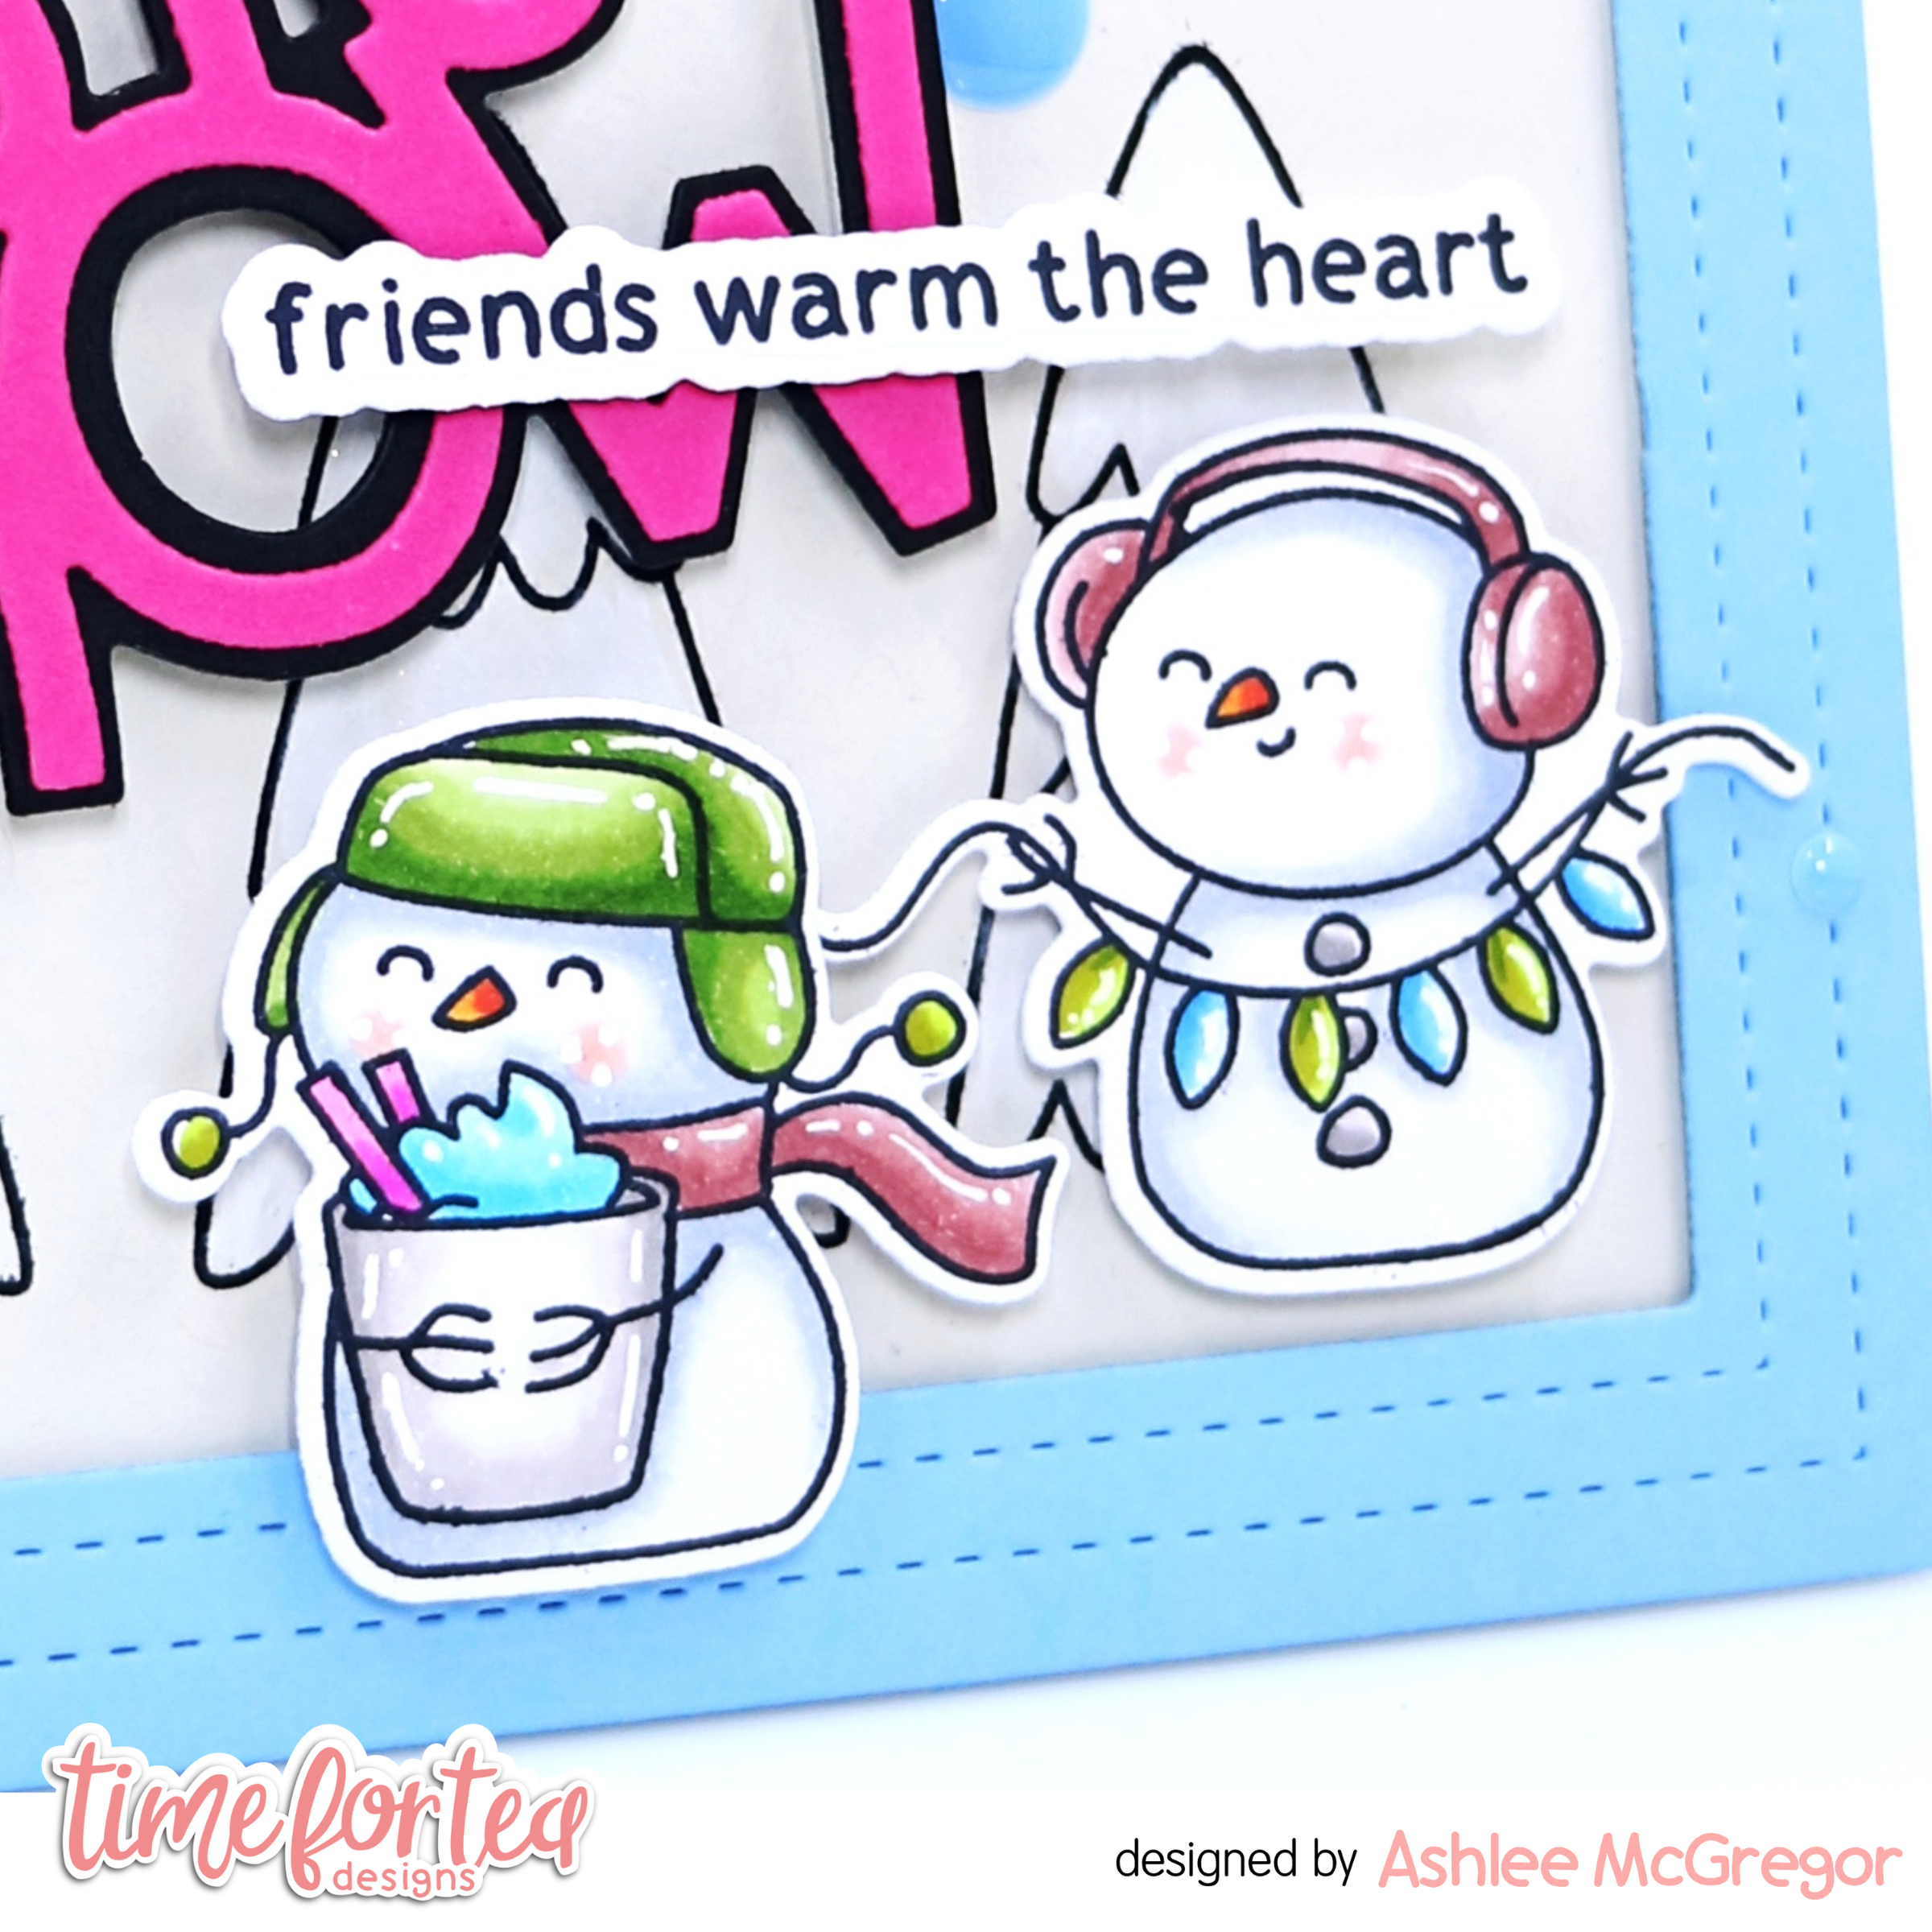
To create this card I started with a white card base that I stamped a row of the trees on and coloured with a white glitter pen (sorry I couldn't capture the sparkle in the photo).

I then added a wide stitch frame that was diet from a light blue cardstock. This was mounted with foam tape to add dimension to the base. 


A poppin sentiment was added by die cutting the let it snow sentiment from black and bright pink cardstocks. A sub sentiment was stamped and die cut using the co-ordinating die and added onto the side of the large sentiment. 


I stamped, coloured and die cut a couple of the cute snowmen and added them to the scene. To complete the card I popped on some of the T4T enamel dots.

What do you think of this fun snow scene card? I hope you enjoyed it...


Happy crafting, till next post. Hugs Ashlee. 


Want to do some shopping at the T4T store? You can use the code T4TASHLEE10 for a discount off your order

Tuesday, 8 February 2022

Love you lots!


Hello everyone friends!!! Today I had fun playing with this awesome stencil Simple Stripes to create my Valentine's Day card. I wanted a special background to highlight the sentiment I used Love You Lots Large Sentiment 
To create the background I placed the stencil first vertically and then horizontally, after that I drew lines with black fine point pen, in the end with white gel pen. I really like the result. 

I added the sentiment from Brighter Days Sentiment Card and for a final touch with Enamel Dots  
I hope you like my card, I find it simple and pretty 
I wish you a wonderful week and I remind you to use the code T4TCLAUDIA10 to get a 10% discount in the shop!

Tuesday, 4 January 2022

Hello 2022!!!

Hello everyone dear Tea Timers and best wishes for a Happy New Year!!!  Today my card is dedicated to sweetness and a fun and creative new year 2022. 


    To create the background, I used the Simple Stripes Stencil   and only shaded half of it with Distress. I created the sentiment with the stamp  Solid Month Numbers
The sweet characters of my card come from the set  Hello Cupcake     with this gorgeous cup cake that I love, I decorated the cream with the Enamel Dots 

I hope you enjoyed my first inspiration of the year, and remember to use the code T4TCLAUDIA10  on your purchases to get 10% off!!! 

Thursday, 18 November 2021

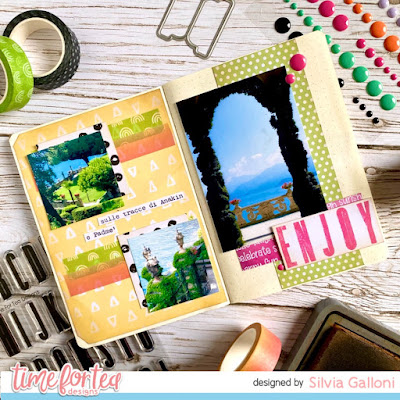
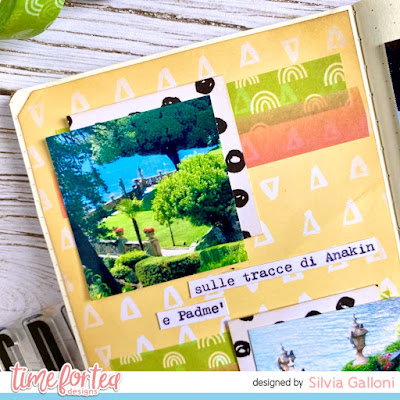
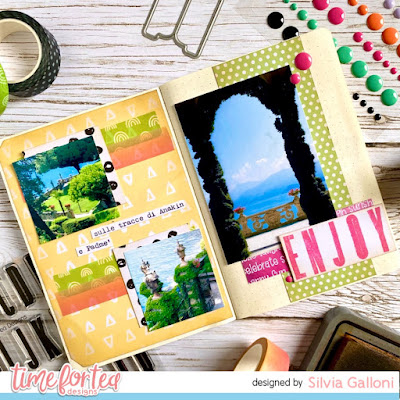
Summer memories: looking for Anakin and Padmé

 Hello crafty friends! Silvia’s back to the Time for Tea Designs blog with some new traveller notebook inspirations.

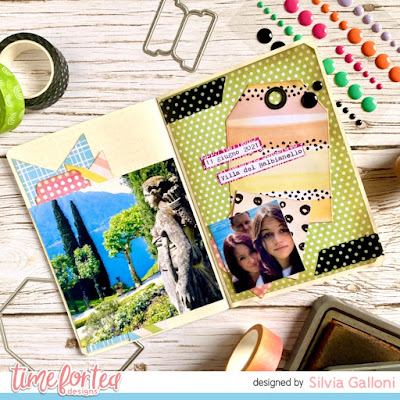
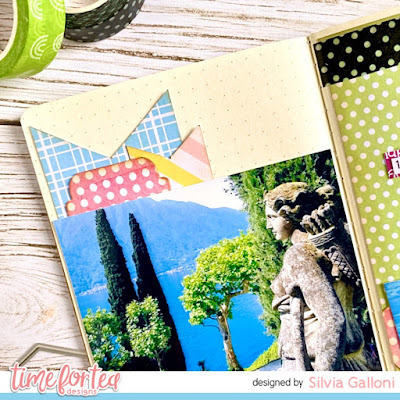
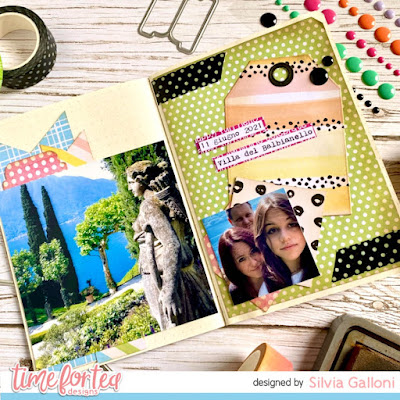
Last Summer I spend a wonderful morning with my family at Villa del Balbianello on Lake Como and we have so much fun looking for Anakin Skywalker and Padmé Amidala (Star Wars) wedding location. 

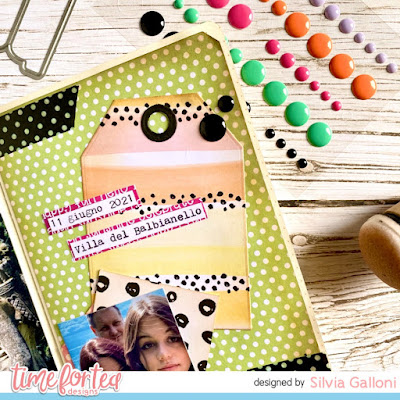
This is really a magical place and I took a lot of photo that I organized in these pages and I decorated them with so many stuff from the October release.


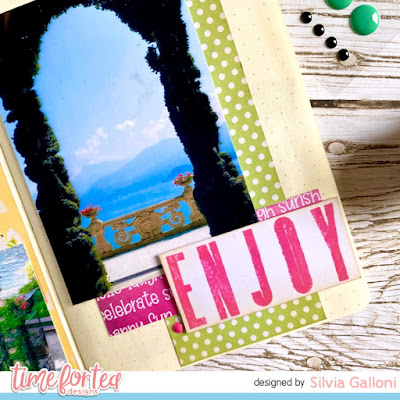
As you can see in the following close-ups I used the amazing "Memory Keeping Essential" die set with the colorful patterned papers from "Sweet Summer" and "Brighter Days" paper pads.


I also used the beautiful washi tapes and enamel dots (a very simple way to add color and interesting in your pages).


For the sentiment I used the new "Tall Alpha" stamp set with picked raspberry Distress Oxide ink.


Well, that's all for today and thank you so much for stopping by . Don't forget that you can get a 10% off yor Time for Tea order with my code, T4TSILVIA10.

Have an amazing day! Hugs, Silvia.


Thursday, 4 November 2021

Sunday Fun

Hello crafty friends, Kitty here. Are you enjoying the new Memory Keep release? It's been such a refreshing change to create some memory book/journaling pages and books and I can't wait to share more with you. Here is my first page...

I started out by creating my background. I used lots of different cardstockk to create a bright backing along with a touch of patterned paper. The yellow & blue panels are from the Sweet Summer Paper Pad which were mounted onto white card. I mounted all three photos onto glitter card. I added the Popcorn Die Cut from the Sweet Summer Ephemera Pack. The Sunday word I cut from the Days of The Week Washi Tape and placed it onto white card to make it stand out a bit more. I printed out the middle wording and die cut it using a Label Die from the Memory Keeping Essentials Dies. The Fun & Love It are from the Noted Tab & Mood Stickers. To finish I added some White Enamel Dots from the Sweet Summer Enamel Dots Set.

Don't forget you can use my discount code T4TKITTY10 at the Time For Tea Website to get 10% off your order.

Kitty xx

Other Posts You Might Like