Pages

Showing posts with label pawsome prints stencil. Show all posts

Wednesday, 10 April 2024

Meeoooowww!!

Hey there Tea-timers...

DT Ashlee here with some new T4T inspiration for you!

MEOOOOWWW...

To create this card I decided to choose a colour of card that I don't usually gravitate towards and that was orange. I then used the Pawsome prints stencil along with brown distress oxide ink to create a paw pattern/inked card base....


Using the You had me at MEOW sentiment die I die cut that from two different brown cardstocks before adhering together with liquid glue and adding to the card base using foam tape....

I added a couple cute little kitty faces by stamping, colouring and die cutting them from the Sweet cart critters set! These were adhered using foam tape also so that my card has lots of nice dimension!!

To complete the card in my usual style I finished it all off with a touch of pretty sequins. That's all for my card today, I hope you enjoyed this kitty themed card....


Until next post happy crafting, hugs Ashlee. 

Wednesday, 13 December 2023

MEOW....!!

 Hello lovely Tea-timer friends...

DT Ashlee here with a kitty cat themed card for today....

"YOU HAD ME AT MEOW"!


Time for tea designs products used for this card are :

- You had me at meow sentiment dies

- Pawsome prints stencil

- Home is where the heart is stamp set

- Home is where the heart is co-ordinating dies


To create this card I started with a mustard yellow card stock that I added partial paw print stencilling too with Catherine Pooler ink. I went on to die cut the sentiment, base from black card and then white for the wording that I added ink blending too for a fade of colour. This was adhered to the card base using foam tape to start adding dimension. 

Using a couple of images from the home is where the heart is set I stamped, coloured and die cut them before adhering to the card. These were coloured using Spectrum noir tri-blend markers. 

To complete the card a touch of pretty sequins adhered using micro glue dots (I love these things for adhering sequins, they are the best!)


That's all for my card today, what do you think?!

Happy crafting, hugs Ashlee. 

Wednesday, 2 August 2023

Meow....!!

 Hey there Tea-timers...

It's DT Ashlee here and today I'm sharing a new card I made using some fun Time for Tea designs goodies to create a kitty cat themed card! 


I used these T4T products :

To create this card I started with a light grey card stock base that I inked the Pawsome prints on to with a grey ink from Catherine Pooler. I then die cut the large focal sentiment from two shades of pink cardstock and glued them together with Bearly arts liquid glue. That was then adhered to the card base using foam tape to pop it up.


 I stamped, coloured and die cut a bunch of images from the Kitty capers set and adhered those in place also with layers of foam tape to add even more dimension. The images were all coloured using Ohuhu brush markers. To finish the card off a touch of pretty pink sequins!


That's all for my card today, I hope you enjoyed this kitty themed card. Till next post happy crafting, hugs Ashlee. 

Wednesday, 31 May 2023

Every daisy

Hey Tea-timer friends...

It's DT Ashlee here today with some new inspiration using the Oops a daisy set from Time for Tea designs!!


To create this card I started with a yellow cardstock that I added some cute paw prints to using the Pawsome prints stencil. I then die cut a circle frame from the Slimline porthole dies and adhered it to the base using foam tape....

A sentiment "Thinking of you every daisy" was stamped onto the base using Memento tuxedo back ink. 


I stamped two kitty cats and a couple bee's from the Oops a daisy set and coloured them in with Spectrum noir tri-blend markers along with Shimmer drops paint. I love adding some painted elements to my images, it's so shiny and beautiful!!

To complete the card I added one tiny little sequin as a finishing touch...


I hope you enjoyed today's inspiration. Happy crafting, Hugs Ashlee. 

(You can use discount code T4TASHLEE10 for a discount off your order in the T4T shop if you would like to do a little crafty shopping). 

Wednesday, 1 February 2023

Pawsome....!!

Hey there Tea-timers...

How awesome was Valentine's inspiration week?! It was so nice seeing all the teams lovely creations so I thought I would continue it on a little more this week with a pink pawsome design!!


I used these Time for Tea designs products :


To create this card I started with a light pink cardstock base that I added the pawsome prints too using the stencil and Catherine Pooler ink. I then added a bit of blending to the top portion and gave it a splatter of black paint...

Using the You had me at Meow sentiment I die cut both layers and adhered them together with liquid glue before adhering to the card base with foam tape so it popped up off the base!


I coloured up two plants and a cat from the Purrfect set using Spectrum noir tri-blend markers, die cut using the co-ordinating dies and adhered those also using foam tape before completing the card with a touch of sequins....

I hope you enjoyed this meow card, happy crafting. Hugs Ashlee.
Thursday, 29 September 2022

2 for 1 Cards with Amanda - Part 1


Happy Thursday, Tea Timers!  It's Amanda here!  Today, I am showing you Part 1 of my 2 for 1 Cards!

For my 2 for 1, I'm using one sheet from the Pawsome Rainbows Paper Pad and the Stitched Window Cover Die. Once I cut my paper with the die, I'm saving all the pieces!  I am going to use the frame on this Part 1 card and I'm going to save my insides for Part 2 (coming Oct 6th right here on the Time for Tea Blog!)

Next, I'm grabbing my Pawsome Prints Stencil, a black piece of cardstock, and Deco Foil Transfer Gel DUO.  Using a spatula, I have put the DUO gel through the stencil.  Next, is to wait an hour before we can add the foil!
After the DUO gel has gone clear and is now tacky, I can place my foil on top of my gel (shiny side up) and run it through my die cutting machine.  I'm also using the Hey, Hello, Hi Dies to create a sentiment and white shadow.
Now that I know where I'm going to place my stamps, I'm stamping my images from the Kitty Capers Stamp Set.  I'm coloring them with OLO Markers and then I can cut them out with the coordinating die set.

The next step is to attach the frame to the black background with 3D foam tape. I've also used 3D foam squares to prop up and adhere my stamped images and sentiments to the card. 


Make sure to come back next week to see Part 2!
Crafty Hugs,


Friday, 16 September 2022

You Had Me At Meow


Happy Friday, DT Annalisa here! My card today features the awesomely large You Had Me At Meow Sentiment Dies. I love how this die takes up a whole A2 card!


I found some adhesive sheets with wood print at my local dollar store and decided to try them in my cardmaking. I used a stitched rectangle die (4 by 5 1/4 inches) to cut out one of the wood patterns. I also ran this through my die-cutting machine with the You Had Me At Meow die. It helped me with the placement of the letters and provided me with wood-looking letters that I could use in another project. I removed the backer sheet of the die-cut wood panel and placed it on a white A2 card base. 


I ink blended Walnut Stain Distress Ink using my Beautiful Blender Brush onto some white card stock through the Pawsome Prints 6 x6" Stencil. I used the You Had Me At Meow sentiment again to cut the stencilled paper. I used the same die to cut out the letters two more times (it got a workout on this card!). I glued all the letters together and then onto the card.  


I used the 
Purrfect DayKitty Capers and Café Critters stamp sets and their coordinating dies. I coloured the images with Copic markers and added white Gelly Roll pen accents. I used liquid glue to adhere the elements to the card.


Thank you so much for reading my blog post, you can use my discount code
T4TANNALISA10 when you visit the Time For Tea Designs shop to get 10% off your order.


Tuesday, 12 July 2022

Meowdy! Let's hang out


Hi tea timers!


Welcome back to the T4T blog! It's Miki here and today I have a different kind of scene to share with you.

To start with, I stamped the images from the Purrfect Day stamp set. I coloured them in with my Spectrum Noir Illustrated markers and cut them with the matching dies. I then added some white highlights for added details. I picked two of the sentiments from the same stamp set and embossed them in white on black card stock. I cut them using the matching dies.

Next, I used the Stitched Window Cover Die and cut it from white card stock. I took each of the inserts and ink blended them with Distress Oxide in Kitsch Flamingo to create a faded effect. I then used the Pawsome Print Stencil and ink blended it in white ink, again with a faded effect. I then sprayed them with a mix of water and Perfect Pearls and let them dry. 

I glued the frame to a card base and added all the inserts back in. I then arranged my images and when I was happy with the placements I glued them with foam tape. I did the same for the sentiments and added some pink heart gems around for added details.

I think this must be my favourite card with the last release and I hope you like it too. The die is perfect for creating more abstract scenes. Remember, you can use my code T4TMIKI10 for 10% off site-wide.


Until next week!

Miki

Tuesday, 5 July 2022

You had me at meow!


Hi friends!


Welcome back to the T4TD blog! It's Miki here and today I have another card to share with you.

To start with, I used the Pawsome Print Stencil and ink blended it in white on a purple cardstock. I let it dry for a bit and used the You had me at meow sentiment dies set to cut the words out. I then cut it twice more from the same purple cardstock and glued the letters together for extra dimension. I then cut the shadow from white cardstock and used one of the negatives from cutting the sentiment to glue the letters down straight. 

For the background I picked Shaded Lilac and lightly ink blended it in the centre of a white panel. I tried to follow the shape of the word shadow. I added some splatters in Shaded Lilac and white and let it dry. I then cut the panel to 4" x 5.25". I glued it on a black A2 card base and glued my large sentiment on top. I added a white panel inside my card base to be able to write a greeting.

I then stamped a kitty from the Purrfect Day Stamp Set on white card stock and coloured it in. I used the matching dies to cut it out and added some white highlights. I glued it on my card using foam tape and added some black gems around.

Today's card is super simple, but I love it and I hope you do too. Remember the code T4TMIKI10 gives you 10% off store-wide.


See you next week!

Miki

Thursday, 30 June 2022

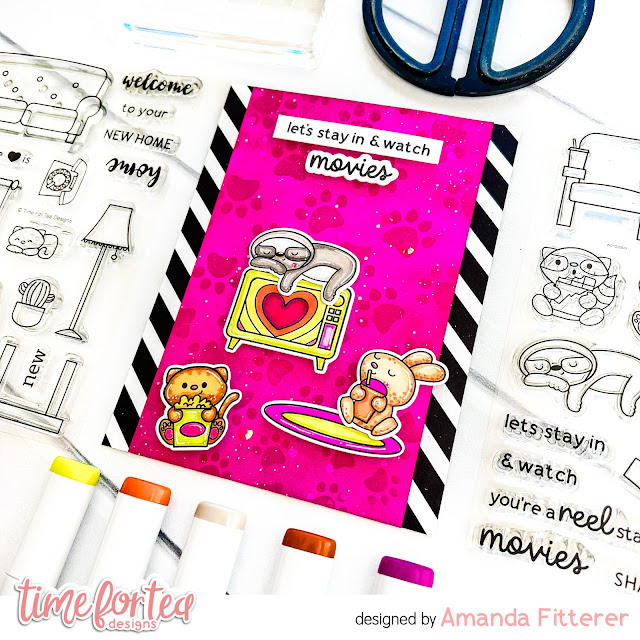
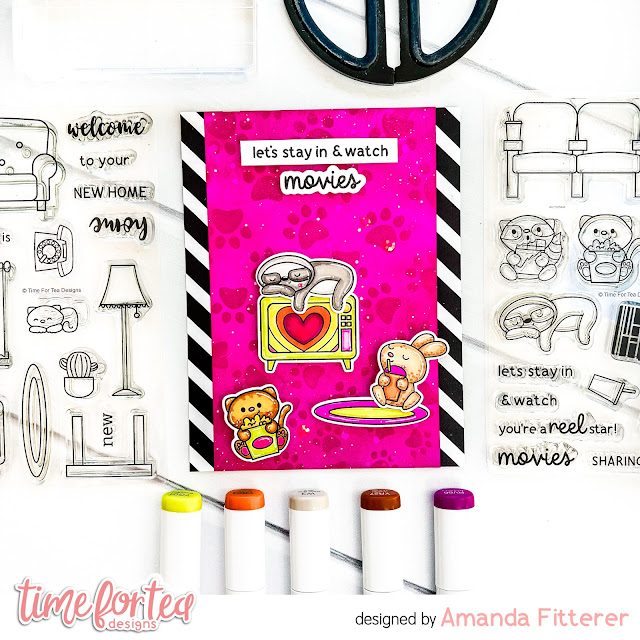
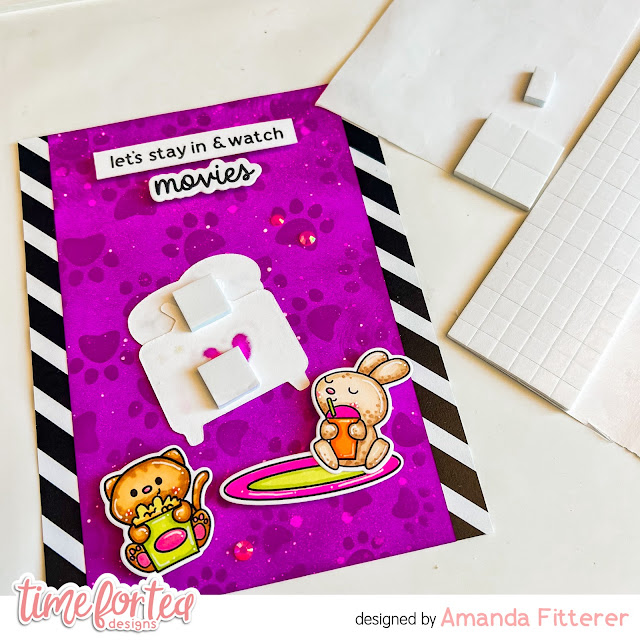
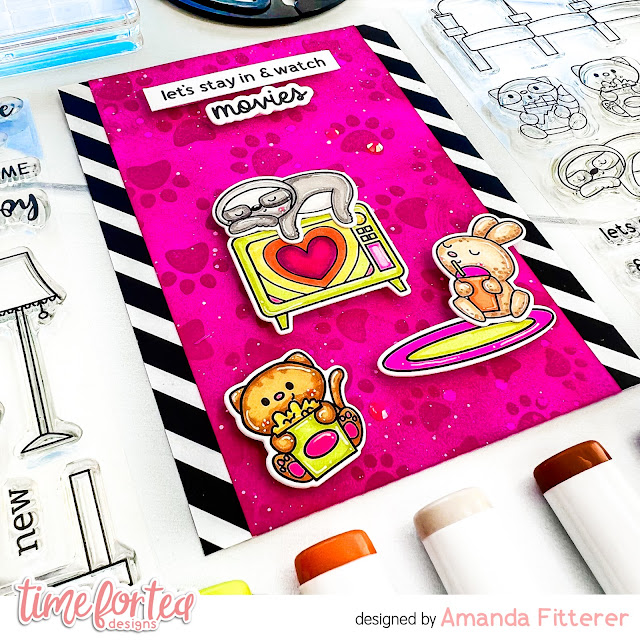
Let's stay in and watch MOVIES!


Hello friends!  It's Amanda back to share a bright and happy card with you today!  I love creating cheery cards that make people smile!  I hope this card puts a smile on your face today! :)

Let me share how I put this card together!
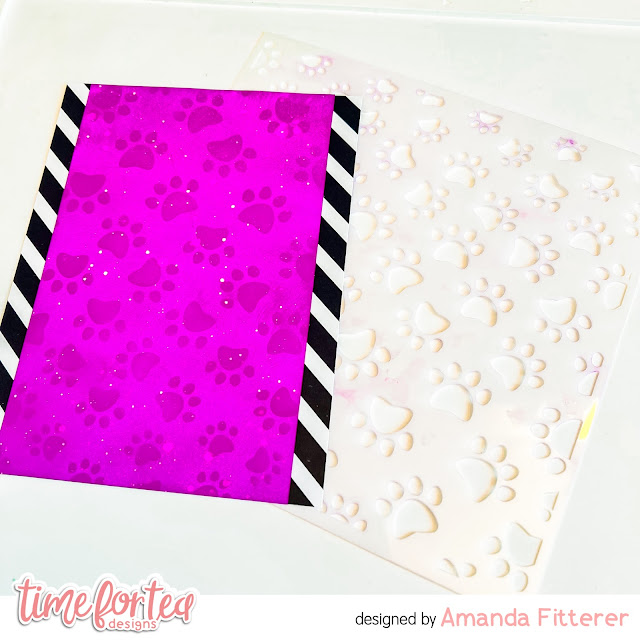
First, I'm going to cut a piece of white cardstock down to 3.75" x 5.5".  I'm using Catherine Pooler's Flirty Fuchsia ink to cover the entire panel.  Then, using the Pawsome Prints Stencil, I'm going to add even more ink to create a subtle, monotone background. 

I'm layering my panel onto a piece of black and white patterned paper cut to 4.25" x 5.5".


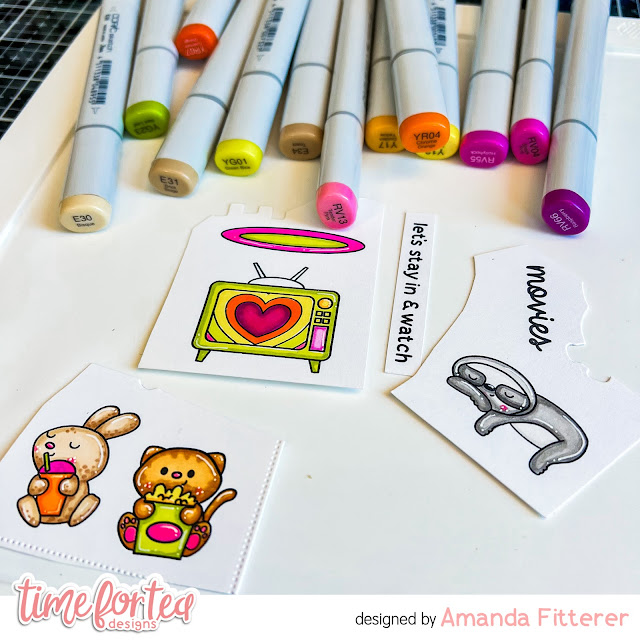
Next, I'm going to stamp and color my cuties from the Movie Night Stamp Set.  I've stamped them with Maker Forte reMarkable Eclipse Black Ink and then I'm coloring them with Copic markers.  Next, I'm going to die cut the images out with the coordinating die set.


The last step is to adhere my stamped images and sentiments to the front panel with 3D foam squares.  I'm also adding some gems with liquid glue.


That's it for me today!
Don't forget, you can use code T4TAMANDA10 to get 10% off your purchase!
Until next week.... Xx, Amanda 


Other Posts You Might Like