Pages

Monday, 6 June 2022

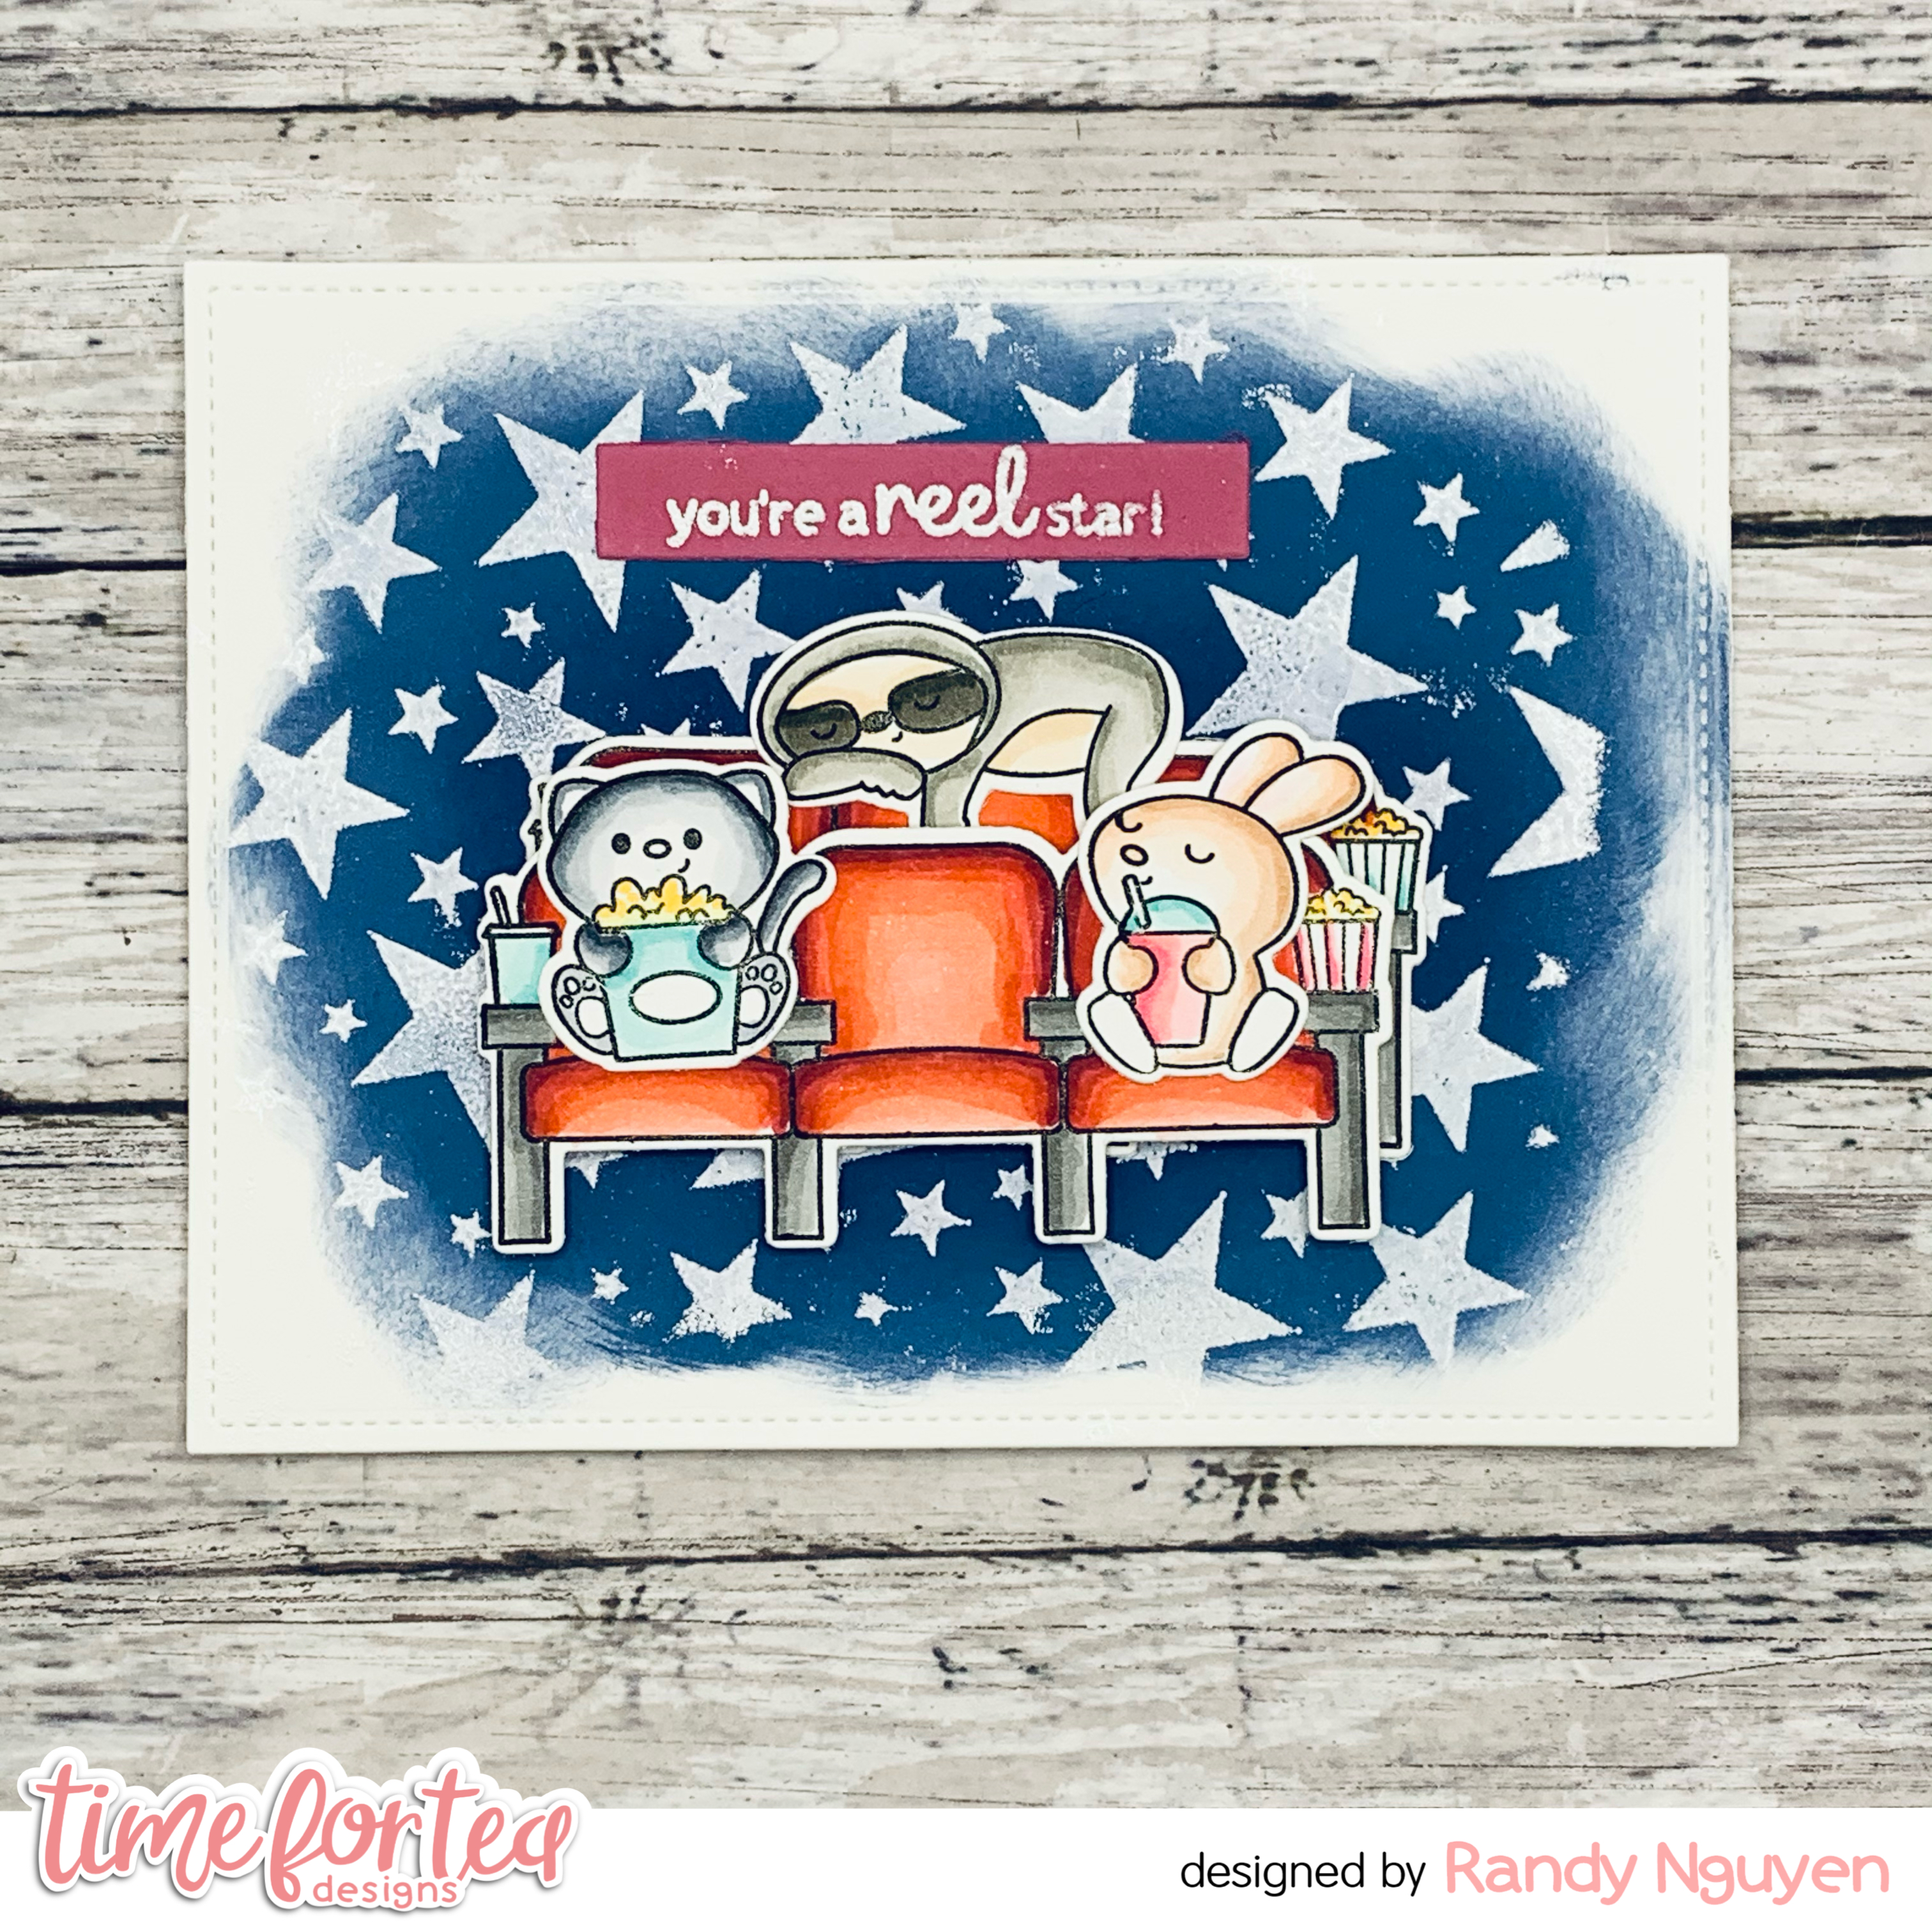
You're a REEL Star!

Hello Everyone and Happy Monday! Today, I am going to showcase the new Movie Star Stencil and pair it with the Movie Night Stamp and Die set. These sets are some of my favorites from the new release as I absolutely adore the theater seats and the cute critters.


Sets Used:


I first cut out my card panel using the largest die from the Autumn Scene set. I then took the Movie Star stencil and blended Embossing Ink over the stencil. I then poured white embossing powder over the panel and heat embossed it. I blended Chipped Sapphire and Faded Jeans over the embossed stars.


I then stamped out my images and used the following Copic markers to color them:
  • Cat: C00, C02, C04, C06
  • Bunny: E00, E31, E33, E35, E37
  • Sloth: W00, W02, W04, W06, E01, E11
  • Chairs: N04, N06, N08, R24, R27, R29

I cut out the images using the coordinating dies. I used liquid adhesive and foam tape to adhere my images onto the panel. I finished the card by heating embossing the sentiment onto pink cardstock and adhered it with liquid adhesive.

I hope you enjoyed my tutorial on the movie theater scene. All sets used are available in the shop and don't forget to use the code T4TRANDY10 for some extra savings. Have a fantastic day! 


Sunday, 5 June 2022

Hit the pawse button

Good afternoon Teatimers,

Today I'm sharing this sweet birthday card using this adorable kitty from the Kitty Capers stamp and die set. I just had to create a cute little scene with the kitty talking time out to look at the beautiful butterfly. Sometimes you just have to hit the pause button and relax, if you can't do that on your birthday when can you?

To start as always I stamped and coloured my images using my Ohuhu Markers (colours listed below in order of lightest to darkest)

Sun - 

Kitty- 

Butterfly - 

To create the background, I used the Wide Stitched Frame Dies and cut out the largest die from white card. Taping the middle section back in place I added distress inks in Mermaid Lagoon Mowed Lawn to create a little outdoor scene.

I added the images to the panel some flat with glue and some on foam pads for dimension. I stamped the sentiment at the bottom of the scene and finished off with a few clear sequins.

Thank you for joining me here on the blog today, you can use my code T4TLYNDSEY10 for 10 % off your order in store. 

Enjoy the rest of your weekend 

Lyndsey x 

Saturday, 4 June 2022

We Are Taking A Break!!!


Hi there Tea Timers!

We are taking a much needed holiday in the next few days so we wanted to let you know what was happening with the shop and your orders while we're away.

The store will be open during our break but shipping will be suspended until the 22nd June. Last day for current orders to ship is the 7th June.
Please ensure your orders are with us by 3pm at the latest on the 7th to be sure that we can ship your order before we close.

We are sorry that we won't be able to process any orders while we are away. As you know we are a family business. Ant & I process all your orders ourselves, so when we're away we do have to suspend shipping for a short time.

If there are any issues with your orders while we are away please email us at admin@timeforteadesigns.co.uk and we will rectify them on our return.

The Design Team will still be posting inspiration during our absence and can answer any crafty related questions vie the Time For Tea Designs Facebook page.

We apologise for any inconvenience this may cause. We will leave the store open so you can continue to browse and place your orders. We will ship them as soon as we can when we return on the 22nd June.

Crafty Holiday hugs
Jo & Ant x

Friday, 3 June 2022

Mew Are Pawsome Shaker


Hello everyone, DT Annalisa here haring a pawsome rainbow shaker card. I love how the large paw opening lets the beautiful patterned paper shine through.

I used the A2 Layering dies to cut out a 5 1/2 inch by 4 1/4 inch piece of the Pawsome Rainbows 6x6' Paper Pad and adhered this with a tape runner to an A2 card base.


I used the same die set to cut a 4 3/4 inch by 3 1/2 inch piece of heavy white cardstock that I cut again with the large paw print from the Pawsome Dies. I cut a 4 7/8 inch by 3 5/8 inch piece of black card stock (and removed the inside) to frame the paw print paper.

I stamped die cut the critters and other elements from the following sets: Kitty Capers and  Coordinating Die set, Purrfect Day and Coordinating Die set Hey There Critters, and Coordinating Die set. I used my Copic markers to colour the images and added some white gelly roll accents.


I heat embossed the 'mew are pawsome' sentiment using VersaMark and white embossing powder (Alabaster ultra fine embossing powder by Brutus Monroe) and an embossing heat gun. I then die cut 'text with the coordinating die.

I used liquid glue to adhere the stamped and coloured elements to the white paw print panel. I cut and glued some acetate to the back of it the paw panel and added some doubled-up foam tape. I took some clear sequins from my stash, placed them in the center of the card and stuck down the paw panel on top.

I glued down the sentiment using liquid glue to complete the card.


Thank you so much for reading my blog post, you can use my discount code T4TANNALISA10 when you visit the Time For Tea Designs shop to get 10% off your order.


Thursday, 2 June 2022

Hello - I'm only a phone call away A2 card


Hi Tea Timers! Welcome back to the blog! It’s Miki here and today I have an extra cute card to share with you. 


To start with, I used the A2 stitched hearts die and cut it from kraft cardstock. This adds some cute details to any background. I then glued it on a top folding A2 card base.


Next, I used the retro phone builder die. I cut the different elements in 3 colours: red, beige and black. I assembled it and glued it on top of the card panel. I don’t know the exact names of the cardstock that I used as I got it in a Mixed A4 Card Pack from Limetree Crafts.


Next, I stamped the two critters from the Let’s chat stamp set and coloured them in. I used the matching dies to cut them out and added some white highlights for extra details. I then used foam tape to position them on the card.


For the sentiments I used the Hello word die from the Hey, Hello, Hi Die set. I cut the sentiment in the same beige cardstock I used on the phone and the shadow in the same red. Using the same colours makes the design look more cohesive. I glued the layers together and positioned the sentiment at the top of the card. I then embossed one of the sentiments in the Let’s chat stamp set and used the matching die to cut it out. I added this with foam tape just underneath my die cut sentiment.


That finishes my card for today. I hope you like it! Remember, T4TMIKI10 gives you 10% off your order in store.


Hugs,

Miki

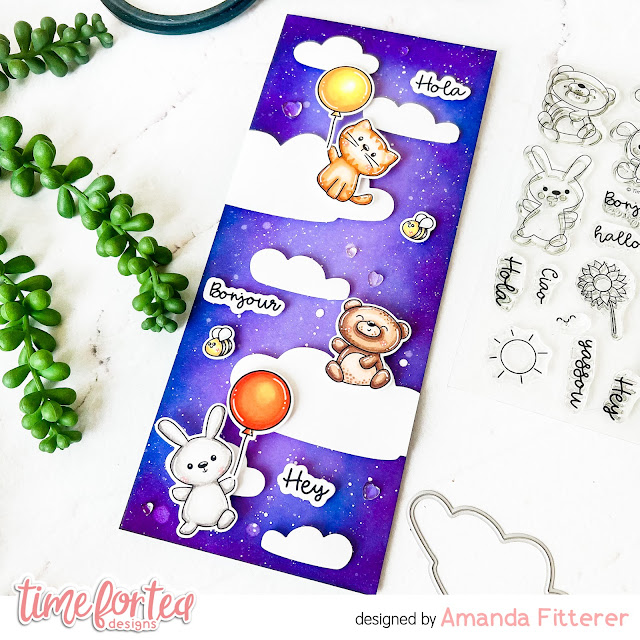
Cloudy Slimline Hey There Critters


Happy Thursday, Tea Timers!  It's Amanda back with another fun project showcasing the NEW RELEASE!
For this card, I've combined the new Cloud Dies and the new Hey There Critters Stamp Set to create a purple-y fantastic slimline card!

I've first started by creating my purple sky by blending Vegas Strip, Blueberry Cheesecake and Sugar Plum inks.  Then, I spritz it with some water and add some flicks of white acrylic paint mixed with water.

Next, I've stamped and colored my Hey There Critters with Copic markers.  I've cut out a few of the Cloud Dies and adhered them around my background with 3D foam squares, trimming off the edges of the larger clouds.


Once I've cut my stamped images and sentiments out with the coordinating dies, I've adhered them to my card front using 3D foam squares.  I've doubled up on the foam squares so that my cute critters have even more dimension than the clouds.


That's it for me today!
Don't forget, you can use code T4TAMANDA10 to get 10% off your purchase!
Until next week.... Xx, Amanda 


Wednesday, 1 June 2022

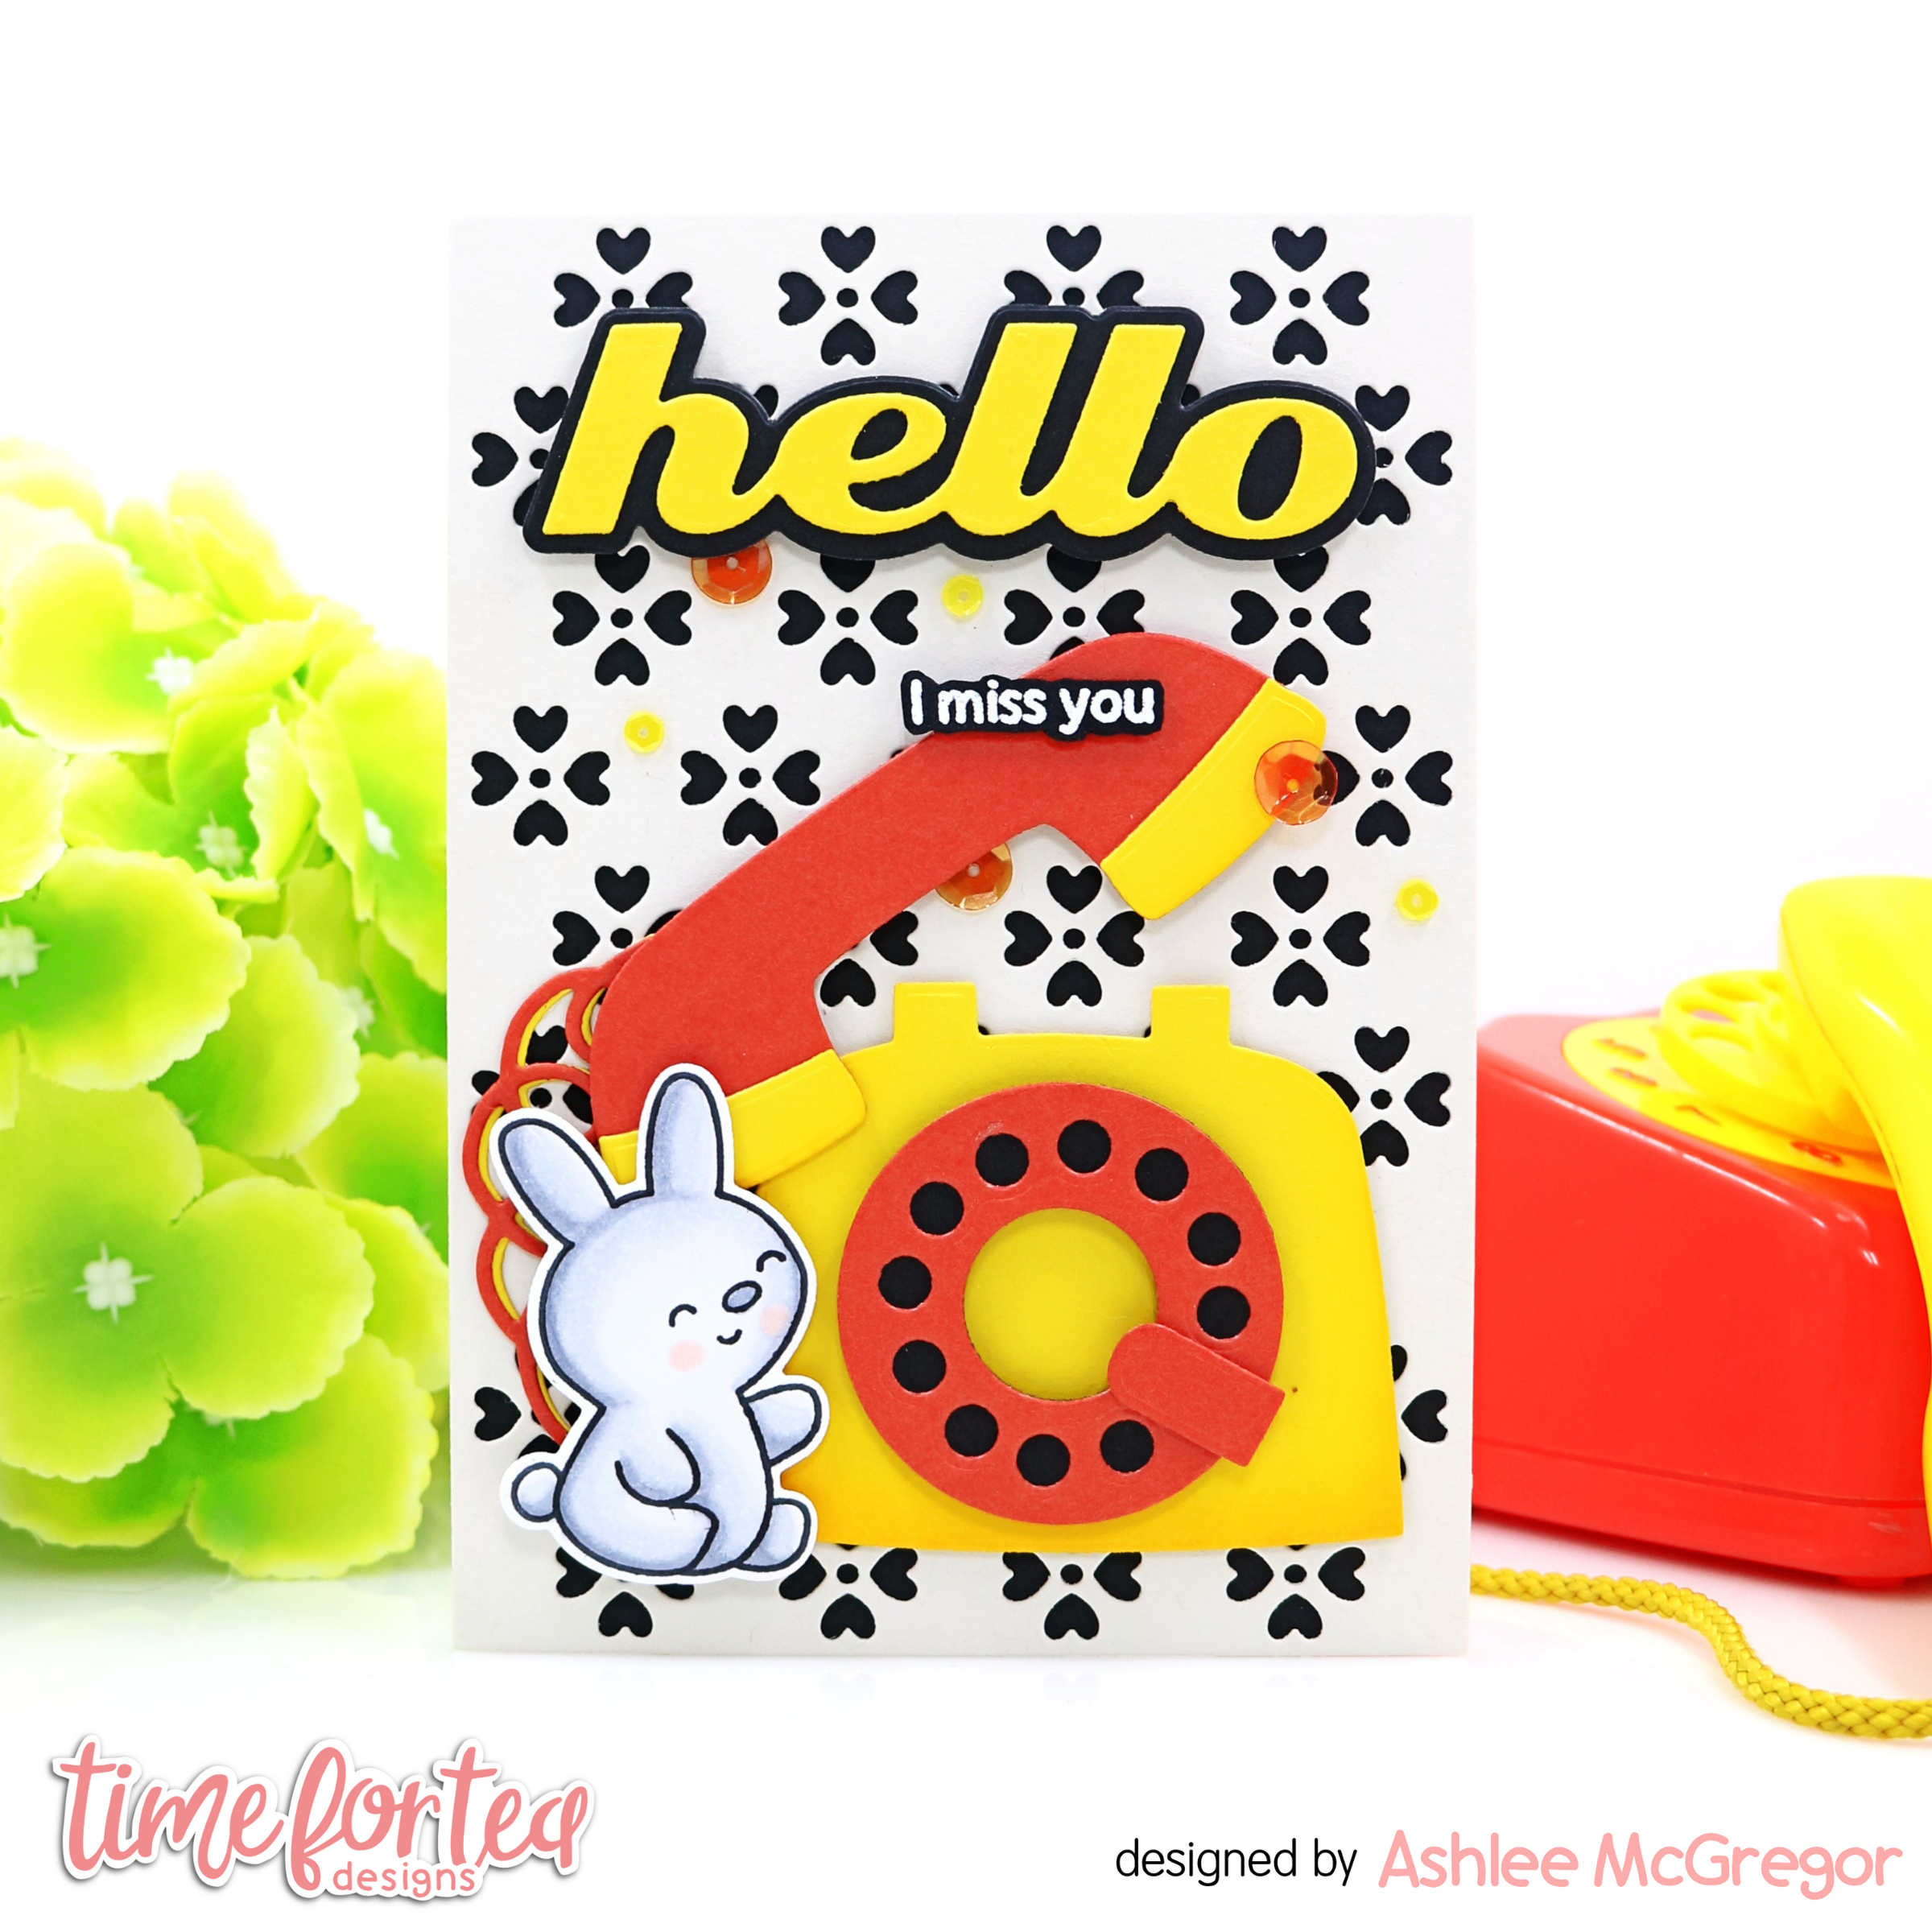
Hello....I miss you!!

 Hey tea timer friends...

It's DT Ashlee here today and I have a new card to share using a bunch of the new release products!! 

Here are the products I used for my card :

- Let's chat stamp and die collection 

- Retro phone builder die 

- Flirty flowers cover die 

- Hey, Hello, Hi die


For this card I was inspired by a tiny little toy phone that I had as a kid that now belongs to my kiddos (You can see it slightly there in my photo props hehe) and when I seen it in the toy box I knew I totally needed to make a card in those colours with the awesome retro phone die!!


To create this card I first started by die cutting the cover die from a really light grey coloured card and then backing with black cardstock. I then die cut all my pieces for the retro phone, assembled it and adhered to the card base with foam tape...


I die cut the hello sentiment from black and yellow and then added that to the top of the card also with foam tape giving it all nice layers of dimension. Using WOW! Opaque bright white embossing powder I heat embossed a sub sentiment from the Let's chat stamp set, fussy cut around it and adhered that onto the phone!

The card needed a little cutie so I stamped, coloured and die cut the bunny and popped him right near the phone ready to make his phone call....

To complete the card a touch of sequins to match the yellow and red.


I hope you enjoy this new card, I had a blast making it and I can't wait to play some more with the T4T new release!! 

Hugs Ashlee 

Other Posts You Might Like