Pages

Showing posts with label clouds dies. Show all posts

Friday, 4 April 2025

Plaid Easter Wishes


Happy Friday, DT Annalisa here! April has arrived, and Easter is just around the corner! I'm excited to share a spring Easter card featuring the Easter Wishes Large sentiment die and the Eggstra Special Birthday stamp set.

To start, I trimmed a piece of the Pretty Pastels 6x6 Paper Pad to fit an A6 card base and secured it using double-sided tape.


Next, I die-cut white cardstock with the Sweet Scalloped Dies and A6 Simple Nesting Dies to create a thin scalloped frame. I attached this frame to the card base with liquid glue.

I then stamped several images from the Eggstra Special Birthday stamp set, colored them using Copics, and cut them out with the coordinating dies. I added accents with a white gel pen using a Gelly Roll Pen.

For additional elements, I die-cut vellum using the Stitched Circle Dies and Cloud Dies, adhering them to the card base with vellum adhesive.


For added dimension, I used double-sided 1mm foam tape to attach the stamped images.

I applied Gina K Designs Dusty Rose ink to a piece of white cardstock, allowing it to dry before die-cutting it with the Easter Wishes Large sentiment die. I then added white gel pen accents for an extra touch.

For more dimension, I die-cut the sentiment from white cardstock twice and adhered the layers together using liquid glue. I attached the sentiment to the card with more liquid glue.


To finish off the card, I added Summer Haze Designer Enamel Dots.

Thank you so much for reading my blog post! To get 10% off your order, use my discount code T4TANNALISA10 when you visit the Time For Tea Designs shop.

Wednesday, 1 March 2023

Seal of approval

Hey there Tea-timer friends..

It's DT Ashlee here for my weekly post and today I've got some ocean themed inspiration for you!! 


For this one I used the super cute set Sealed with a kiss and created a fun water scene using these dies....


To create this card I started with a blue card stock base that inked slightly in the middle with a CPD Cummerbund ink just to create a slight variation in the sky. 

I then used a different shade of blue cardstock that I inked with a mix of Catherine Pooler blue inks (Something borrowed and Suede shoes) before splattering to create a super cool base to cut the waves from. I used one of the ocean waves to cut three panels of waves and then adhered them onto the card base using foam tape creating different levels of water!!

Using the cloud die I die cut three clouds from an off white cardstock and adhered those finishing off the sky...


I coloured up a bunch of cute images from the Sealed with a kiss set using Spectrum noir tri-blend markers and die cut them with the co-ordinating dies before adding to the ocean....

A stamped and die cut sentiment along with a touch of sequins completed the card!!


I hope you enjoyed my card for today, happy crafting. Hugs Ashlee.

Saturday, 14 January 2023

Sealed with a Kiss!


Happy Saturday Teatimer's it's DT member Natalie here with a sweet, heart themed card for today's post. It's been so hectic over the last few months and my mojo just seems to have disappeared. I really didn't know what I wanted to make, so I dug around in my stash found a stamp set I wanted to use and then found some dies I thought would work well together with it. 


I used the Heart Nesting Dies  for the base layer keeping the bigger one white and then ink blending a sunset sky on the other using Kitsch Flamingo, Dried Marigold and Squeezed Lemonade Distress Oxide inks. 
I cut out two more hearts the same size and used the Ocean Waves Dies to create the sea layers again I ink blended these with Tumbled Glass and Uncharted Mariner Distress Oxides. 


The Seals are from the Sealed with a Kiss Stamp Set and I coloured them up with Copic markers. Then for the clouds I used the Cloud Dies which I layered velum underneath to create a wispy feel. I adhered everything together and finished up by adding some finishing touches with my gelly roll pens. 
I hope you like today's card make sure you check back for more inspiration. Also if you want to buy any of the items in the Time for Tea shop you can get 10% off your order using code T4TNATALIE10. 

Thursday, 10 November 2022

A Cute Cafe Scene


Happy Thursday, Tea Timers!  It's Amanda here!  Today I'm sharing how I used my yellow cardstock cutouts from my last blog post.

I have created my layers for my card base using a white A2 card base, an ink blended layer (using Maker Forte's Blue Moon and Lady Liberty Inks) and then my yellow cutouts.  On my yellow cutouts, I ink blended the Tiled Wall Stencil with Yellowstone ink.  I also splattered some white and black paints on my background.

Next, I die cut some clouds using the Cloud Dies.
I stamped some images from the Cafe Critters Stamp Set and then colored them with OLO Markers.
My sentiment came from the Let's Chat Stamp Set.  I stamped it on black cardstock with clear glue ink, then applied white embossing powder.  I melted the embossing powder with my heat tool and then die cut it out with the coordinating die.
I assembled my card using liquid glue and 3D foam squares.


That's it for me today, friends! Thanks for stopping by the Time for Tea Blog today!  See you here next week! Xx, Amanda


Wednesday, 12 October 2022

Hello pumpkin....!!

 Hey Tea-timers...

I am loving the trick or treaters collection from the digital release, it's so fun!!

So guess what?! I have another new card made using the digital goodies to share with you all!!


T4T products I used to make this card :


To create this card I started by choosing the digital paper I wanted to use as my card base. I then die cut the stitched window cover die from black card and adhered it over the pattern paper using foam tape to pop it up. I printed out the digital images and coloured them up using alcohol markers before fussy cutting them and adding to the bottom window. 

Hello was my die cut sentiment of choice so I that I can send this card anytime, not specifically for Halloween...

To fill up the windows I added some die cut clouds and completed it all with a few sequins!!


Have you checked out the T4T digital goodies? They are fantastic and you can print and use them straight away AND as many times as you want!! (Gotta love that!)

Thanks for stopping by and checking out my card today, I hope you enjoyed it...
Happy crafting, hugs Ashlee. 

Wednesday, 6 July 2022

Mini slimline with a HI

 Hey Tea-timer friends...

It's DT Ashlee here with some new T4T inspiration to get you inspired to get crafty!!


Todays card uses these Time for Tea goodies...

- Hey, Hello, Hi dies 

- Flirty flowers cover die

- Cloud die

- Mini slimline scallop die

- Sweet village stamp and die collection


To create this card I started with some different shades of pink cardstock that I die cut the mini slimline scallop layers from. I  die cut the flirty flowers cover from a really light sandy coloured card, cut it down and adhered it underneath the scallop frame. I popped foam tape behind the frame and adhered it to the base. I die cut the HI sentiment from a few different cardstocks before glueing together with liquid glue. I added a slight shadow by offsetting a black layer! 


I wanted to add a cool little cloud element so I die cut the cloud from a pink and slightly off white cardstock before popping onto the frame with foam tape....

Now it was time to add some cute images so I stamped, coloured and die cut some from the Sweet village set. How adorable are those tiny little animal pals right?!

To complete the card I finished it off with a touch of pretty pink sequins. What do you think? 


Thanks so much for stopping by and checking out my card today, I really hope you enjoyed it and it inspired you to get your craft on...

Happy crafting, hugs Ashlee.  


(Want to do some shopping in the T4T store? You can use code T4TASHLEE10 for discount  off your order, how awesome is that!!)

Tuesday, 28 June 2022

Oval shaped card - using paper pads

Hi Tea Timers,

Welcome back to the T4TD blog! As promised last week, I am back with a new design idea for using pattern paper in your cards. 

I started today's card by die cutting the largest oval die in the Oval Scalloped Nesting Die set twice. I then scored one of them close to the top to make a fold and glued it on the back of the other oval. This created my card base. 

Next, I used the oval frame from the same set and die cut the frame twice in white and glued them together for extra dimension. For the background I used one of the designs in the Pawsome Rainbows paper pad and cut it a bit smaller than the outside of my oval frame. I also cut a piece of vellum to the same size and glued them at the back of the frame. By adding the vellum the of the colours on the pattern paper get a bit muted. For the grass I picked a green design from the Gorgeous Gingham paper pad and cut it using the oval frame die. This time I used the negative and cut it with the Landscape Edge Die and glued it on the inside of the frame. 

I chose to use the Hey there critters stamp set for my critters. I stamped the cute animals and some of the accessories and coloured them in with the Spectrum Noir Illustrator markers. I then used the matching dies to cut them out and added some white highlights for details. For the clouds I used the small dies from the Clouds Die set. I lightly ink blended the edges with Tumbled Glass and stamped the hello sentiment on one of them.

I arranged the images on the background and glued them down. Next, I glued the frame on the card front and that's it!

Thanks for tuning in! I hope you like today's card, it was a lot of fun to create. Remember, you can use T4TMIKI10 for 10% off your orders store-wide.

Hugs,

Miki

Friday, 24 June 2022

Kitty Hugs

 
Hello and happy Friday! DT Annalisa here. For my weekly project, I am sharing a kitty hugs card using some items from the new release and some older ones. It is always good to use crafting supplies you haven't shown some love to in a while.

I did some ink blending over the heart inserts of the Heart Grid Masking stencil with Spun Sugar and Kitsch Flamingo Distress Oxides and my Beautiful Blender Brushes. I added some white splatter with a paintbrush and some white acrylic paint. I trimmed the panel down to 5 1/2 by 4 1/4 inches and glued it down to a card base of the same size.


I ink blended Salvaged Patina Distress Oxide onto white cardstock and then used the Hugs Stitched Sentiment Die. I cut the outline of the die into some vellum paper and then used liquid glue to adhere the letters to it.

I stamped, coloured (with Copics), die-cut elements from the Kitty CapersPurrfect Day and Home Is Where The Heart Is stamp sets. The small heart stamp is from Hogs & Kisses, the heart die cuts are the pieces that were die-cut out of the Flirty Flowers Cover Die. I coloured some of them in BG10. I used the Cloud Dies on some vellum paper. 


To assemble the card, I used a combination of liquid glue and foam tape for some added dimension. I finished up the card with some Sweet Summer Designer Enamel Dots.

Thank you so much for reading my blog post, you can use my discount code T4TANNALISA10 when you visit the Time For Tea Designs shop to get 10% off your order.

Thursday, 2 June 2022

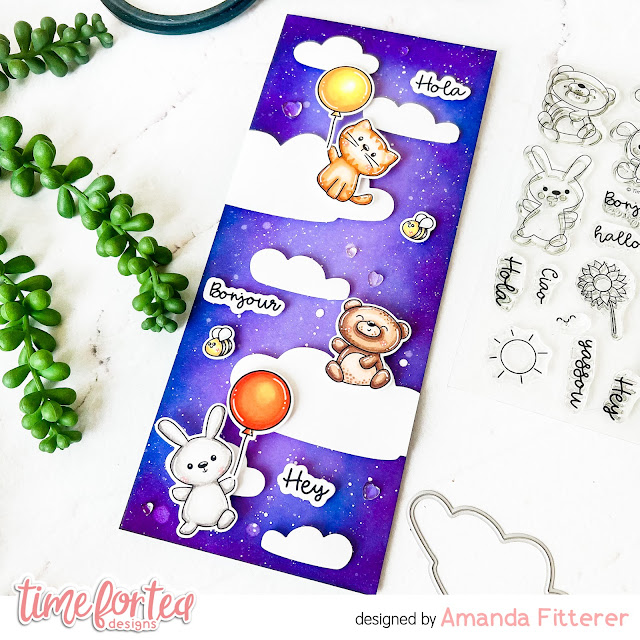
Cloudy Slimline Hey There Critters


Happy Thursday, Tea Timers!  It's Amanda back with another fun project showcasing the NEW RELEASE!
For this card, I've combined the new Cloud Dies and the new Hey There Critters Stamp Set to create a purple-y fantastic slimline card!

I've first started by creating my purple sky by blending Vegas Strip, Blueberry Cheesecake and Sugar Plum inks.  Then, I spritz it with some water and add some flicks of white acrylic paint mixed with water.

Next, I've stamped and colored my Hey There Critters with Copic markers.  I've cut out a few of the Cloud Dies and adhered them around my background with 3D foam squares, trimming off the edges of the larger clouds.


Once I've cut my stamped images and sentiments out with the coordinating dies, I've adhered them to my card front using 3D foam squares.  I've doubled up on the foam squares so that my cute critters have even more dimension than the clouds.


That's it for me today!
Don't forget, you can use code T4TAMANDA10 to get 10% off your purchase!
Until next week.... Xx, Amanda 


Thursday, 26 May 2022

Trifold Tag Card with Amanda

 
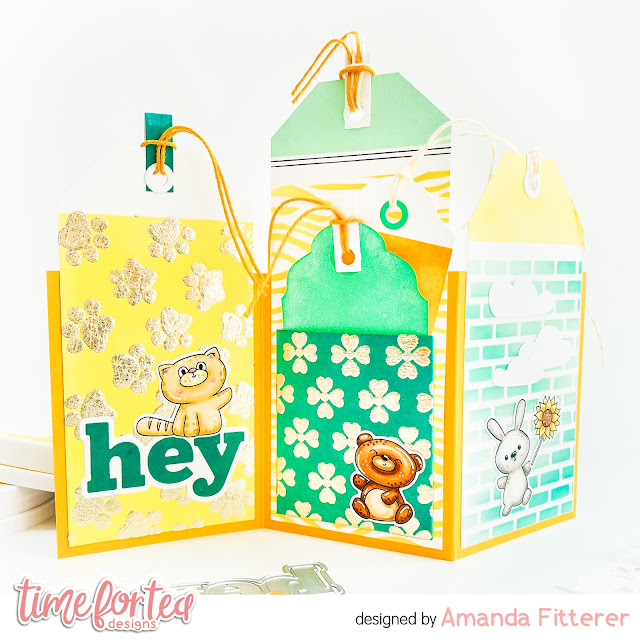
Happy Thursday, Tea Timers!  It's Amanda back with another fun project showcasing the NEW RELEASE!  This card is a unique card because it's a trifold tag card.  It's super easy to make, but looks quite impressive!

1.  Trim a piece of cardstock to 10.5″ x 4″. 
2.  Score at 3.5″ and 7″ and fold into a “Z”.
3.  Make some tags for each panel. 
Trim 2 pieces of cardstock to 3.25″ x 5″ and 1 piece to 3.25″ x 6″. Trim off the corners of each piece of cardstock to create a tag and add a hole punch in the center. 
4.  Decorate your tags however you like.

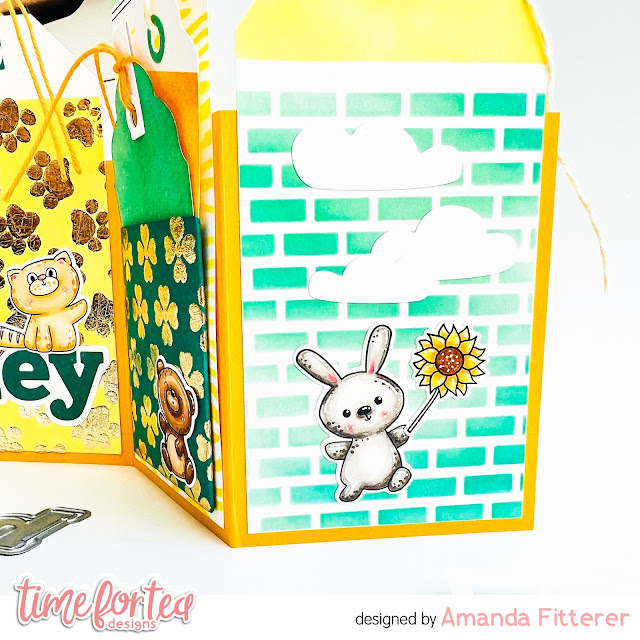
For this first tag, I've used the Tiled Wall Stencil, the new Cloud Dies, and the new Hey There Critters Stamp Set to create an adorable scene with the bunny holding a sunflower.


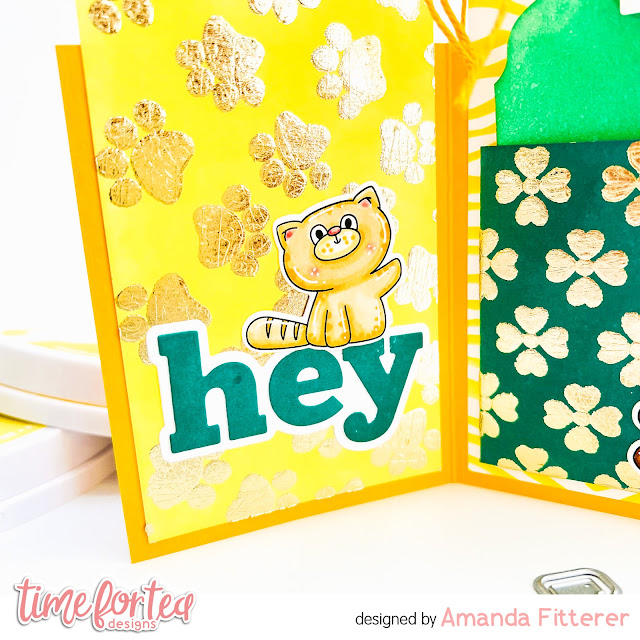
For this tag, I've used the the same Hey There Critters Stamp Set along with the new Hey, Hello, Hi Dies. For my background, I used some Foil Transfer Gel Duo with the new Pawsome Prints Stencil and some gold foil.

For my final tag, I've used the Flirty Flowers Stencil for my background and the Hey There Stamp Set.  I also used the Tiger Stripes Stencil behind my mini pocket.


That's it!  Easy peasy and JUST SO CUUUUTEE!!
Don't forget, you can use code T4TAMANDA10 to get 10% off your purchase!
Until next week.... Xx, Amanda 

Other Posts You Might Like