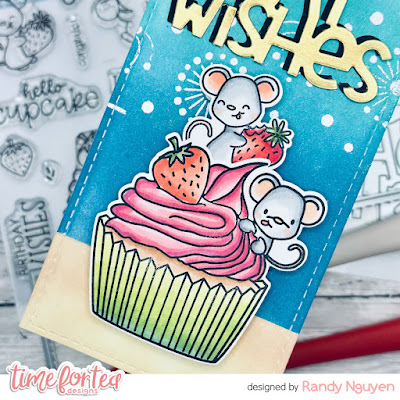
Hi Tea Timers, DT Randy here, back with a new slimline card I created pairing a large sentiment with a large image to create this fun and easy birthday card. With then sentiment including the word "wishes," I thought it would be cute to pair it with the dandelion stencil.
I initially was going to create a standard A2 card but the slimline card ended up being the perfect size for both elements.
Sets used:
I first stamped out my images and used the coordinating die sets to die cut them out. I then used Copic Markers to color the images.
For the sentiment, I die cut it twice, once using gold cardstock and another time using black cardstock to have a shadow effect. The shadow effect definitely helps the sentiment pop.
I then die cut out the largest slimline die from white cardstock. I die cut it out from a second smaller scrap piece of cardstock for the bottom portion of the card.
I blended Salvaged Patina, Peacock Feathers and Uncharted Mariner Distress Oxides onto my large slimline piece. I set it the side to let it dry for a bit.
On the smaller piece, I blended it with Antique Linen and Tea Dye Distress Oxides to create my bottom piece.
I took the larger slimline piece and patted it with my antistatic powder. I then took the stencil and blended it with embossing ink. I covered it with white embossing powder and then heat set it with the heat gun.
To assemble my card, I first glued down the bottom piece with liquid adhesive. I then adhered the sentiment. First the shadow piece and then the gold cardstock a bit off centered to it.
I adhered the mice onto the back of the cupcake near the top using liquid adhesive. I then adhered the images to the card using foam tape.
I hope you enjoyed this blogpost today. All the products I used are linked above. Don't forget to use the code T4TRANDY10 at checkout for extra savings. Happy crafting!


No comments:
Post a Comment
Thank you for leaving a comment, it really does brighten my day!