Pages

Showing posts with label Pumpkin Spice Stamp Set. Show all posts

Sunday, 2 November 2025

Pumpkin Fun!

Hello everyone!

Michelle here from the Design Team with a fun and festive card featuring my two favourite happy crocs on the hunt for the perfect pumpkin. They’ve made their way to the patch, and it looks like they’ve found the one!

Supplies used:

Snappy Before Coffee

Giant Pumpkin - Pumpkin Spice

Pumpkins - Trick Or Treaters

Fence - Ewe Are Moovellous

Pumpkin vines - Purrfect Day

Bold Sentiments


To create the scene, first, I ink blended soft clouds for the sky using Peacock Feathers Distress Oxide. Next I die cut 4 hillsides - 1 from white card stock that I ink blended with Twisted Citron and Lucky Clover Distress Oxides. For the remaining 3 hillsides, this was going to be the mud/ground that the pumpkins are growing in so I die cut them out of kraft card stock to help make things a bit quicker. I added a little bit of ink blending and splattered with Vintage Photo and Ground Espresso Distress Oxide to give it more depth.

I added rows of pumpkins and a cute pick-your-own sign behind a white picket fence to build the scene - all the images were all either stamped or printed and then coloured with alcohol markers. 

The crocs were coloured in bright greens to pop against all those rich autumn tones, and I just love how joyful they look with their prize pumpkin.

For the sentiment, I picked a simple one from the Bold Sentiments stamp set - ‘You are awesome’ as I think it says it all.


To complete the card, I adhered it to some white card stock, leaving a thin frame around it before mounting it onto a card base that I had ink blended a gingham pattern using Carved Pumpkin Distress Oxide.

Thanks for visiting today. Hope you’re enjoying all the autumn crafty goodness!


Michelle

Sunday, 5 October 2025

Sweet Friends!

Hello everyone!

Michelle here from the Design Team with a card that’s warm, sweet and ready for autumn. These little mice have found the perfect way to spend the day - snuggled into mugs of hot chocolate, pumpkin spice and all things nice.

Supplies used:

Pumpkin Spice 

Hey There Critters

Coffee Beans - Snappy Before Coffee

Chocolate Cubes and Spoon - Warm Hugs

Woodgrain Stamp

Sentiment - Sweet Cart Critters


To start off, I stamped, printed and coloured all the images with alcohol markers in autumnal colours. I used a white gel pen for the highlights to help make the images pop.

The background was ink blended with Carved Pumpkin and Mustard Seed Distress Oxides with a brick stencil layered on top to give that cafe wall feel. I also added gold watercolour splatters to give it extra texture.


Next, I added a wooden table along the bottom to ground the scene. This was created from the woodgrain clear stamp and Vintage Photo Distress Oxide on craft cardstock.

Once all background parts were done, I arranged all the colourful mugs filled with whipped cream, cinnamon sticks, chocolate and in one mug, maybe a little bit more!


For the sentiment- you are the sweetest friend, I heat embossed this with ink and white powder onto black cardstock before cutting out with a banner sentiment die. For the final finishing touches, I added a few small die cut hearts topped with glitter. 

This would be a lovely card to send as the weather turns cooler and the hot drinks start flowing.


Thanks for stopping by today. Wishing you a cosy and creative season ahead!


Michelle

Friday, 17 January 2025

Watercolour Thank you


Happy Friday, everyone, from DT Annalisa! Today, I’d like to share a watercolored thank you card I created using the Pumpkin Spice stamp set from Time For Tea Designs.

To create the background, I started with Ranger's Distress Watercolor Cardstock and used Scorched Timber and Salvaged Patina Distress Watercolor Pencils. I soaked the pencils in water, scribbled them onto acetate, and spritzed the acetate with water. Then, I pressed the acetate onto the watercolour paper repeatedly, heat setting and spritzing it with water as needed.


Once the background was dry, I used a Beautiful Blender Brush to apply Walnut Stain Distress Ink through the Coffee Stains 6 x6" Stencil. I die-cut the panel with a stitched rectangle die and used a paintbrush and my finger to apply translucent Distress Grit Paste to the edges. 

I created an A2 card base using brown cardstock, which I inked with Walnut Stain Distress Ink to match the background. I adhered the background to the card base using double-sided foam tape.

Next, I stamped images from the Pumpkin Spice stamp set onto watercolour cardstock using Versafine Onyx Black ink. I coloured the images with Distress Watercolor Pencils, as I am much more comfortable using Copics, but I am trying to practice with watercolours more this year. Once the images were dry, I die-cut them using their coordinating dies.


For the sentiment, I stamped the word "thanks" using the Bold Sentiments stamp set and die-cut it with the matching die set. I used double-sided foam tape to adhere all the elements (except for the coffee beans) to the card base.

Finally, I added translucent Distress Grit Paste to the whipped cream for dimension to complete the card.

Thank you so much for reading my blog post! Be sure to use my discount code T4TANNALISA10 when you visit the Time For Tea Designs shop to get 10% off your order.

Wednesday, 12 June 2024

Warm hugs and yummy treats!

Hey Tea-timers...

Who needs some warm winter hugs? It's winter here in Tasmania now so we need all the warm hugs and warms drinks we can get so today's card is inspired by that!


To create this card I started with a pink card stock base before adding ink blending to it using a red distress oxide ink and spritzing with water to create a mottled effect. I then used the middle sized frame die from the wide stitched frame die set to cut out a frame and adhere to the base....


Using the warm hugs large sentiment die I die cut this twice. Once from black card and then once from white card before adhering them together slightly offset and then adhering in place on the frame!


I stamped, coloured and die cut a cup of the warm drinks and a yummy treat from the Pumpkin spice stamp set. These were adhered in place before completing the card with a touch of pretty sequins....

That's all for my card today, I hope it makes you feel nice and warm!

Happy crafting, hugs Ashlee.

Friday, 26 April 2024

Warm Hugs in a Mug


Happy Friday, DT Annalisa here! I tried no line colouring in today's card, I love the look of it, but it is a technique that I find quite tricky, since you have no dark outlines, you must create contrast in the right places to get the right look. 

I ink blended Simon Says Stamp Khaki Ink for the background over the Coffee Beans 6 x6" Stencil using my Beautiful Blender Brush onto white cardstock. I removed the stencil and used a lighter hand and what was left on my brush to fill the white areas. I added brown splatter with a paintbrush, water and Khaki Ink.


I die-cut the ink-blended panel with a stitched rectangle die and then used double-sided tape to stick it to an 80 lb Neenah Desert Storm card base ink-blended with vintage photo Distress Oxide. 

I used salvaged patina Distress Spray Stain on the smooth side of Distress Watercolor Cardstock by Ranger. Once it was almost dry I sprayed water using a Distress Sprayer that filled in the white spaces with a pale teal colour. 


I die-cut the teal panel with the Warm Hugs Large Sentiment Die. I ink-blended another piece of Neenah Desert Storm with vintage photo Distress Oxide and die-cut it with the same die. I glued the two die-cuts together slightly offset to create a shadow.

I stamped elements from Let's ChatPumpkin SpiceWarm Hugs and Get Whale Soon with Ink on 3 fadout No Line Coloring ink. I coloured them with Copics, cut them out with their coordinating dies and added white gel pen accents with a Gelly Roll Pen


I adhered the images and the sentiment to the card base using double-sided foam tape for dimension.

I added teal and pink sequins from the Candy Christmas Squin Mix from Pawsome Stamps using liquid glue to complete the card.


Thank you so much for visiting my blog post, be sure to use my discount code T4TANNALISA10 when you visit the Time For Tea Designs shop to get 10% off your order.

Friday, 17 November 2023

You are the Pumpkin Spice in my Latte


Happy Friday, DT Annalisa here! November can be dark and dreary, so why not treat yourself to a caffeinated beverage! My card today is happiness in a mug - for me, that is an iced latte or a cappuccino, while others enjoy a pumpkin spice latte. I combined the Takeout Coffee Cup Dies with the Pumpkin Spice stamp set to create this coffee-themed card.

I used the Zig Zag Frame & Tag Dies and die-cut watercolour paper. I used carved pumpkin Distress Oxide Spray for the inner panel, and tea-dye Distress Oxide Spray for the frame. To darken the edges of the frame, I ink blended on ground espresso Distress Ink with a blender brush. 

I used liquid glue to stick both pieces of watercolour paper to an A2 card base.


I die-cut the coffee cup sections from watercolour paper. I used tea-dye Distress Oxide Spray on the cup base, lid and whipped cream. I then ink-blended on ground espresso to the cup and lid with a blender brush. I ink blended ground espresso onto craft cardstock for the cup sleeve. I glued all the cup elements to the card base using liquid glue.

I stamped and coloured (with Copics) the pumpkin (Pumpkin Spice), acorns (Jumping With Joy) and kitty in the pumpkin (Trick or Treaters Digital Stamp Collection) and cut them out. I added white gel pen accents with a Gelly Roll Pen


I stamped the sentiment from Pumpkin Spice, cut out some of the words with the coordinating die set, and trimmed those without dies. I used liquid glue to stick everything to the card base. I added three orange Summer Haze Designer Enamel Dots to complete the card. 

 Thank you so much for reading my blog post, be sure to use my discount code T4TANNALISA10 when you visit the Time For Tea Designs shop to get 10% off your order.


Friday, 3 November 2023

Let's Do Coffee


Happy Friday, Annalisa here today. The days are getting shorter, and the temperatures are becoming chilly and as such, I thought it would be fitting to share a warm coffee-themed card. The Pumpkin Spice stamp set from Time For Tea Designs is perfect for this time of year.

I placed the Coffee Stains 6 x 6" stencil onto my glass matt and sprayed it with Tea dye Oxide Spray. I then took watercolour paper and pressed it on the inked stencil with a paper towel for a few moments to ensure the ink sunk in. I then carefully lifted off the stencil and set the panel aside to dry.

Once the panel was dry, I die-cut it with a stitched rectangle from my stash and ink-blended walnut stain and ground espresso Distress Inks with my Beautiful Blender Brush. I stuck this panel to an A2 card base of cream cardstock.

I die-cut vellum with the Landscape Edge Standalone Die to form a wavy shape that I ink-blended with peacock feathers Distress Oxide. I then glued this to the card base. 

I stamped and coloured (with Copics) images from the Pumpkin Spice and Happy New Year Critters stamp sets and cut them out with their coordinating dies. I added white gel pen accents with a Gelly Roll Pen. Next, I used liquid glue to adhere the stamped images to the card base. 

I ink-blended prize ribbon Distress Oxide onto watercolour cardstock and die cut it with the Hey, Hello, Hi Dies. I die-cut the frame into vellum and used it to back the 'hey' sentiment. I stuck the sentiment and frame backer to the card with liquid glue. 

I stamped 'let's do coffee' from The Perfect Blend stamp set to the card base with Versafine Onyx Black. I sprinkled on Alabaster Ultra Fine Embossing Powder and heat set it to complete the card.

Thank you so much for reading my blog post. Remember to use my discount code T4TANNALISA10 when you visit the Time For Tea Designs shop to get 10% off your order.

Thursday, 9 March 2023

You, Me and a Cup of Tea


Hello, Tea Timers!  It's Amanda here!  Today, I am sharing this card I made using the Pumpkin Spice Stamp Set with a sentiment from the Perfect Blend Stamp Set!

This card is a perfect BLEND of simplicity and elegance!  I love how versatile the layout is and how you could use it for a masculine or feminine card!

I used an acrylic block to first stamp out the tea cups.  I always start in the middle and then work my way to the outside.  Next, I swapped out the tea with the beans and stamped those in between the mugs.  I colored them in with OLO alcohol markers.

For the sentiment, I stamped it on black cardstock with glue ink.  Then, I sprinkled some white embossing powder on it and melted it with my heat tool.

I hope you make some time to get crafty today, friends!!  'Til next week!!  Xx, Amanda


Wednesday, 11 January 2023

Coffee?!

 Hey there tea-timers...

It's DT Ashlee here today, now I don't know about you but I myself can't go without my coffee...

And what's better than just coffee? Coffee with a friend!!

Today's inspiration is a card to send to a friend to organise a coffee catchup and its got some adorable little cups with cute faces centre show...


I used these Time for Tea designs products :


This card is a very CAS one so it was super simple to create. I started with a white card base and stamped both my sentiments directly onto the base with black ink leaving a gap in between for the images. I then stamped, coloured and die cut three cute cups from the pumpkin spice stamp set. These were coloured with OLO and Spectrum noir tri-blend markers. 

Once the images were ready I added them to the card base with different levels of foam tape creating a happy little bunch of coffee cups. To complete the card a touch of sequins adhered using micro glue dots. 

Do you want coffee now?! I would but it's nearly bed time here so maybe tea for me, coffee come at me in the morning hehe. 


Thanks for stopping by the blog today, I hope you enjoyed my latest card. Happy crafting, hugs Ashlee.

Thursday, 22 December 2022

How to Make the Pumpkin Spice Stamp Set Work for a Holiday Card!


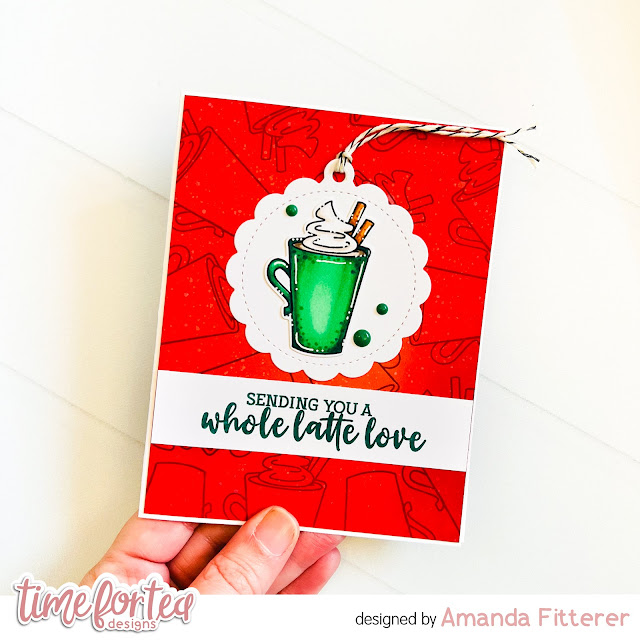
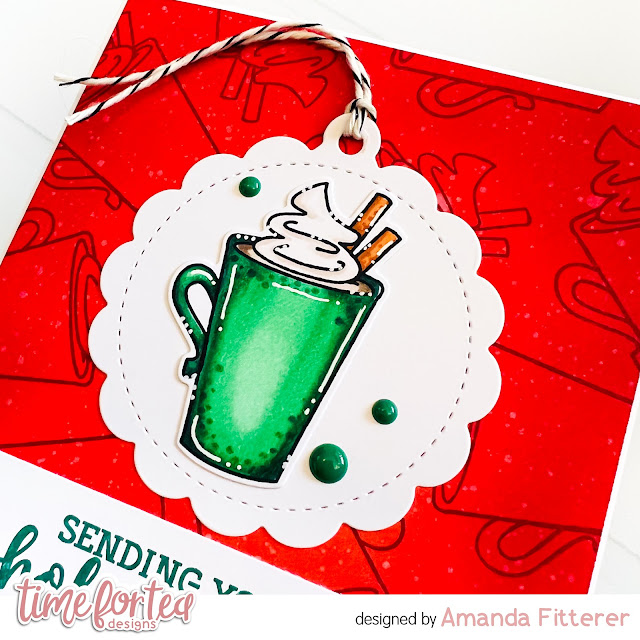
Happy Thursday, Tea Timers!  It's Amanda here!  I'm sharing this card I made for a family friend!  I wanted to use the Pumpkin Spice Stamp Set, but I needed it to work for Holiday card!

The first thing I did was create a vibrant red background using red cardstock and then ink blending only the edges with a dark red ink.  I stamped some mugs around the entire background with dark red ink as well.

Next, I stamped my mug image on white cardstock and then colored it in with OLO markers.  I die cut it out, as well as a little tag die.  I placed some Festive Fun Enamel Dots on the tag as well.  I stamped my sentiment on a white strip and added that to the front of my card.

This was such an easy and quick card to make!  I love that the Pumpkin Spice stamp set can be used for a winter card, don't you?!

Thank you so much for stopping by the blog today!  I hope you find time to get crafty today!!  Xx, Amanda


Wednesday, 21 December 2022

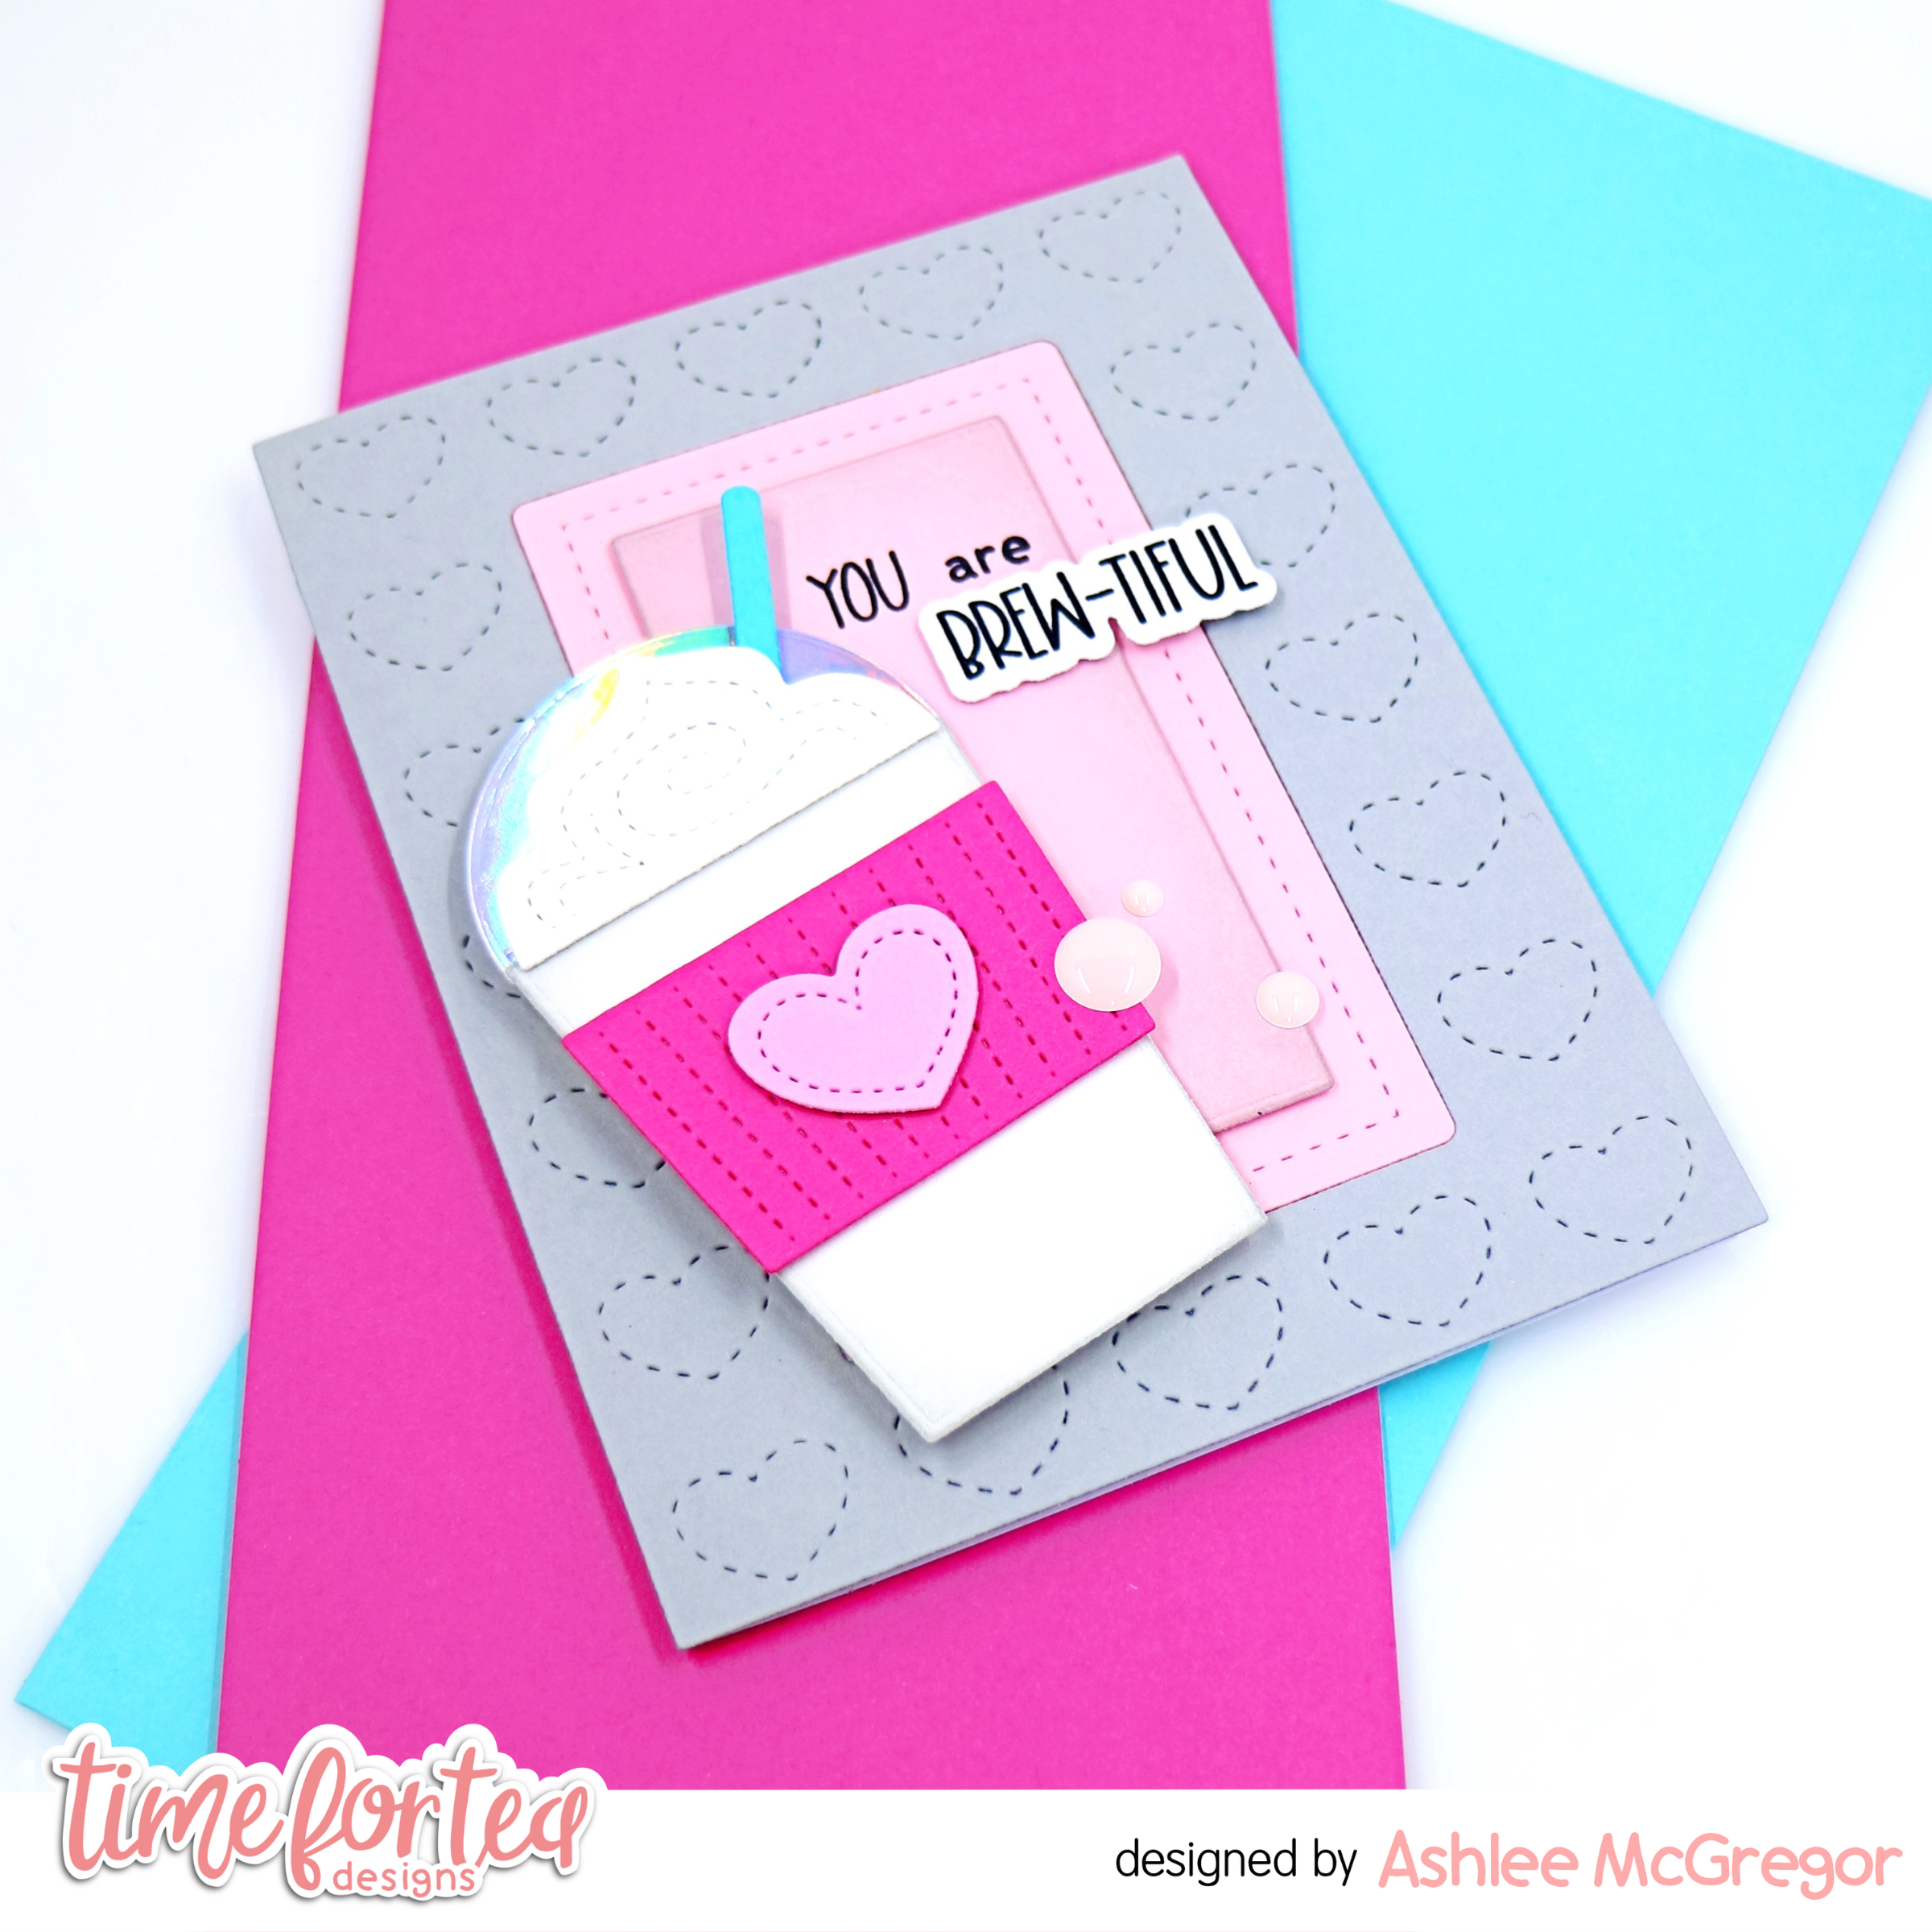
Brew-tiful....!!

 Hey there Tea-timer friends....

Who loves a nice brew of iced coffee topped with cream?! I know I do and this card is totally inspired by delicious coffee....


I used the fabulous T4T Takeout coffee cup die to die cut all the pieces for the takeout coffee cup and adhered them together with liquid glue and foam tape ready for my card base. 


To create the base of my card I used the A2 Stitched hearts cover die and die cut it from grey cardstock I then used the centre dies from that same piece to die cut the pink frames for the centre. 

I added a stamped and die cut sentiment from the Pumpkin spice collection!

To complete the card a touch of Time for Tea designs Festive fun enamel dots...
A brew-tiful card perfect for the coffee lover!


This is the last card for me for 2022 on the T4T blog, I hope you have enjoyed my creations this year. I look forward to sharing more T4T inspiration with you all in 2023. Happy crafting, hugs DT Ashlee. 

Saturday, 12 November 2022

You mean a Latte to me!


So the new Time for Tea release is finally here and what a cute one it is. Like everyone else I think I was instantly in love with the cute Gingerbread Family Stamp Set, so keep looking back for more inspiration for them. I have so many ideas I want to create with them!
For today's card though I wanted to create a cosy Christmas coffee scene combining them with the Pumpkin Spice Stamp Set. We all know how much coffee is a well loved theme for us Crafter's so this is another super fun set. 
Using red and green as my theme I began colouring up my images, adding a pop of yellow with the pumpkins. As usual I used my trusted copic markers to colour up my images and added some extra details with my white gelly roll pen. 
The base of my card I used the Wide Stitched Frame Dies which I'm absolutely loving at the minute. I used a rich red for the frame and a nice Christmas green for the inside which helps adds some contrast to the card. I mounted these onto my card base and used some foam tape to give the red frame some height so I could layer the images at different heights too to add some extra interest. After everything was adhered I realised I didn't quite place the images right on the left hand side so added in some steam from my mug to add a little interest. Then added some dots of red, gold and white using gelly roll for some background detail and white heat embossed my sentiment which came from the Perfect Blend Stamp set and that was my card finished up. 
I hope you like it and be sure to check back for more inspiration. You can find all the products in the Time for Tea Shop and get 10% off your orders using code T4TNATALIE10. Have a great weekend and I'll see you all next week!


Friday, 11 November 2022

New Release: Brew Can Do It


DT Annalisa here today! Hello, and welcome to a brand new release! As a huge coffee fan, I had to share a coffee-themed card first! This release has EIGHT new stamp sets and coordinating designs, ranging in type from gingerbread characters to snowmen, penguins, seals and more. 

I stamped all the cups/mugs in the Pumpkin Spice stamp set and coloured them with my Copic markers. I added white gel pen accents and used the coordinating dies to cut them out.

I cut white cardstock with the 4 1/8 x 4 1/8 inch die from the Square Label Dies and ink blended on salvaged patina distress oxide using my teal Beautiful Blender Brush. I used the 5 x 5 inch die in the same set to cut patterned paper from the Brighter Days 6x6' Paper Pad. I also created a card base using the same-sized die.

I used liquid glue to adhere the patterned paper to the card base. I stamped the 'brew can do it' sentiment from The Perfect Blend stamp set to the teal panel and then stuck this panel to the card with double-sided foam tape.  


I added foam tape to the back of each mug and placed them on the card. I adhered three "Clear Bubbles enamel dots" to complete the card. These clear bubbles are absolutely beautiful and my photos don't do them justice!

Thank you so much for reading my blog post, you can use my discount code T4TANNALISA10 when you visit the Time For Tea Designs shop to get 10% off your order.

Other Posts You Might Like