Pages

Showing posts with label flirty flowers stencil. Show all posts

Friday, 13 March 2026

Lots Of Luck Shaker


Happy Friday! DT Annalisa here, sharing a fun green shaker card just in time for St. Patrick’s Day. For this project, I used stamps, dies, and a stencil from Time For Tea Designs.

I began by applying Mowed Lawn Distress Oxide Spray over the Flirty Flowers Stencil. After carefully removing the stencil, I heat-set the ink. Next, I sprayed Twisted Citron onto the background to fill in the remaining white areas. Once that layer was dry, I finished the background with splatters of Mowed Lawn Distress Oxide.


To add texture and interest, I die-cut the green panel using the Stitched Quilted Cover Die, then cut the sentiment from the panel with the Lots of Luck Large Sentiment Die. I adhered a piece of acetate behind the sentiment opening using liquid glue to create the shaker window.


I created an A2 card base from cardstock and adhered a piece of silver dotted patterned paper so it would show through the sentiment opening. Then, I added 3mm double-sided foam tape to the back of the green panel and attached it to the card base, filling the shaker area with green, silver, and gold sequins.

The stamped images are from the Good Luck Critters, set, which I die-cut with the coordinating dies. I coloured them with Copic markers and added white gel pen accents. For extra sparkle, I applied a little Quickie Glue Pen along some edges and sprinkled on Lawn Fawn Prisma Glitter.

Finally, I adhered the images to the card with liquid glue to complete the design.


Thank you so much for reading my blog post! Don’t forget to use my discount code T4TANNALISA10 when shopping at Time For Tea Designs to receive 10% off your order.

Friday, 27 February 2026

Love You Lots Sloth


Happy Friday! DT Annalisa here today, and I’m sharing a card created with a limited colour palette featuring rich blues and soft neutrals. I love how restricting the colours can really make the design feel cohesive and polished. For this card, I used stamps, dies, and stencils from Time For Tea Designs to bring everything together.


The background was created using the Flirty Flowers Stencil, Distress Watercolour Cardstock by Ranger, and Distress Watercolour Pencils. I soaked the Prize Ribbon, Iced Spruce, and Uncharted Mariner Distress Watercolour Pencils in water to soften the pigment. Then, I scribbled the colours onto the back of the Flirty Flowers Stencil and spritzed it lightly with water. I pressed the stencil onto the watercolour cardstock and let it sit for a while before carefully removing it. Once removed, I heat-set the panel to speed up the drying process. To finish the background, I added a few sprays of Snow Flurries Distress Mica Stain for extra shine and sparkle.


After the panel was completely dry, I die-cut it using the Rounded Corner Stitched Rectangle Dies and adhered it to a card base with liquid glue.

Next, I spritzed navy blue cardstock with Snow Flurries Distress Mica Stain and die-cut it using the  Love You Lots Large Sentiment Die. I also die-cut the sentiment from silver and white cardstock. I layered all three die-cuts together with liquid glue, slightly offsetting the silver layer to create a shadow effect. The finished sentiment was then adhered to the card front.


To complete the card, I stamped and coloured the sloth in a coffee cup from the Warm Hugs stamp set and cut it out using the coordinating die. I used Copic Markers to colour the image and added white gel pen accents for highlights. Finally, I attached the image to the card with 1 mm double-sided foam tape for added dimension.


Thank you so much for reading my blog post! Don’t forget to use my discount code T4TANNALISA10 when you shop at Time For Tea Designs to receive 10% off your order.

Friday, 20 June 2025

Summer Gardening Scene


Happy first day of Summer 2025! DT Annalisa here and I’m excited to share a fun gardening-themed card featuring the new Cacti Critters from Time For Tea Designs. I absolutely love the bunny with his watering can!

To create the background, I sprayed Twisted Citron and Mowed Lawn Distress Spray onto the Flirty Flowers Stencil and then pressed it onto watercolour paper. After removing the stencil, I spritzed the panel with water and added splatters using Mowed Lawn Distress Watercolour Pencil.


Next, I die-cut white cardstock with the Five Windows Cover Die to create a white frame, which I adhered to the green panel using liquid glue. I then attached this to a card base.

For the soil area, I used Ground Espresso, Walnut Stain, and Scorched Timber Distress Watercolour Pencils on watercolour paper. I glued a slim strip of this paper to the bottom of the largest window frame.


I stamped several images, colored them with Copic markers, and added white gel pen accents. The sets I used, along with their coordinating dies, include Cacti Critters, Boat Buddies, Hey There Critters, Fruitful Friends, Ewe Are The Best, and Ewe Are Moovellous.

Finally, I used liquid glue and double-sided foam tape to attach the images to the card base, and I added Stickles to some of them to complete the card.


Thank you so much for reading my blog post. Don’t forget to use my discount code T4TANNALISA10 when you shop at Time For Tea Designs to receive 10% off your order.

Friday, 1 March 2024

Lots of Luck


Happy first Friday in March. DT Annalisa here sharing a bright green card ideal for wishing someone luck on a new challenge or adventure. It features several products from Time For Tea Designs

I sprayed Distress Oxide in twisted citron, mowed lawn onto the Flirty Flowers Stencil, and pressed it onto watercolour paper with my fingers. I used a paper towel to soak up the extra liquid. I lifted up the stencil and spayed gently with water.

Once the panel was dry, I die-cut it with the new Sweet Scalloped Dies. I used liquid glue to stick it to a 5 3/4 inch by 4-inch card base.

I die-cut gold and black cardstock with the Lots of Luck Large Sentiment Die. I added white gel pen accents with a Gelly Roll Pen to the black cardstock and glued this on top of the gold cut-out slightly offset to create a shadow effect. I used double-sided tape to adhere this to the card base.

I stamped and coloured (with Copics) images from Oops a Daisy (cat), Good Luck Critters (mouse, clovers and horseshoes), Just Married (small flowers) and cut them out with their coordinating dies. I added white gel pen accents with a Gelly Roll Pen

I adhered the images to the card base using liquid glue or double-sided foam tape for dimension. I added Glossy Accents by Ranger to various areas of the card and then adhered Designer Enamel Dots from the Festive Fun collection to complete the card.

Thank you so much for reading my blog post. Remember to use my discount code T4TANNALISA10 when you visit the Time For Tea Designs shop to get 10% off your order.
Wednesday, 8 February 2023

New home

 Hey there Tea-timer friends...

DT Ashlee here with some card inspiration to celebrate a new home!

I wanted the top portion of this card to be where the whole design was so I masked off a section and did some ink blending along with adding a flirty flowers stencilled design to create the wall of the room!

(Card base was die cut from the Hooray sentiment and cover plate die and the inking was all done using Catherine Pooler inks)


Once the inking was complete I stamped, coloured and die cut images from the Home is where the hearts is stamp set and added them to the base using different levels of foam tape creating a dimensional home scene...

(Colouring was done using Spectrum noir tri-blend markers)

Kitty is very happy perched up on top of the couch hehe!


To finish off the card I added a touch of sequins adhered with glue dots.

I used these Time for Tea designs products :


I hope you enjoyed my new card, I had fun creating it. Thanks for stopping by today and happy crafting. Hugs Ashlee.


Thursday, 23 June 2022

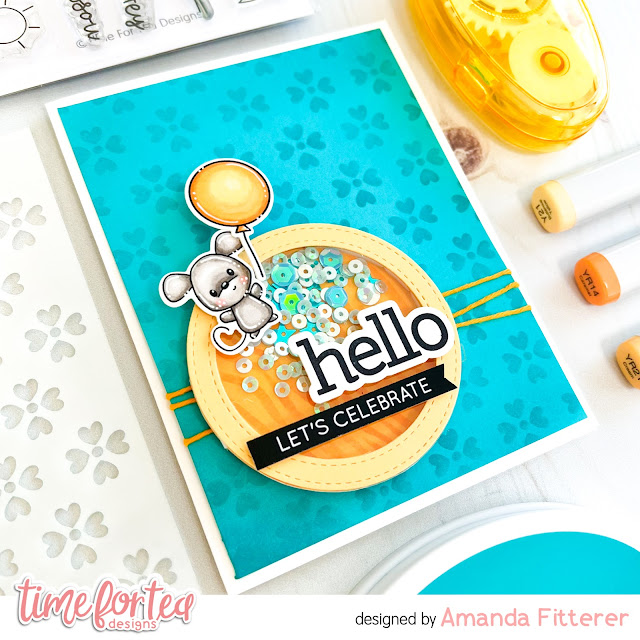
Interactive Shaker Card


Hello friends!  It's Amanda back with another fun project using items from the NEWEST RELEASE!  

Today, I'm sharing how I have created this interactive shaker card!
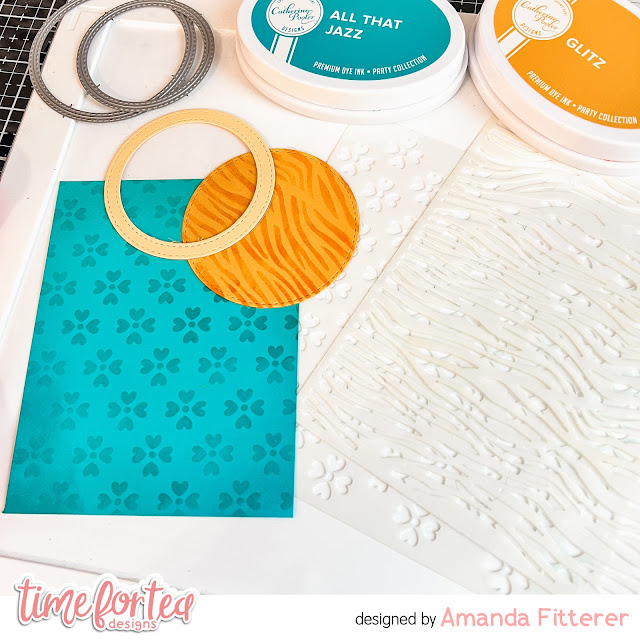
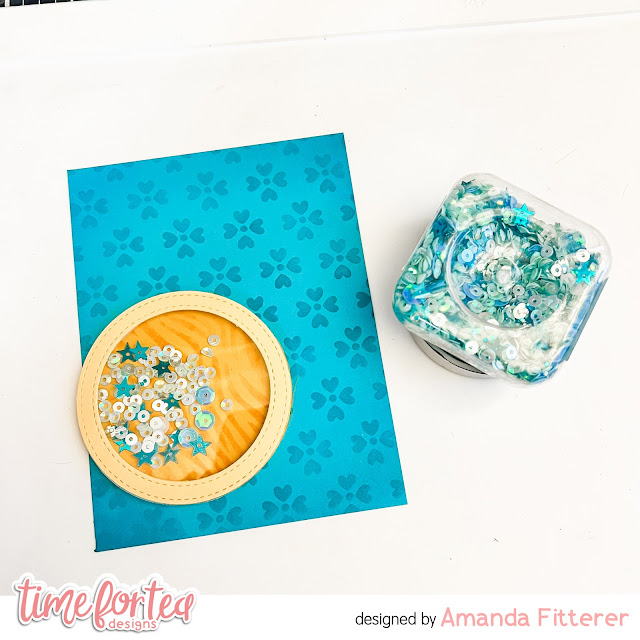
First, I'm starting with a piece of teal cardstock cut down to 4" x 5.25".  Next, I'm going to blend All That Jazz Ink through the Flirty Flowers Stencil.  Once I've removed the stencil, I'm also going to blend the ink on the edges.

For my shaker, I'm going to cut a few circles.  I'm layering 2 circles to create a circle border out of a lighter yellow.  I'm also cutting out an orange circle and using the Tiger Stripes Stencil on it.  Lastly, I'm cutting a piece of acetate with the larger circle.

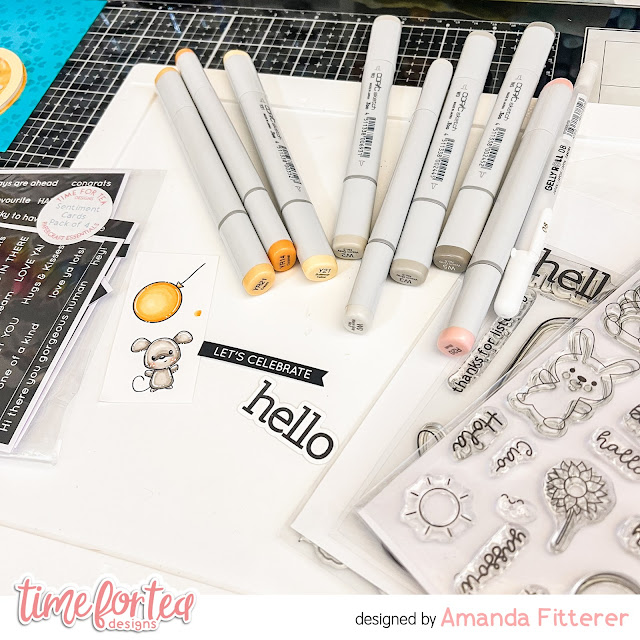
I'm stamping out my images from the Hey There Critters Stamp Set and the "hello" sentiment from the Let's Chat Stamp Set.  I've also grabbed another sentiment from the Brighter Days Sentiment Cards.  I'm coloring my images with Copic markers and then will die cut them with the coordinating dies.

Now, I'm ready to assemble my shaker element using 3D foam tape and some sequins.

Once my shaker is ready, I'm going to wrap some twine around my card front and then adhere my shaker, stamped images, and sentiments to my card front using 3D foam squares.

Now, I can attach my card front to an A2 sized card base!


That's it for me today!
Don't forget, you can use code T4TAMANDA10 to get 10% off your purchase!
Until next week.... Xx, Amanda 


Friday, 17 June 2022

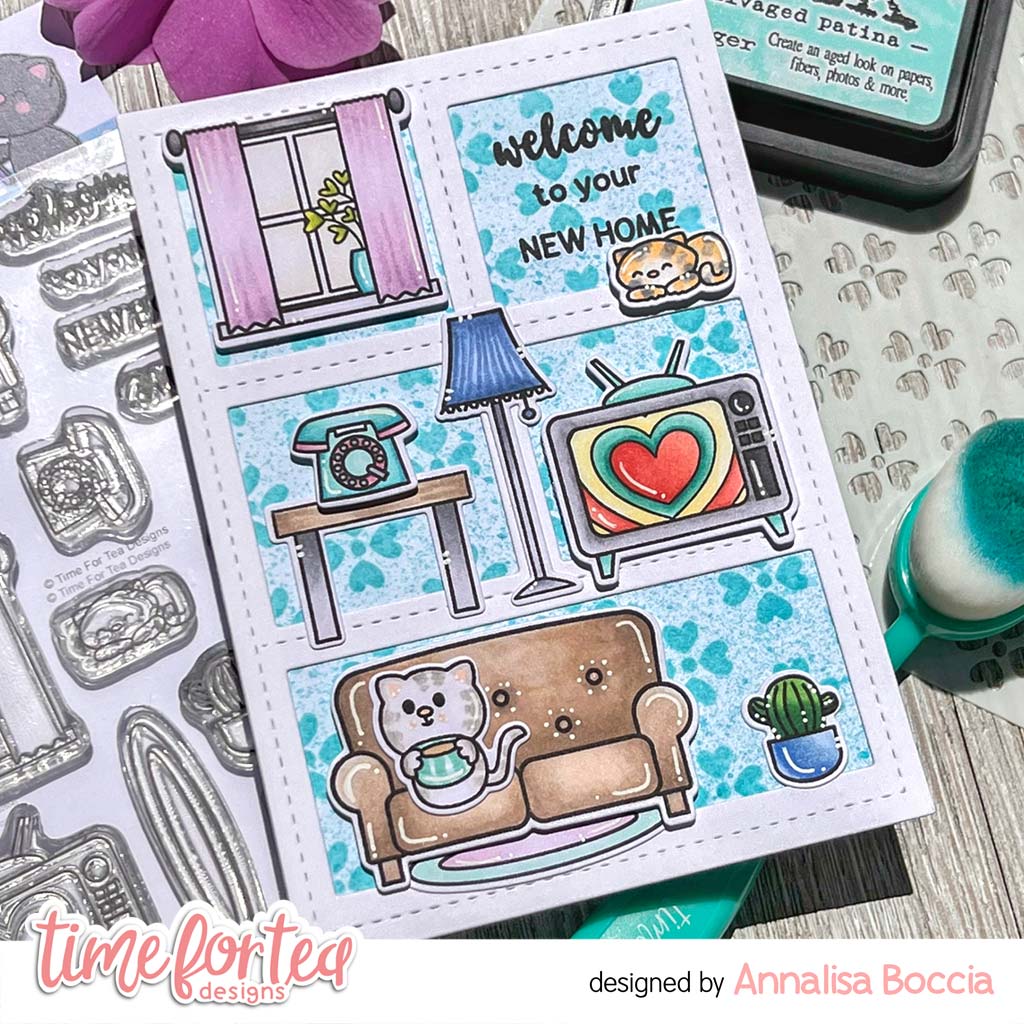
Welcome To Your New Home


Hello and happy Friday, DT Annalisa here. Moving has got to be one of the most stressful things to do. This card is for someone who has just moved to help bring them joy after a long day of unpacking.

To start, I ink blended on some Salvaged Patina Distress Ink to an A6 (4 1/8 inch by 5 13/16 inch) card base through the Flirty Flowers Stencil with my aqua Beautiful Blender Brush. I removed the stencil and lightly blended the ink left on my brush on the card base to avoid stark white areas. I then added some ink splatter. 


Next, I die-cut the Stitched Window Cover Die (Sized to fit an A6 EU-sized card base) and glued it to the stencilled card base. I stamped the critters and elements from the Home Is Where The Heart Is Clear Stamp Set and used the coordinating dies. I also stamped the kitty with a coffee from the Café Critters and die-cut her with the coordinating dies. I coloured everything with Copic markers and added white Gelly Roll Pen accents.


I stamped the sentiment in the top right-hand square using Versafine Onyx Black and then used liquid glue or 3D foam tape to adhere the elements to the card to finish it up.

Thank you so much for reading my blog post, you can use my discount code T4TANNALISA10 when you visit the Time For Tea Designs shop to get 10% off your order.


Friday, 27 May 2022

Hey, Hello, Hi Rainbow

Happy Friday, everyone. DT Annalisa here sharing a bright and welcoming card featuring the new Hey, Hello, Hi Dies and the Flirty Flowers Stencil from Time For Tea Designs. I love these extra-large sentiment dies.

I used several Distress Oxide inks (Abandoned Coral, Spiced Marmalade, Mustard Seed, Cracked Pistachio, Mermaid Lagoon and Wilted Violet) on the flirty Flowers Stencil using my Beautiful Rainbow Blender Brushes. I removed the stencil and lightly blended the same colours over the entire panel in the appropriate sections so the cardstock wasn't stark white.


I glued the largest border die from the A2 Nesting Frame Dies to the card to frame the stencilled card stock. I then placed this panel onto an A2 card base. 

I ink blended white card stock with Abandoned Coral and Spiced Marmalade and die-cut out 'hey.' I blended the same colours onto vellum and then die-cut the shadow. I followed this same process for the other words and their shadows, using Mustard Seed and Squeezed Lemonade for 'hello' and Mermaid Lagoon and Wilted Violet for 'hi.' I added some white gel pen accents to the letters.


I glued down each word and their shadow die pieces, to complete the card.

Thank you so much for reading my blog post, you can use my discount code T4TANNALISA10 when you visit the Time For Tea Designs shop to get 10% off your order.


Thursday, 26 May 2022

Trifold Tag Card with Amanda

 
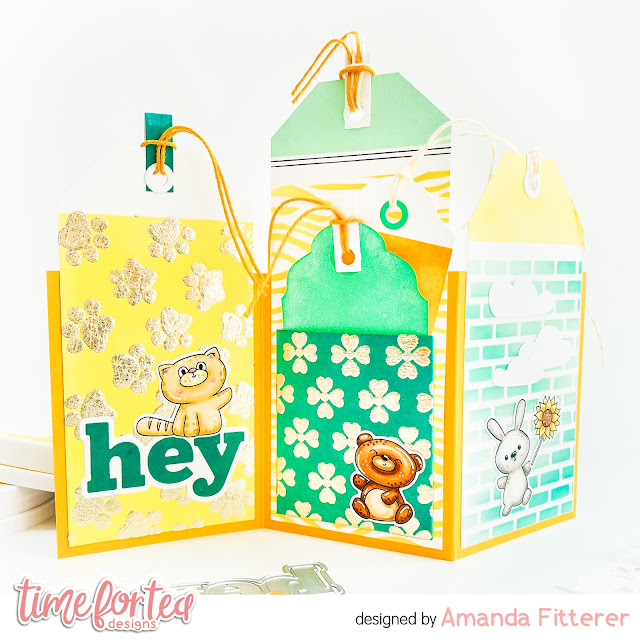
Happy Thursday, Tea Timers!  It's Amanda back with another fun project showcasing the NEW RELEASE!  This card is a unique card because it's a trifold tag card.  It's super easy to make, but looks quite impressive!

1.  Trim a piece of cardstock to 10.5″ x 4″. 
2.  Score at 3.5″ and 7″ and fold into a “Z”.
3.  Make some tags for each panel. 
Trim 2 pieces of cardstock to 3.25″ x 5″ and 1 piece to 3.25″ x 6″. Trim off the corners of each piece of cardstock to create a tag and add a hole punch in the center. 
4.  Decorate your tags however you like.

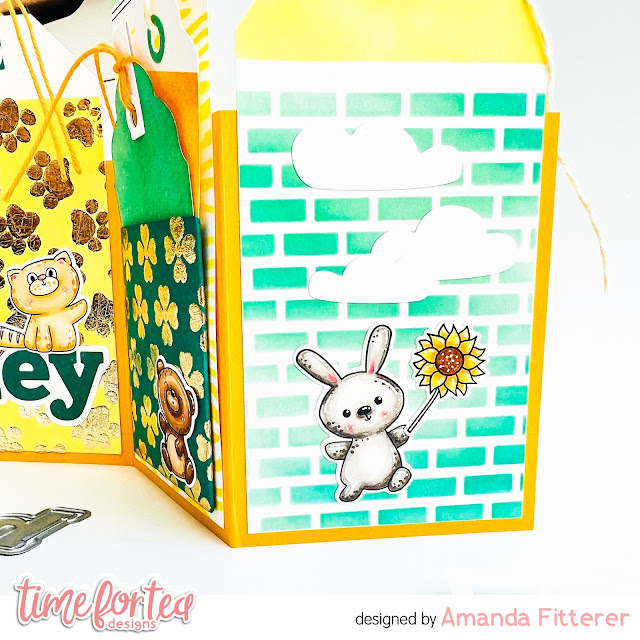
For this first tag, I've used the Tiled Wall Stencil, the new Cloud Dies, and the new Hey There Critters Stamp Set to create an adorable scene with the bunny holding a sunflower.


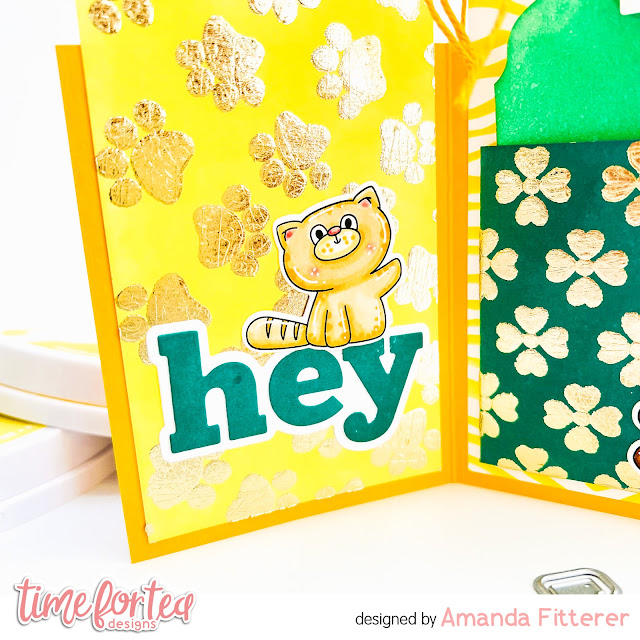
For this tag, I've used the the same Hey There Critters Stamp Set along with the new Hey, Hello, Hi Dies. For my background, I used some Foil Transfer Gel Duo with the new Pawsome Prints Stencil and some gold foil.

For my final tag, I've used the Flirty Flowers Stencil for my background and the Hey There Stamp Set.  I also used the Tiger Stripes Stencil behind my mini pocket.


That's it!  Easy peasy and JUST SO CUUUUTEE!!
Don't forget, you can use code T4TAMANDA10 to get 10% off your purchase!
Until next week.... Xx, Amanda 

Other Posts You Might Like