Pages

Showing posts with label Walrus Be Friends. Show all posts

Friday, 12 June 2026

Love Ya Lots


Happy Friday, everyone! DT Annalisa here, and today I’m sharing an icy blue mini slimline card featuring the adorable Walrus Be Friends stamp set from Time For Tea Designs.

To create the background, I trimmed a piece of Distress Watercolour Paper to 6" x 3" and sprayed it with Peacock Feathers Distress Spritz. Once dry, I blended Peacock Feathers and Salvaged Patina Distress Ink over the panel to add depth and dimension.


Next, I used a scalloped mini slimline die from my stash to cut a frame from white cardstock. I adhered the frame to the blue panel with liquid glue and then mounted the completed panel onto a 6.5" x 3.5" card base.


For the focal images, I stamped the adorable characters from the Walrus Be Friends stamp set and die-cut them using the coordinating dies. I coloured the images with Copic markers and finished them with white gel pen highlights for added detail and interest.

Finally, I adhered the images to the card front with liquid glue and added a sentiment from the Sentiment Cards – Winter Wonderland White collection.

Thanks so much for stopping by, and I hope this card inspires you to create something fun today! Don’t forget to use my discount code T4TANNALISA10 when you shop at Time For Tea Designs to receive 10% off your order.

Sunday, 31 May 2026

We Will Walrus Be Friends!

Hello Tea Timers!

Michelle from the Design Team here and today I am sharing the most fun summer card featuring two absolutely adorable walruses having the best beach day ever. This one is packed with sunshine, sparkle and so much personality!

Supplies used: 

Walrus Be Friends

Beach Buddies

Cool Critters


I started by building up a soft sky background with fluffy clouds and then added a gorgeous sandy beach layer beneath it. A sprinkling of texture across the sand really brings it to life and gives it that warm, sun-soaked feel. The bright blue glittery waves at the front are my absolute favourite part and add such a beautiful shimmer to the whole scene!


On the beach we have our two wonderful walruses soaking up the sun. One most impressive collection of ice lollies and a fab pair of dark sunglasses, the other happy to see a delicious cold treat. Scattered around them are pretty pink and purple shells which add lovely little pops of colour across the sand.

Two tall palm trees lean in from the left and a cheerful shining sun beams down from the top right corner, completing that perfect holiday postcard feel. 


To finish everything off, the "we will walrus be friends" sentiment sits tucked into the sparkling waves at the bottom, and honestly it is the most perfect pun to round off such a joyful card!

This one would be a fantastic card to send to a best friend, and I just know it would bring a huge smile to anyone who receives it!


Thanks so much for stopping by today.

Michelle

Tuesday, 8 April 2025

Walrus Be Friends


Hey everyone! Design Team member Jill here with today's card! It may be spring weather in some places, but where I am it still feels like winter! 

To make this card,  I took a white card panel and used the "Flirty Flowers Cover die". Even though this cover die is named Flowers, I thought it would make really cute snowflakes. Next, I ink blended the panel with Distress Oxide in "Blueprint Sketch". I attached a sheet of silver glitter cardstock to add to the winter/ snow effect. 


Then, I colored in the walrus, iceberg and hat with alcohol markers and placed them on the panel. I finished it off with white embossing sentiments and snowflakes. 

Thanks for stopping by!


Friday, 13 October 2023

Ocean Waves


Happy Friday! DT Annalisa here today sharing an ocean-themed card I created using several adorable stamps from Time For Tea Designs. I love how many ocean critters are available now in the T4T portfolio as making ocean-themed cards is one of my favourite things to do! 

I used the following supplies to create the card:


I created an inky ocean using ink smooshing with peacock feathers Distress Ink, water and some acetate. I die-cut the panel with the Ocean Waves Dies and set it aside to dry. For the sand, I ink-blended Kraft cardstock with Vintage Photo Distress Oxide. I also added brown splatter with a paintbrush. I die-cut the panel with the Landscape Edge Standalone Die.


I added white water colour splatter to the ocean and sand background sections. I used liquid glue to adhere the ocean and sand sections to an A2 card base.

I stamped and coloured (with Copics) several images from the stamp sets listed above and cut them out with their coordinating dies. I added white gel pen accents with a Gelly Roll Pen.


I added sparkles to sections of the images with a Quickie Glue Pen and Lawn Fawn Prisma Glitter. 

I adhered the images to the card base using liquid glue or double-sided foam tape for dimension.

I stamped the ‘wavin' hello!’ sentiment from Fintastic Friends and cut it out with the coordinating die. I added double-sided foam tape to the back and stuck it down to complete the card.


Thank you so much for reading my blog post. Remember to use my discount code T4TANNALISA10 when you visit the Time For Tea Designs shop to get 10% off your order.
Friday, 14 July 2023

You've Got my Seal of Approval

Happy Friday! DT Annalisa here sharing a sea-themed card I created for my niece's 17th birthday. She has a friend obsessed with fishing, so I knew I had to use the Sealed With A Kiss and the coordinating dies for her birthday card.

I used the following Time For Tea Designs supplies to create the card:

Walrus Be Friends coordinating die set
Fintastic Friends (stripped fish)
Fintastic Friends coordinating die set
Beach Buds (shells)
Beach buds coordinating die set
Darling Daffodils ("Happy Birthday")
Darling Daffodils coordinating dies


I used water and Peacock Feathers Distress Ink on Distress Watercolor Cardstock by Ranger for the background panel. I did the 'ink smooshing' technique and liked how it turned out - the type of paper you use makes a BIG difference.

I adhered the water panel to an EU A6-sized card base. I used double-sided foam tape to stick the large frame from the Wide Stitched Frame Dies on top of the scene.


I stamped, and coloured (with Copics) several images from the stamp sets listed above and cut them out with their coordinating dies. I added white gel pen accents with a Gelly Roll Pen. I added sparkles to the edges of some images with a Quickie Glue Pen and Lawn Fawn Prisma Glitter.

I stuck the images to the card base using a combination of liquid glue and double-sided foam tape for dimension. 

Thank you so much for reading my blog post. Remember to use my discount code T4TANNALISA10 when you visit the Time For Tea Designs shop to get 10% off your order.
Friday, 20 January 2023

Let's Seal-ebrate


Happy Friday! DT Annalisa here, today's project is a wintery slim-line card featuring the Sealed With A Kiss stamp set from Time For Tea Designs.

I sprayed Distress Mica Stain in Shiny Bauble to Distress Watercolor Cardstock by Ranger. This stain has a beautiful shine, and I love the light blue colour.


I used the Falalala Scalloped Slimline Dies to die-cut a scalloped border. I created a snowy hill using the Slimline Hillside Scene Dies, and ink blended this very lightly with Salvaged Patina Distress Ink before adhering it to the bottom left of the scene with liquid glue. I added the scalloped frame on top of this with liquid glue. I used double-sided tape to stick this panel to a slim-line card base.

I stamped and coloured the seals, fish and fishing pole from the Sealed With A Kiss stamp set and die-cut them with the coordinating dies. The winter hats and chunks of ice are from the Walrus Be Friends stamp set. I stamped, coloured and die-cut these with the coordinating die set. I added highlights with a White Gelly Roll Pen and sparkles with a Quickie Glue Pen and Lawn Fawn Prisma Glitter.


I used double-sided foam tape to adhere some elements (including the sentiment) and liquid glue for the rest. I love the overall shine on this card when you pick it up and move it around in the light. If you have never tried Distress Mica Stain I highly recommend it.


Thank you so much for reading my blog post, you can use my discount code T4TANNALISA10 when you visit the Time For Tea Designs shop to get 10% off your order.


Thursday, 19 January 2023

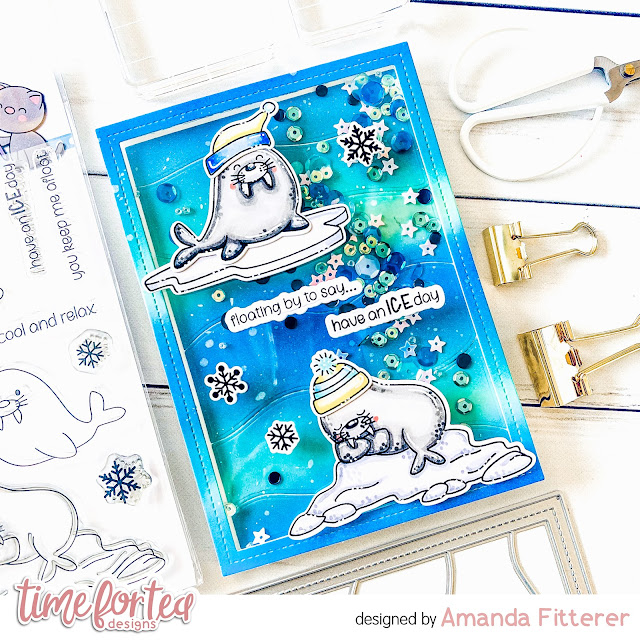
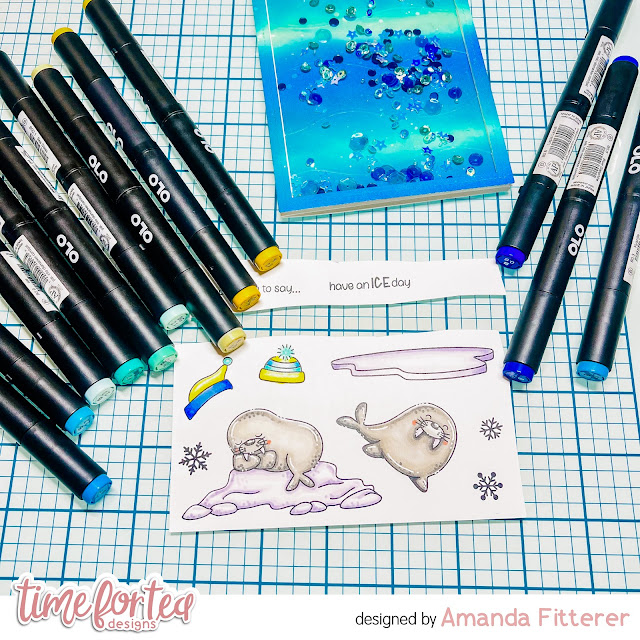
Creating a Shaker Card using the Walrus Be Friends Stamp Set


Happy Thursday, Tea Timers!  It's Amanda here!  Do you LOVE making shaker cards?!  I just think they're SO much fun and worth the amount of time that it takes to make them!

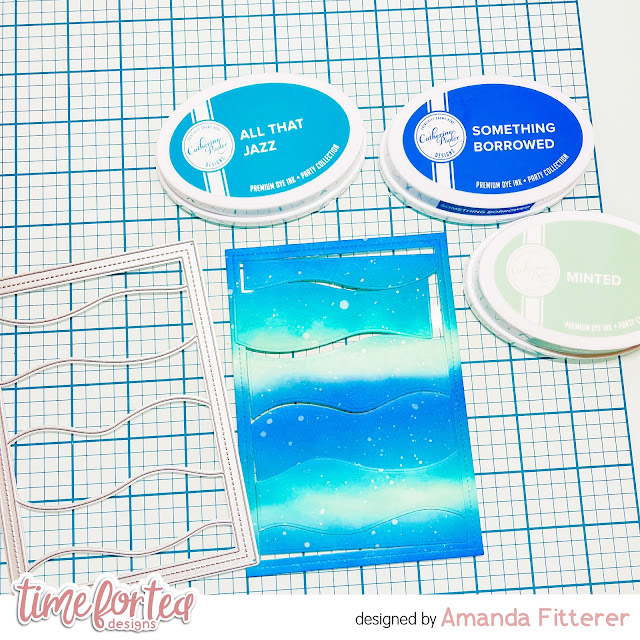
To create this card, I first ink blended a piece of white cardstock with Minted, All That Jazz, and Something Borrowed Catherine Pooler inks.  Then, I used the Waves Cover Die to cut it out.

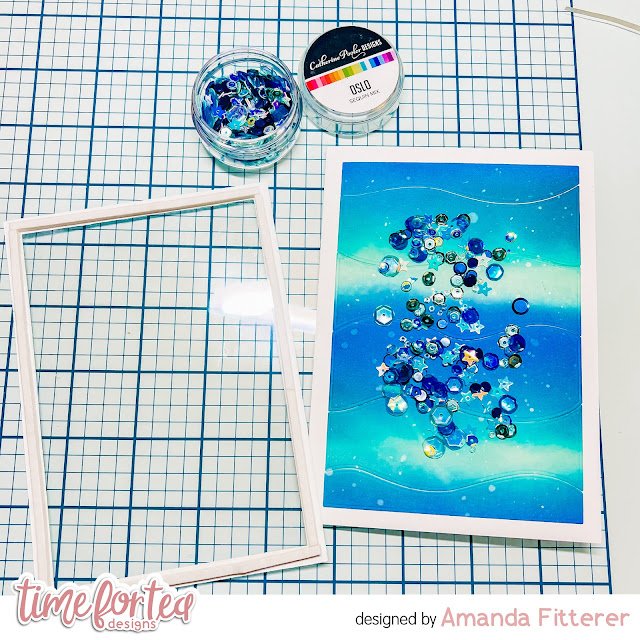
Next, I glued my waves directly onto my white card base.  I added some sequins to the center.  I used double sided tape to adhere my acetate sheet to the die cut frame.  Then, I placed Deep Foam Tape around the entire edge of the frame.  Then, I could place my frame on my card base.

I then stamped my images from the Walrus Be Friends Stamp Set and colored them with OLO markers.  Then I die cut them with the coordinating dies.

The last step is to adhere my stamped images and sentiments to the card using 3D foam squares!

That's it for me today, friends!  I'll be back next Thursday for some more inspiration!  Xx, Amanda


Friday, 25 November 2022

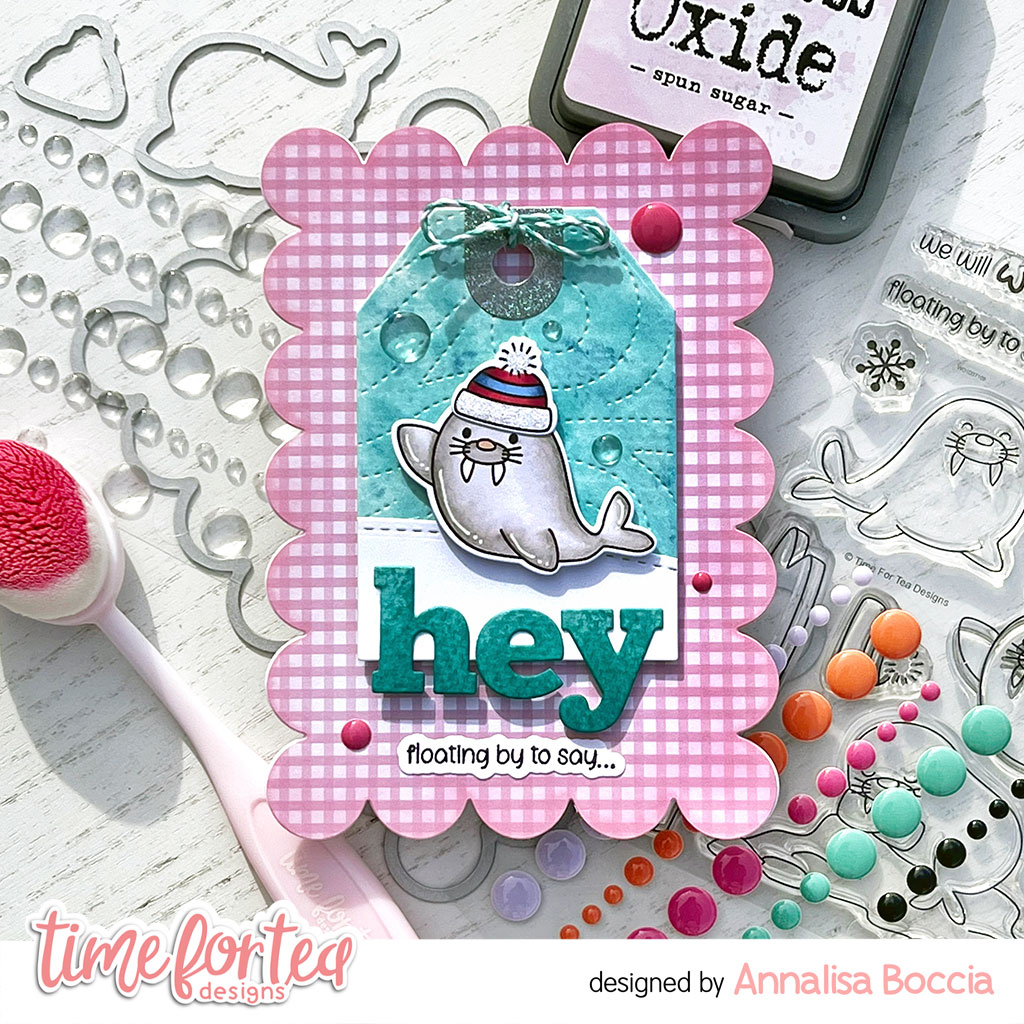
Floating By to say Hey


Hello and happy Friday. DT Annalisa here sharing a fun scalloped card featuring the new Walrus Be Friends stamp set by Time For Tea Designs. I love how the Walrus is waving hello.

To start, I die-cut a piece of Gorgeous Gingham 6x6' Paper Pad with the Large Scallop Celebrate Frame Dies. I ink-blended Spun Sugar Distress Oxide ink to the sides of the paper with my Beautiful Blender Brush. I then adhered this to a card base that I created using the same die. 


I sprayed Distress Mica Stain in Shiny Bauble onto watercolour paper. I love the shine mica stain has. Once it was dry, I die-cut it first with the Snow Flurry Cover Die and then with the tag die found in the Memory Keeping Essential Dies. I also used some of this paper to die-cut the hey sentiment from the Hey, Hello, Hi Dies. I ink blended on Peacock Feathers Distress Ink to the letters to darken them up. 

I cut some white card stock with the Slimline Hillside Scene Dies to create a snowy hill for the Walrus to sit on. I cut it again with the tag die and then glued it on top of the tag. I glued the 'hey' to the base of the tag with liquid glue. I tied a bow onto the tag with some Lawn Fawn teal Lawn Trimmings. 


I stamped the seal and hat from the Walrus Be Friends and coloured them with my Copic markers. I die-cut them with the coordinating dies and added some white gel pen accents. I used liquid glue to adhere the hat to the Walrus and then used double-sided foam tape to stick them to the tag. I then added double-sided foam tape to the back of the tag and placed it on the scalloped card base. 

I stamped and die-cut the sentiment and glued it to the bottom of the card base below the tag. To complete the card, I added "Summer Haze" and "Clear Bubbles" Designer Enamel Dots.


Thank you so much for reading my blog post, you can use my discount code T4TANNALISA10 when you visit the Time For Tea Designs shop to get 10% off your order.


Other Posts You Might Like