Pages

Showing posts with label Clear Bubbles Enamel Dots. Show all posts

Friday, 26 July 2024

My Favourite Bookworm


Happy Friday, DT Annalisa here, for my card, I wanted it to look like the kitty was so absorbed in his reading that he was IN the book he was reading. I like how it turned out and hope you do.

For the background, I used the Tall Alpha Clear Stamp Set. I inked it up with Cornflower Blue Hero arts shadow Ink and stamped it on white cardstock with my MISTI. I reapplied the ink and stamped again a few times for a crisp impression. Next, I ink-blend the Cornflower Blue from the cardstock's edges with my Beautiful Blender Brushes.


I used double-sided tape to stick the inked panel to a blue 4 1/8 by 5 3/4 inch card base.

I die-cut vellum using the new Stitched Circle Dies. I used double-sided vellum tape to stick the circle to the card base.

I stamped and coloured (with Copics) images from the Book Buddies stamp set and cut them out with their coordinating dies. I added white gel pen accents with a Gelly Roll Pen. The butterfly is from Squeeze the Day - I coloured it and die-cut it with the coordinating dies.


I used 1mm double-sided foam tape to stick the critters and sentiment to the card. I added Glossy Accents by Ranger to the glasses and butterfly.

I added the Clear Bubbles Designer Enamel Dots to the card to complete it.


Thank you so much for reading my blog post. Remember to use my discount code T4TANNALISA10 when you visit the Time For Tea Designs shop to get 10% off your order.

Friday, 1 December 2023

Slimline Christmas Houses


Happy December, DT 
Annalisa here and I am kicking this month off with a CAS (clean and simple) slimline Christmas card that I created using three dies and no stamps. I rarely do this, but I really enjoyed making this card. 

I used the Simple Slimline Nesting Dies to die-cut a white panel and some blue cardstock. I sprayed the blue cardstock with Distress Mica Stain in Shiny Bauble to add shimmer. I love the shimmer and shine that Mica sprays add to projects. 

Slimline Christmas Houses card

I used liquid glue to adhere the blue panel to the white panel and a slimline card base. I used the Slimline Mini Village Die to cut white cardstock that I then glued to the card. 

I ink-blended lumberjack plaid Distress Oxide onto white cardstock and then used Anthony's Alpha Dies to cut out the letters to create the word 'Christmas.' I added sparkles to the bottom of each letter with a Quickie Glue Pen and Lawn Fawn Prisma Glitter.


I used liquid glue to stick the letters to the card base. Next, I added Designer Enamel Dots Clear Bubbles to complete the card. 

Thank you so much for visiting my blog. Remember to use my discount code T4TANNALISA10 when you visit the Time For Tea Designs shop to get 10% off your order.

Thursday, 28 September 2023

Let's Party

Hey there, Tea Timers!!  It's Amanda here!  Today I get to share a card I made using the Let's Party Stamp Set from the New Release

To make this card, I'm going to start by creating my background!  I ink blended Catherine Pooler's Hot Tub and Skylight inks on a white cardstock panel.  I flicked some white paint mixed with water on it using a paint brush.  Then, I cut it down to fit in the upper 2/3 of my card base.  

I blended Buttercream on a smaller strip of cardstock and then stamped some of the tiny stamps from the Let's Party Stamp Set , also in Buttercream.

I stamped my sentiment in between these 2 color panels with black ink and then added some stars using Spiced ink.


Next, I stamped my images from the 
Let's Party Stamp Set and colored them in with Copic markers.  I used my color palette as a guide in choosing colors.

After die cutting them out with the coordinating dies, I assembled my card!  I glued down my panels.  Then, I used 3D foam squares to prop up my stamped images.


Aren't those little critters just too cute?!  That's all I have to share with you today!  Come back tomorrow for more inspo from other designers!
Xx, Amanda


Thursday, 3 August 2023

Flying by to Say THANK YOU!

Hey there, Tea Timers!!  It's Amanda back with a super sweet card featuring the Love is in the Air stamp set!
To create this card, I started by creating my background!  I blended Catherine Pooler's Sixteen Candles, It's a Girl, Do-Si-Do and Bellini inks through the 6x6 Scene Builder Stencil cloud side.

Next, I stamped and colored my images with Copic markers.  I used their coordinating dies to cut them out.
I stamped my sentiment directly onto my card front.
Then, I used liquid glue and 3D foam squares to attach my stamped images to my card front.

For a finishing touch, I added some Clear Bubbles Enamel Dots.

And then, I used liquid glue to adhere my card front to my card base!

Here are a few more close-up images!


Thank you so much for stopping by the Time for Tea Designs blog today!  Xx, Amanda


Wednesday, 21 June 2023

I'm here for you

 Hey there Tea-timer friends...

It's DT Ashlee here and today I've got some simple easy to re create inspiration for you that would be perfect if you need to mass produce some cards!


I used these Time for Tea designs products :

- Pawsome dies

 - Hey, Hello, Hi dies

- Simple sentiments stamp set

- T4T Enamel dots clear bubbles


To create this card I started with a teal blue card stock base that I die cut the largest pawsome die paw from and then in laid the pieces back in. (The in lay pieces were die cut from a light grey card stock). 

I stamped a sentiment directly onto the card stock base from the simple sentiments set. This was a sub sentiment for the large hi die cut that I added just above the stamped sentiment and then completed it all with two clear bubble enamel dots!

A simple but sweet card that's easy to re-create. May be you might want to case this one and create a batch of cards too...


Thanks for stopping by T4T today, I hope you feel inspired by my card. Happy crafting, hugs Ashlee.

Thursday, 27 April 2023

How to Create a Scene Card with Amanda Fitterer

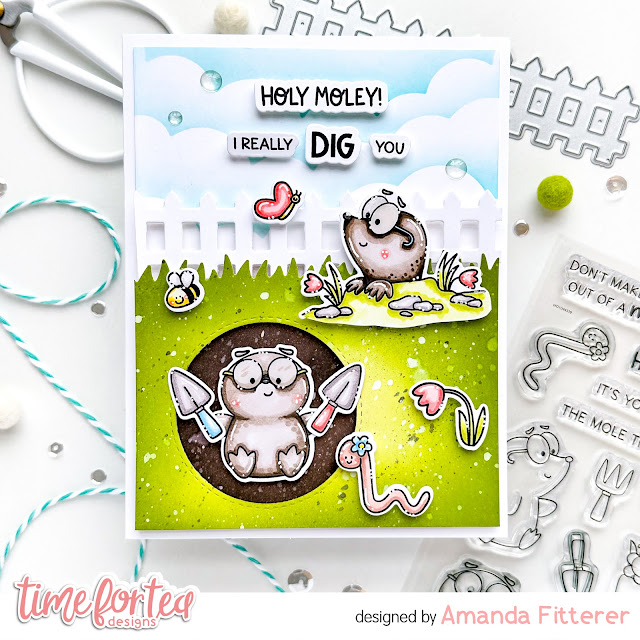
 Hi crafty friends!!  It's Amanda here sharing a really fun scene card with you today!  Today, I'm going to share my tips and tricks on how I create an entire scene in one A2 card!

When I create a scene card, I like to leave a white 1/8" border around the entire edge of my card.  This helps frame the scene in.  So, I plan my scene on a piece of white cardstock that is 4" x 5.25". 

First, I am going to work on my foreground.  My foreground will appear closer to the viewer.  To do that, I'm going to prop it up with foam tape.  

I am trimming a piece of white cardstock to 4"x 3".  Then, I am ink blending it with Catherine Pooler's Melon Ice and Martini inks, concentrating the lighter color in the center and the darker color on the edges.

Next, I'm using a circle die to cut out my hole and the Landscape Edge Standalone Dies for the grass. I've also cut a fence using the Fenced In Dies


Now, I'm planning my background!  This will appear farthest away from the viewer.

I'm taking a piece of white cardstock trimmed to 4.25"x5.5.  I'm creating some clouds using Cummerbund ink and a cloud stencil.  The Scene Builder Stencil has some clouds you can use!

On the bottom of the card, I'm blending the "inside" of my hole with Sand Castle and S'mores.  Once I'm done ink blending, I'm trimming the panel down to 4"x5.25".


Now, we're going to add our focal images!  I've stamped my images from the I Really Dig You stamp set and then colored them with alcohol markers.  I've die cut the little guys out and used scissors to trim the grass down.  To make their glasses look more realistic, I'm adding Glossy Accents to them and then will allow them to dry!


Now, I can stamp my sentiments and die cut them out with the coordinating dies!  


Now, that we have all the elements ready to go, we can assemble the scene!
First, I'm going to adhere my background panel onto the A2 card base by using liquid glue.  This gives me some wiggle room in case I don't place it perfectly.

Next, I'm going to place foam tape all along the back of my grass and my fence.  Then, I will adhere my grass first, then the fence (behind the grass).

Then, we'll put foam squares behind all our stamped images.  This gives another layer of dimension!


Lastly, I've added a few Clear Bubbles Enamel Dots for just a bit more excitement!


That's it!  Such a fun and dimensional scene card! I hope you enjoyed this post and I hope you find some time to get crafty today!!  

Xx, Amanda


Friday, 3 March 2023

Hello, Meow You Doing?


Hello, and welcome! DT Annalisa here sharing a bright tea-themed card featuring a kitty in a giant mug from the Tearrific Pals stamp set from Time For Tea Designs.

I started with a 5 3/4 by 4 1/8 inch and the Scattered Hearts Stencil. I placed the Scattered Hearts Stencil on my Wendy Vecchi 7-inch Make Art Station and used the strong magnets to ensure the stencil didn't move while I ink-blended. I used Peacock Feathers, Picked Rasberry and Squeezed Lemonade Distress Inks and my Beautiful Rainbow Blender Brushes to apply ink. 

I die-cut white cardstock using the Wide Stitched Frame Dies. I used the large frame and the thin-lined frame created when I used all three dotted frames together. I really liked the way the thin and thick frames looked together so I decided to use both. I used liquid glue to adhere both the card base.

I stamped the kitty in the tea mug, the sugar cubes and the tea bag, coloured them with my Copics and cut them out with their coordinating dies. I added some white gel pen accents, stickles and Glossy Accents for added interest. Once everything was dry, I used double-sided foam tape to adhere the elements to the card.


For the sentiment, I stamped the 'hello' from Let's Chat Clear Stamp Set and used the coordinating die set to cut it out, I cut out three additional backers for the sentiment and glued them all together and to the card with liquid glue (for added dimension). I completed this same process for the 'meow you doing?' using the Purrfect Day Clear Stamp Set and the Coordinating Dies. 

I added Clear Bubbles Designer Enamel Dots for a finishing touch to the card. These bubbles are so pretty, and I love using them on cards.

Thank you so much for reading my blog post, you can use my discount code T4TANNALISA10 when you visit the Time For Tea Designs shop to get 10% off your order.


Wednesday, 28 December 2022

Hey, Hello, Hi it's a rainbow!

 Hey there Tea-timer friends...

I hope you have all been having a fantastic Christmas time. I have been absolutely loving it, its definitely one of my most favourite times of the year! 

I thought I would change things up from Christmas cards for today and share a Hello greeting card...


This card uses these Time for Tea designs products :


To create this card I started bu selecting a piece of rainbow paper and die cutting it from the hooray cover plate. I then die cut all the shadows for the sentiments from black cardstock before die cutting the tops of the sentiments from different coloured card. The sentiment and the shadow were adhered together using liquid glue and then popped onto the card base with foam tape adding dimension. To complete the card I added clear bubbles enamel dots. 

I love how bright and cheerful this card is, perfect for a happy hello to a friend!!

Thanks for checking out today's card, I hope it inspired you to use a rainbow of colour on your next creation.

Happy holidays everyone, hugs Ashlee. 

Wednesday, 14 December 2022

Happy trails

 Hey there Tea-timer friends...

DT Ashlee here with some new inspiration for you featuring the Happy trails stamp & co-ordinating die collection from Time for Tea designs!


This card uses these Time for Tea designs products...


To create this card I started with a white card base and added a die cut stitched window cover over the top using foam tape to pop it up a little.

I then added a little die cut mountain scene...

Images were stamps, coloured and die cut from the happy trails set and added to the card base to create a card full of adventure! All images were coloured using alcohol markers. Using a white pen I added some white pen highlights!


To complete the card I added the happy trails sentiment and T4T clear bubbles enamel dots...

Does this card make you excited for an adventutre? 

I hope you enjoyed my latest creation, I will be back soon with more to inspire you! Happy crafting, hugs Ashlee. 


Friday, 25 November 2022

Floating By to say Hey


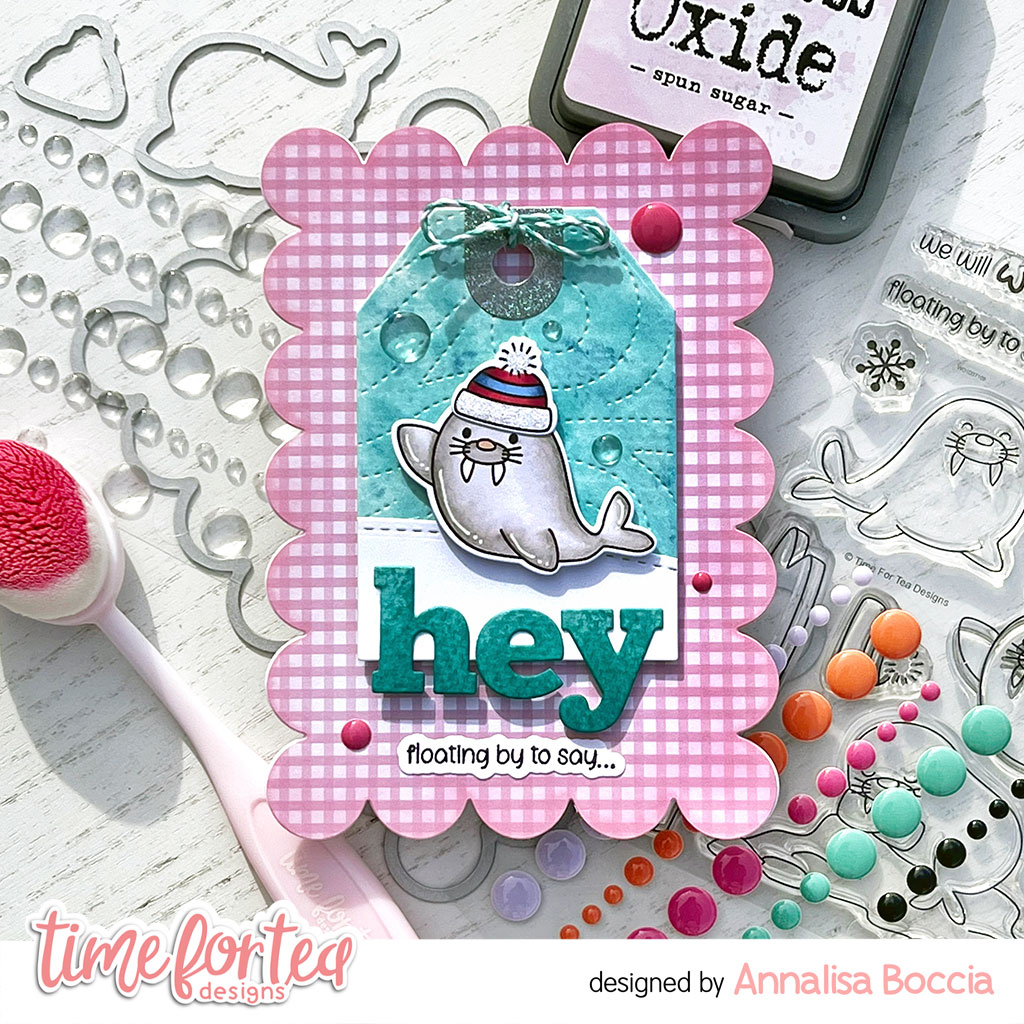
Hello and happy Friday. DT Annalisa here sharing a fun scalloped card featuring the new Walrus Be Friends stamp set by Time For Tea Designs. I love how the Walrus is waving hello.

To start, I die-cut a piece of Gorgeous Gingham 6x6' Paper Pad with the Large Scallop Celebrate Frame Dies. I ink-blended Spun Sugar Distress Oxide ink to the sides of the paper with my Beautiful Blender Brush. I then adhered this to a card base that I created using the same die. 


I sprayed Distress Mica Stain in Shiny Bauble onto watercolour paper. I love the shine mica stain has. Once it was dry, I die-cut it first with the Snow Flurry Cover Die and then with the tag die found in the Memory Keeping Essential Dies. I also used some of this paper to die-cut the hey sentiment from the Hey, Hello, Hi Dies. I ink blended on Peacock Feathers Distress Ink to the letters to darken them up. 

I cut some white card stock with the Slimline Hillside Scene Dies to create a snowy hill for the Walrus to sit on. I cut it again with the tag die and then glued it on top of the tag. I glued the 'hey' to the base of the tag with liquid glue. I tied a bow onto the tag with some Lawn Fawn teal Lawn Trimmings. 


I stamped the seal and hat from the Walrus Be Friends and coloured them with my Copic markers. I die-cut them with the coordinating dies and added some white gel pen accents. I used liquid glue to adhere the hat to the Walrus and then used double-sided foam tape to stick them to the tag. I then added double-sided foam tape to the back of the tag and placed it on the scalloped card base. 

I stamped and die-cut the sentiment and glued it to the bottom of the card base below the tag. To complete the card, I added "Summer Haze" and "Clear Bubbles" Designer Enamel Dots.


Thank you so much for reading my blog post, you can use my discount code T4TANNALISA10 when you visit the Time For Tea Designs shop to get 10% off your order.


Friday, 11 November 2022

New Release: Brew Can Do It


DT Annalisa here today! Hello, and welcome to a brand new release! As a huge coffee fan, I had to share a coffee-themed card first! This release has EIGHT new stamp sets and coordinating designs, ranging in type from gingerbread characters to snowmen, penguins, seals and more. 

I stamped all the cups/mugs in the Pumpkin Spice stamp set and coloured them with my Copic markers. I added white gel pen accents and used the coordinating dies to cut them out.

I cut white cardstock with the 4 1/8 x 4 1/8 inch die from the Square Label Dies and ink blended on salvaged patina distress oxide using my teal Beautiful Blender Brush. I used the 5 x 5 inch die in the same set to cut patterned paper from the Brighter Days 6x6' Paper Pad. I also created a card base using the same-sized die.

I used liquid glue to adhere the patterned paper to the card base. I stamped the 'brew can do it' sentiment from The Perfect Blend stamp set to the teal panel and then stuck this panel to the card with double-sided foam tape.  


I added foam tape to the back of each mug and placed them on the card. I adhered three "Clear Bubbles enamel dots" to complete the card. These clear bubbles are absolutely beautiful and my photos don't do them justice!

Thank you so much for reading my blog post, you can use my discount code T4TANNALISA10 when you visit the Time For Tea Designs shop to get 10% off your order.

Other Posts You Might Like